Note
Access to this page requires authorization. You can try signing in or changing directories.
Access to this page requires authorization. You can try changing directories.
Issues help teams manage and resolve operational problems by preserving investigation context over time. Use this article to create an issue from a deep investigation, review an issue that the Observability Agent created autonomously, and continue working with the issue as the incident evolves.
Prerequisites
- Read the Azure Monitor issues overview.
- Learn about the Azure Copilot Observability Agent.
- Learn about deep investigations, which produce the investigation context that issues persist.
- Learn about the Transparency FAQ for Azure Copilot Observability Agent.
- Ensure the subscription containing the investigated resource is associated with an Azure Monitor Workspace (AMW).
- Ensure you have either the Contributor, Monitoring Contributor, or Issue Contributor role on the AMW you're investigating. For more information about role management, see Assign Azure roles using the Azure portal.
Associate an AMW in the Azure portal
Note
You need to perform this setup once for each subscription you want to investigate. A user with the Contributor role on the subscription should perform this setup.
To create issues and run Observability Agent investigations, associate a subscription with an Azure Monitor Workspace:
- If the alert's target resource subscription isn't already linked to an AMW, you see a message indicating that an Azure Monitor Workspace is required. The Select an Azure Monitor workspace screen appears.
- Select an existing Azure Monitor Workspace or create a new one as needed.
- After you confirm your selection, the Issue page reloads. The Observability Agent automatically starts an investigation.
Associate an AMW through REST API
You can create, update, view, and delete an AMW association to a subscription by using the following REST API commands.
Create or update an association
PUT https://management.azure.com/subscriptions/<subscription_id>/providers/microsoft.monitor/settings/default?api-version=2025-06-03-preview
Host: management.azure.com
Content-Type: application/json
Authorization: Bearer <bearerToken>

{
  "properties": {
    "defaultAzureMonitorWorkspace": "<amw_id>"
  }
}
View an association
GET https://management.azure.com/subscriptions/<subscription_id>/providers/microsoft.monitor/settings/default?api-version=2025-06-03-preview
Host: management.azure.com
Authorization: Bearer <bearerToken>
Delete an association
DELETE https://management.azure.com/subscriptions/<subscription_id>/providers/microsoft.monitor/settings/default?api-version=2025-06-03-preview
Host: management.azure.com
Authorization: Bearer <bearerToken>
Create an issue from an investigation
Create an issue when you want to persist the results of an investigation. Each issue is saved in an Azure Monitor Workspace (AMW).
After the Azure Copilot Observability Agent completes an investigation, select Create issue to create an issue that tracks the operational problem.
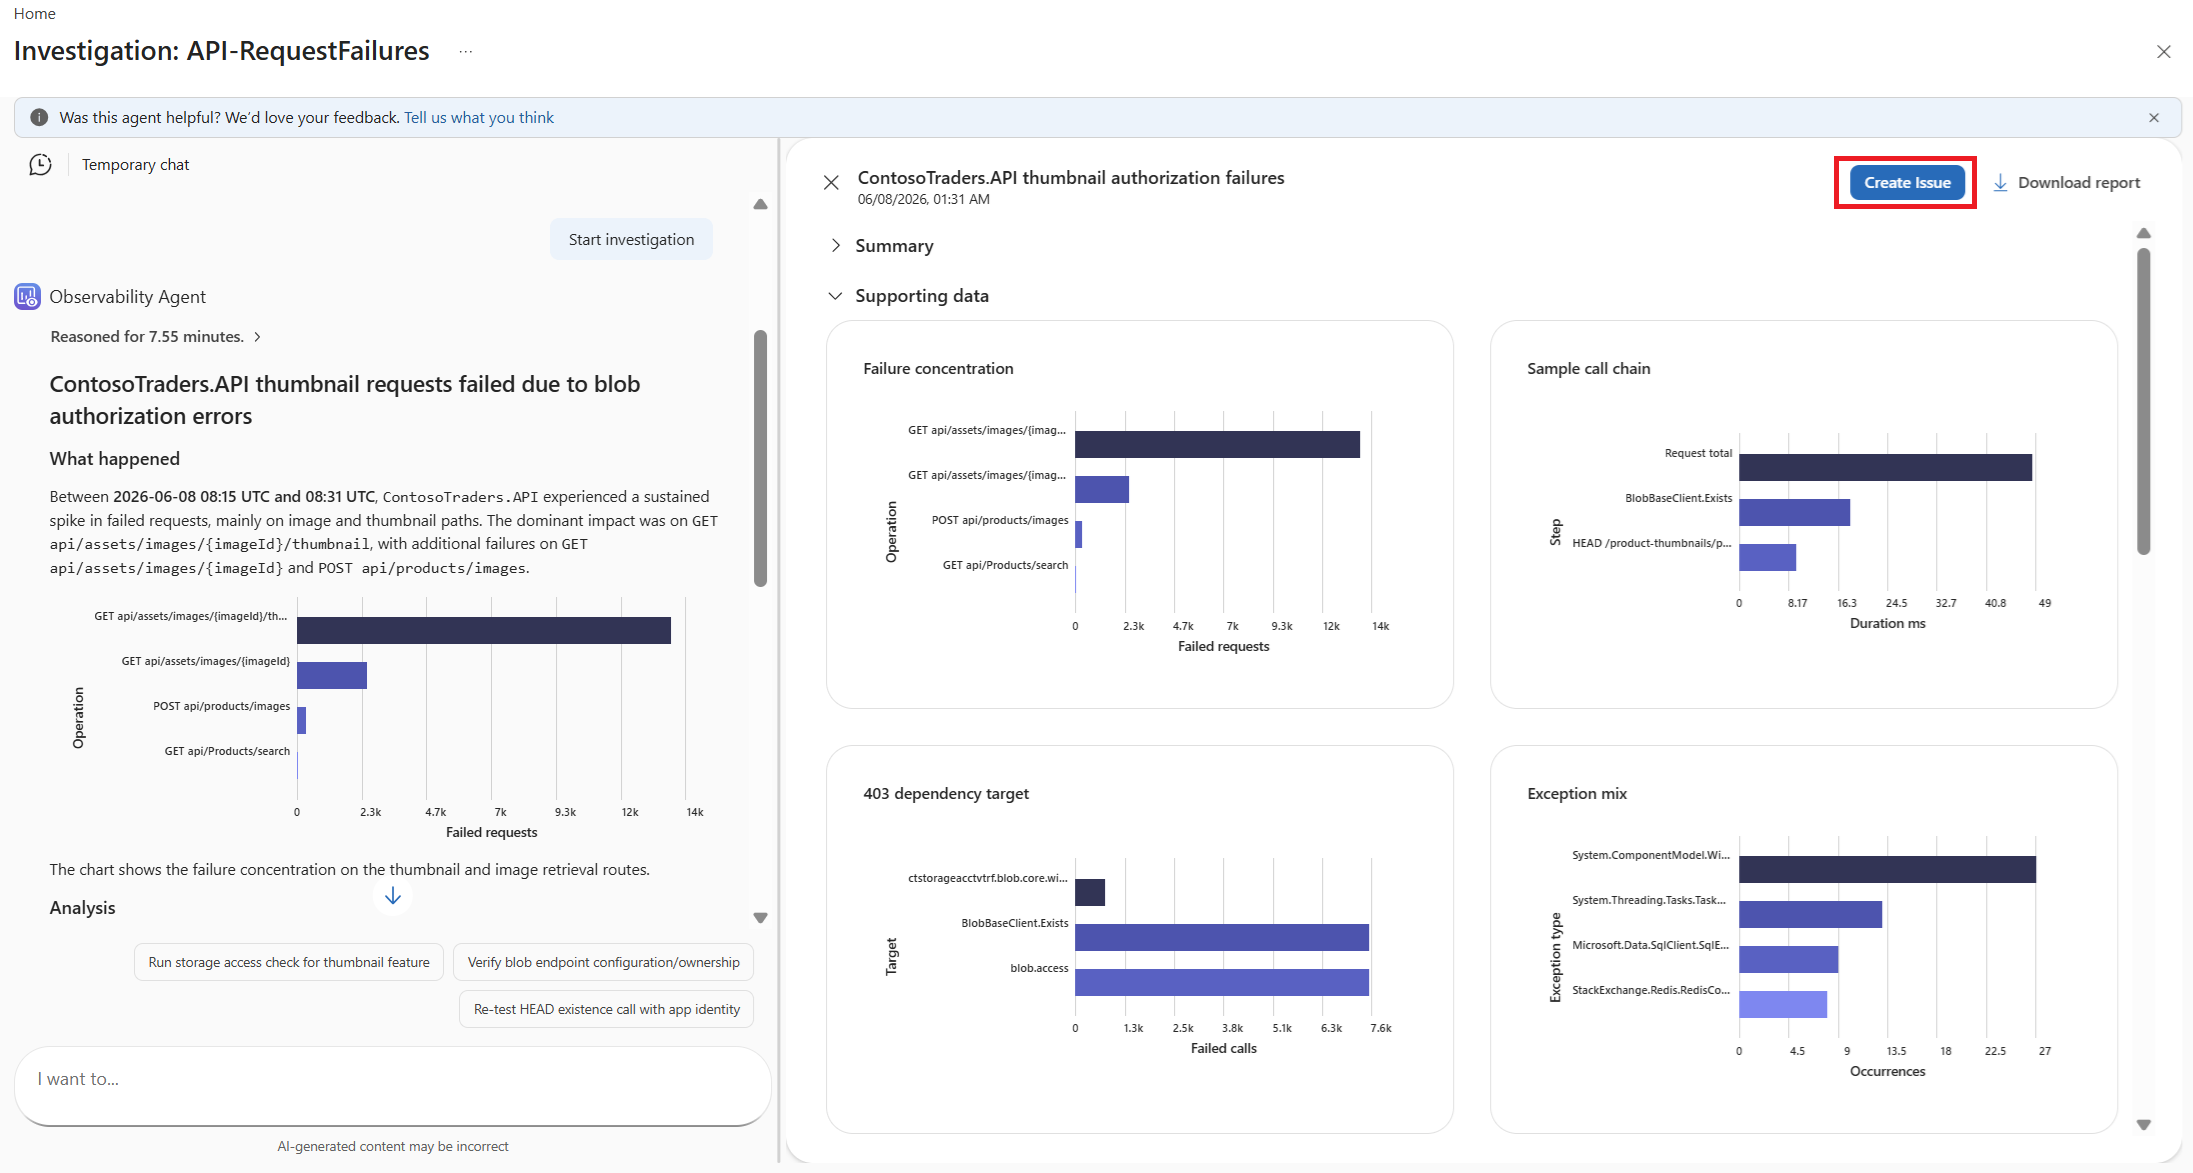
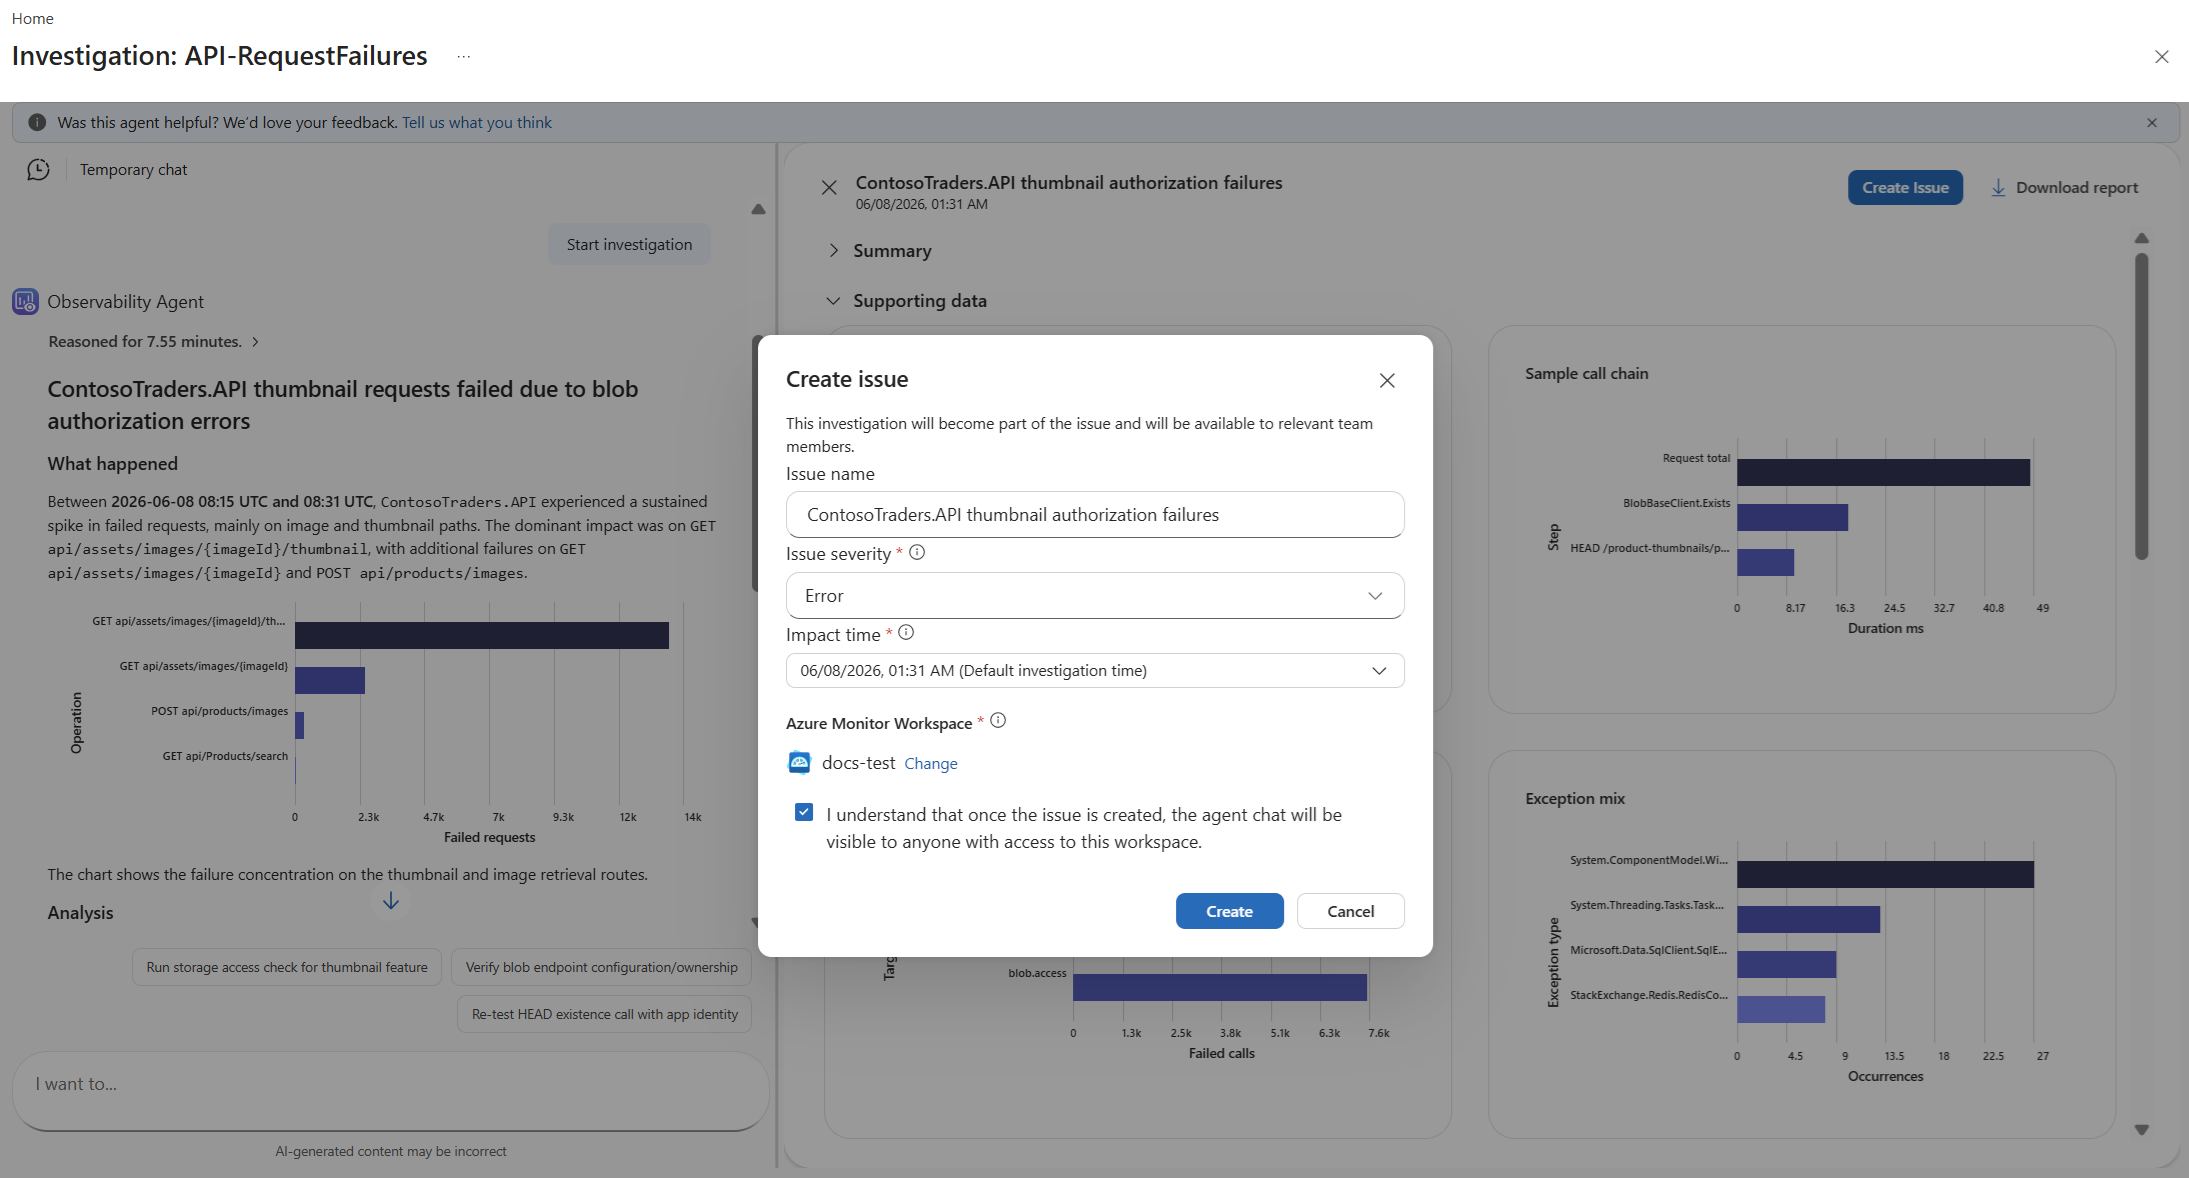
In the Create issue box:
- Keep or replace the Issue name.
- Select or keep the Issue severity.
- Select or keep the Impact time.
- Optionally, change the Azure Monitor Workspace name where the issue data gets stored. If you have more than one workspace associated with the subscription, select the workspace that you want to use for this issue.
- Select the I understand box, and then select Create.
After you create the issue, it appears on the Issues page. From there, you can open the issue details page to update issue parameters, interact with the Azure Copilot Observability Agent, and share a link to the issue, as described in the following sections.
You can also access issues directly from an Azure Monitor Workspace, which shows the issues stored in that specific workspace.
Review an autonomously created issue
When you opt in to autonomous correlation, the Azure Copilot Observability Agent can create issues in the background without a user starting an investigation. Autonomously created issues appear on the same Issues page and in the same Azure Monitor Workspace as user-created issues.
After the agent creates the issue, the handling flow is the same as for a user-created issue: open the issue, review the supporting data, interact with the agent on the Investigation tab, update issue parameters, and share a link to the issue.
If remediation is needed, responders use the issue as the shared coordination record and then take the required mitigation action outside the issue workflow.
For more information about when the agent creates an issue autonomously, how to opt in or out, and how to manage the automatic deep investigations that can follow, see Autonomous operations in the Azure Copilot Observability Agent.
On the Issues page, autonomously created and user-created issues appear together in the same list. Select an issue to open its details page and review what the agent found.
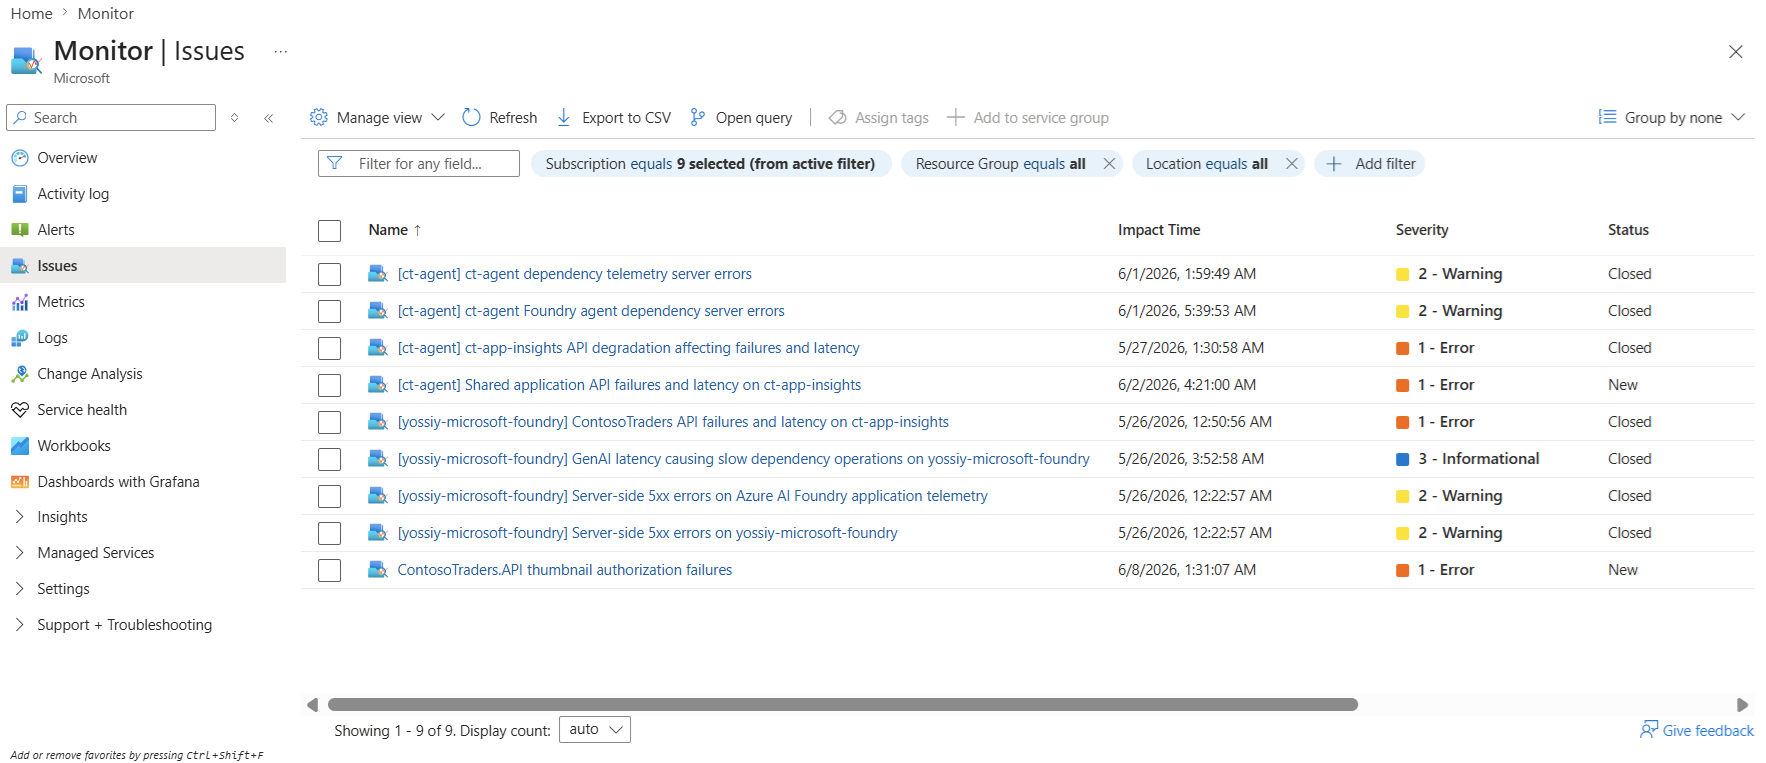
You can identify an autonomously created issue by two consistent markers: the title is prefixed with [<AppName>], and the Background section opens with Observability Agent created this issue for <AppName> because.
Change the parameters of an issue
Change the parameters of an issue by using the dropdown lists on the Overview tab of the issue page.
- Severity - Set the severity of an issue to Critical, Error, Warning, Informational, or Verbose.
- Status - Set the status of an issue to New, In Progress, Mitigated, Resolved, Closed, Canceled, or On-Hold.
- Impact time - Change the impact time of the issue. Changing the impact time automatically initiates a new Observability Agent investigation by using the updated time.
Use issues for team handoff and shared ownership
Use issue updates to keep collaboration explicit as incidents move between responders and teams.
- Set Status to reflect current ownership and progress.
- Adjust Severity when new evidence changes operational priority.
- Update Impact time if responders identify an earlier or later incident start.
- Use Copy link to hand off the issue to another responder or team.
- Continue analysis in the Investigation area so follow-up reasoning stays attached to the same issue.
This workflow can help teams keep one durable case file per incident instead of splitting context across separate chats, alerts, or ad hoc notes.
Share a link to the issue
Select Copy link to share a link to the issue. The link to the issue is copied to your clipboard. Make sure that recipients have permissions to view the issue.
View the issue Background area
The issue Background area provides a summary of the alert and telemetry that triggered the issue, generated by the Azure Copilot Observability Agent. You can expand or collapse it from the issue's Overview tab.
The Background area includes a narrative summary and a relevant visualization for the issue.
The Investigation area
An issue can include one or more investigations. The Investigation area is where the original investigation context carries forward into the ongoing response workflow. It contains the Azure Copilot Observability Agent, which presents the investigation associated with the issue. The agent highlights what was observed, the suspected cause, and suggested next steps related to the issue.
You can continue interacting with the Observability Agent from this area to further explore the problem. For more information about the Observability Agent, see Azure Copilot Observability Agent overview.
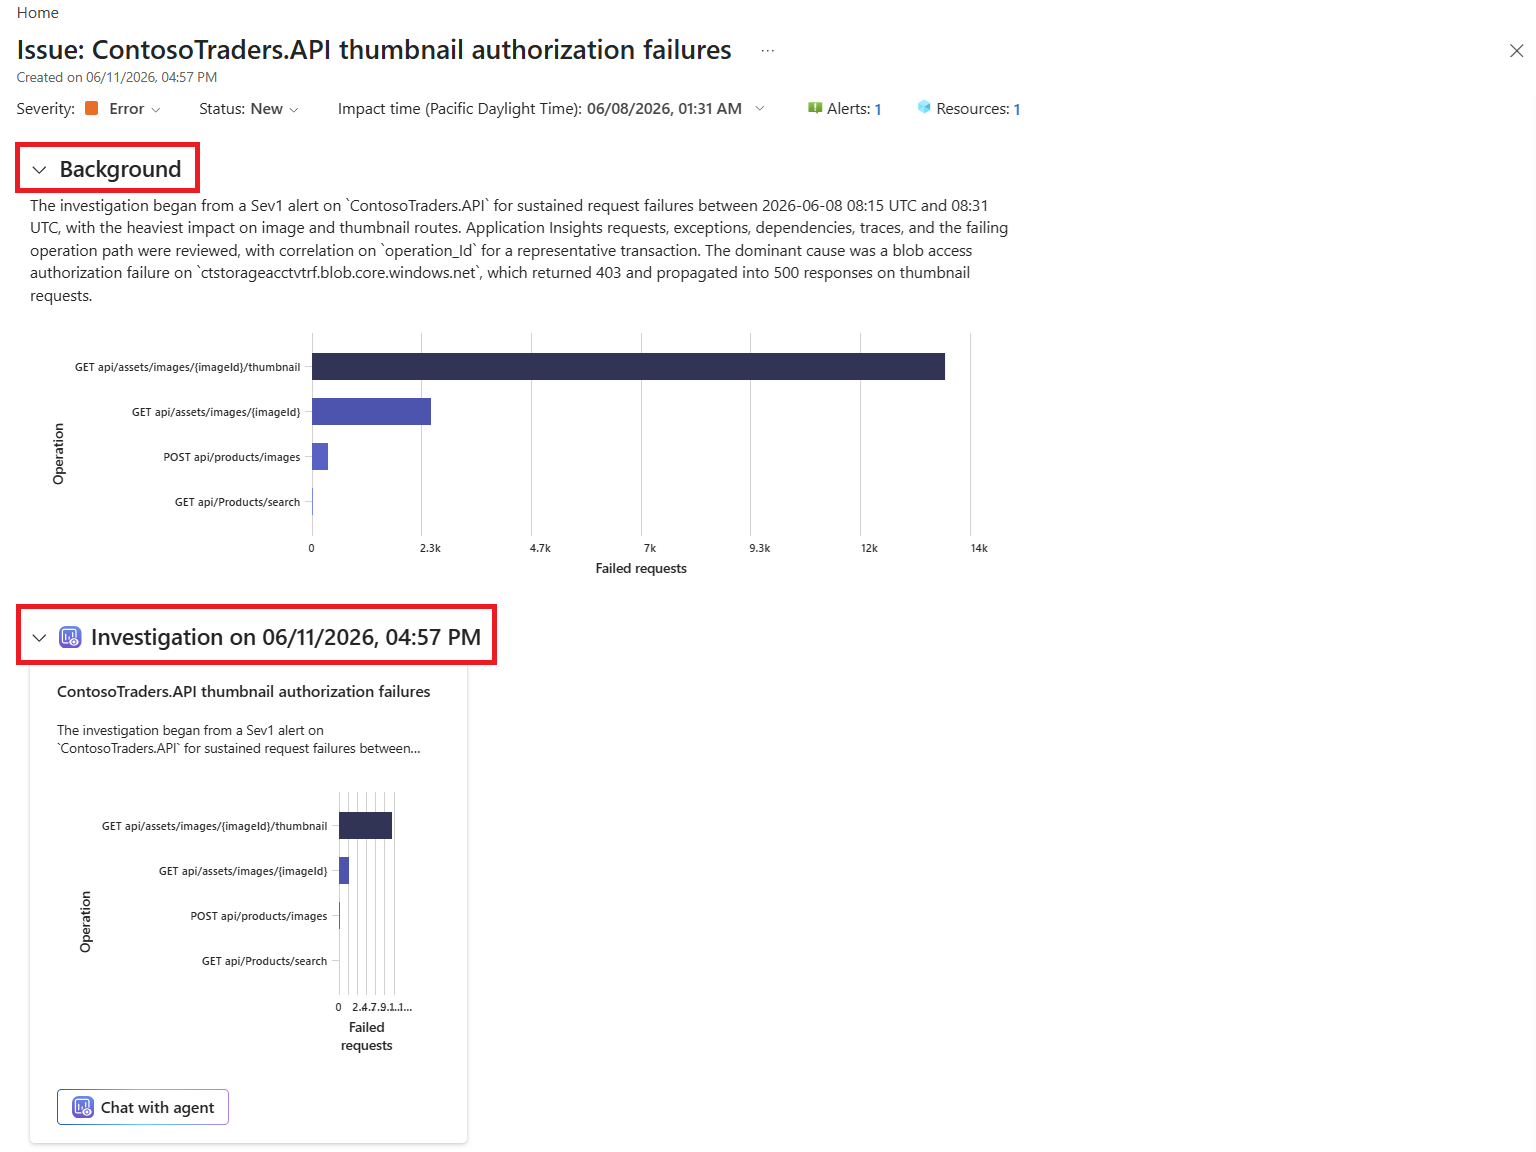
View the resources and alerts included in an issue
Select the Alerts or Resources tab to see the alerts and resources associated with the issue.