Note
Access to this page requires authorization. You can try signing in or changing directories.
Access to this page requires authorization. You can try changing directories.
Important
Anyscale on Azure is currently in PREVIEW. This preview version is provided without a service level agreement. Certain features might not be supported or might have constrained capabilities. During the preview period, Anyscale on Azure is available in a limited set of regions. See the Anyscale on Azure supported regions documentation for details on available regions and how to request access.
See the Supplemental Terms of Use for Microsoft Azure Previews for legal terms that apply to Azure features that are in beta, preview, or otherwise not yet released into general availability.
This quickstart walks you through deploying Anyscale on an existing Azure Kubernetes Service (AKS) cluster using the Envoy Gateway controller. By the end, you have a registered Anyscale cloud and are ready to run Ray workloads.
Prerequisites and required tools
Before you begin, make sure you have:
- An Azure subscription with the Owner or Administrator role.
- Enroll in the Anyscale on Azure Public Preview before you start. Contact Anyscale support to enroll, and provide your Azure subscription ID and preferred deployment regions.
- Permission to create service principals from external Microsoft Entra tenants.
- Install the following tools locally. Use the latest version of each.
- Azure CLI
- kubectl. Your version must be within one minor version of your AKS cluster. See the Kubernetes version skew policy.
- Helm
- Anyscale CLI:
pip install anyscale
Configure your Azure subscription
Creating the service principal requires permission to create service principals from external Microsoft Entra tenants. Review the prerequisite above before you proceed.
Create the Anyscale service principal
To establish trust with the Anyscale control plane, run the following command:
az ad sp create --id 086bc555-6989-4362-ba30-fded273e432b
Register required resource providers
Check which providers are already registered:
# List registered providers
az provider list --query "[?registrationState=='Registered']" --output table
Register any of the following that aren't listed:
# Register required providers
for provider in Microsoft.Storage Microsoft.ManagedIdentity Microsoft.Authorization \
  Microsoft.Resources Microsoft.Network Microsoft.ContainerService; do
  az provider register --namespace "$provider"
done
Create Azure resources
You can also use existing resources if you have them. For example, if you already have an AKS cluster with OIDC issuer and workload identity enabled, you can skip to Create an Anyscale cloud resource.
Create or select a resource group
You can use an existing resource group or create a new one in one of the supported regions:
# Create a resource group
az group create \
  --name <resource-group> \
  --location <location>
Create the AKS cluster
Before you create the cluster, confirm you have sufficient quota for the VM SKU you plan to use in your chosen region. Ray workloads require at least 4 vCPUs per worker node. Standard_D4s_v5 or equivalent is a good starting point. Check your current quota:
# Check vCPU quota for the desired region and VM family
az vm list-usage --location <location> --query "[?contains(name.value, 'standardDSv5Family')]" -o table
If you need a quota increase, request one in the Azure portal.
Create the cluster with OIDC issuer and workload identity enabled:
az aks create \
  --resource-group <resource-group> \
  --name <cluster-name> \
  --location <location> \
  --node-count 3 \
  --node-vm-size Standard_D4s_v5 \
  --enable-oidc-issuer \
  --enable-workload-identity \
  --generate-ssh-keys
After Azure creates the cluster, save the resource group name and cluster name. You'll need them later.
Node pools and workload placement
By default, Ray head nodes and worker nodes share the default node pool. For production workloads, create dedicated AKS node pools for Ray workloads and use Kubernetes taints and tolerations to steer Ray pods to those nodes.
Apply a NoSchedule taint to the dedicated node pool to prevent non-Ray workloads from scheduling on it. Then configure matching tolerations in your Anyscale cluster configuration so Ray pods are admitted to the tainted pool. This setup keeps Ray workers isolated from operator and system pods on the default node pool.
For production deployments, pair dedicated node pools with declarative compute configs to define instance types, resource requirements, and workload placement in code. This is the preferred approach for Anyscale on Azure.
For GPU workloads, you need a node pool backed by a GPU-capable VM SKU. If your subscription doesn't have sufficient GPU quota, request a quota increase in the Azure portal before creating the node pool.
For supported VM types and Ray sizing recommendations, see Supported instance types in the Anyscale documentation. To map model size to GPU memory for batch inference workloads, see GPU costs and selection.
For full details on creating and configuring AKS node pools, see Manage node pools in AKS.
Create an Anyscale cloud resource
In this section, you create an Anyscale cloud resource in the Azure portal and link it to your AKS cluster. The Anyscale cloud resource represents the cluster in the Anyscale control plane and allows you to run Ray workloads on it.
Note
The Anyscale Operator is also available through Azure Marketplace, but Anyscale doesn't recommend that route. Use the Anyscale Clouds Resource Provider in the Azure portal instead.
In the Azure portal, search for Anyscale clouds in the global search bar and select Anyscale clouds under Services from the results.
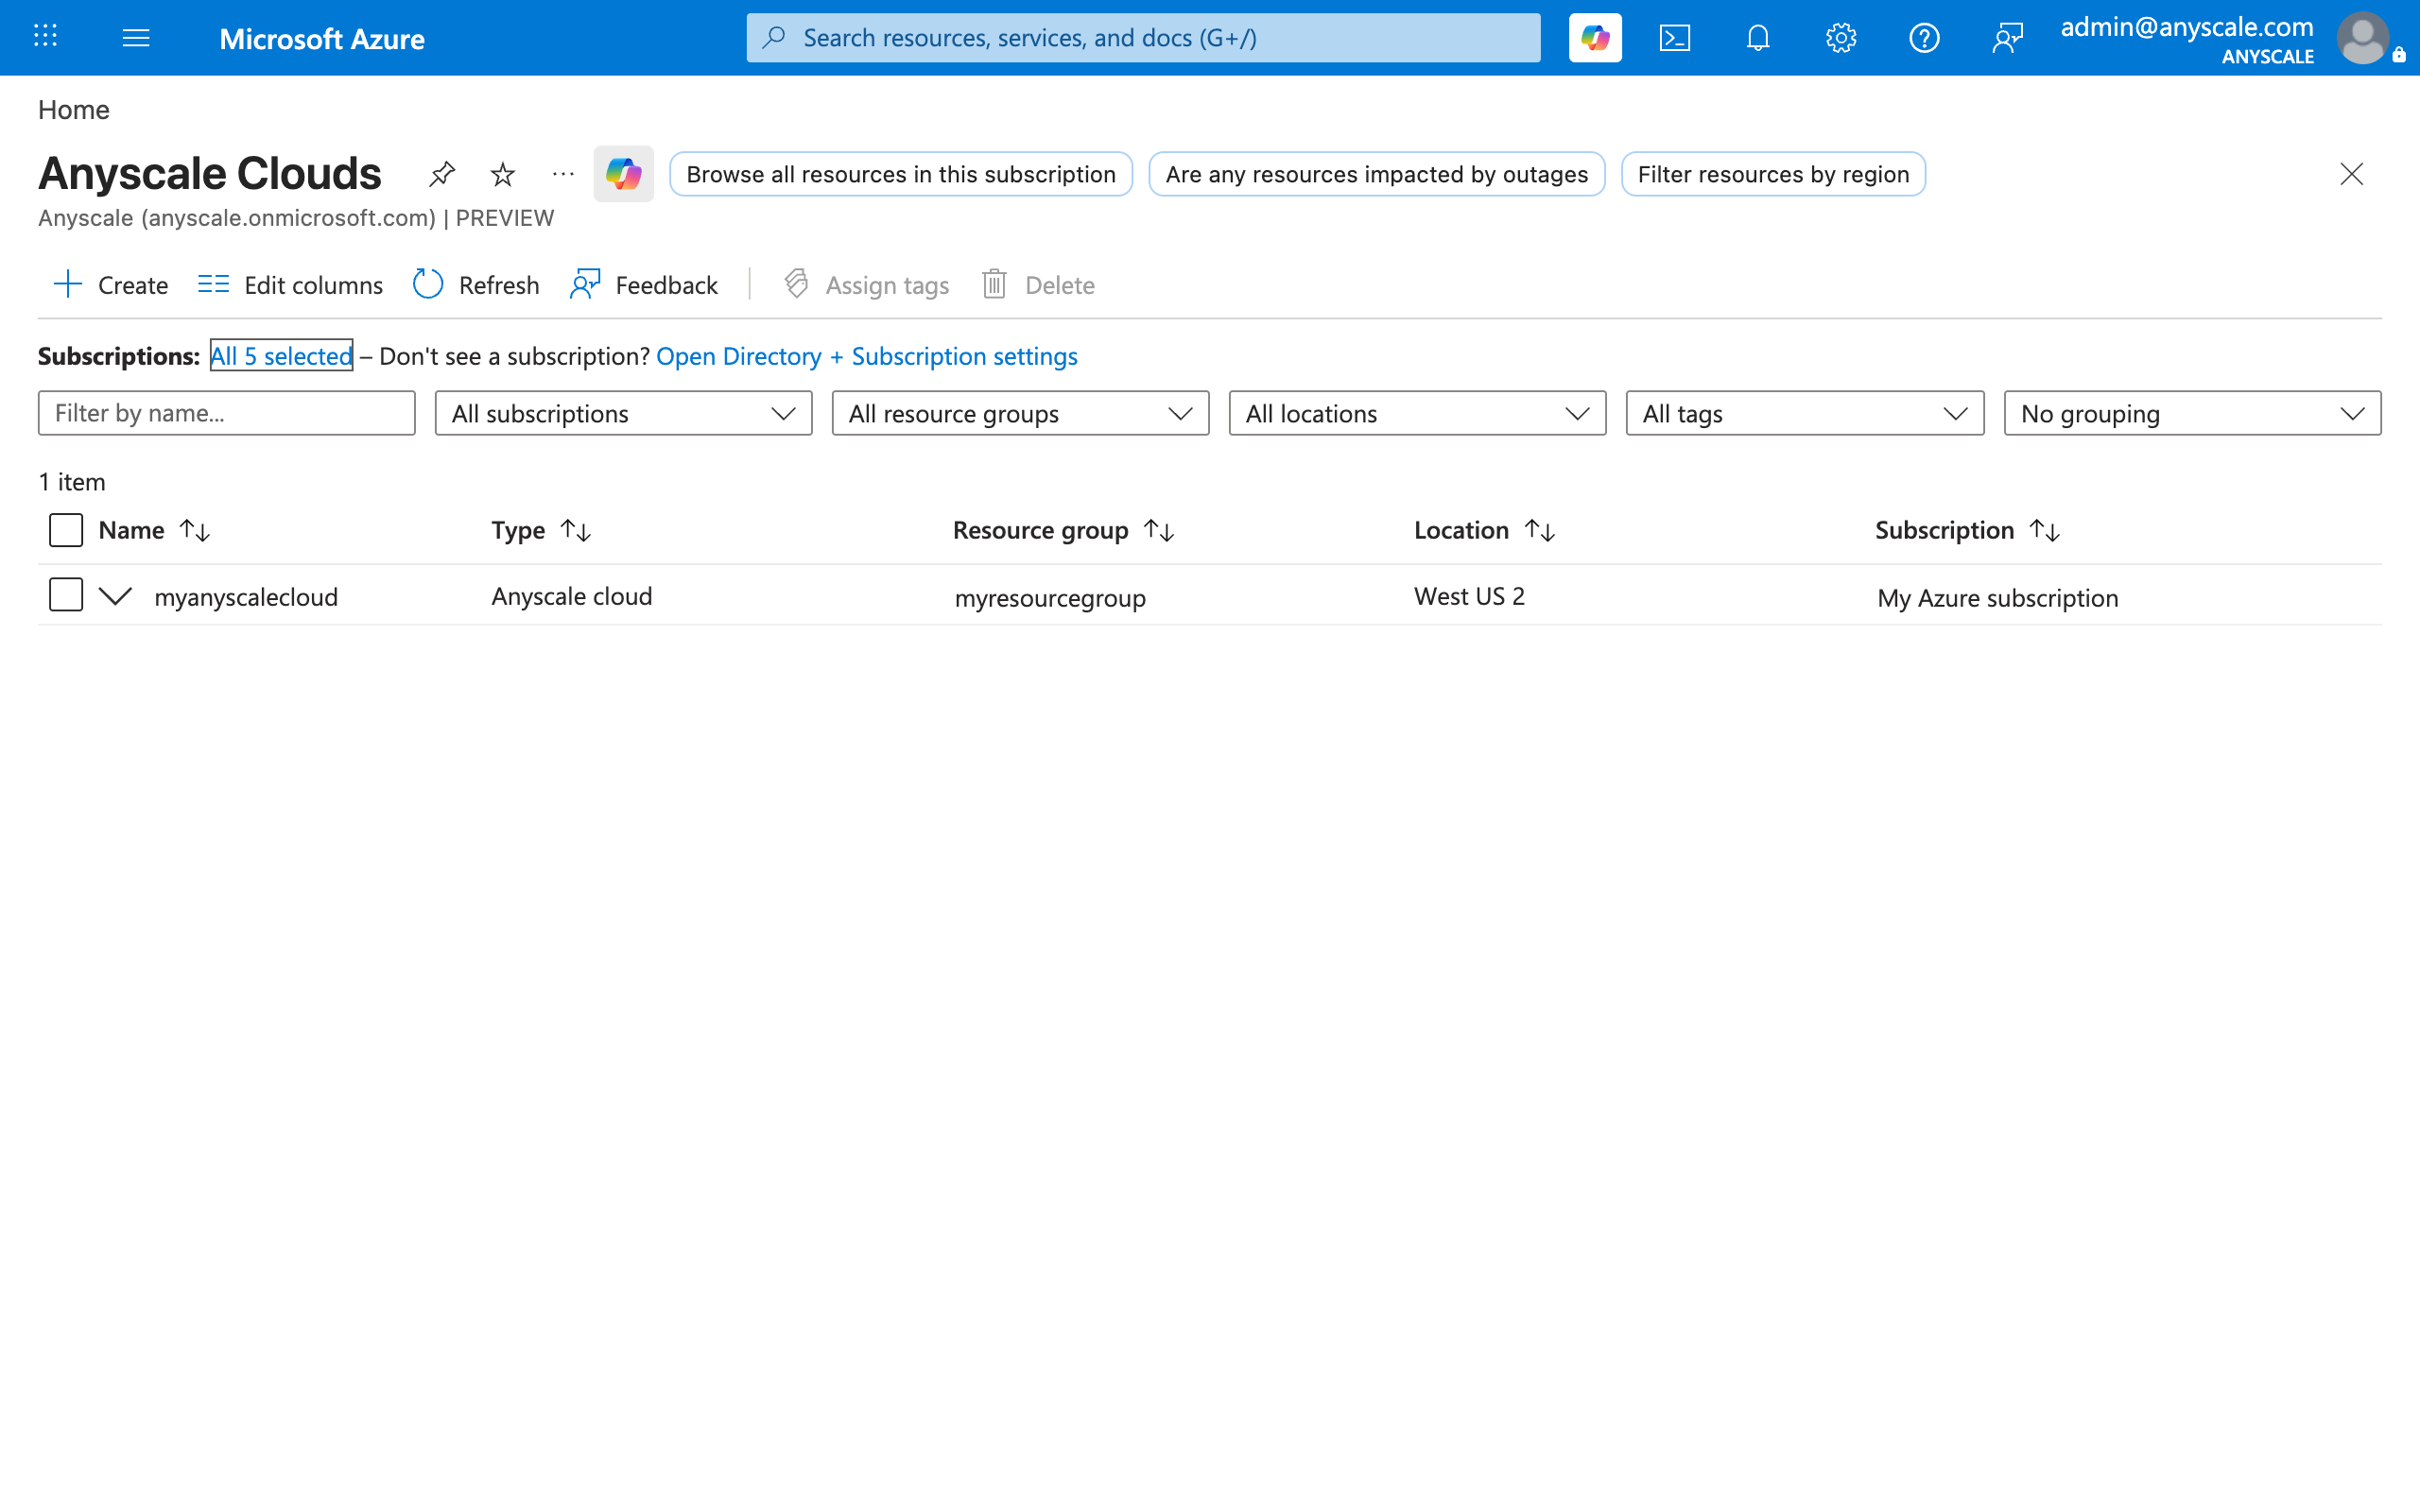
Select Create. In the Create Anyscale Operator pane, complete the following steps:
On the Basics tab, enter or select the following information:
- Subscription: Select the Azure subscription where you created your AKS cluster.
- Resource group: Select the resource group where you created your AKS cluster.
- Cloud name: Enter a unique name for your Anyscale cloud. This is the name that appears in the Anyscale console and CLI.
- Region: Select the same region where you created your AKS cluster.
- Cluster: Select the AKS cluster you created.
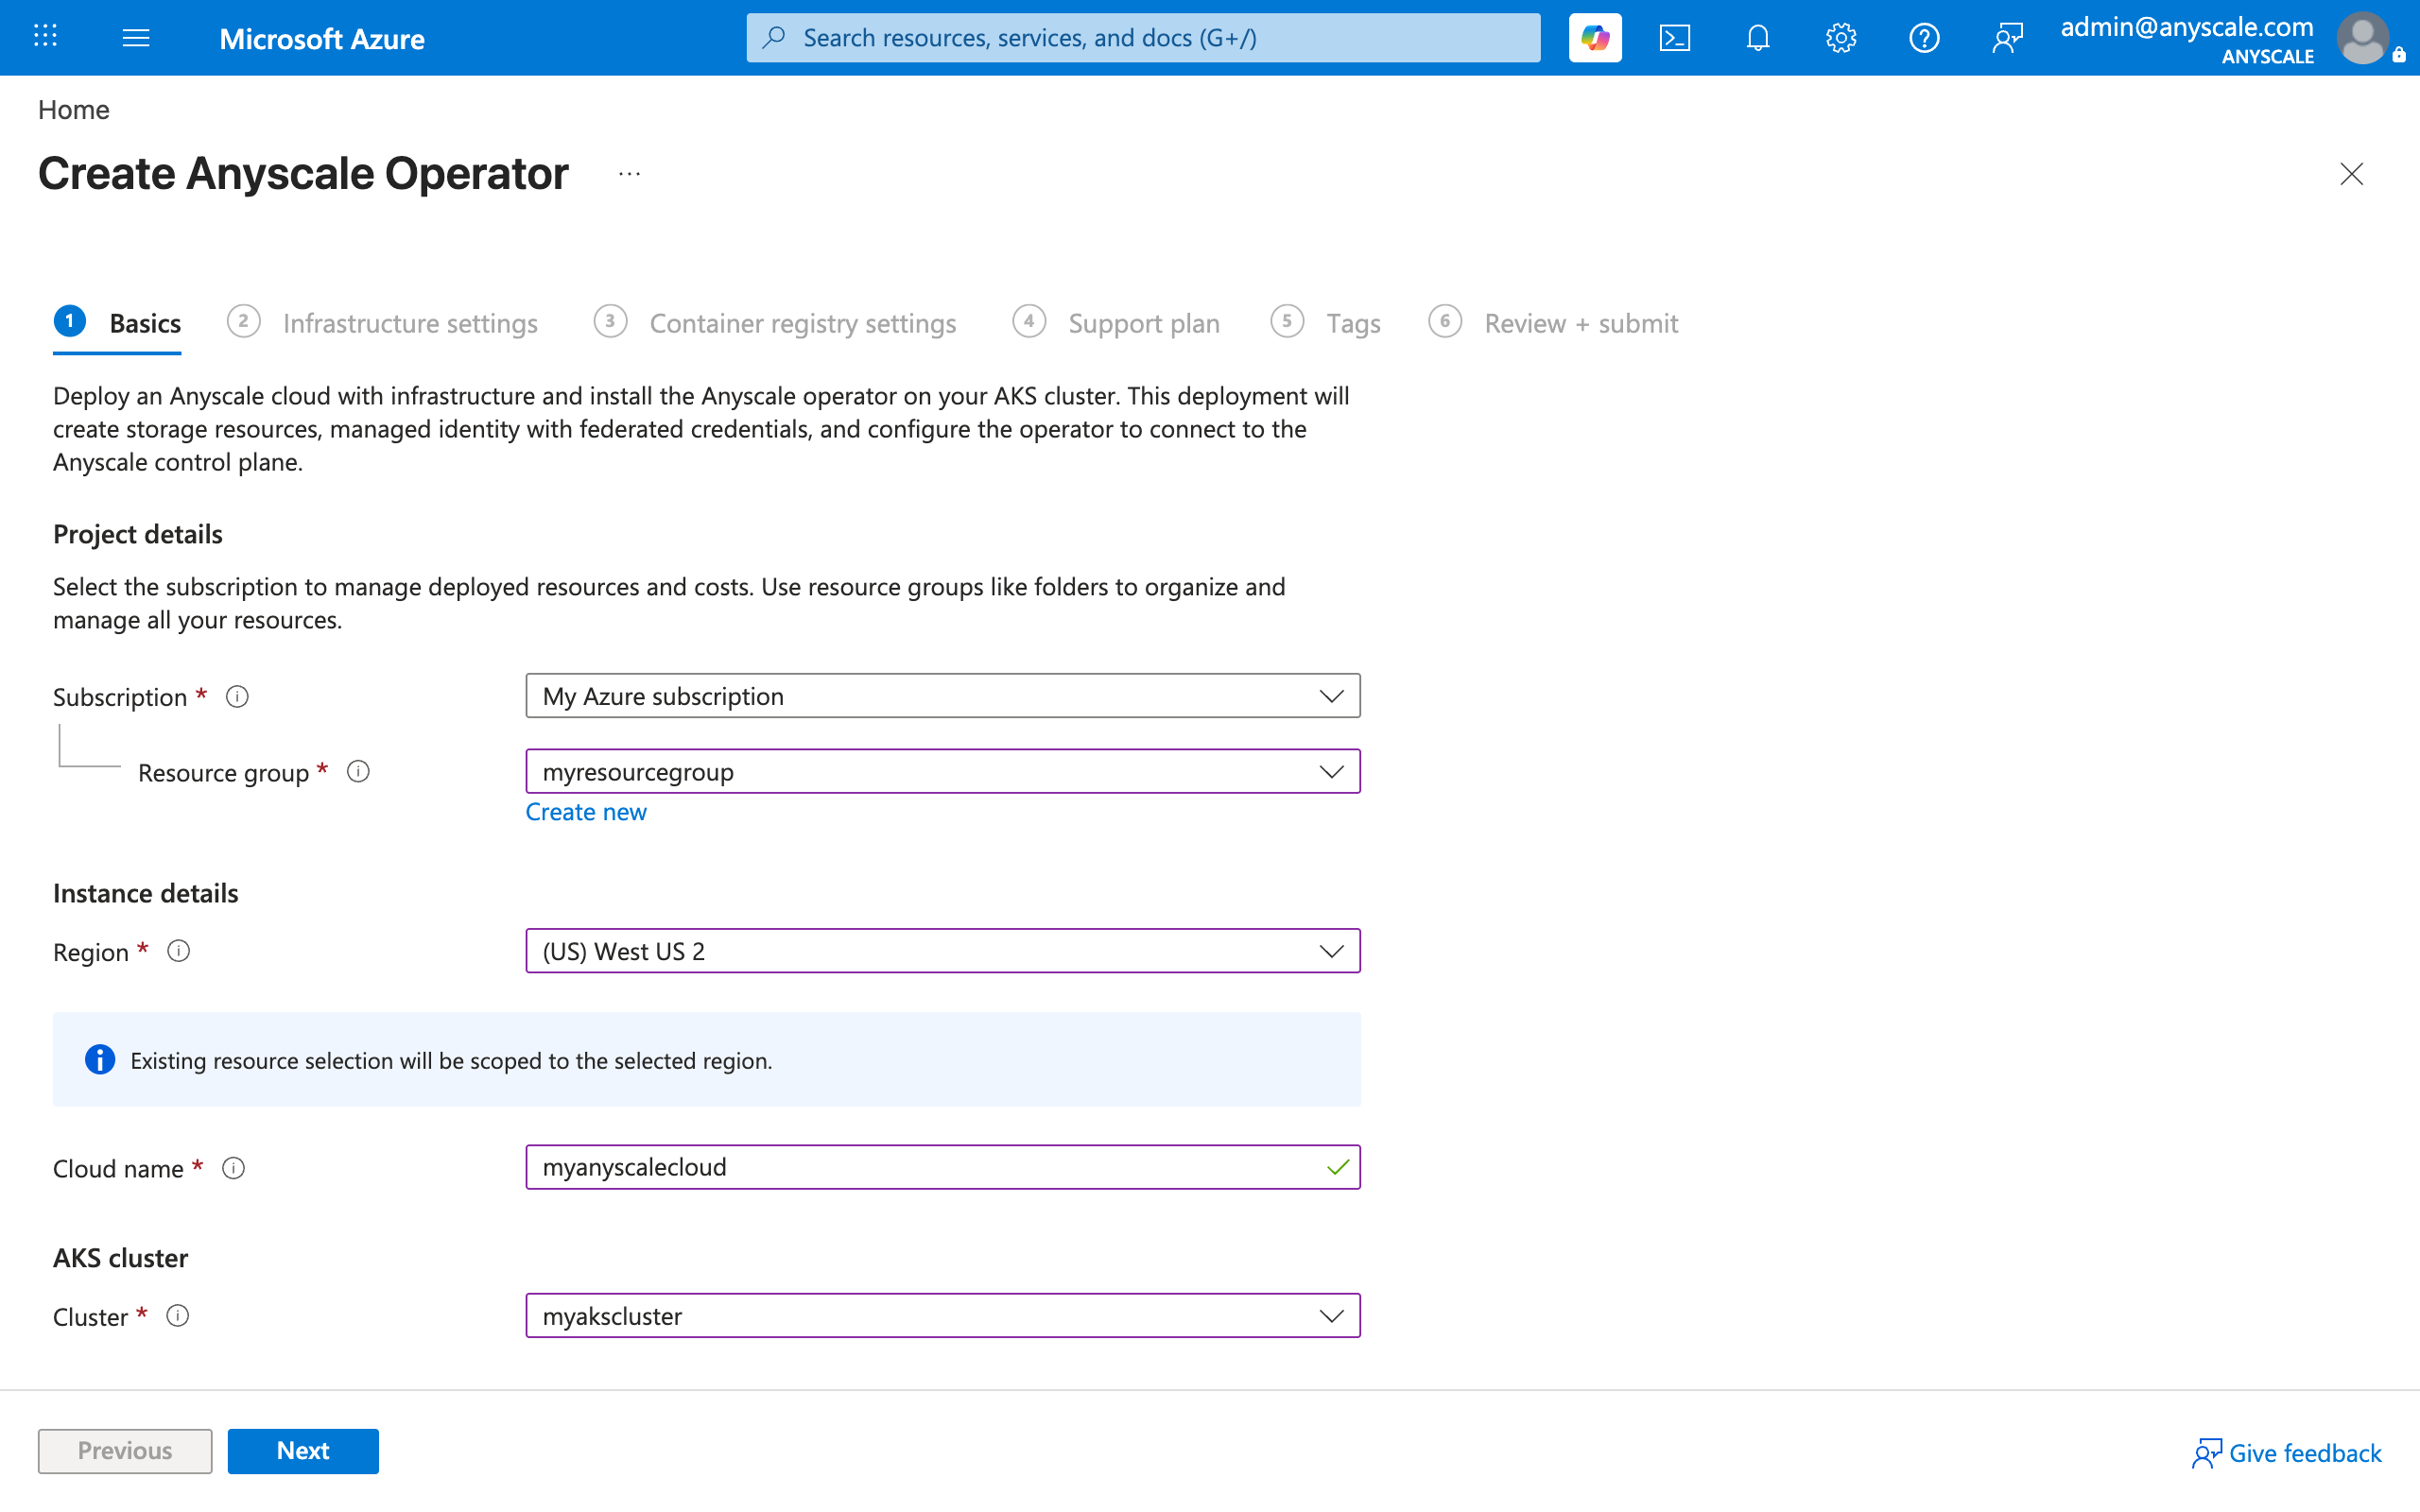
Select Next.
On the Infrastructure settings tab, the portal prepopulates a Storage account name and Anyscale operator identity name. Accept the defaults or enter custom names. Select Next.
On the Container registry tab, select an ACR mode:
- Create new ACR (default): The portal prepopulates a name. Accept the default or enter a custom name. Role assignments are configured automatically.
- Use Existing ACR: Select an existing ACR from the dropdown. Role assignments are configured automatically.
- No ACR: Skip ACR configuration. You can configure container image builds later.
Note
This ACR is used exclusively for Anyscale container image builds. To configure your cluster to pull Ray images from a different registry, see Configure a custom container image registry in the Anyscale documentation.
Select Next.
On the Support plan tab, review the support tier for your Anyscale cloud. This value is fixed and can't be changed. For details, see Support model. Select Next.
On the Tags tab, optionally add name/value pairs to categorize resources for billing and cost management. Select Next.
On the Review + submit tab, review the Marketplace terms of use. It can take a moment for validation to complete. After validation passes, select Create.
The portal creates the required storage, managed identity, container registry, and service account, and installs the Anyscale Kubernetes operator. The deployment takes about 5–8 minutes. Wait for it to finish before you proceed.
Assign access to your team
After cloud creation completes, you and any teammates who need to create workspaces, jobs, or services must hold the Anyscale Platform Contributor role on the cloud resource. Subscription Owner or Contributor permissions on the underlying Azure resources don't carry over to the Anyscale resource provider. Workload operations require an explicit Anyscale platform role.
To assign the role, navigate to your Anyscale cloud resource in the Azure portal, select Access control (IAM) > Add > Add role assignment, and assign Anyscale Platform Contributor to the appropriate users, groups, or service principals.
For the full list of Anyscale platform roles and the resource-provider actions they control, see Identity and access.
Note
Skipping this step can cause workspace, job, or service creation to fail with a 404 error. Azure Resource Manager returns 404 instead of 403 when the caller doesn't have read permission on the parent Anyscale cloud resource.
Install the Envoy Gateway controller
After installation, the Anyscale operator creates the TLS certificate secrets (anyscale-<cloud-resource-id>-certificate and anyscale-svc-<cloud-resource-id>-certificate) automatically. Find the Cloud Resource ID in the Anyscale console under your cloud's settings.
| Identifier | Format | Where to find it | Used for |
|---|---|---|---|
| Cloud ID | cld_* |
anyscale cloud list or the Anyscale console |
anyscale cloud verify --id |
| Cloud Resource ID | cldrsrc_* |
Anyscale console, cloud settings page | TLS cert secret names in gateway.yaml |
Throughout this section, replace underscores in the Cloud Resource ID with hyphens: cldrsrc-<id>.
Get AKS credentials
Run the following command to configure your local kubectl to connect to the AKS cluster. Replace the placeholders with your resource group and cluster name:
az aks get-credentials \
  --resource-group <azure-resource-group-name> \
  --name <your-aks-cluster-name> \
  --overwrite-existing
Confirm the Anyscale operator is running:
kubectl get pods -n anyscale-operator
The operator pod should show a status of Running.
Install Envoy Gateway
helm install eg oci://docker.io/envoyproxy/gateway-helm \
  --version v1.7.0 \
  --namespace envoy-gateway-system \
  --create-namespace

kubectl wait --for=condition=available deployment/envoy-gateway \
  -n envoy-gateway-system --timeout=120s
Create and apply envoyproxy.yaml
apiVersion: gateway.envoyproxy.io/v1alpha1
kind: EnvoyProxy
metadata:
  name: envoy-proxy
  namespace: envoy-gateway-system
spec:
  provider:
    type: Kubernetes
    kubernetes:
      envoyService:
        type: LoadBalancer
        annotations:
          service.beta.kubernetes.io/azure-load-balancer-internal: "false"
kubectl apply -f envoyproxy.yaml
Create and apply gatewayclass.yaml
apiVersion: gateway.networking.k8s.io/v1
kind: GatewayClass
metadata:
  name: eg
spec:
  controllerName: gateway.envoyproxy.io/gatewayclass-controller
  parametersRef:
    group: gateway.envoyproxy.io
    kind: EnvoyProxy
    name: envoy-proxy
    namespace: envoy-gateway-system
kubectl apply -f gatewayclass.yaml
Create and apply gateway.yaml
Replace <cloud-resource-id> with your Cloud Resource ID from the table above, converting underscores to hyphens, for example cldrsrc-<id>.
apiVersion: gateway.networking.k8s.io/v1
kind: Gateway
metadata:
  name: gateway
  namespace: anyscale-operator
spec:
  gatewayClassName: eg
  listeners:
  - name: http
    port: 80
    protocol: HTTP
    allowedRoutes:
      namespaces:
        from: Same
  - name: https
    port: 443
    protocol: HTTPS
    hostname: '*.i.azure.anyscaleuserdata.com'
    tls:
      mode: Terminate
      certificateRefs:
      - kind: Secret
        name: anyscale-<cloud-resource-id>-certificate
    allowedRoutes:
      namespaces:
        from: Same
  - name: https-session
    port: 443
    protocol: HTTPS
    hostname: '*.s.azure.anyscaleuserdata.com'
    tls:
      mode: Terminate
      certificateRefs:
      - kind: Secret
        name: anyscale-svc-<cloud-resource-id>-certificate
    allowedRoutes:
      namespaces:
        from: Same
kubectl apply -f gateway.yaml
After applying, retrieve the load balancer address:
kubectl get gateway gateway -n anyscale-operator -o jsonpath='{.status.addresses[0].value}'
Configure the Anyscale operator with gateway settings
Update the operator extension configuration. Replace <cluster-name>, <resource-group>, and <gateway-lb-address> with your values:
az k8s-extension update \
  --cluster-name <cluster-name> \
  --resource-group <resource-group> \
  --cluster-type managedClusters \
  --name anyscaleoperator \
  --yes \
  --configuration-settings \
    networking.gateway.enabled=true \
    networking.gateway.name=gateway \
    networking.gateway.className=eg \
    networking.gateway.namespace=anyscale-operator \
    "networking.gateway.apiVersion=gateway.networking.k8s.io/v1" \
    networking.gateway.hostname=<gateway-lb-address>
This command updates only the gateway settings. The update preserves all other operator configuration set during portal installation.
Anyscale on Azure installs the operator as an AKS extension, not a standalone Helm release. Use az k8s-extension update --configuration-settings to pass Helm values to the operator. Don't use the Helm CLI directly to configure the operator.
Verify the deployment
After the controller is up and running, verify that your Anyscale cloud is healthy and can communicate with the operator.
Set the Anyscale console URL and sign in:
export ANYSCALE_HOST=https://console.azure.anyscale.com
anyscale login
To avoid setting
ANYSCALE_HOSTeach session, add the export to your shell configuration file (.bashrcor.zshrc) and start a new shell.Set your
kubectlcontext to the correct cluster:kubectl config use-context <cluster-name>Find your cloud ID from the Anyscale console or by running:
anyscale cloud listThe cloud ID has the format
cld_*.Verify the cloud:
anyscale cloud verify --id <cloud-id>The CLI prompts you to select your
kubectlcontext and confirm the operator namespace. After you confirm, a healthy cloud returns output similar to:Overall Result: ALL 1 cloud resources verified successfully
Note
During Public Preview, the Anyscale CLI supports only read operations against Azure cloud resources. Manage clouds and cloud resources through the Anyscale Clouds Resource Provider in the Azure portal. For details, see Public Preview limitations.
Run your first workload
Now that your cloud is set up and verified, you can run a Ray job on it. Create a simple Ray program and submit it as a job through the Anyscale CLI.
Create a file named
main.py:import ray import time num_ray_tasks = 5 @ray.remote def process(x): if x == (num_ray_tasks - 1): print("Hello from one of the Running Ray Tasks!") time.sleep(200) return x * 2 result = ray.get([process.remote(x) for x in range(num_ray_tasks)]) print("The job result is", result)Create a file named
job.yamlin the same directory:name: my-first-job working_dir: . entrypoint: python main.py max_retries: 1Submit the job, using the cloud name as it appears in the Anyscale console or
anyscale cloud list(it starts with/subscriptions/):anyscale job submit -f job.yaml --cloud <cloud-name>The command returns a URL to track job status and view output in the Anyscale console.
Clean up resources
Complete the following steps to remove the resources you created in this quickstart:
- In the Anyscale console, stop any running jobs, workspaces, and services associated with the cloud.
- In the Azure portal, navigate to Anyscale clouds, select the cloud resources to delete, and select Delete. If you follow this guide, there should only be one cloud resource.
- In the Azure portal, navigate to Anyscale clouds, select the cloud to delete, and select Delete.
- In the Azure portal, navigate to your AKS cluster and select Delete.
- If you created a resource group specifically for this quickstart, navigate to it in the Azure portal and select Delete resource group to remove any remaining resources.
During Public Preview, if you're unable to delete a resource through the portal, contact Anyscale support for assistance.
Add a second cloud resource
An Anyscale cloud can include multiple AKS clusters through cloud resources. Each cloud resource represents one AKS cluster, so you can run Ray workloads across different configurations within the same cloud.
To add another cloud resource to an existing Anyscale cloud, use the Azure portal:
- Navigate to the Anyscale clouds page and select your cloud from the list.
- Select Resources to expand the menu, then select Cloud Resources.
- Select Create and follow the setup wizard.
Next steps
- Networking
- Identity and access
- Configure container image builds for an existing cloud
- Supported regions
- Configure head node fault tolerance before running production Anyscale Services