Note
Access to this page requires authorization. You can try signing in or changing directories.
Access to this page requires authorization. You can try changing directories.
APPLIES TO: All API Management tiers
Azure Front Door is a modern application delivery network platform providing a secure, scalable content delivery network (CDN), dynamic site acceleration, and global HTTP(s) load balancing for your global web applications. When used in front of API Management, Front Door can provide TLS offloading, end-to-end TLS, load balancing, response caching of GET requests, and a web application firewall, among other capabilities. For a full list of supported features, see What is Azure Front Door?
Note
For web workloads, we highly recommend that you use Azure DDoS Protection and a web application firewall to safeguard against emerging DDoS attacks. Another option is to employ Azure Front Door along with a web application firewall. Azure Front Door offers platform-level protection against network-level DDoS attacks. For more information, see Security baseline for Azure services.
This article shows how to:
- Set up an Azure Front Door Standard/Premium profile in front of a publicly accessible Azure API Management instance: either non-networked, or a Developer or Premium instance injected in a virtual network in external mode.
- Restrict API Management to accept API traffic only from Azure Front Door.
Tip
You can also configure Azure Front Door Premium to route traffic to an API Management gateway using a private endpoint.
Prerequisites
- An API Management instance.
- If you choose to use a network-injected instance, it must be deployed in an external VNet. (Virtual network injection is supported in the Developer and Premium service tiers.)
- Import one or more APIs to your API Management instance to confirm routing through Front Door.
Configure Azure Front Door
Create profile
For steps to create an Azure Front Door Standard/Premium profile, see Quickstart: Create an Azure Front Door profile - Azure portal. For this article, you may choose a Front Door Standard profile. For a comparison of Front Door Standard and Front Door Premium, see Tier comparison.
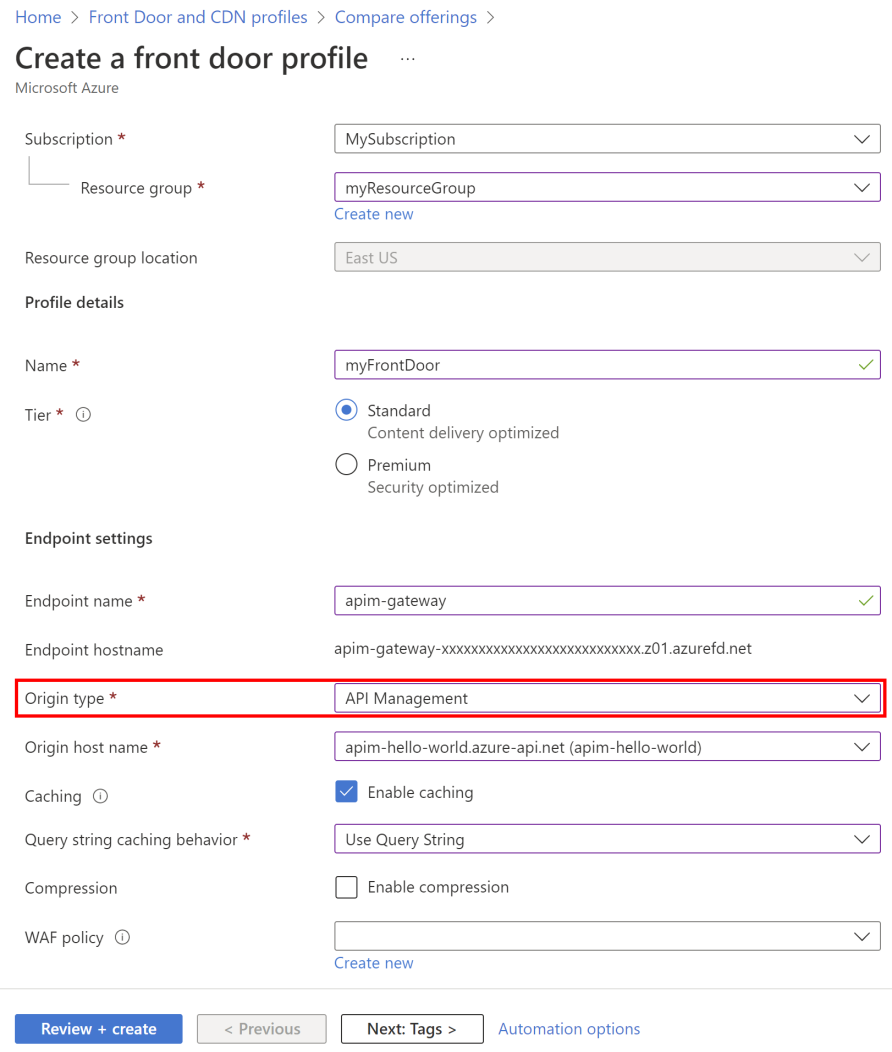
Configure the following Front Door settings that are specific to using the gateway endpoint of your API Management instance as a Front Door origin. For an explanation of other settings, see the Front Door quickstart.
| Setting | Value |
|---|---|
| Origin type | Select API Management |
| Origin hostname | Select the hostname of your API Management instance, for example, myapim.azure-api.net |
| Caching | Select Enable caching for Front Door to cache static content |
| Query string caching behavior | Select Use Query String |
Update default origin group
After the profile is created, update the default origin group to include an API Management health probe.
In the portal, go to your Front Door profile.
In the left menu, under Settings select Origin groups > default-origin-group.
In the Update origin group window, configure the following Health probe settings and select Update:
Setting Value Status Select Enable health probes Path Enter /status-0123456789abcdefProtocol Select HTTPS Method Select GET Interval (in seconds) Enter 30 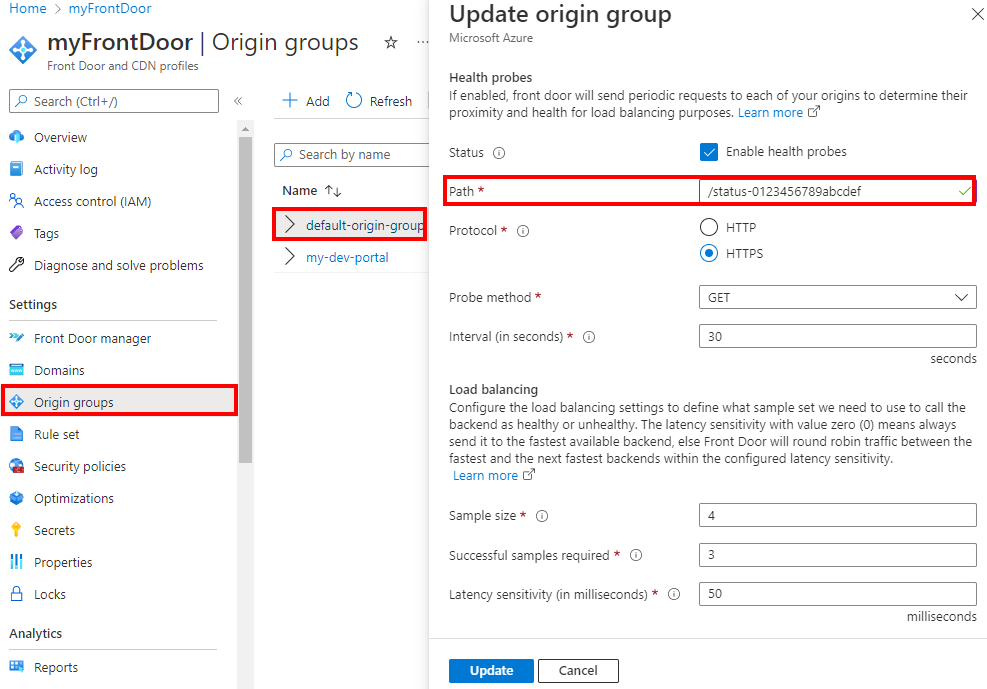
Update default route
We recommend updating the default route that's associated with the API Management origin group to use HTTPS as the forwarding protocol.
- In the portal, go to your Front Door profile.
- In the left menu, under Settings select Origin groups.
- Expand default-origin-group.
- In the context menu (...) of default-route, select Configure route.
- Set Accepted protocols to HTTP and HTTPS.
- Enable Redirect all traffic to use HTTPS.
- Set Forwarding protocol to HTTPS only and then select Update.
Test the configuration
Test the Front Door profile configuration by calling an API hosted by API Management, for example, the Swagger Petstore API. First, call the API directly through the API Management gateway to ensure that the API is reachable. Then, call the API through Front Door.
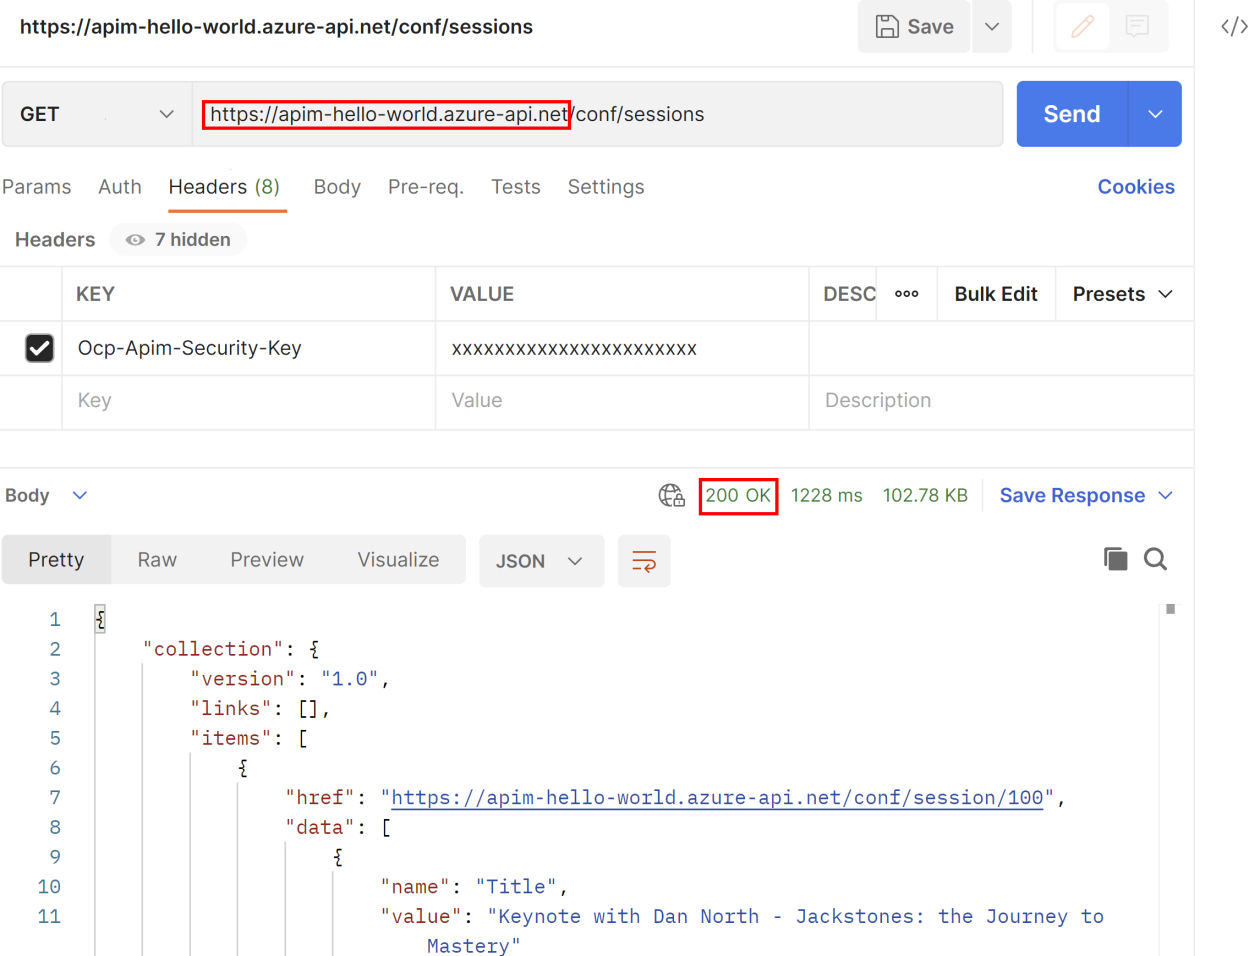
Call an API directly through API Management
To call an API directly through the API Management gateway, you can use a command line client such as curl or another HTTP client. A successful response returns a 200 OK HTTP response and the expected data:
Call an API directly through Front Door
Call the same API operation using the Front Door endpoint configured for your instance. The endpoint's hostname in the azurefd.net domain is shown in the portal on the Overview page of your Front Door profile. A successful response shows 200 OK and returns the same data as in the previous example.
Restrict incoming traffic to API Management instance
Use API Management policies to ensure that your API Management instance accepts traffic only from Azure Front Door. You can accomplish this restriction using one or both of the following methods:
- Restrict incoming IP addresses to your API Management instances
- Restrict traffic based on the value of the
X-Azure-FDIDheader
Restrict incoming IP addresses
You can configure an inbound ip-filter policy in API Management to allow only Front Door-related traffic, which includes:
Front Door's backend IP address space - Allow IP addresses corresponding to the AzureFrontDoor.Backend section in Azure IP Ranges and Service Tags.
Note
If your API Management instance is deployed in an external virtual network, accomplish the same restriction by adding an inbound network security group rule in the subnet used for your API Management instance. Configure the rule to allow HTTPS traffic from source service tag AzureFrontDoor.Backend on port 443.
Azure infrastructure services - Allow IP addresses 168.63.129.16 and 169.254.169.254.
Check Front Door header
Requests routed through Front Door include headers specific to your Front Door configuration. You can configure the check-header policy to filter incoming requests based on the unique value of the X-Azure-FDID HTTP request header that is sent to API Management. This header value is the Front Door ID, which is shown in the portal on the Overview page of the Front Door profile.
In the following policy example, the Front Door ID is specified using a named value named FrontDoorId.
<check-header name="X-Azure-FDID" failed-check-httpcode="403" failed-check-error-message="Invalid request." ignore-case="false">
        <value>{{FrontDoorId}}</value>
</check-header>
Requests that aren't accompanied by a valid X-Azure-FDID header return a 403 Forbidden response.
(Optional) Configure Front Door for developer portal
Optionally, configure the API Management instance's developer portal as an endpoint in the Front Door profile. While the managed developer portal is already fronted by an Azure-managed CDN, you might want to take advantage of Front Door features such as a WAF.
The following are high level steps to add an endpoint for the developer portal to your profile:
To add an endpoint and configure a route, see Configure and endpoint with Front Door manager.
When adding the route, add an origin group and origin settings to represent the developer portal:
- Origin type - Select Custom
- Host name - Enter the developer portal's hostname, for example, myapim.developer.azure-api.net
For more information and details about settings, see How to configure an origin for Azure Front Door.
Note
If you've configured a Microsoft Entra ID or Microsoft Entra External ID identity provider for the developer portal, you need to update the corresponding app registration with an additional redirect URL to Front Door. In the app registration, add the URL for the developer portal endpoint configured in your Front Door profile.
Related content
To automate deployments of Front Door with API Management, see the template Front Door Standard/Premium with API Management origin
Learn how to deploy Web Application Firewall (WAF) on Azure Front Door to protect the API Management instance from malicious attacks.