Note
Access to this page requires authorization. You can try signing in or changing directories.
Access to this page requires authorization. You can try changing directories.
Connect a symbol to a data source, and use it to render an icon or a text at a given point.
Symbol layers are rendered using WebGL. Use a symbol layer to render large collections of points on the map. Compared to HTML marker, the symbol layer renders a large number of point data on the map, with better performance. However, the symbol layer doesn't support traditional CSS and HTML elements for styling.
Tip
Symbol layers by default will render the coordinates of all geometries in a data source. To limit the layer such that it only renders point geometry features set the filter property of the layer to ['==', ['geometry-type'], 'Point'] or ['any', ['==', ['geometry-type'], 'Point'], ['==', ['geometry-type'], 'MultiPoint']] if you want, you can include MultiPoint features as well.
The maps image sprite manager loads custom images used by the symbol layer. It supports the following image formats:
- JPEG
- PNG
- SVG
- BMP
- GIF (no animations)
Add a symbol layer
Before you can add a symbol layer to the map, you need to take a couple of steps. First, create a data source, and add it to the map. Create a symbol layer. Then, pass in the data source to the symbol layer, to retrieve the data from the data source. Finally, add data into the data source, so that there's something to be rendered.
The following code demonstrates what should be added to the map after it has loaded. This sample renders a single point on the map using a symbol layer.
//Create a data source and add it to the map.
var dataSource = new atlas.source.DataSource();
map.sources.add(dataSource);

//Create a symbol layer to render icons and/or text at points on the map.
var layer = new atlas.layer.SymbolLayer(dataSource);

//Add the layer to the map.
map.layers.add(layer);

//Create a point and add it to the data source.
dataSource.add(new atlas.data.Point([0, 0]));
There are four different types of point data that can be added to the map:
- GeoJSON Point geometry - This object only contains a coordinate of a point and nothing else. The
atlas.data.Pointhelper class can be used to easily create these objects. - GeoJSON MultiPoint geometry - This object contains the coordinates of multiple points and nothing else. The
atlas.data.MultiPointhelper class can be used to easily create these objects. - GeoJSON Feature - This object consists of any GeoJSON geometry and a set of properties that contain metadata associated to the geometry. The
atlas.data.Featurehelper class can be used to easily create these objects. atlas.Shapeclass is similar to the GeoJSON feature. Both consist of a GeoJSON geometry and a set of properties that contain metadata associated to the geometry. If a GeoJSON object is added to a data source, it can easily be rendered in a layer. However, if the coordinates property of that GeoJSON object is updated, the data source and map don't change. That's because there's no mechanism in the JSON object to trigger an update. The shape class provides functions for updating the data it contains. When a change is made, the data source and map are automatically notified and updated.
The following code sample creates a GeoJSON Point geometry and passes it into the atlas.Shape class to make it easy to update. The center of the map is initially used to render a symbol. A click event is added to the map such that when it fires, the coordinates of the mouse are used with the shapes setCoordinates function. The mouse coordinates are recorded at the time of the click event. Then, the setCoordinates updates the location of the symbol on the map.
function InitMap()
{
    var map = new atlas.Map('myMap', {
        center: [-122.33, 47.64],
        zoom: 13,
        view: "Auto",

        //Add authentication details for connecting to Azure Maps.
        authOptions: {
            authType: 'subscriptionKey',
            subscriptionKey: '{Your-Azure-Maps-Subscription-key}'
        }
    });

    //Wait until the map resources are ready.
    map.events.add('ready', function () {

      /*Create a data source and add it to the map*/
      var dataSource = new atlas.source.DataSource();
      map.sources.add(dataSource);
      var point = new atlas.Shape(new atlas.data.Point([-122.33, 47.64]));
      //Add the symbol to the data source.
      dataSource.add([point]);

      /* Gets co-ordinates of clicked location*/
      map.events.add('click', function(e){
        /* Update the position of the point feature to where the user clicked on the map. */
        point.setCoordinates(e.position);
      });

      //Create a symbol layer using the data source and add it to the map
      map.layers.add(new atlas.layer.SymbolLayer(dataSource, null));
    });
}
Tip
By default, symbol layers optimize the rendering of symbols by hiding symbols that overlap. As you zoom in, the hidden symbols become visible. To disable this feature and render all symbols at all times, set the allowOverlap property of the iconOptions options to true.
Add a custom icon to a symbol layer
Symbol layers are rendered using WebGL. As such all resources, such as icon images, must be loaded into the WebGL context. This sample shows how to add a custom icon to the map resources. This icon is then used to render point data with a custom symbol on the map. The textField property of the symbol layer requires an expression to be specified. In this case, we want to render the temperature property. Since temperature is a number, it needs to be converted to a string. Additionally we want to append "°F" to it. An expression can be used to do this concatenation; ['concat', ['to-string', ['get', 'temperature']], '°F'].
function InitMap()
{
    var map = new atlas.Map('myMap', {
        center: [-73.985708, 40.75773],
        zoom: 12,
        view: "Auto",

        //Add authentication details for connecting to Azure Maps.
        authOptions: {
            authType: 'subscriptionKey',
            subscriptionKey: '{Your-Azure-Maps-Subscription-key}'
        }
    });

    map.events.add('ready', function () {

      //Load the custom image icon into the map resources.
      map.imageSprite.add('my-custom-icon', '/images/icons/showers.png').then(function () {

        //Create a data source and add it to the map.
        var datasource = new atlas.source.DataSource();
        map.sources.add(datasource);

        //Create a point feature and add it to the data source.
        datasource.add(new atlas.data.Feature(new atlas.data.Point([-73.985708, 40.75773]), {
          temperature: 64
        }));

        //Add a layer for rendering point data as symbols.
        map.layers.add(new atlas.layer.SymbolLayer(datasource, null, {
          iconOptions: {
            //Pass in the id of the custom icon that was loaded into the map resources.
            image: 'my-custom-icon',

            //Optionally scale the size of the icon.
            size: 0.5
          },
          textOptions: {
            //Convert the temperature property of each feature into a string and concatenate "°F".
            textField: ['concat', ['to-string', ['get', 'temperature']], '°F'],

            //Offset the text so that it appears on top of the icon.
            offset: [0, -2]
          }
        }));
      });
    });
}
![]()
Note
For a copy of the image file used in the above sample, see showers.png in GitHub.
Tip
The Azure Maps Web SDK provides several customizable image templates you can use with the symbol layer. For more information, see the How to use image templates document.
Customize a symbol layer
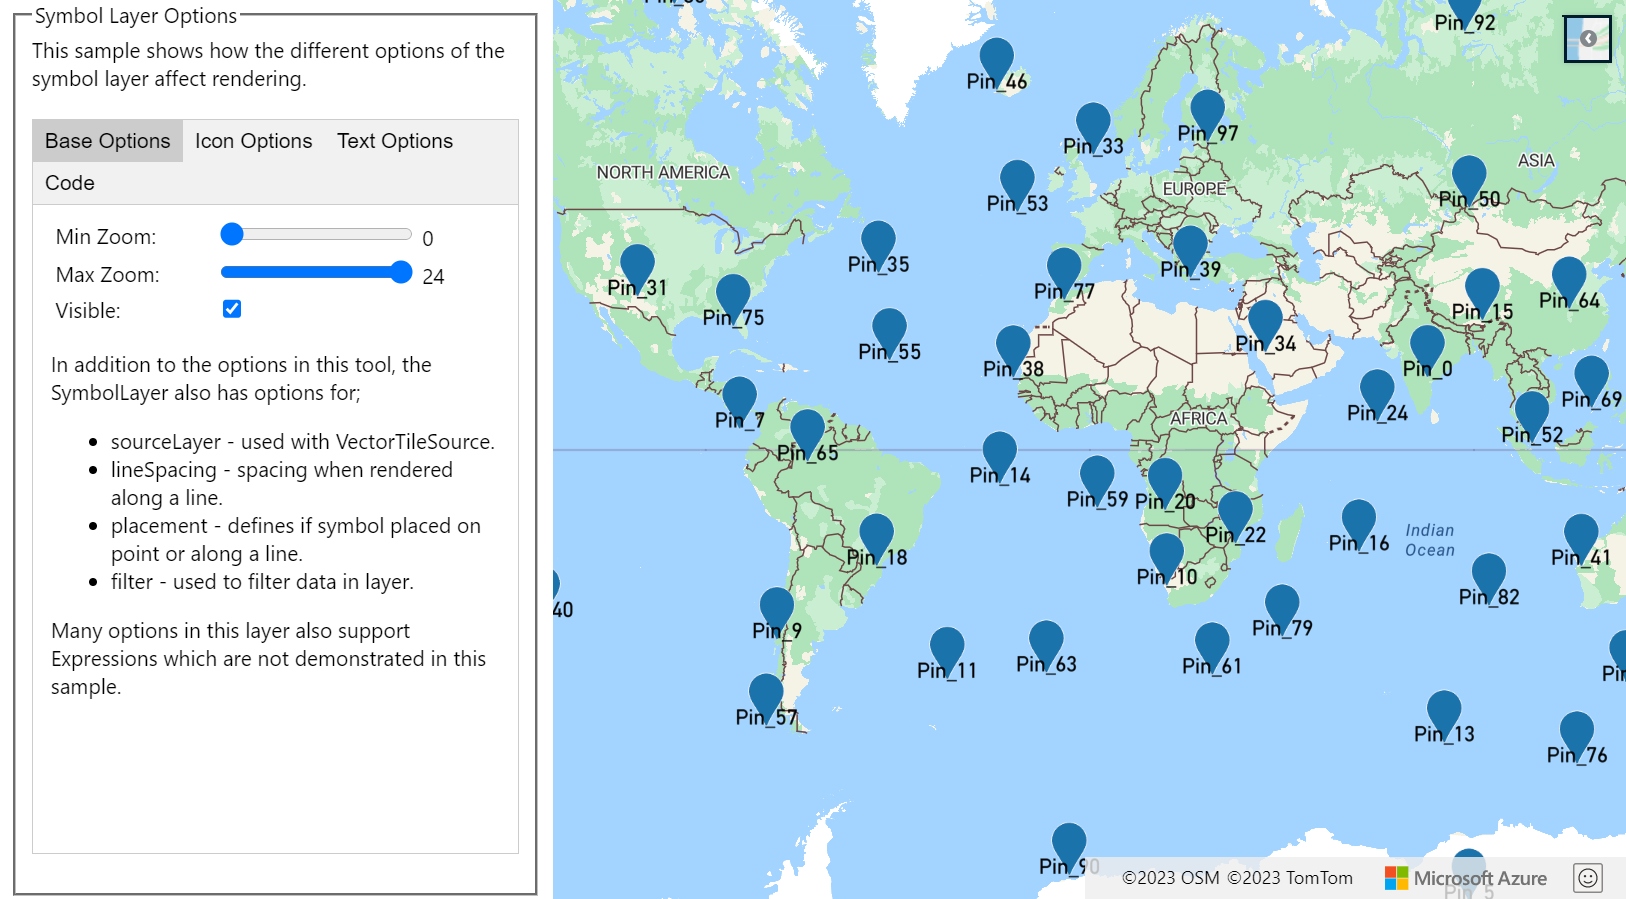
The symbol layer has many styling options available. The Symbol Layer Options sample shows how the different options of the symbol layer that affects rendering. For the source code for this sample, see Symbol Layer Options source code.
Tip
When you want to render only text with a symbol layer, you can hide the icon by setting the image property of the icon options to 'none'.
Next steps
Learn more about the classes and methods used in this article:
See the following articles for more code samples to add to your maps: