Manage Azure Monitor Agent
This article provides the different options currently available to install, uninstall, and update the Azure Monitor agent. This agent extension can be installed on Azure virtual machines, scale sets, and Azure Arc-enabled servers. It also lists the options to create associations with data collection rules that define which data the agent should collect. Installing, upgrading, or uninstalling Azure Monitor Agent won't require you to restart your server.
Virtual machine extension details
Azure Monitor Agent is implemented as an Azure VM extension with the details in the following table. You can install it by using any of the methods to install virtual machine extensions including the methods described in this article.
| Property | Windows | Linux |
|---|---|---|
| Publisher | Microsoft.Azure.Monitor | Microsoft.Azure.Monitor |
| Type | AzureMonitorWindowsAgent | AzureMonitorLinuxAgent |
| TypeHandlerVersion | See Azure Monitor agent extension versions | Azure Monitor agent extension versions |
Extension versions
View Azure Monitor agent extension versions.
Prerequisites
The following prerequisites must be met prior to installing Azure Monitor Agent.
Permissions: For methods other than using the Azure portal, you must have the following role assignments to install the agent:
Built-in role Scopes Reason - Virtual machines, scale sets,
- Azure Arc-enabled servers
To deploy the agent Any role that includes the action Microsoft.Resources/deployments/* (for example, Log Analytics Contributor - Subscription and/or
- Resource group and/or
To deploy agent extension via Azure Resource Manager templates (also used by Azure Policy) Non-Azure: To install the agent on physical servers and virtual machines hosted outside of Azure (that is, on-premises) or in other clouds, you must install the Azure Arc Connected Machine agent first, at no added cost.
Authentication: Managed identity must be enabled on Azure virtual machines. Both user-assigned and system-assigned managed identities are supported.
User-assigned: This managed identity is recommended for large-scale deployments, configurable via built-in Azure policies. You can create a user-assigned managed identity once and share it across multiple VMs, which means it's more scalable than a system-assigned managed identity. If you use a user-assigned managed identity, you must pass the managed identity details to Azure Monitor Agent via extension settings:
{
  "authentication": {
    "managedIdentity": {
      "identifier-name": "mi_res_id" or "object_id" or "client_id",
      "identifier-value": "<resource-id-of-uai>" or "<guid-object-or-client-id>"
    }
  }
}
We recommend that you use
mi_res_idas theidentifier-name. The following sample commands only show usage withmi_res_idfor the sake of brevity. For more information onmi_res_id,object_id, andclient_id, see the Managed identity documentation.System-assigned: This managed identity is suited for initial testing or small deployments. When used at scale, for example, for all VMs in a subscription, it results in a substantial number of identities created (and deleted) in Microsoft Entra ID. To avoid this churn of identities, use user-assigned managed identities instead. For Azure Arc-enabled servers, system-assigned managed identity is enabled automatically as soon as you install the Azure Arc agent. It's the only supported type for Azure Arc-enabled servers.
Not required for Azure Arc-enabled servers: The system identity is enabled automatically when you create a data collection rule in the Azure portal.
Networking: If you use network firewalls, the Azure Resource Manager service tag must be enabled on the virtual network for the virtual machine. The virtual machine must also have access to the following HTTPS endpoints:
- global.handler.control.monitor.azure.com
<virtual-machine-region-name>.handler.control.monitor.azure.com (example: westus.handler.control.monitor.azure.com)<log-analytics-workspace-id>.ods.opinsights.azure.com (example: 12345a01-b1cd-1234-e1f2-1234567g8h99.ods.opinsights.azure.com)
(If you use private links on the agent, you must also add the dce endpoints).
Note
When using AMA with AMPLS, all of your Data Collection Rules must use Data Collection Endpoints. Those DCE's must be added to the AMPLS configuration using private link
- Disk Space: Required disk space can vary greatly depending upon how an agent is utilized or if the agent is unable to communicate with the destinations where it is instructed to send monitoring data. By default the agent requires 10Gb of disk space to run. The following provides guidance for capacity planning:
| Purpose | Environment | Path | Suggested Space |
|---|---|---|---|
| Download and install packages | Linux | /var/lib/waagent/Microsoft.Azure.Monitor.AzureMonitorLinuxAgent-{Version}/ | 500 MB |
| Download and install packages | Windows | C:\Packages\Plugins\Microsoft.Azure.Monitor.AzureMonitorWindowsAgent | 500 MB |
| Extension Logs | Linux (Azure VM) | /var/log/azure/Microsoft.Azure.Monitor.AzureMonitorLinuxAgent/ | 100 MB |
| Extension Logs | Linux (Azure Arc) | /var/lib/GuestConfig/extension_logs/Microsoft.Azure.Monitor.AzureMonitorLinuxAgent-{version}/ | 100 MB |
| Extension Logs | Windows (Azure VM) | C:\WindowsAzure\Logs\Plugins\Microsoft.Azure.Monitor.AzureMonitorWindowsAgent | 100 MB |
| Extension Logs | Windows (Azure Arc) | C:\ProgramData\GuestConfig\extension_logs\Microsoft.Azure.Monitor.AzureMonitorWindowsAgent | 100 MB |
| Agent Cache | Linux | /etc/opt/microsoft/azuremonitoragent, /var/opt/microsoft/azuremonitoragent | 500 MB |
| Agent Cache | Windows (Azure VM) | C:\WindowsAzure\Resources\AMADataStore.{DataStoreName} | 10.5 GB |
| Agent Cache | Windows (Azure Arc) | C:\Resources\Directory\AMADataStore. {DataStoreName} | 10.5 GB |
| Event Cache | Linux | /var/opt/microsoft/azuremonitoragent/events | 10 GB |
| Event Cache | Linux | /var/lib/rsyslog | 1 GB |
Note
This article only pertains to agent installation or management. After you install the agent, you must review the next article to configure data collection rules and associate them with the machines with agents installed. Azure Monitor Agents can't function without being associated with data collection rules.
Install
For information on how to install Azure Monitor Agent from the Azure portal, see Create a data collection rule. This process creates the rule, associates it to the selected resources, and installs Azure Monitor Agent on them if it's not already installed.
Uninstall
To uninstall Azure Monitor Agent by using the Azure portal, go to your virtual machine, scale set, or Azure Arc-enabled server. Select the Extensions tab and select AzureMonitorWindowsAgent or AzureMonitorLinuxAgent. In the dialog that opens, select Uninstall.
Update
Note
The recommendation is to enable Automatic Extension Upgrade which may take up to 5 weeks after a new extension version is released for it to update installed extensions to the released (latest) version across all regions. Upgrades are issued in batches, so you may see some of your virtual machines, scale-sets or Arc-enabled servers get upgraded before others. If you need to upgrade an extension immediately, you may use the manual instructions below.
To perform a one-time update of the agent, you must first uninstall the existing agent version. Then install the new version as described.
We recommend that you enable automatic update of the agent by enabling the Automatic Extension Upgrade feature. Go to your virtual machine or scale set, select the Extensions tab and select AzureMonitorWindowsAgent or AzureMonitorLinuxAgent. In the dialog that opens, select Enable automatic upgrade.
Use Azure Policy
Use the following policies and policy initiatives to automatically install the agent and associate it with a data collection rule every time you create a virtual machine, scale set, or Azure Arc-enabled server.
Note
As per Microsoft Identity best practices, policies for installing Azure Monitor Agent on virtual machines and scale sets rely on user-assigned managed identity. This option is the more scalable and resilient managed identity for these resources. For Azure Arc-enabled servers, policies rely on system-assigned managed identity as the only supported option today.
Built-in policy initiatives
Before you proceed, review prerequisites for agent installation.
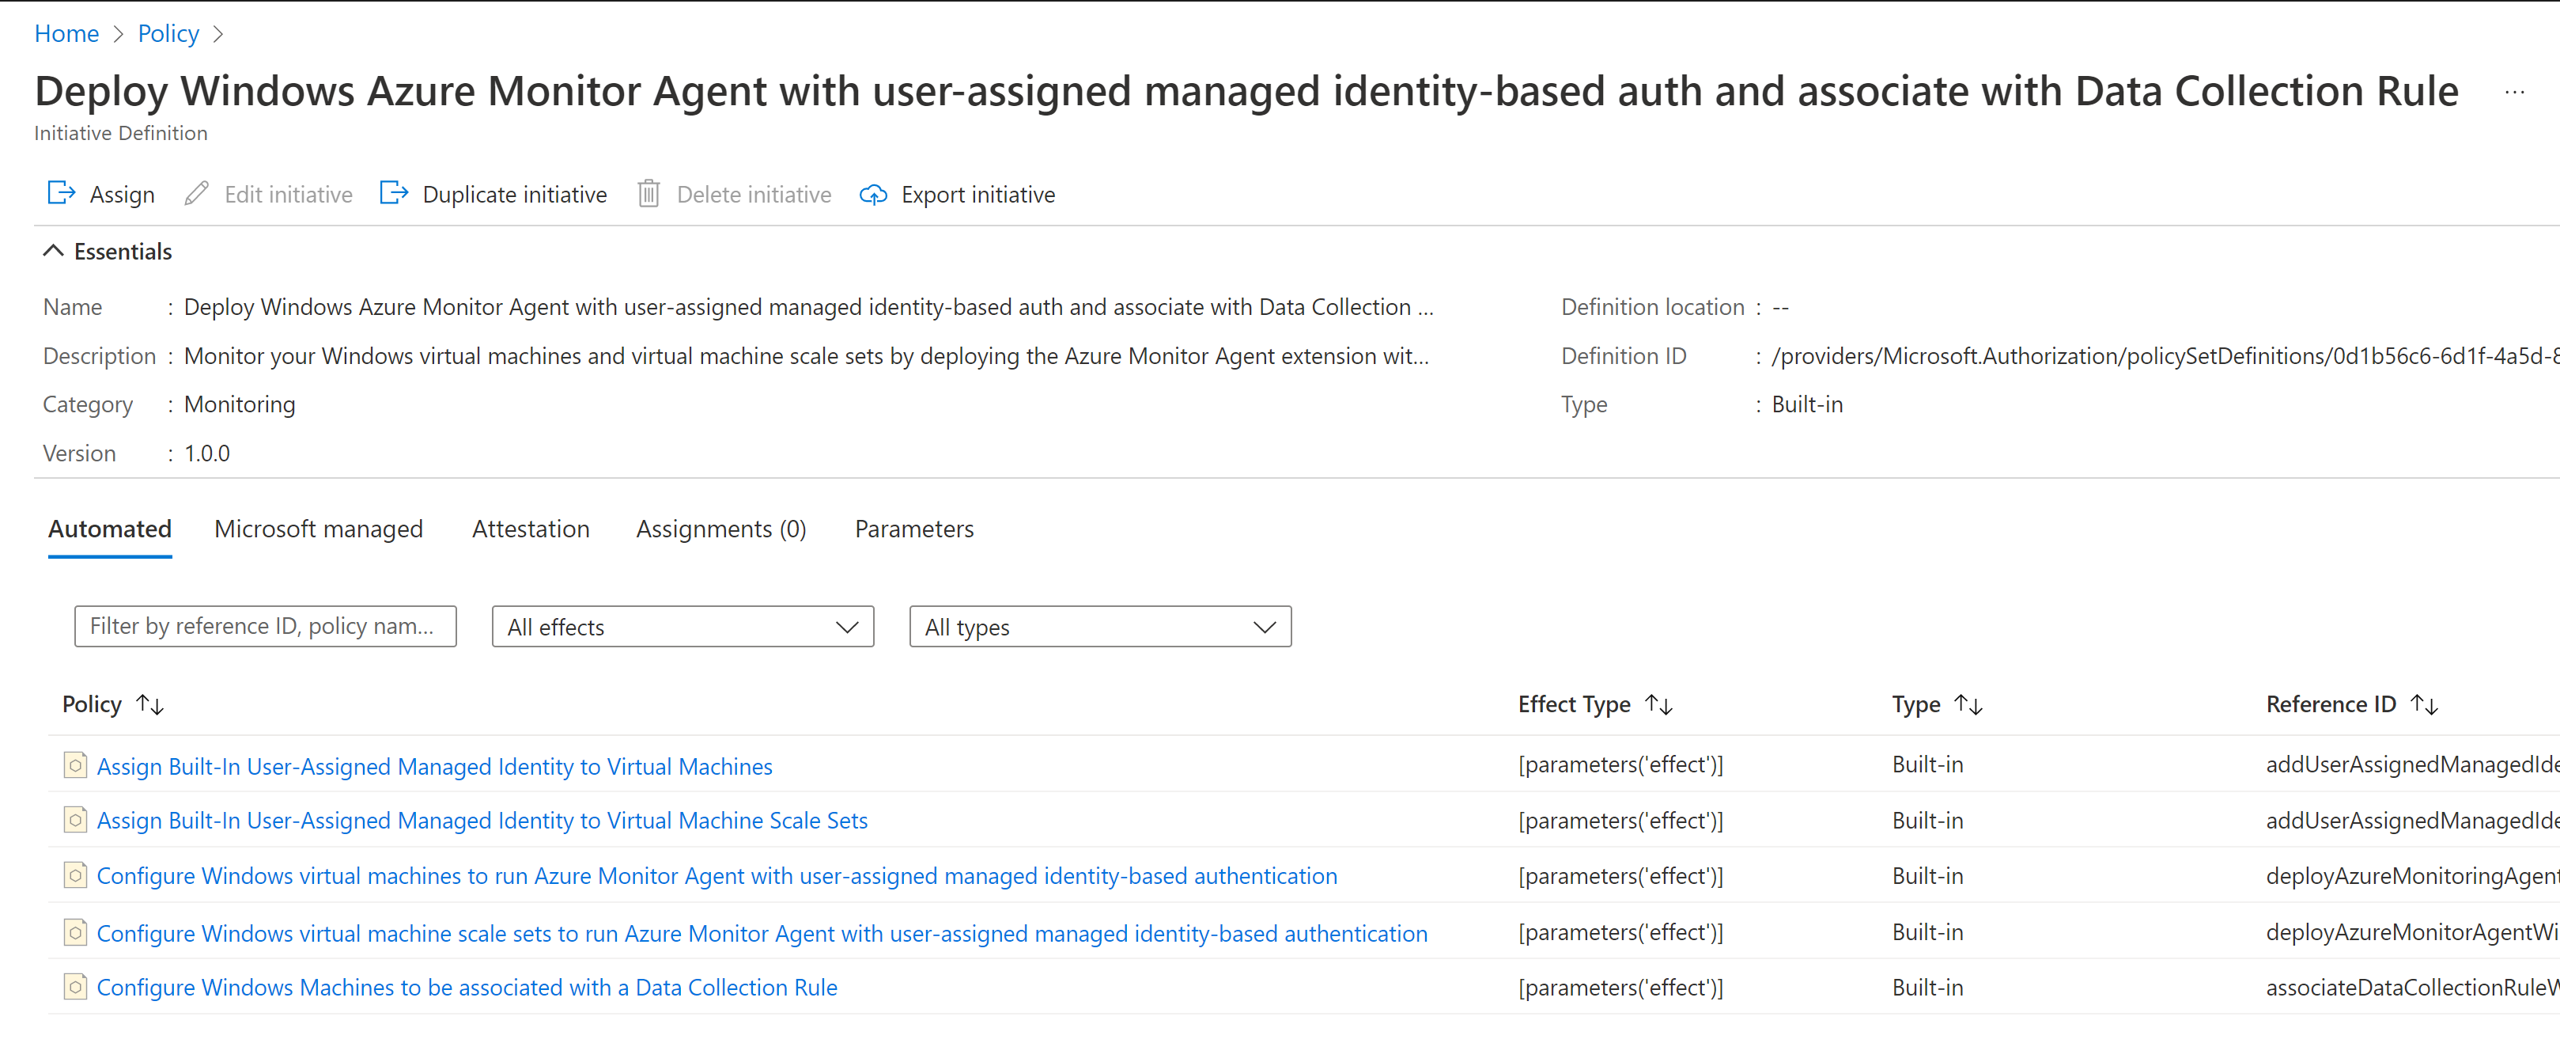
There are built-in policy initiatives for Windows and Linux virtual machines, scale sets that provide at-scale onboarding using Azure Monitor agents end-to-end
- Deploy Windows Azure Monitor Agent with user-assigned managed identity-based auth and associate with Data Collection Rule
- Deploy Linux Azure Monitor Agent with user-assigned managed identity-based auth and associate with Data Collection Rule
Note
The policy definitions only include the list of Windows and Linux versions that Microsoft supports. To add a custom image, use the Additional Virtual Machine Images parameter.
These initiatives above comprise individual policies that:
(Optional) Create and assign built-in user-assigned managed identity, per subscription, per region. Learn more.
Bring Your Own User-Assigned Identity: If set tofalse, it creates the built-in user-assigned managed identity in the predefined resource group and assigns it to all the machines that the policy is applied to. Location of the resource group can be configured in theBuilt-In-Identity-RG Locationparameter. If set totrue, you can instead use an existing user-assigned identity that is automatically assigned to all the machines that the policy is applied to.
Install Azure Monitor Agent extension on the machine, and configure it to use user-assigned identity as specified by the following parameters.
Bring Your Own User-Assigned Managed Identity: If set tofalse, it configures the agent to use the built-in user-assigned managed identity created by the preceding policy. If set totrue, it configures the agent to use an existing user-assigned identity.User-Assigned Managed Identity Name: If you use your own identity (selectedtrue), specify the name of the identity that's assigned to the machines.User-Assigned Managed Identity Resource Group: If you use your own identity (selectedtrue), specify the resource group where the identity exists.Additional Virtual Machine Images: Pass additional VM image names that you want to apply the policy to, if not already included.Built-In-Identity-RG Location: If you use built-in user-assigned managed identity, specify the location where the identity and the resource group should be created. This parameter is only used whenBring Your Own User-Assigned Managed Identityparameter is set tofalse.
Create and deploy the association to link the machine to specified data collection rule.
Data Collection Rule Resource Id: The Azure Resource Manager resourceId of the rule you want to associate via this policy to all machines the policy is applied to.

Known issues
- Managed Identity default behavior. Learn more.
- Possible race condition with using built-in user-assigned identity creation policy. Learn more.
- Assigning policy to resource groups. If the assignment scope of the policy is a resource group and not a subscription, the identity used by policy assignment (different from the user-assigned identity used by agent) must be manually granted these roles prior to assignment/remediation. Failing to do this step will result in deployment failures.
- Other Managed Identity limitations.
Built-in policies
You can choose to use the individual policies from the preceding policy initiative to perform a single action at scale. For example, if you only want to automatically install the agent, use the second agent installation policy from the initiative, as shown.

Remediation
The initiatives or policies will apply to each virtual machine as it's created. A remediation task deploys the policy definitions in the initiative to existing resources, so you can configure Azure Monitor Agent for any resources that were already created.
When you create the assignment by using the Azure portal, you have the option of creating a remediation task at the same time. For information on the remediation, see Remediate non-compliant resources with Azure Policy.

Frequently asked questions
This section provides answers to common questions.
What impact does installing the Azure Arc Connected Machine agent have on my non-Azure machine?
There's no impact to the machine after the Azure Arc Connected Machine agent is installed. It hardly uses system or network resources and is designed to have a low footprint on the host where it's run.
Next steps
Create a data collection rule to collect data from the agent and send it to Azure Monitor.
Feedback
Coming soon: Throughout 2024 we will be phasing out GitHub Issues as the feedback mechanism for content and replacing it with a new feedback system. For more information see: https://aka.ms/ContentUserFeedback.
Submit and view feedback for