Note
Access to this page requires authorization. You can try signing in or changing directories.
Access to this page requires authorization. You can try changing directories.
This article describes the required Azure configurations for using Secure Webhook.
Register with Microsoft Entra ID
To register the application with Microsoft Entra ID:
Follow the steps in Register an application with the Microsoft identity platform.
In Microsoft Entra ID, select Expose application.
Select Add for Application ID URI.
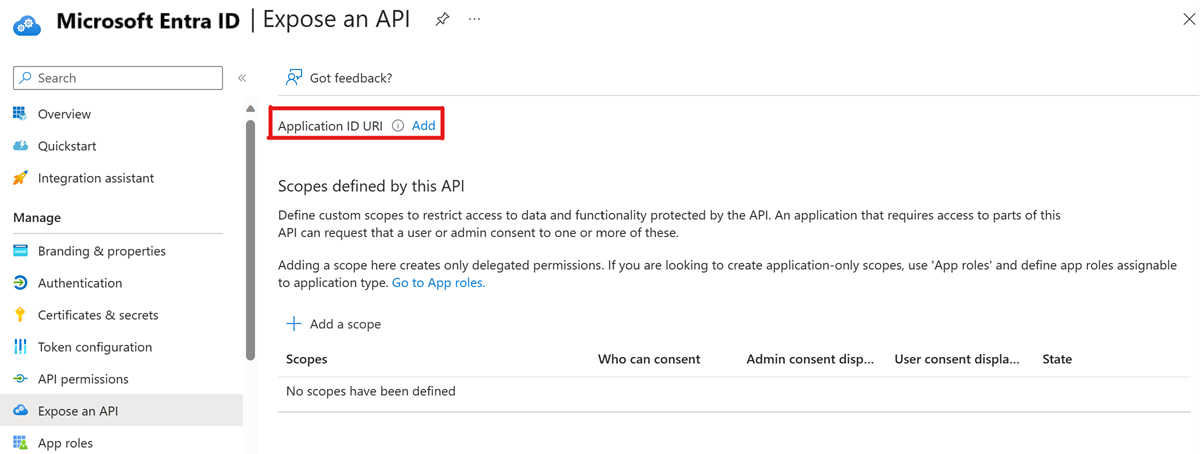
Select Save.

Define a service principal
The action group service is a first-party application. It has permission to acquire authentication tokens from your Microsoft Entra application to authenticate with ServiceNow.
As an optional step, you can define an application role in the created app's manifest. This way, you can further restrict access so that only certain applications with that specific role can send messages. This role has to be then assigned to the Action Group service principal. Tenant admin privileges are required.
You can do this step by using the same PowerShell commands.
Create a Secure Webhook action group
After your application is registered with Microsoft Entra ID, you can create work items in your ITSM tool based on Azure alerts by using the Secure Webhook action in action groups.
Action groups provide a modular and reusable way of triggering actions for Azure alerts. You can use action groups with metric alerts, activity log alerts, and log search alerts in the Azure portal.
To learn more about action groups, see Create and manage action groups in the Azure portal.
Note
To map the configuration items to the ITSM payload when you define a Log Search alerts query, the query result must be included in the Configuration items, with one of these labels:
- "Computer"
- "Resource"
- "_ResourceId"
- "ResourceId"
To add a webhook to an action, follow these instructions for Secure Webhook:
In the Azure portal, search for and select Monitor. The Monitor pane consolidates all your monitoring settings and data in one view.
Select Alerts > Manage actions.
Select Add action group and fill in the fields.
Enter a name in the Action group name box and enter a name in the Short name box. The short name is used in place of a full action group name when notifications are sent by using this group.
Select Secure Webhook.
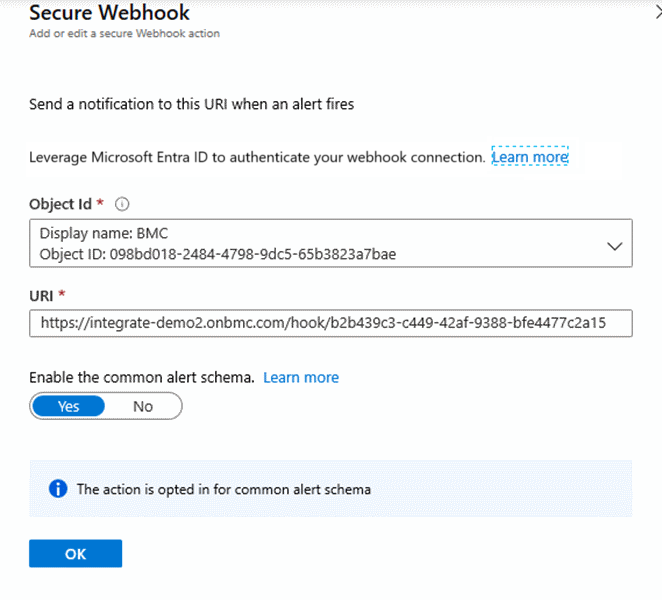
Select these details:
- Select the object ID of the Microsoft Entra instance that you registered.
- For the URI, paste in the webhook URL that you copied from the ITSM tool environment.
- Set Enable the common Alert Schema to Yes.
The following image shows the configuration of a sample Secure Webhook action:

Configure the ITSM tool environment
Secure Webhook supports connections with the following ITSM tools:
To configure the ITSM tool environment:
- Get the URI for the Secure Webhook definition.
- Create definitions based on ITSM tool flow.