Note
Access to this page requires authorization. You can try signing in or changing directories.
Access to this page requires authorization. You can try changing directories.
You can change the size of a capacity pool or a volume as necessary, for example, when a volume or capacity pool fills up.
For information about monitoring a volume’s capacity, see Monitor the capacity of a volume.
Considerations
- Resize operations on Azure NetApp Files volumes don't result in data loss.
- Volume quotas are indexed against
maxfileslimits. Once a volume has surpassed amaxfileslimit, you cannot reduce the volume size below the quota that corresponds to thatmaxfileslimit. For more information and specific limits, seemaxfileslimits. - Capacity pools with Basic network features have a minimum size of 4 TiB. For capacity pools with Standard network features, the minimum size is 1 TiB. For more information, see Resource limits
- Volume resize operations are nearly instantaneous but not always immediate. There can be a short delay for the volume's updated size to appear in the portal. Verify the size from a host perspective before re-attempting the resize operation.
Important
If you are using a capacity pool with a size of 2 TiB or smaller and have the ANFStdToBasicNetworkFeaturesRevert and ANFBasicToStdNetworkFeaturesUpgrade AFECs enabled and want to change the capacity pool's QoS type from auto to manual, you must perform the operation with the REST API using the 2023-07-01 API version or later.
Resize the capacity pool using the Azure portal
You can change the capacity pool size in 1-TiB increments or decrements. However, the capacity pool size cannot be smaller than the sum of the capacity of the volumes hosted in the pool.
Resizing the capacity pool changes the purchased Azure NetApp Files capacity.
From the NetApp Account view, go to Capacity pools, and select the capacity pool that you want to resize.
Right-click the capacity pool name or select the "…" icon at the end of the capacity pool row to display the context menu. Select Resize.

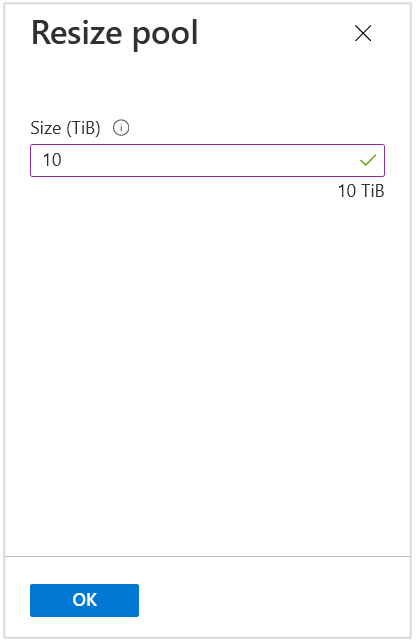
In the Resize pool window, specify the pool size. Select OK.

Resize a volume using the Azure portal
You can change the size of a volume as necessary. A volume's capacity consumption counts against its pool's provisioned capacity.
From the NetApp Account view, go to Volumes, and select the volume that you want to resize.
Right-click the volume name or select the "…" icon at the end of the volume's row to display the context menu. Select Resize.

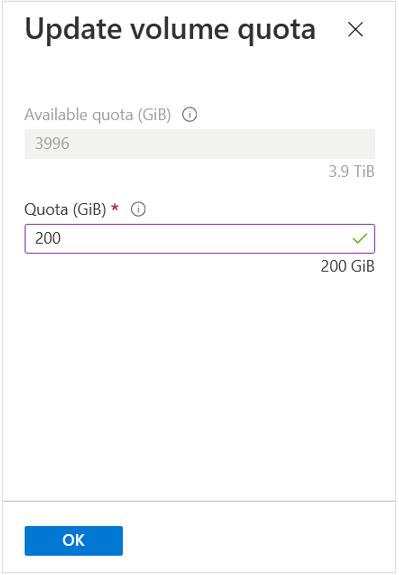
In the Update volume quota window, specify the quota for the volume. Select OK.

Resizing the capacity pool or a volume using Azure CLI
You can use the following commands of the Azure command line (CLI) tools to resize a capacity pool or a volume:
az netappfiles poolaz netappfiles volume(use the--usage-thresholdparameter)
Resizing the capacity pool or a volume using REST API
You can build automation to handle the capacity pool and volume size change.
See REST API for Azure NetApp Files and REST API using PowerShell for Azure NetApp Files.
The REST API specification and example code for Azure NetApp Files are available through the resource-manager GitHub directory. See this command for a sample volume update.
Resize a replication destination volume
In a cross-region or cross-zone replication relationship, a destination volume is automatically resized based on the size of the source volume. As such, you don’t need to resize the destination volume separately. This automatic resizing behavior is applicable when the volumes are in an active replication relationship, or when replication peering is broken with the resync operation.
The following table describes the destination volume resizing behavior based on the Mirror state:
| Mirror state | Destination volume resizing behavior |
|---|---|
| Mirrored | When the destination volume has been initialized and is ready to receive mirroring updates, resizing the source volume automatically resizes the destination volumes. |
| Broken | When you resize the source volume and the Mirror state is broken, the destination volume is automatically resized with the resync operation. |
| Uninitialized | When you resize the source volume and the Mirror state is still uninitialized, resizing the destination volume needs to be done manually. As such, it's recommended that you wait for the initialization to complete (that is, when the Mirror state becomes mirrored) to resize the source volume. |
Important
Ensure that you have enough headroom in the capacity pools for both the source and the destination volumes of replication. When you resize the source volume, the destination volume is automatically resized. But if the capacity pool hosting the destination volume doesn’t have enough headroom, the resizing of both the source and the destination volumes will fail.