Note
Access to this page requires authorization. You can try signing in or changing directories.
Access to this page requires authorization. You can try changing directories.
Before you can use Chat, you need two things: an Azure Storage account where your chat data lives, and the chat feature turned on for a hub that points at that storage. This article walks through both.
Prerequisites
- An Azure subscription.
- An Azure Web PubSub resource. If you don't have one, create a resource.
Step 1: Configure storage
Chat reaches your storage through the resource's managed identity, so there are no connection strings or keys to manage. Enable a managed identity on the resource first; see Use a managed identity. Then configure storage:
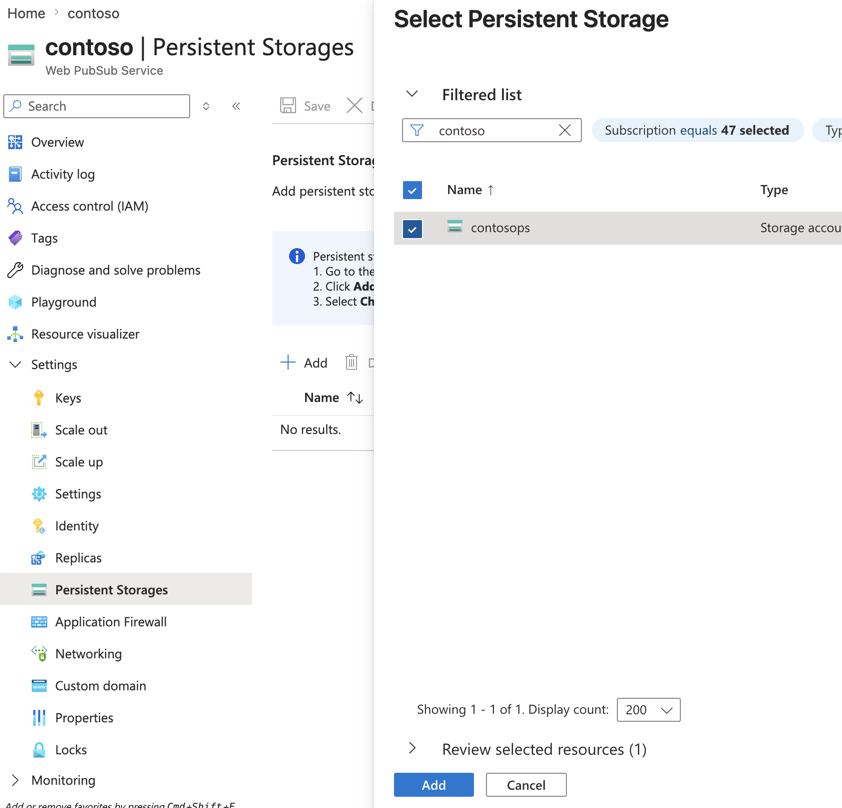
- In your Web PubSub resource, go to Persistent Storages and select Add to link an existing storage account.
- Select Save. The linked persistent storage is added, and your resource's managed identity is granted the Contributor role on the storage account so Chat can read and write its tables.
Step 2: Add a chat hub
After your storage is linked, create a Chat hub and point it at that storage.
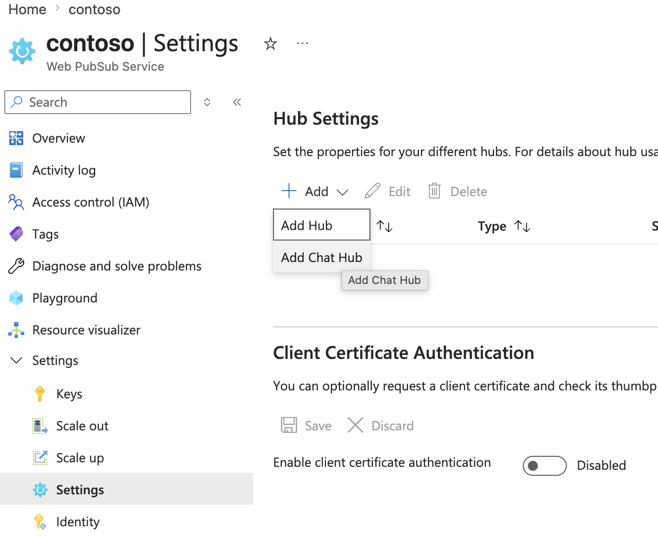
In your Web PubSub resource, go to Settings and select Add Chat Hub.
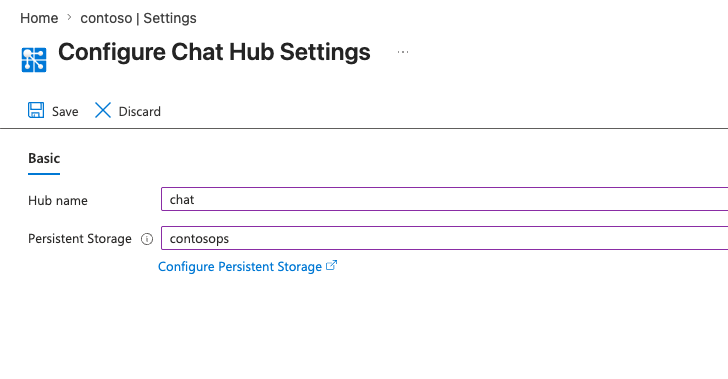
Enter a Hub name, select the Persistent Storage you linked in Step 1, and then select Save.
What gets stored
When Chat is enabled, it creates a set of tables in your storage account, all named with the prefix of your hub. A subset of what they hold:
- Messages and conversation history
- Rooms and their members
- Users
- Roles and permissions
Your data stays in your storage account. The service keeps no copy.