Note
Access to this page requires authorization. You can try signing in or changing directories.
Access to this page requires authorization. You can try changing directories.
This article describes how to update the OT software on your Defender for IoT sensors so that you can manage updates and stay up to date with the latest version.
You can purchase pre-configured appliances for your sensors, or install software on your own hardware machines. In either case, you'll need to update software versions to use new features for OT sensors.
For more information, see Which appliances do I need?, Pre-configured physical appliances for OT monitoring, and OT monitoring software release notes.
Note
Update files are available for currently supported versions only. If you have OT network sensors with legacy software versions that are no longer supported, open a support ticket to access the relevant files for your update.
Prerequisites
To perform the procedures described in this article, make sure that you have:
A list of the OT sensors you'll want to update, and the update methods you want to use. Each sensor that you want to update must be both onboarded to Defender for IoT and activated.
Update scenario Method details Cloud-connected sensors Cloud connected sensors can be updated remotely, directly from the Azure portal, or manually using a downloaded update package.
Remote updates require that your OT sensor has version 22.2.3 or later already installed.Locally managed sensors Locally managed sensors can be updated using a downloaded update package directly on an OT sensor console. Required access permissions:
To download update packages or push updates from the Azure portal, you need access to the Azure portal as a Security Admin, Contributor, or Owner user.
To run updates on an OT sensor, you need access as an Admin user.
To update an OT sensor via CLI, you need access to the sensor as a privileged user.
For more information, see Azure user roles and permissions for Defender for IoT and On-premises users and roles for OT monitoring with Defender for IoT.
Important
We recommend verifying that you have sensor backups running regularly, and especially before updating sensor software.
For more information, see Back up and restore OT network sensors from the sensor console.
Verify network requirements
Make sure that your sensors can reach the Azure data center address ranges and set up any extra resources required for the connectivity method your organization is using.
For more information, see OT sensor cloud connection methods and Connect your OT sensors to the cloud.
Make sure that your firewall rules are configured as needed for the new version you're updating to.
For example, the new version might require a new or modified firewall rule to support sensor access to the Azure portal. From the Sites and sensors page, select More actions > Download sensor endpoint details for the full list of endpoints required to access the Azure portal.
For more information, see Networking requirements and Sensor management options from the Azure portal.
Update OT sensors with the latest OT monitoring software
This section describes how to update Defender for IoT OT sensors using any of the supported methods.
Sending or downloading an update package and running the update are two separate steps. Each step can be done one right after the other or at different times.
For example, you might want to first send the update to your sensor or download an update package, and then have an administrator run the update later on, during a planned maintenance window.
Select the update method you want to use:
This procedure describes how to send a software version update to OT sensors at one or more sites, and run the updates remotely using the Azure portal. We recommend that you update the sensor by selecting sites and not individual sensors.
Send the software update to your OT sensor
In Defender for IoT in the Azure portal, select Sites and sensors.
If you know your site and sensor name, you can browse or search for it directly, or apply a filter to help locate the site you need.
Select one or more sites to update, and then select Sensor update > Remote update > Step one: Send package to sensor.
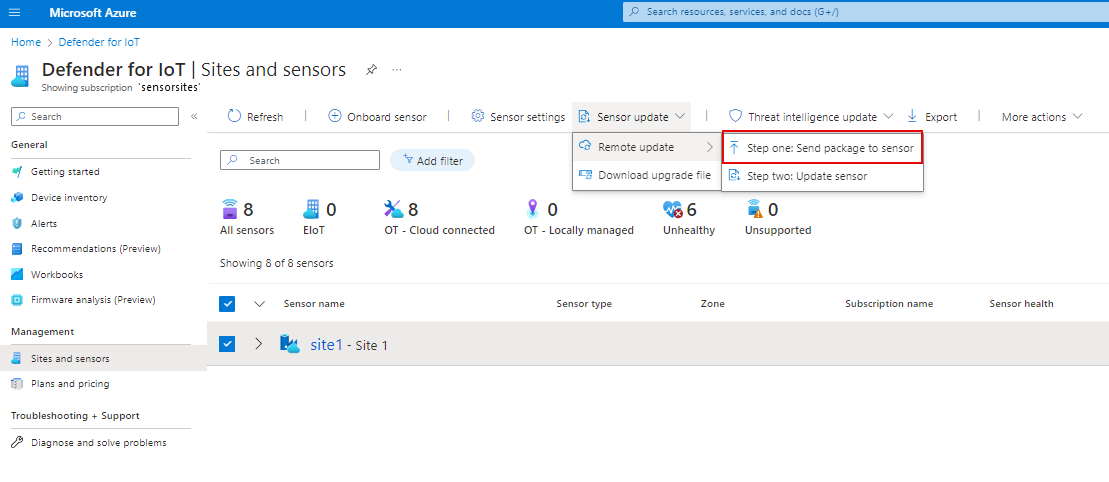
For one or more individual sensors, select Step one: Send package to sensor. This option is also available from the ... options menu to the right of the sensor row.
In the Send package pane that appears, under Available versions, select the software version from the list. If the version you need doesn't appear, select Show more to list all available versions.
To jump to the release notes for the new version, select Learn more at the top of the pane.
The lower half of the page shows the sensors you selected and their status. Verify the status of the sensors. A sensor might not be available for update for various reasons, for example, the sensor is already updated to the version you want to send, or there's a problem with the sensor, such as it's disconnected.
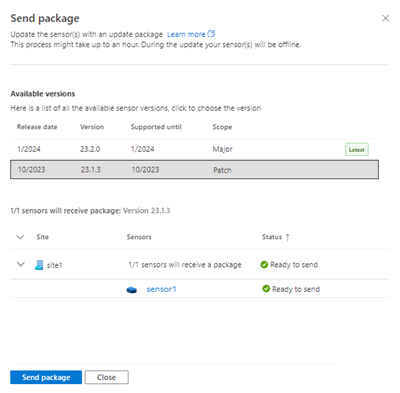
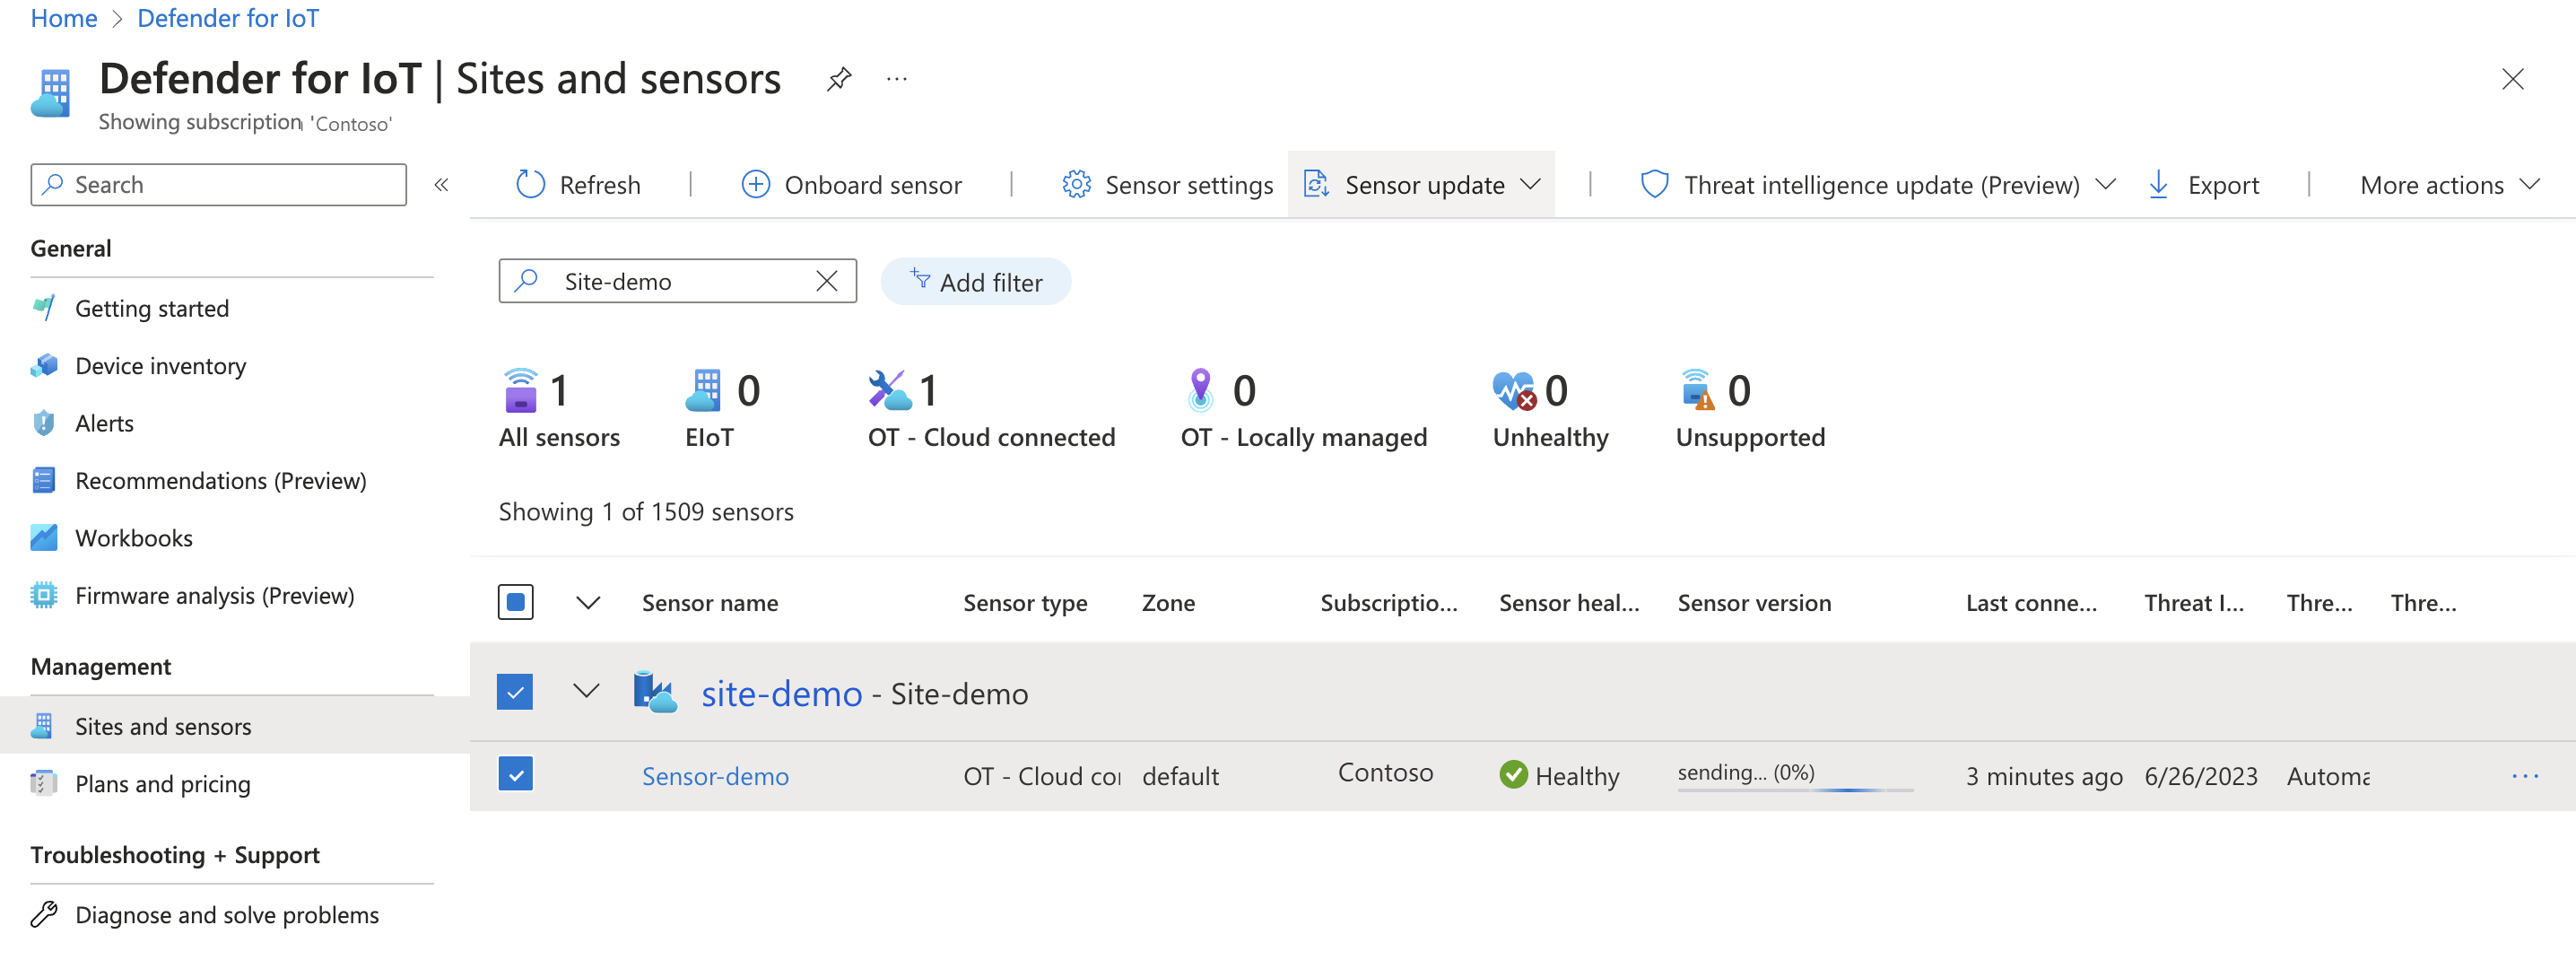
Once you've checked the list of sensors to be updated, select Send package, and the software transfer to your sensor machine is started. You can see the transfer progress in the Sensor version column, with the percentage completed automatically updating in the progress bar, so you can see that the process has started and letting you track its progress until the transfer is complete. For example:
When the transfer is complete, the Sensor version column changes to
 Ready to update.
Hover over the Sensor version value to see the source and target version for your update.


Install your sensor from the Azure portal
To install the sensor software update, ensure that you see the
Ready to update icon in the Sensor version column.
Select one or more sites to update, and then select Sensor update > Remote update > Step 2: Update sensor from the toolbar. The Update sensor pane opens in the right side of the screen.

For an individual sensor, the Step 2: Update sensor option is also available from the ... options menu.
In the Update sensor pane that appears, verify your update details.
When you're ready, select Update now > Confirm update to install the update on the sensor. In the grid, the Sensor version value changes to
 Installing, and an update progress bar appears showing you the percentage complete. The bar automatically updates, so that you can track the progress until the installation is complete.
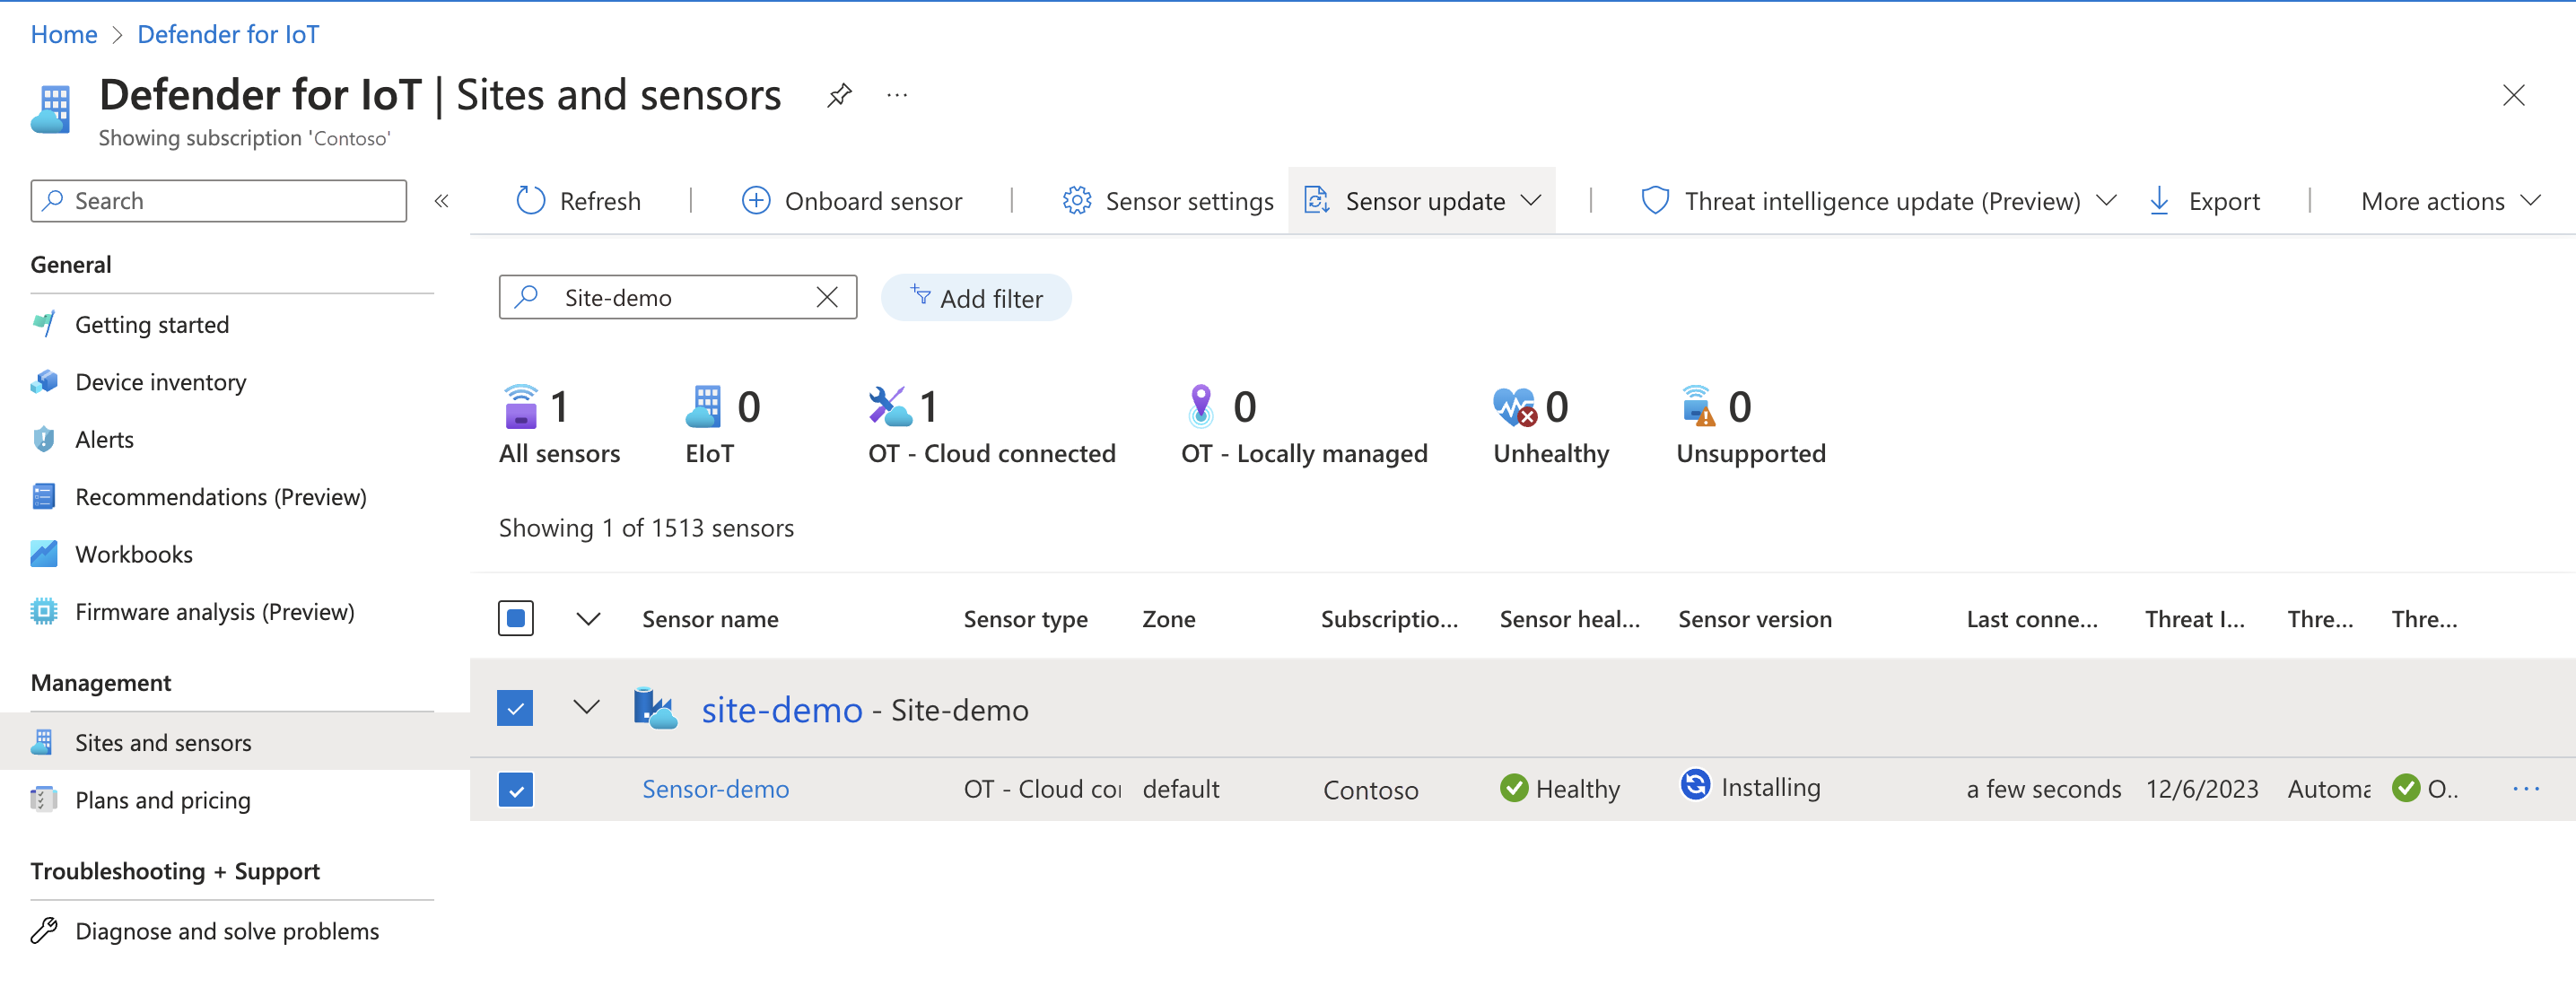
When completed, the sensor value switches to the newly installed sensor version number.


If a sensor update fails to install for any reason, the software reverts back to the previous version installed, and a sensor health alert is triggered. For more information, see Understand sensor health and Sensor health message reference.


Confirm that your update succeeded
To confirm that the update process completed successfully, check the sensor version in the following locations for the new version number:
In the Azure portal, on the Sites and sensors page, in the Sensor version column
On the OT sensor console:
- In the title bar
- On the Overview page > General Settings area
- In the System settings > Sensor management > Software update pane
Upgrade log files are located on the OT sensor machine at /opt/sensor/logs/legacy-upgrade.log, and are accessible to the cyberx_host user via SSH.
Next steps
For more information, see: