Note
Access to this page requires authorization. You can try signing in or changing directories.
Access to this page requires authorization. You can try changing directories.
In this quickstart, you set up all the resources in Azure Deployment Environments to enable self-service deployment environments for development teams. Learn how to create and configure a dev center, add a catalog to the dev center, and define an environment type. Then associate a project with the dev center, add an environment type, and allow developer access to the project.
A dev center is the top-level resource for Deployment Environments that contains the collection of development projects. In the dev center, you specify the common configuration for your projects, such as catalogs with application templates, and the types of environments to which development teams can deploy their code.
A platform engineering team typically sets up the dev center, attaches external catalogs to the dev center, creates projects, and provides access to development teams. Development teams then create environments by using environment definitions, connect to individual resources, and deploy applications.
After you complete this quickstart, developers can use the developer portal, the Azure CLI, or the Azure Developer CLI to create environments in the project to deploy their applications.
To learn more about the components of Deployment Environments, see Key concepts for Deployment Environments.
You need to perform the steps in this quickstart before you can create a deployment environment. Alternatively to creating these resources manually, you can deploy the dev center and project by using an ARM template.
Prerequisites
- An Azure account with an active subscription. Create an account for free.
- An Azure role-based access control role that has permissions to create and manage resources in the subscription, such as Contributor or Owner.
Create a dev center
First, you create a dev center and attach a catalog to it. The catalog contains the application templates, called environment definitions, that development teams can use to create environments. In this quickstart, you attach the Microsoft quick start catalog, which contains sample environment definitions to help you get started.
To create and configure a dev center in Deployment Environments by using the Azure portal:
Sign in to the Azure portal.
Search for Azure Deployment Environments, and then select the service in the results.
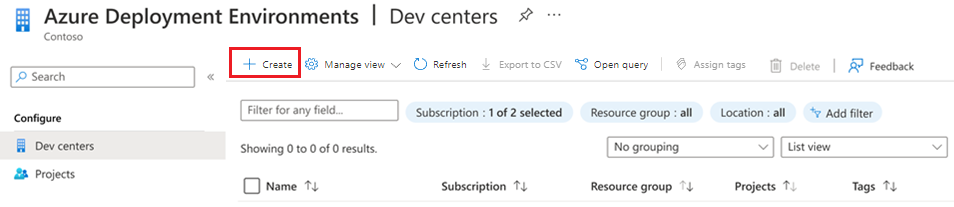
In the left pane, select Configure, and then select Dev centers.
In the Dev centers pane, select Create.
In Create a dev center, on the Basics tab, select or enter the following information:
Name Value Subscription Select the subscription in which you want to create the dev center. Resource group Either use an existing resource group or select Create new and enter a name for the resource group. Name Enter a name for the dev center. Location Select the location or region where you want to create the dev center. Create a default dev box definition Select the checkbox. Attach the environment definition quick start catalog Select the checkbox. Select Review + Create.
On the Review tab, wait for deployment validation, and then select Create.
You can view the progress of the deployment in your Azure portal notifications.
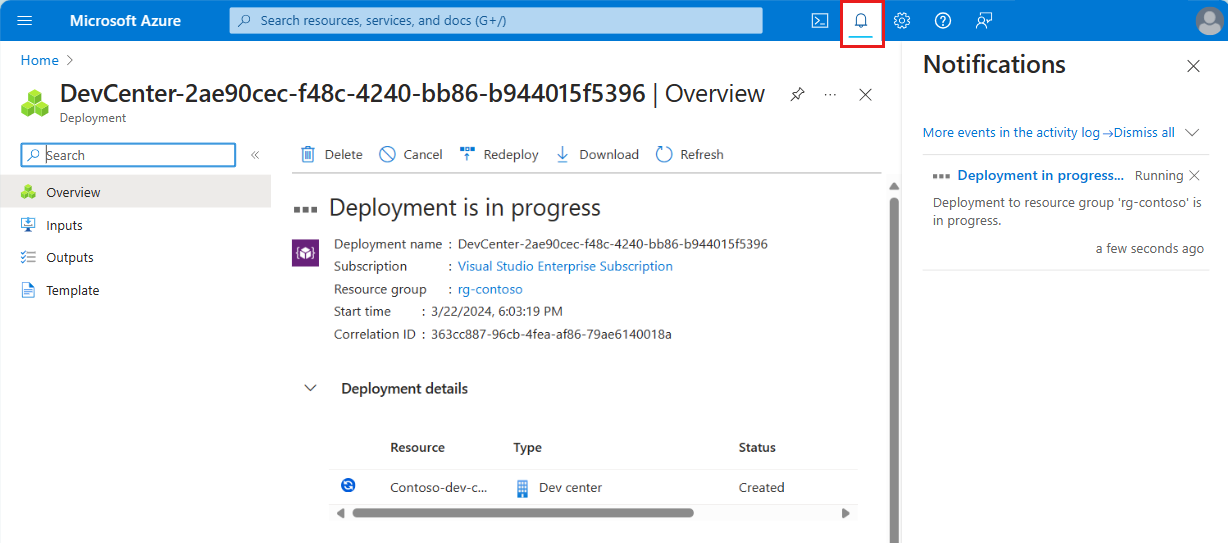
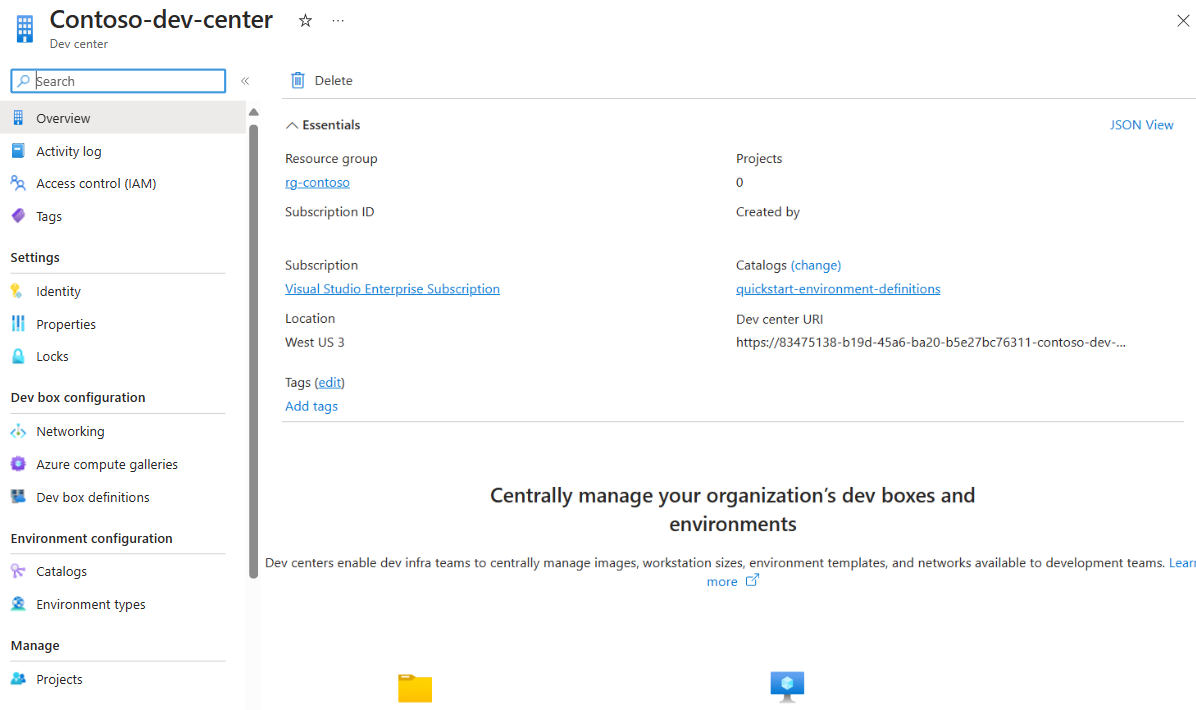
When the creation of the dev center is complete, select Go to resource. Confirm that you see the dev center overview pane.


Configure a managed identity for the dev center
To allow the creation of environments, the dev center requires permissions on the subscription. You can attach an identity to the dev center, and then assign the necessary permissions to that identity. You can attach either a system-assigned managed identity or a user-assigned managed identity. For information about the two types of identities, see Add a managed identity.
In this quickstart, you configure a system-assigned managed identity for your dev center. You then assign roles to the managed identity to allow the dev center to create environment types in your subscription.
Attach a system-assigned managed identity
To attach a system-assigned managed identity to your dev center:
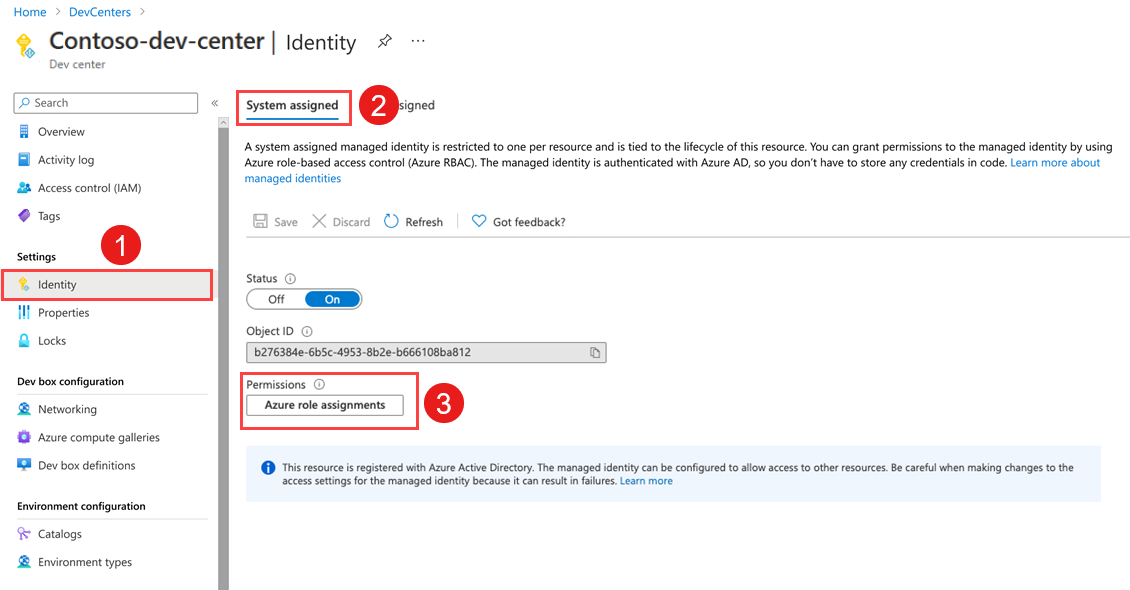
In your dev center, in the left menu, under Settings, select Identity.
Under System assigned, set Status to On, and then select Save.
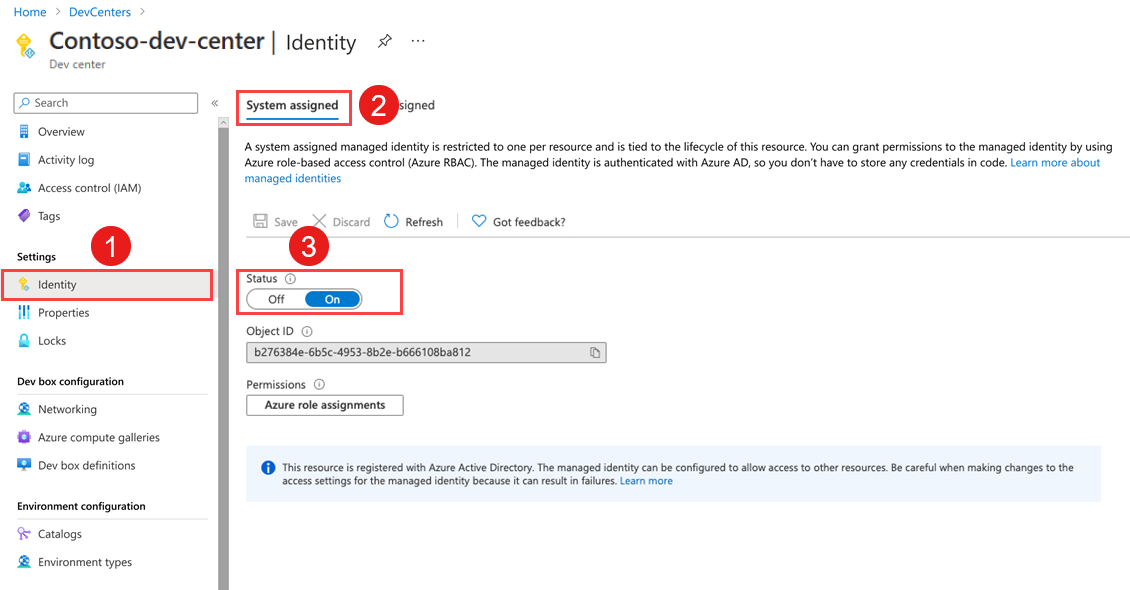
In the Enable system assigned managed identity dialog, select Yes. It might take a few minutes for the rest of the fields to appear.

Assign roles for the dev center managed identity
The managed identity that represents your dev center requires access to the subscription where you configure the project environment types, and to the catalog.
In your dev center, in the left menu, under Settings, select Identity.
Under System assigned > Permissions, select Azure role assignments.
To give Contributor access to the subscription, select Add role assignment (Preview), enter or select the following information, and then select Save:
Name Value Scope Subscription Subscription Select the subscription in which to use the managed identity Role Contributor To give User Access Administrator access to the subscription, select Add role assignment (Preview), enter or select the following information, and then select Save:
Name Value Scope Subscription Subscription Select the subscription in which to use the managed identity Role User Access Administrator

Create an environment type
An environment type can help you define the different types of environments that your development teams can deploy. You can apply different settings for each environment type.
In the Azure portal, go to Azure Deployment Environments.
In Dev centers, select your dev center.
In the left menu, under Environment configuration, select Environment types, and then select Create.
In the Create environment type pane, enter the following information, and then select Add:
Name Value Name Enter a name for the environment type. Tags Optionally, enter a tag name and a tag value. 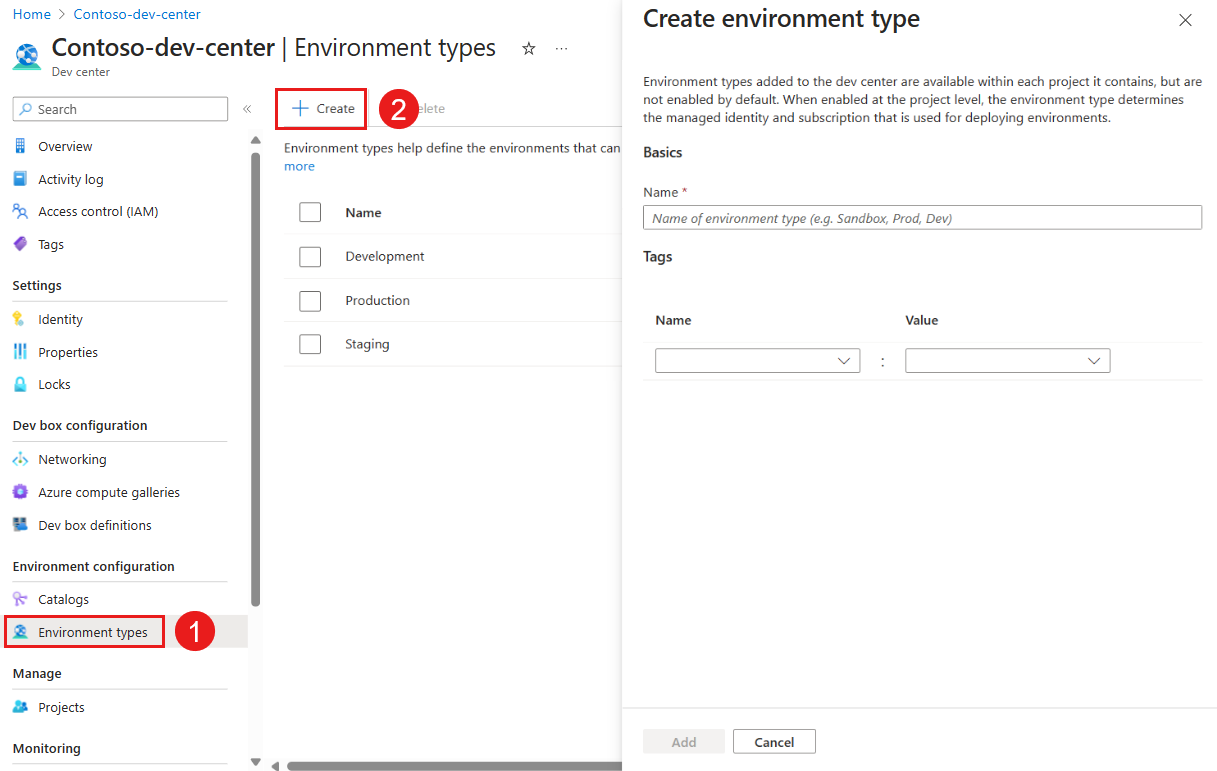

An environment type that you add to your dev center is available in each project in the dev center, but environment types aren't enabled by default. When you enable an environment type at the project level, the environment type determines the managed identity and subscription that are used to deploy environments.
Create a project
In Deployment Environments, a project represents a team or business function within the organization. For example, you might create a project for the implementation of an e-commerce application that has development, staging, and production environments. For another project, you might define a different configuration.
When you associate a project with a dev center, all the settings for the dev center are automatically applied to the project. Each project can be associated with only one dev center.
To create a Deployment Environments project in your dev center:
In the Azure portal, go to Azure Deployment Environments.
In the left menu, under Configure, select Projects.
In the Projects pane, select Create.
In Create a project, on the Basics tab, enter or select the following information:
Name Value Subscription Select the subscription in which you want to create the project. Resource group Either use an existing resource group or select Create new and enter a name for the resource group. Dev center Select a dev center to associate with the project. All settings for the dev center apply to the project. Name Enter a name for the project. Description (Optional) Enter any project-related details. On the Review + Create tab, wait for deployment validation, and then select Create.
Confirm that the project was successfully created by checking your Azure portal notifications. Then select Go to resource. Confirm that you see the project overview pane.
Create a project environment type
In Deployment Environments, project environment types are a subset of the environment types that you configure for the dev center. They help you preconfigure the types of environments that specific development teams can create.
To configure a project, add a project environment type:
In the Azure portal, go to your project.
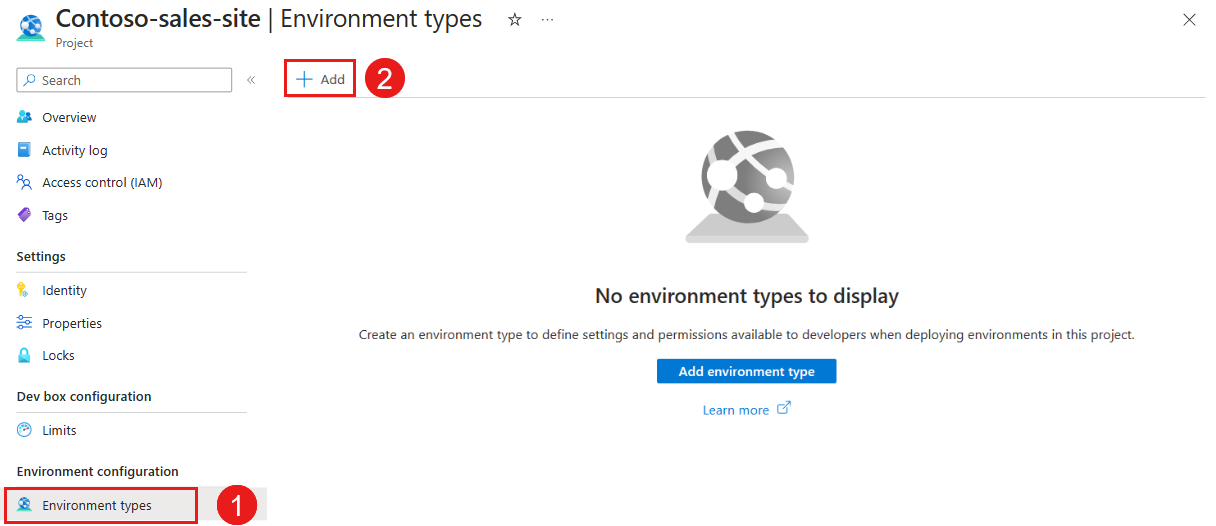
In the left menu, under Environment configuration, select Environment types. Select Add at the top of the pane.
In Add environment type to <project-name>, enter or select the following information:
Name Value Type Select a dev center-level environment type to enable for the specific project. Deployment subscription Select the subscription in which the environment is created. Deployment identity Select either a system-assigned identity or a user-assigned managed identity to perform deployments on behalf of the user. Permissions on environment resources > Environment creator role(s) Select the roles to give access to the creator of the environment resources. Permissions on environment resources > Additional access Select the users or Microsoft Entra groups to assign to specific roles on the environment resources. Tags Enter a tag name and a tag value. These tags are applied on all resources that are created as part of the environment. Select Add.

Note
At least one identity (system-assigned or user-assigned) must be enabled for deployment identity. The identity is used to perform the environment deployment on behalf of the developer. Additionally, the identity attached to the dev center should be assigned the Contributor and the User Access Administrator roles for access to the deployment subscription for each environment type.
Give access to the development team
Before developers can create environments based on the environment types in a project, you must provide access for them via a role assignment at the level of the project. The Deployment Environments User role enables users to create, manage, and delete their own environments. You must have sufficient permissions to a project before you can add users to it.
In the Azure portal, go to your project.
In the left menu, select Access control (IAM).
Select Add > Add role assignment.
Assign the following role. For detailed steps, see Assign Azure roles using the Azure portal.
Setting Value Role Select Deployment Environments User. Assign access to Select User, group, or service principal. Members Select the users or groups you want to have access to the project. 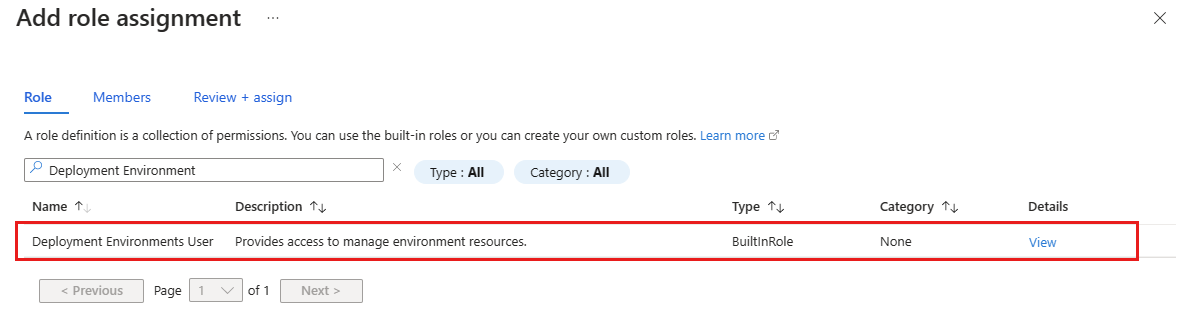

Note
Only users who have the Deployment Environments User role, the DevCenter Project Admin role, or a built-in role that has appropriate permissions can create an environment. Users who have the Deployment Environments Reader role can view their own environments and environments created by others.
Next step
In this quickstart, you created a dev center and configured it with an identity, a catalog, and an environment type. You then created a project and granted project access to your development team. To learn about how your development team members can create environments, go to the next quickstart.