Note
Access to this page requires authorization. You can try signing in or changing directories.
Access to this page requires authorization. You can try changing directories.
In this article, you learn how to manage a dev center in Microsoft Dev Box by using the Azure portal.
Development teams vary in the way they function and can have different needs. A dev center helps you manage these scenarios by enabling you to group similar sets of projects together and apply similar settings.
Permissions
To manage a dev center, you need the following permissions:
| Action | Permissions required |
|---|---|
| Create or delete a dev center | Owner or Contributor permissions on an Azure subscription or a specific resource group. |
| Manage a dev center | Owner or Contributor role, or specific Write permission to the dev center. |
| Attach or remove a network connection | Network Contributor permissions on an existing network connection (Owner or Contributor). |
Create a dev center
Your development teams' requirements change over time. You can create a new dev center in Microsoft Dev Box to support organizational changes like a new business requirement or a new regional center.
You can create as many or as few dev centers as you need, depending on how you organize and manage your development teams.
To create a dev center in the Azure portal:
Sign in to the Azure portal.
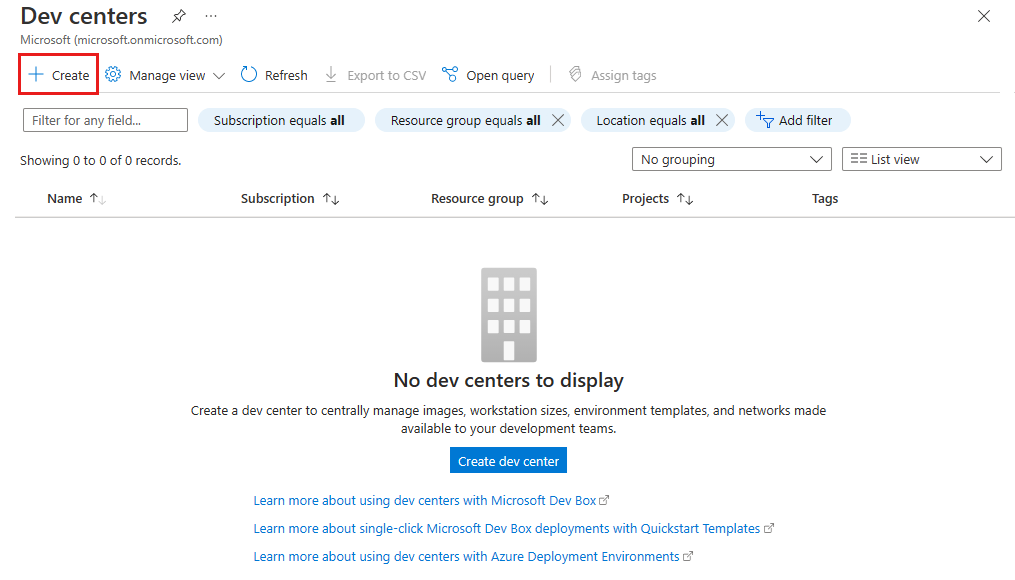
In the search box, enter dev centers. In the list of results, select Dev centers.

On the Dev centers page, select Create.
On the Create a dev center pane, on the Basics tab, enter the following values:
Setting Value Subscription Select the subscription in which you want to create the dev center. Resource Group Select an existing resource group, or select Create new and then enter a name for the new resource group. Name Enter a name for your dev center. Location Select the location or region where you want the dev center to be created. Attach a quick start catalog Clear both checkboxes. 
The Dev Box quick start catalog contains tasks and scripts that you can use to configure your dev box during the final stage of the creation process. You can attach a quick start catalog to a dev center later. For more information, see Create reusable dev box customizations.
For a list of the currently supported Azure locations with capacity, see Frequently asked questions about Microsoft Dev Box.
On the Settings tab, enter the following values:
Setting Value Description Project level catalog Select to enable Project Admins to attach catalogs to projects. Project-level catalogs enable you to provide customizations for each development team. Allow Microsoft hosted network in projects Select to enable Project Admins to specify that dev boxes created from a pool deploy to a Microsoft-hosted network. Microsoft-hosted networks are isolated networks managed by Microsoft. Using a Microsoft hosted network can reduce administrative overhead. Azure Monitor Agent Select to enable all dev boxes in the dev center to install the Azure Monitor Agent. The Azure Monitor Agent collects monitoring data from the dev box and sends it to Azure Monitor. 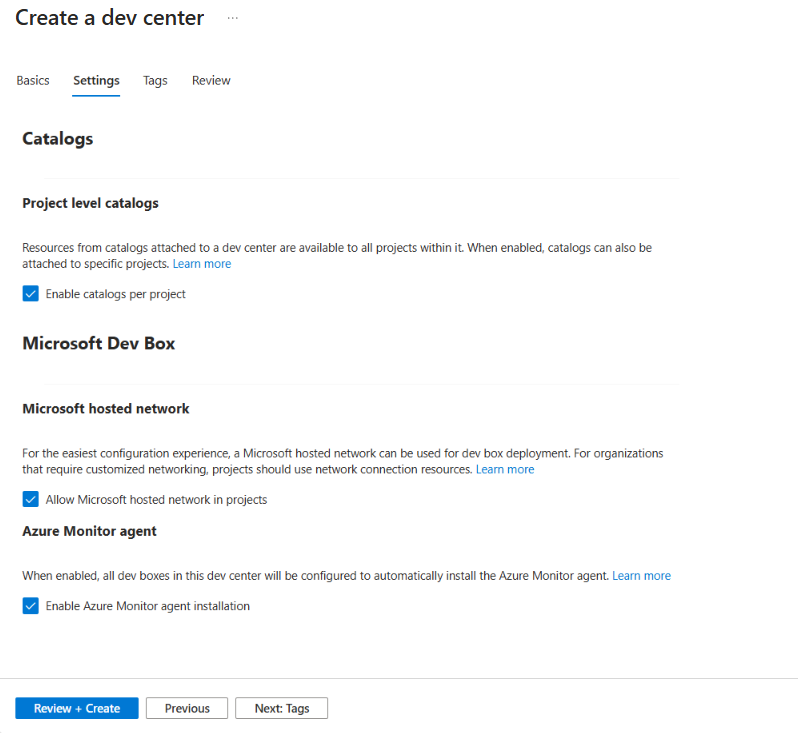
(Optional) On the Tags tab, enter a name/value pair that you want to assign.
Select Review + Create.
On the Review tab, select Create.
Track the progress of the dev center creation from any page in the Azure portal by opening the Notifications pane.
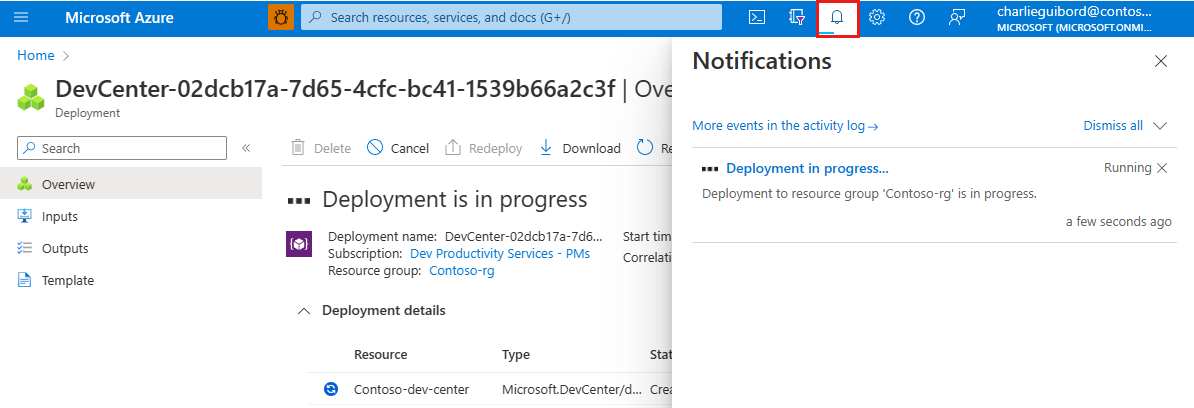
When the deployment completes, select Go to resource. Confirm that the dev center page appears.


Delete a dev center
You might choose to delete a dev center to reflect organizational or workload changes. Deleting a dev center in Microsoft Dev Box is irreversible, and you must prepare for the deletion carefully.
A dev center can't be deleted while any projects are associated with it. You must delete the projects before you can delete the dev center.
Attached network connections and their associated virtual networks aren't deleted when you delete a dev center.
When you're ready to delete your dev center, follow these steps:
Sign in to the Azure portal.
In the search box, enter dev centers. In the search results, select Dev centers from the Services list.
On the Dev centers page, open the dev center that you want to delete.
Select Delete.
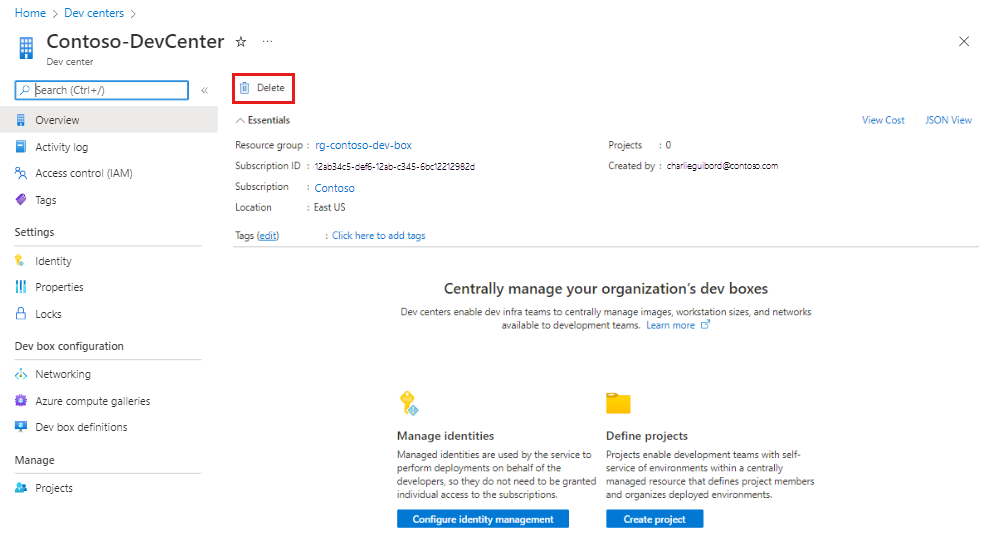
In the confirmation message, select OK.

Attach a network connection to a dev center
You can attach existing network connections to a dev center. You must attach a network connection to a dev center before you can use it in projects to create dev box pools.
Network connections enable dev boxes to connect to existing virtual networks. The location, or Azure region, of the network connection determines where associated dev boxes are hosted.
To attach a network connection to a dev center in Microsoft Dev Box:
Sign in to the Azure portal.
In the search box, enter dev centers. In the list of results, select Dev centers.
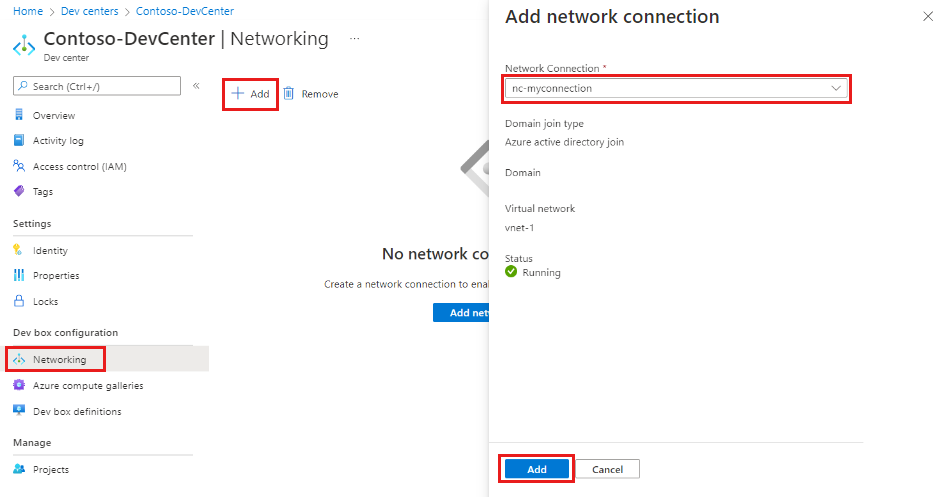
Select the dev center that you created, and then select Networking.
Select + Add.
On the Add network connection pane, select the network connection that you created earlier, and then select Add.

After you attach a network connection, the Azure portal runs several health checks on the network. You can view the status of the checks on the resource overview page.

You can add network connections that pass all health checks to a dev center and use them to create dev box pools. Dev boxes within dev box pools are created and domain joined in the location of the virtual network assigned to the network connection.
To resolve any errors, see Troubleshoot Azure network connections.
Remove a network connection from a dev center
You can remove network connections from dev centers. Network connections can't be removed if one or more dev box pools are using them.
Sign in to the Azure portal.
In the search box, enter dev centers. In the list of results, select Dev centers.
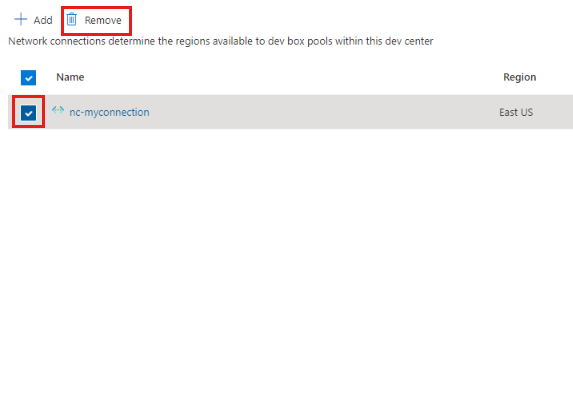
Select the dev center that you created, and then select Networking.
Select the network connection that you want to remove, and then select Remove.
Review the warning message, and then select OK.

After you remove a network connection, it's no longer available for use in dev box pools within the dev center.
Assign permissions for users
You can assign multiple users permissions to a dev center to help with administrative tasks. You can assign users or groups to the following built-in roles:
- Owner: Grants full access to manage all resources, including the ability to assign roles in Azure role-based access control (RBAC).
- Contributor: Grants full access to manage all resources, but doesn't allow the user to assign roles in Azure RBAC, manage assignments in Azure Blueprints, or share image galleries.
- Reader: Grants the ability to view all resources, but doesn't allow the user to make any changes.
To make role assignments:
Sign in to the Azure portal.
In the search box, enter dev centers. In the list of results, select Dev centers.
Select the dev center that you want to give access to.
On the left menu, select Access Control (IAM).
Select Add > Add role assignment.
Assign a role by configuring the following settings. For detailed steps, see Assign Azure roles using the Azure portal.
Setting Value Role Select Owner, Contributor, or Reader. Assign access to Select User, group, or service principal. Members Select the users or groups that you want to be able to access the dev center.