Quickstart: Get started with NuGet packages in Azure Artifacts
Azure DevOps Services | Azure DevOps Server 2022 - Azure DevOps Server 2019
Azure Artifacts enables developers to publish and download NuGet packages from sources such as feeds and public registries. With Azure Artifacts, you can create feeds that are either:
- Private, so you can share packages with your team and specific users.
- Public, so you can share packages openly with anyone on the internet.
In this quickstart, you learn how to:
- Create a new feed.
- Set up your project and connect to your feed.
- Publish NuGet packages.
- Download packages from your feed.
Prerequisites
Create an Azure DevOps organization and a project if you haven't already.
Install the latest NuGet version.
Install the Azure Artifacts Credential Provider.
Create a feed
Sign in to your Azure DevOps organization, and then go to your project.
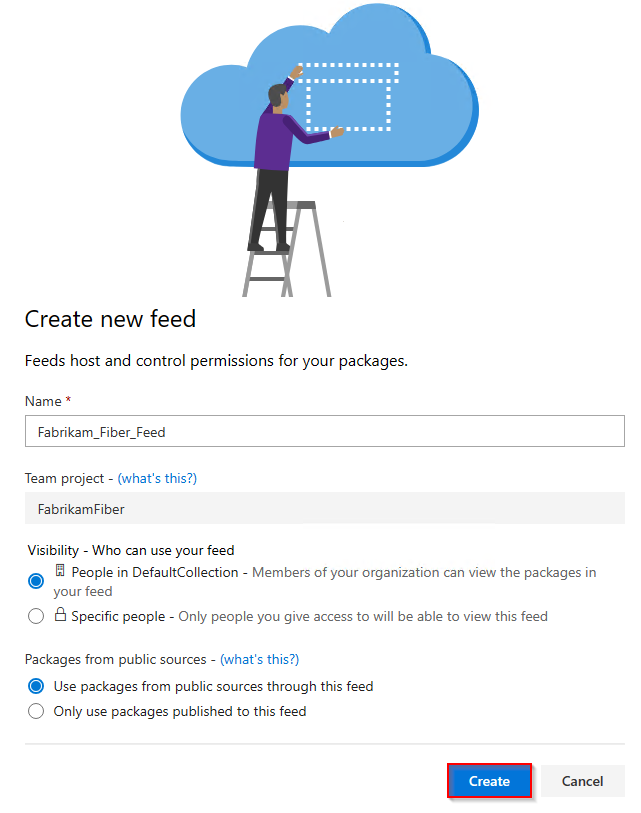
Select Artifacts, and then select Create Feed.
For Name, enter a descriptive name for your feed.
For Visibility, select an option to indicate who can view packages within the feed.
If you want to include packages from public sources, select the checkbox under Upstream sources.
For Scope, specify whether the scope of your feed is the project or the organization.
Select Create when you're done.

Sign in to your Azure DevOps server, and then go to your project.
Select Artifacts, and then select Create Feed.
For Name, enter a descriptive name for your feed.
For Visibility, select an option to indicate who can view packages within the feed.
If you want to include packages from public sources, select the checkbox under Upstream sources.
For Scope, specify whether the scope of your feed is the project or the organization.
Select Create when you're done.

Select Create when you're done.

Sign in to your Azure DevOps server, and then go to your project.
Select Artifacts, and then select New feed.
For Name, enter a descriptive name for your feed.
For Visibility, select an option to indicate who can view packages within the feed.
If you want to include packages from public sources, select the Use packages from public sources through this feed option.
Select Create when you're done.
Note
By default, newly created feeds have their project's Build Service value set to Feed and Upstream Reader (Collaborator).
Connect to a feed
Sign in to your Azure DevOps organization, and then go to your project.
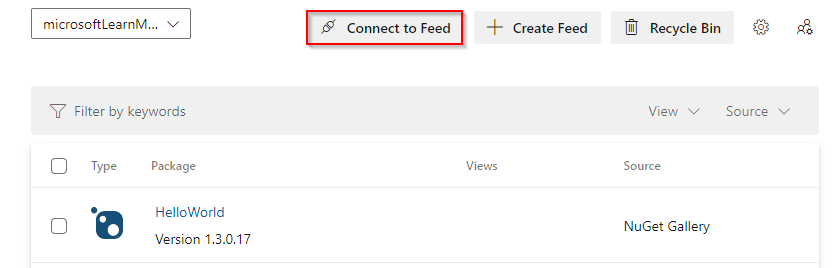
Select Artifacts, and then select your feed from the dropdown menu.
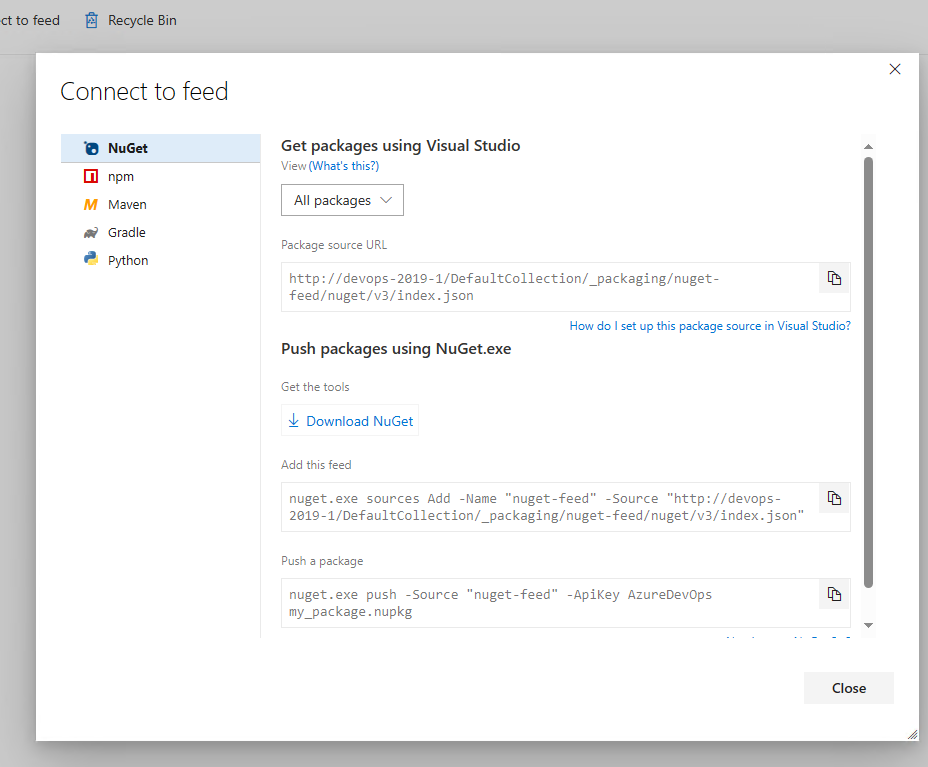
Select Connect to Feed, and then select NuGet.exe from the left pane. If this is your first time using Azure Artifacts with Nuget.exe, ensure that you installed all the prerequisites.
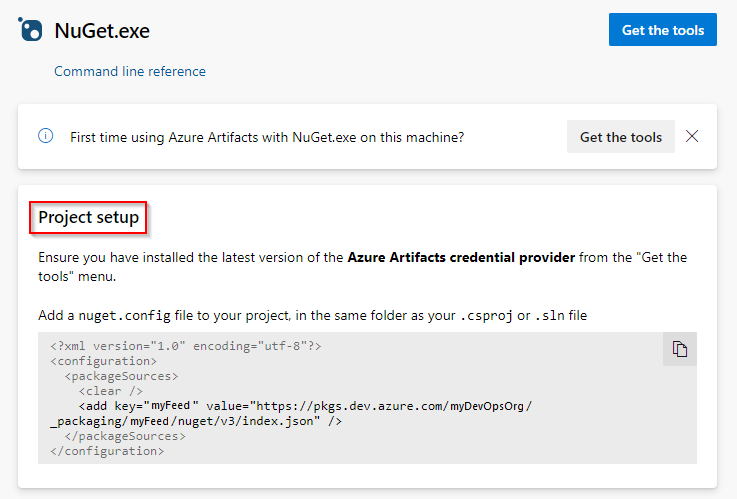
Follow the instructions in the Project setup section to configure your nuget.config file and authenticate with Azure Artifacts.
Sign in to your Azure DevOps server, and then go to your project.
Select Artifacts, and then select your feed from the dropdown menu.
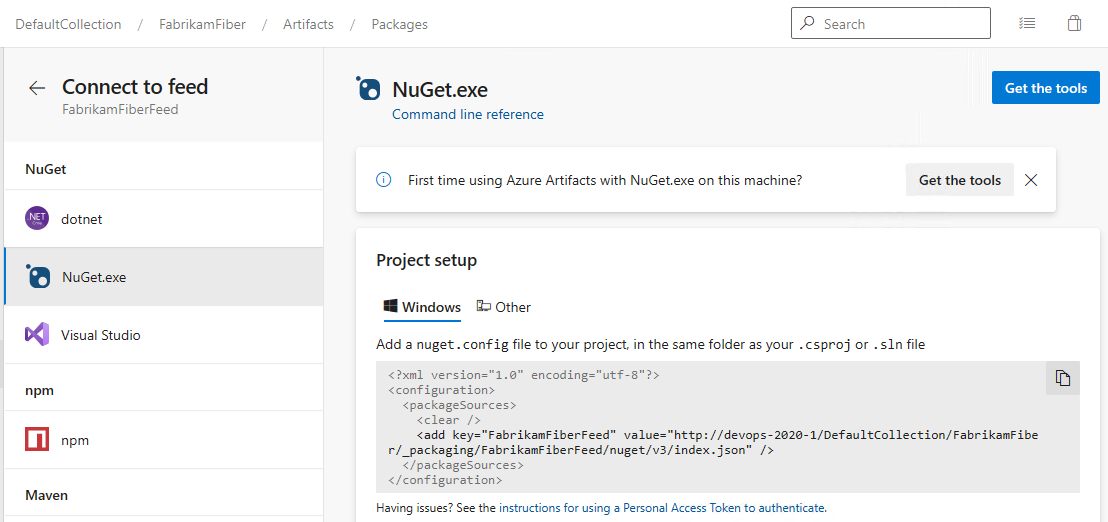
Select Connect to Feed, and then select NuGet.exe from the left pane.
Follow the instructions in the Project setup section to connect to your feed.
Sign in to your Azure DevOps server, and then go to your project.
Select Artifacts, and then select your feed from the dropdown menu.
Select Connect to Feed, and then select NuGet from the left pane.
Follow the instructions to add your package source URL to nuget.config.
Download packages
1. Get the package source URL
Sign in to your Azure DevOps server, and then go to your project.
Select Artifacts, select your feed from the dropdown menu, and then select Connect to Feed.
Select NuGet from the left pane, and then copy your Package source URL value.
Sign in to your Azure DevOps server, and then go to your project.
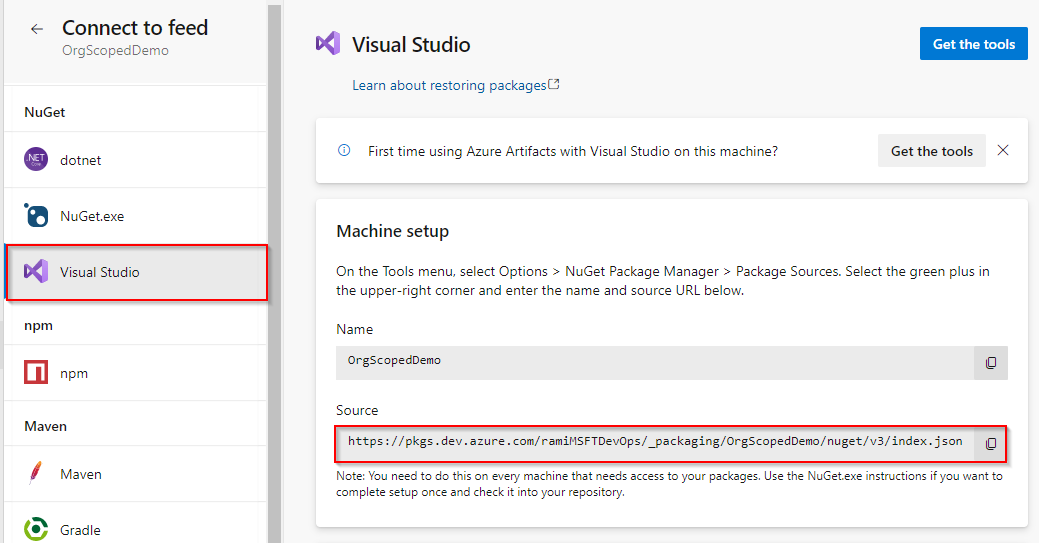
Select Artifacts, select your feed from the dropdown menu, and then select Connect to Feed.
Select Visual Studio from the left pane, and then copy your Source URL.
2. Set up Visual Studio
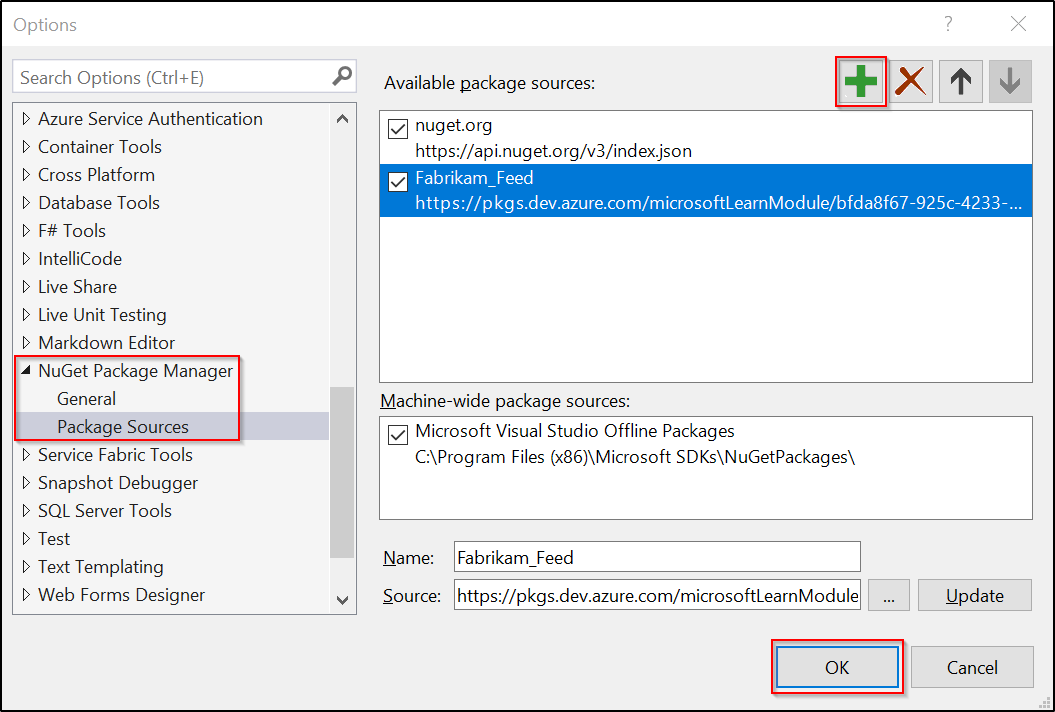
In Visual Studio, select Tools > Options.
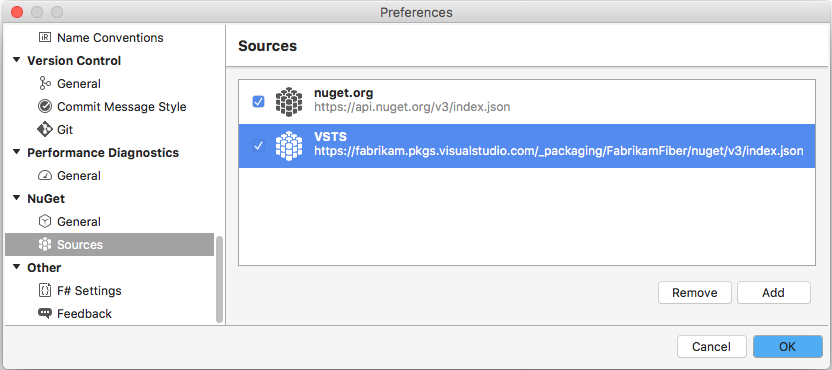
Expand the NuGet Package Manager section, and then select Package Sources.
Enter the feed's Name value and the Source URL, and then select the green plus sign (+) to add a source.
If you enabled upstream sources in your feed, clear the nuget.org checkbox.
Select OK when you're done.
3. Download packages
In Visual Studio, right-click your project, and then select Manage NuGet Packages.
Select Browse, and then select your feed from the Package source dropdown menu.

Use the search bar to search for packages from your feed.
Note
Using NuGet Package Explorer to search for packages in upstream sources is not supported.
Publish packages
To publish your package to your feed, run the following command. You can enter any string for the ApiKey argument.
nuget.exe push -Source <SOURCE_NAME> -ApiKey key <PACKAGE_PATH>
Examples:
Project-scoped feed:
nuget.exe push -Source https://pkgs.dev.azure.com/myOrganization/MyProject/_packaging/MyFeed/nuget/v3/index.json -ApiKey AZ release/myDemoPackage.1.0.0.nupkgOrganization-scoped feed:
nuget.exe push -Source https://pkgs.dev.azure.com/myOrganization/_packaging/myFeed/nuget/v3/index.json -ApiKey AZ release/myDemoPackage.1.0.0.nupkg
Note
The ApiKey is required, but you can use any arbitrary value when publishing to Azure Artifacts feeds.