Note
Access to this page requires authorization. You can try signing in or changing directories.
Access to this page requires authorization. You can try changing directories.
Autoshutdown in Azure DevTest Labs helps minimize waste by automatically shutting down a lab's VMs at a specific time of day or night. As a lab owner, you can configure an autoshutdown schedule for all your lab VMs. Lab owners can also set a central autoshutdown policy to control whether lab users can configure autoshutdown schedules for their own VMs.
This article explains how to set autoshutdown schedules and policies for labs and lab VMs in the Azure portal. The article also describes how to configure autoshutdown notifications, and how to create a logic app in Azure Logic Apps that automatically sends autoshutdown notifications.
Prerequisites
- To set autoshutdown schedules or autoshutdown policy for a lab, at least Contributor-level access to the lab. For more information, see Create a lab in the Azure portal.
- To set autoshutdown schedules for an individual lab virtual machine (VM) if allowed by policy, at least Contributor-level permissions on the VM.
- To create the Logic Apps app to send shutdown notifications, an Outlook 365 email client and at least Contributor-level permissions in the Azure subscription that contains the DevTest Labs instance.
Configure lab autoshutdown schedule
By default, lab autoshutdown is disabled. Once enabled, the autoshutdown schedule applies to all VMs in the lab unless it's changed for individual VMs. To change or remove the schedule for a specific lab VM if allowed by policy, see Configure VM autoshutdown settings.
To set your lab's autoshutdown schedule:
- On the Azure portal home page for your lab, select Configuration and policies from the left menu.
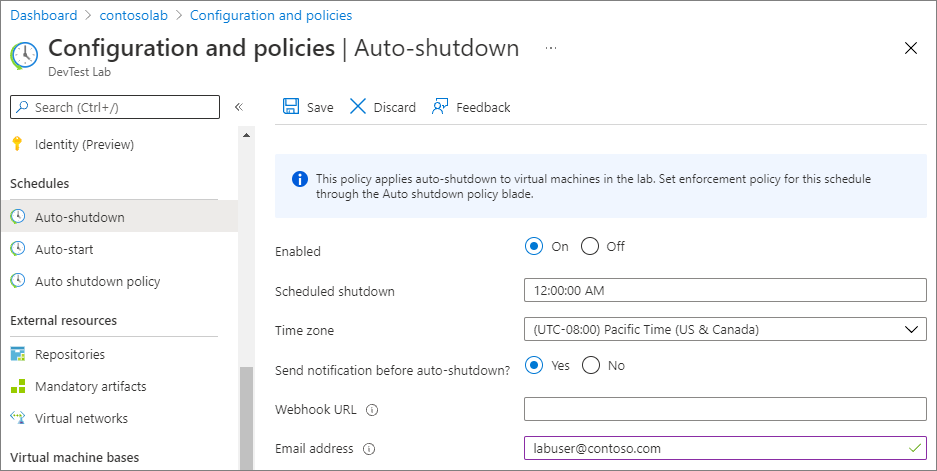
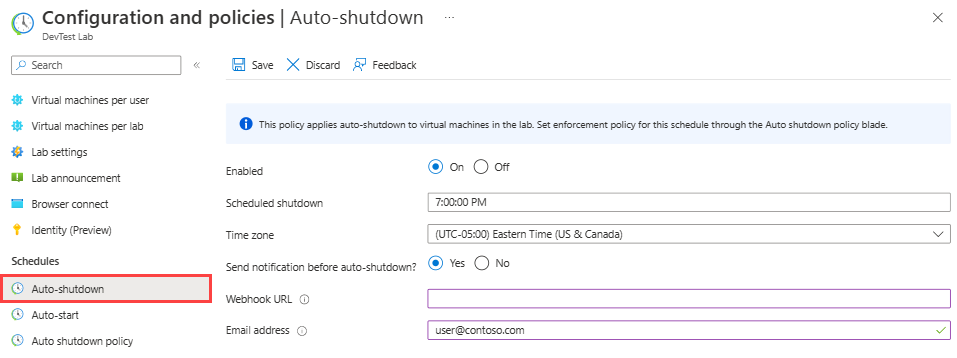
- On the Configuration and policies page, select Auto-shutdown from the Schedules section of the left menu.
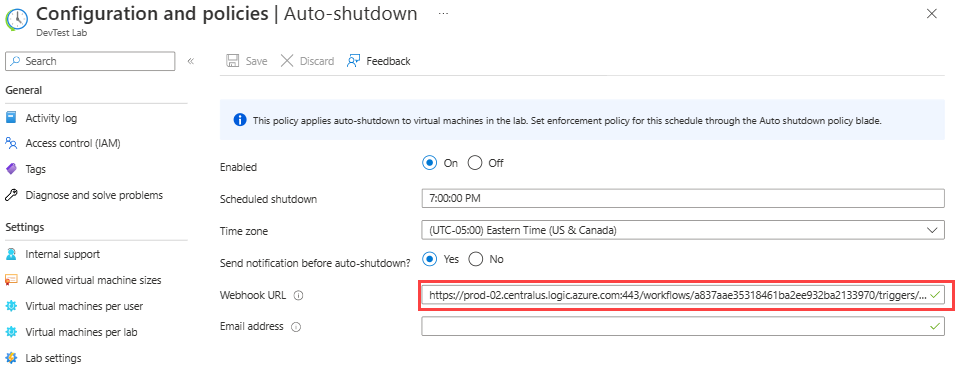
- On the Auto-shutdown screen, select On for Enabled to enable autoshutdown, or Off to disable it.
- For Scheduled shutdown and Time zone, specify the time and time zone to shut down all lab VMs.
- For Send notification before auto-shutdown?, select Yes if you want to send a notification 30 minutes before the specified autoshutdown time.
- If you chose Yes, enter a webhook URL endpoint under Webhook URL or semicolon-separated email addresses under Email address where you want the notification to post or be sent.
- Select Save.
Note
If you update the autoshutdown schedule for your lab or a VM within 30 minutes before the previously scheduled shutdown time, the new shutdown schedule takes effect the next day.
Configure lab autoshutdown policy
As a lab owner, you can control cost and minimize waste in your labs by managing autoshutdown policy settings. For more information about lab policies, see Define lab policies in Azure DevTest Labs.
Important
Autoshutdown policy changes apply only to new VMs created in the lab, not to already existing VMs.
To set autoshutdown policy for your lab:
On the Azure portal home page for your lab, select Configuration and policies from the left menu.
On the Configuration and policies page, select Auto shutdown policy from the Schedules section of the left menu.
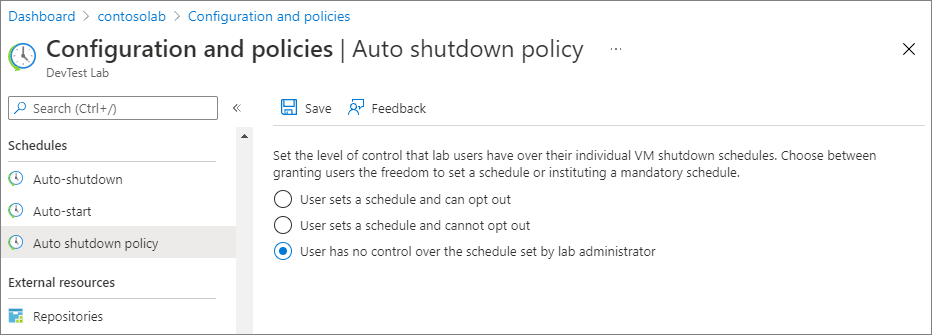
On the Auto shutdown policy page, select one of the following options:
User sets a schedule and can opt out: Lab users can override or opt out of the lab autoshutdown schedule. This option grants VM owners full control over their own VMs' autoshutdown behavior.
User sets a schedule and cannot opt out: Lab users can change the shutdown timing for their own VMs, but they can't opt out of the lab autoshutdown policy. VM owners can update their own VMs' shutdown times and shutdown notifications. This option ensures that every lab VM is under some autoshutdown schedule.
User has no control over the schedule set by lab administrator: Lab users can't alter or opt out of the lab autoshutdown schedule. They can still set up shutdown notifications for their own VMs. This option gives the lab administrator complete control over the autoshutdown schedule for all lab VMs.
Select Save.
Configure VM autoshutdown settings
If the autoshutdown policy allows, you can set autoshutdown schedules for individual lab VMs.
- On the Azure portal home page for the VM, select Auto-shutdown from the Operations section of the left menu.
- On the Auto-shutdown screen, select On for Enabled to enable autoshutdown, or Off to disable it.
- For Scheduled shutdown and Time zone, specify the time and time zone to shut down the VM.
- For Send notification before auto-shutdown?, select Yes if you want to send a notification 30 minutes before the specified autoshutdown time.
- If you chose Yes, enter a webhook URL endpoint under Webhook URL or an email address under Email address where you want the notification to post or be sent.
- Select Save.
View activity logs for autoshutdown updates
After you update autoshutdown settings, you can see that activity logged in the activity log for the VM.
On the Azure portal home page for the VM, select Activity log from the left menu.
Apply the appropriate filters, and view the entries for Add or modify schedules.
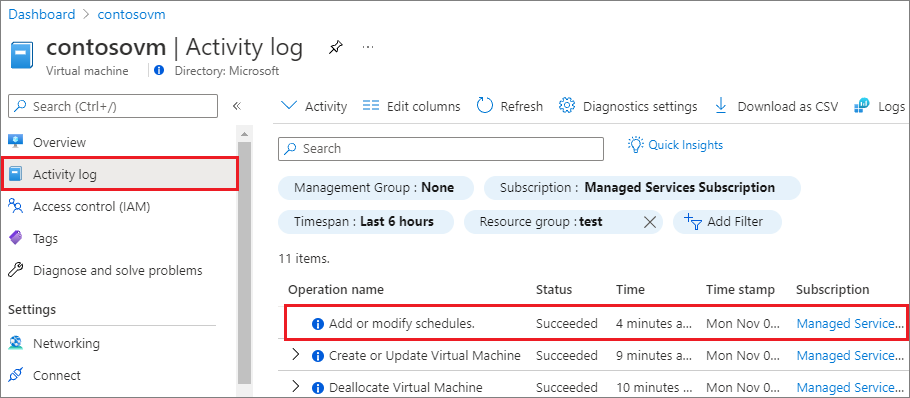
Select the Add or modify schedules operation to open a summary page that shows more details about the operation.
Configure autoshutdown notifications
When you enable autoshutdown notifications, lab users receive a notification 30 minutes before autoshutdown shuts down their VMs. The notification gives users a chance to finish their work before the shutdown. If the autoshutdown settings specify an email address, the notification sends to that email address. If the settings specify a webhook, the notification sends to the webhook URL.
The notification can also provide links that allow the following actions for each VM:
- Skip the autoshutdown this time.
- Delay the autoshutdown for an hour.
- Delay the autoshutdown for 2 hours.
You can use webhooks to implement your notifications. You set up integrations that subscribe to certain events. When one of those events occurs, an HTTP POST payload sends to the webhook's URL.
Apps like Azure Logic Apps have extensive support for webhooks. The following section describes how to use Logic Apps to configure an autoshutdown email notification to VM owners.
For more information about responding to webhooks, see:
Create a logic app that sends email notifications
Logic Apps provides many connectors that make it easy to integrate a service with other clients like Office 365. The following high-level steps set up a logic app for email notification.
- Create the logic app.
- Configure the built-in template.
- Integrate with your email client.
- Get the webhook URL to use in lab autoshutdown notification settings.
Create the logic app
Follow these steps to create a logic app in Azure.
In the Azure portal, search for and select logic apps.
At the top of the Logic apps page, select Add.
Select Workflow Service Plan and then select Select.
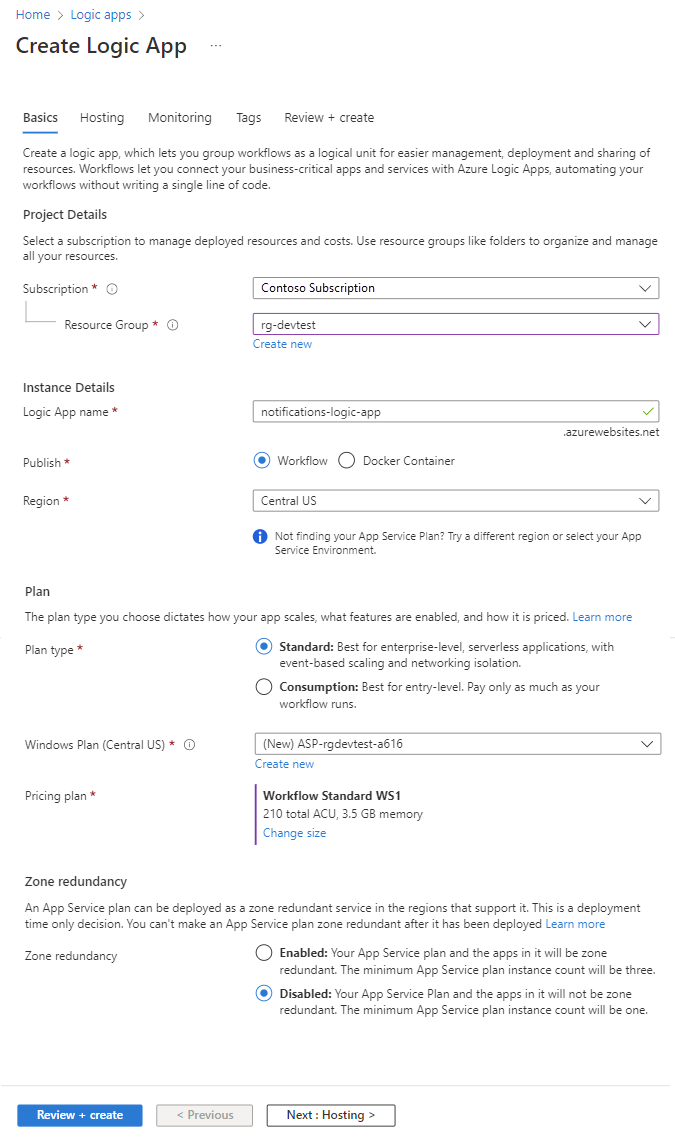
On the Create Logic App (Workflow Service Plan) page, provide the following information:
- Subscription: Make sure to use the same Azure subscription as your lab.
- Resource group: Select an existing resource group or create a new one.
- Logic app name: Enter a descriptive name for your logic app.
- Region: Select a nearby Azure region or the one that contains your lab.
- Windows Plan: Keep the provided default App Service Plan (ASP).
- Pricing plan: Keep the provided default Workflow Standard WS1 pricing plan.
- Zone redundancy: Keep set to Disabled.
Select Review + create, and when validation passes, select Create.
When the deployment finishes, select Go to resource.
Configure the built-in template
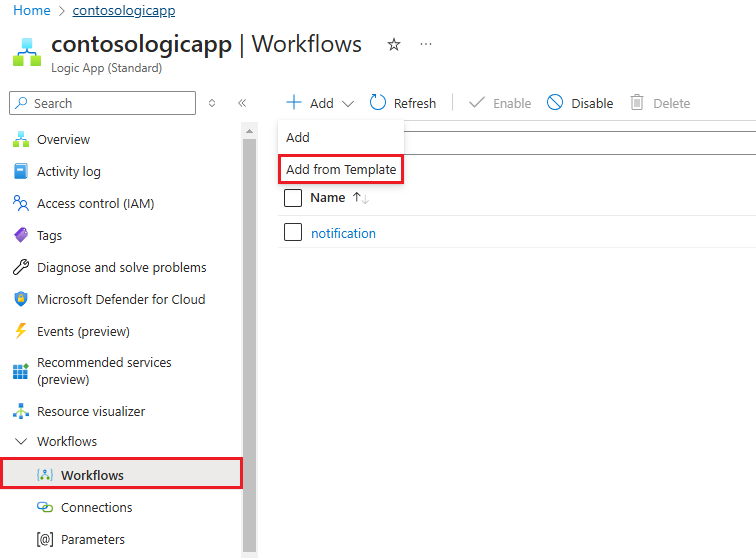
On the Azure portal home page for your logic app, select Create a workflow in Designer on the Get started tab, or select Workflows from the left menu.
On the Workflows page, select Add > Add from Template.
On the Templates page, search for request and then select Request-Response: Receive and respond to messages over HTTP or HTTPS from the results.
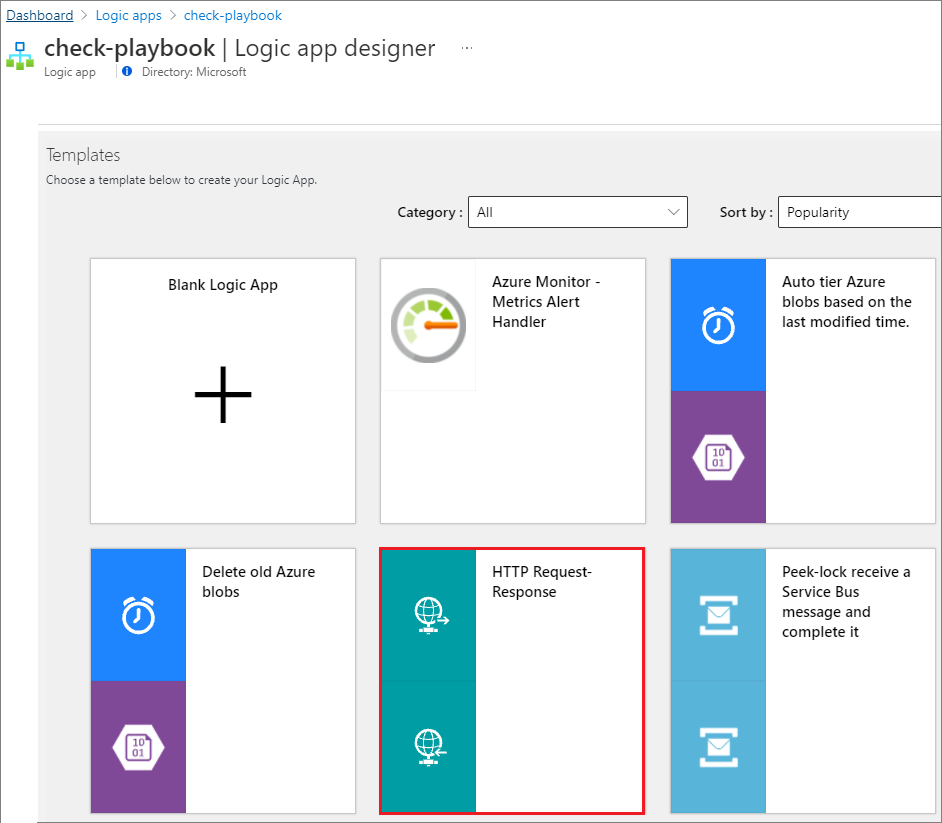
On the Request-Response: Receive and respond to messages over HTTP or HTTPS screen, select Use this template.
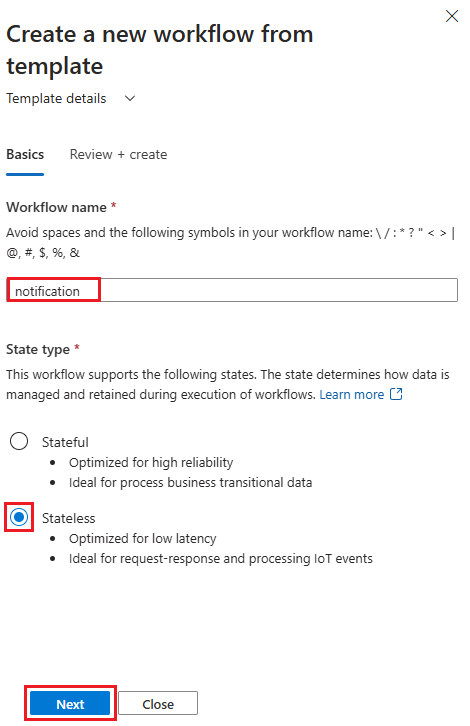
On the Create a new workflow from template screen:
- Provide a name for the workflow.
- Select Stateless under State type.
Select Next.
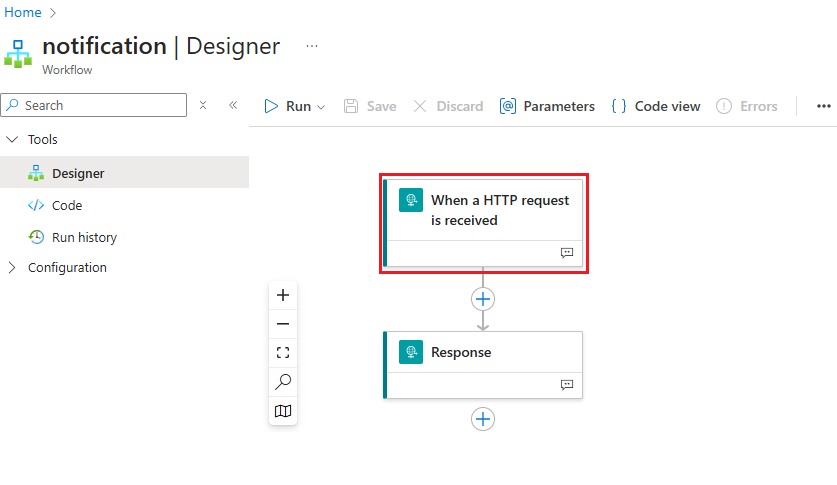
Review the settings and then select Create. The Designer page for your workflow opens.
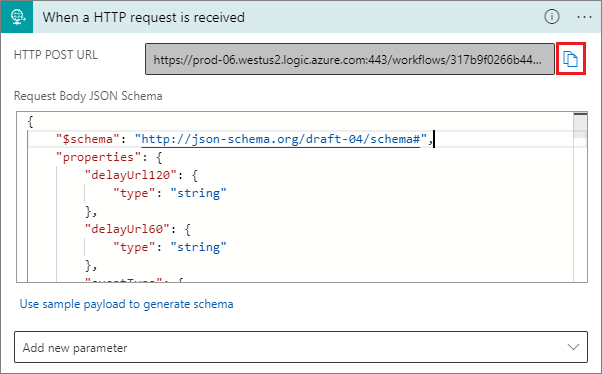
On the Designer page, select the When an HTTP request is received step.
On the When an HTTP request is received screen, paste the following JSON code into the Request Body JSON Schema section, and then select Save.
{
    "$schema": "http://json-schema.org/draft-04/schema#",
    "properties": {
        "delayUrl120": {
            "type": "string"
        },
        "delayUrl60": {
            "type": "string"
        },
        "eventType": {
            "type": "string"
        },
        "guid": {
            "type": "string"
        },
        "labName": {
            "type": "string"
        },
        "owner": {
            "type": "string"
        },
        "resourceGroupName": {
            "type": "string"
        },
        "skipUrl": {
            "type": "string"
        },
        "subscriptionId": {
            "type": "string"
        },
        "text": {
            "type": "string"
        },
        "vmName": {
            "type": "string"
        },
        "vmUrl": {
            "type": "string"
        },
        "minutesUntilShutdown": {
            "type": "string"
        }
    },
    "required": [
        "skipUrl",
        "delayUrl60",
        "delayUrl120",
        "vmName",
        "guid",
        "owner",
        "eventType",
        "text",
        "subscriptionId",
        "resourceGroupName",
        "labName",
        "vmUrl",
        "minutesUntilShutdown"
    ],
    "type": "object"
}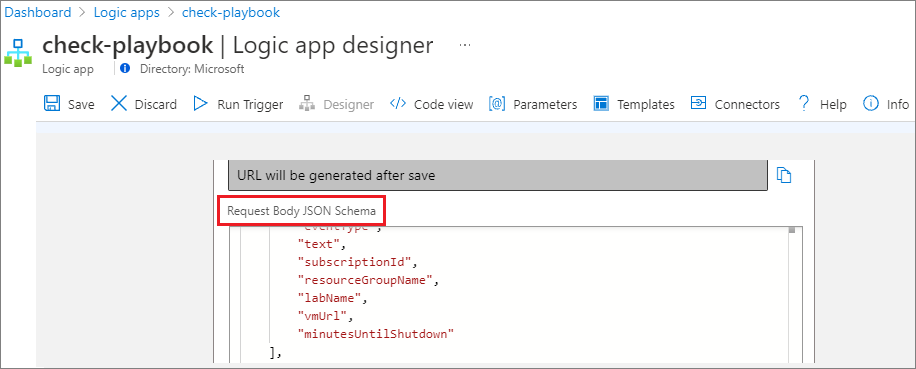
Integrate with your email client.
On the Designer page, select the + below the Response step and select Add an action.

On the Add an action screen, enter Office 365 Outlook in the Search field, and then select Send an email (V2) from the results.

If prompted, sign in to your Outlook 365 email account.
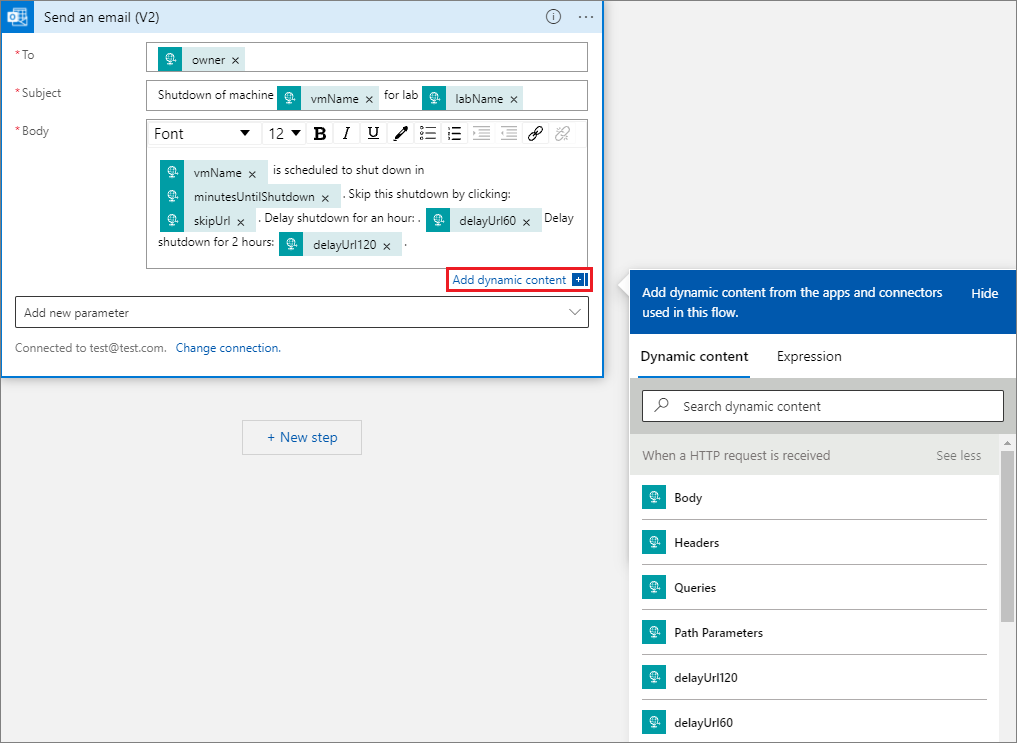
In the Send an email (V2) form, fill in the To, Subject, and Body fields.
You can select the Add dynamic content icon next to the fields to automatically populate the notification with values from fields that the app and connectors use. For example, select owner for To, add vmName and labName to Subject, and add skipUrl and delayUrl to the message Body.
Select Save on the Designer page.
Get the webhook URL
On the Designer page, select the When an HTTP request is received step.
On the When an HTTP request is received screen, copy the HTTP URL to the clipboard.
On the Auto-shutdown configuration page for your lab, paste this webhook URL into the Webhook URL field in the notification settings, and select Save.