Note
Access to this page requires authorization. You can try signing in or changing directories.
Access to this page requires authorization. You can try changing directories.
Use this quickstart to onboard to Azure Enclave by registering the required resource providers and granting the permissions needed to manage Azure Enclave resources in your subscription.
Prerequisites
- You must already have an Azure tenant and subscription.
- You must be an Owner of an existing Azure subscription.
Register the Microsoft.Mission resource provider and grant permissions
Option 1: PowerShell
PowerShell is the fastest way to register the required resource providers.
You can run the following code to quickly register all required resource providers to begin using Azure Enclave.
Sign in to your Azure tenant and open the subscription.
In the Azure portal, select the
Cloud Shellicon at the top of the window.
Set the Azure context for your subscription. For example, run
Set-AzContext -Subscription <subscription-id>.Copy and paste this code into Cloud Shell, and then press Enter.
# Register the Azure Enclave Resource Provider and grant permissions to the Resource Provider application

$resourceProviders = @(
   "Microsoft.Advisor",
   "Microsoft.AlertsManagement",
   "Microsoft.Authorization",
   "Microsoft.Automation",
   "Microsoft.Billing",
   "Microsoft.Capacity",
   "Microsoft.ChangeAnalysis",
   "Microsoft.ClassicSubscription",
   "Microsoft.CognitiveServices",
   "Microsoft.Compute",
   "Microsoft.Consumption",
   "Microsoft.CostManagement",
   "Microsoft.DesktopVirtualization",
   "Microsoft.Features",
   "Microsoft.GuestConfiguration",
   "Microsoft.insights",
   "Microsoft.KeyVault",
   "Microsoft.Logic",
   "Microsoft.ManagedIdentity",
   "Microsoft.MarketplaceOrdering",
   "Microsoft.Network",
   "Microsoft.OperationalInsights",
   "Microsoft.OperationsManagement",
   "Microsoft.PolicyInsights",
   "Microsoft.Portal",
   "Microsoft.ResourceGraph",
   "Microsoft.ResourceHealth",
   "Microsoft.ResourceNotifications",
   "Microsoft.Resources",
   "Microsoft.Security",
   "Microsoft.SecurityInsights",
   "Microsoft.SerialConsole",
   "Microsoft.SqlVirtualMachine",
   "Microsoft.Storage",
   "Microsoft.support",
   "Microsoft.Web",
   "Microsoft.Mission"
)

$resourceProviders | foreach {Register-AzResourceProvider -ProviderNamespace $_ -Verbose}
- (Optional) Enable the
EncryptionAtHostfeature
The EncryptionAtHost feature enables encryption at the compute host level.
# Register the feature
az feature register --namespace Microsoft.Compute --name EncryptionAtHost

# Check registration status (may take 10-15 minutes)
az feature show --namespace Microsoft.Compute --name EncryptionAtHost

# Once registered, refresh the provider
az provider register --namespace Microsoft.Compute
- After the update is complete, proceed to Azure setup or next steps.
Option 2: Azure portal
Sign in to your Azure tenant and open the subscription.
Under Settings, open Resource providers.
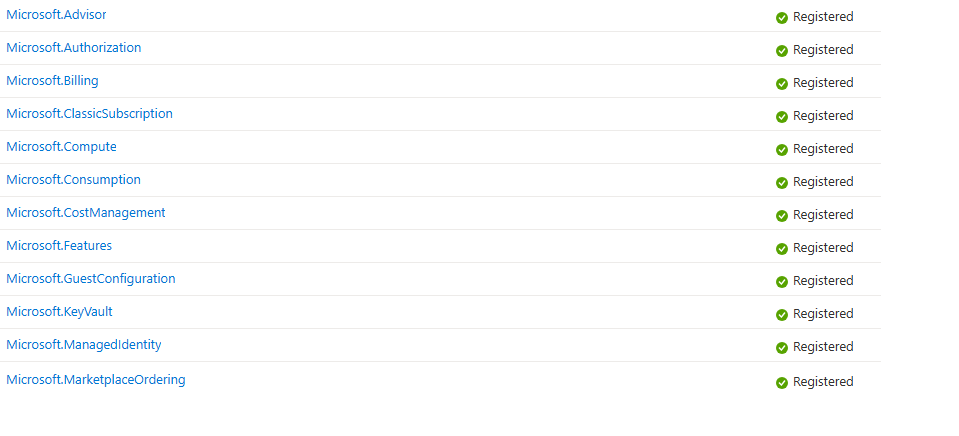
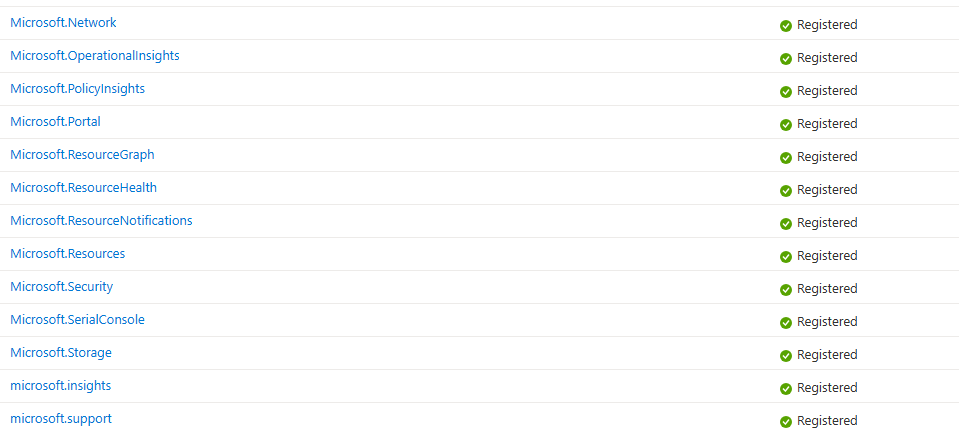
Register the resource providers listed in Option 1: PowerShell in the subscription. The PowerShell script is the fastest option and the authoritative source for the required registrations. These images show the expected end state.
Search for and select
Microsoft.Mission, and then select Register.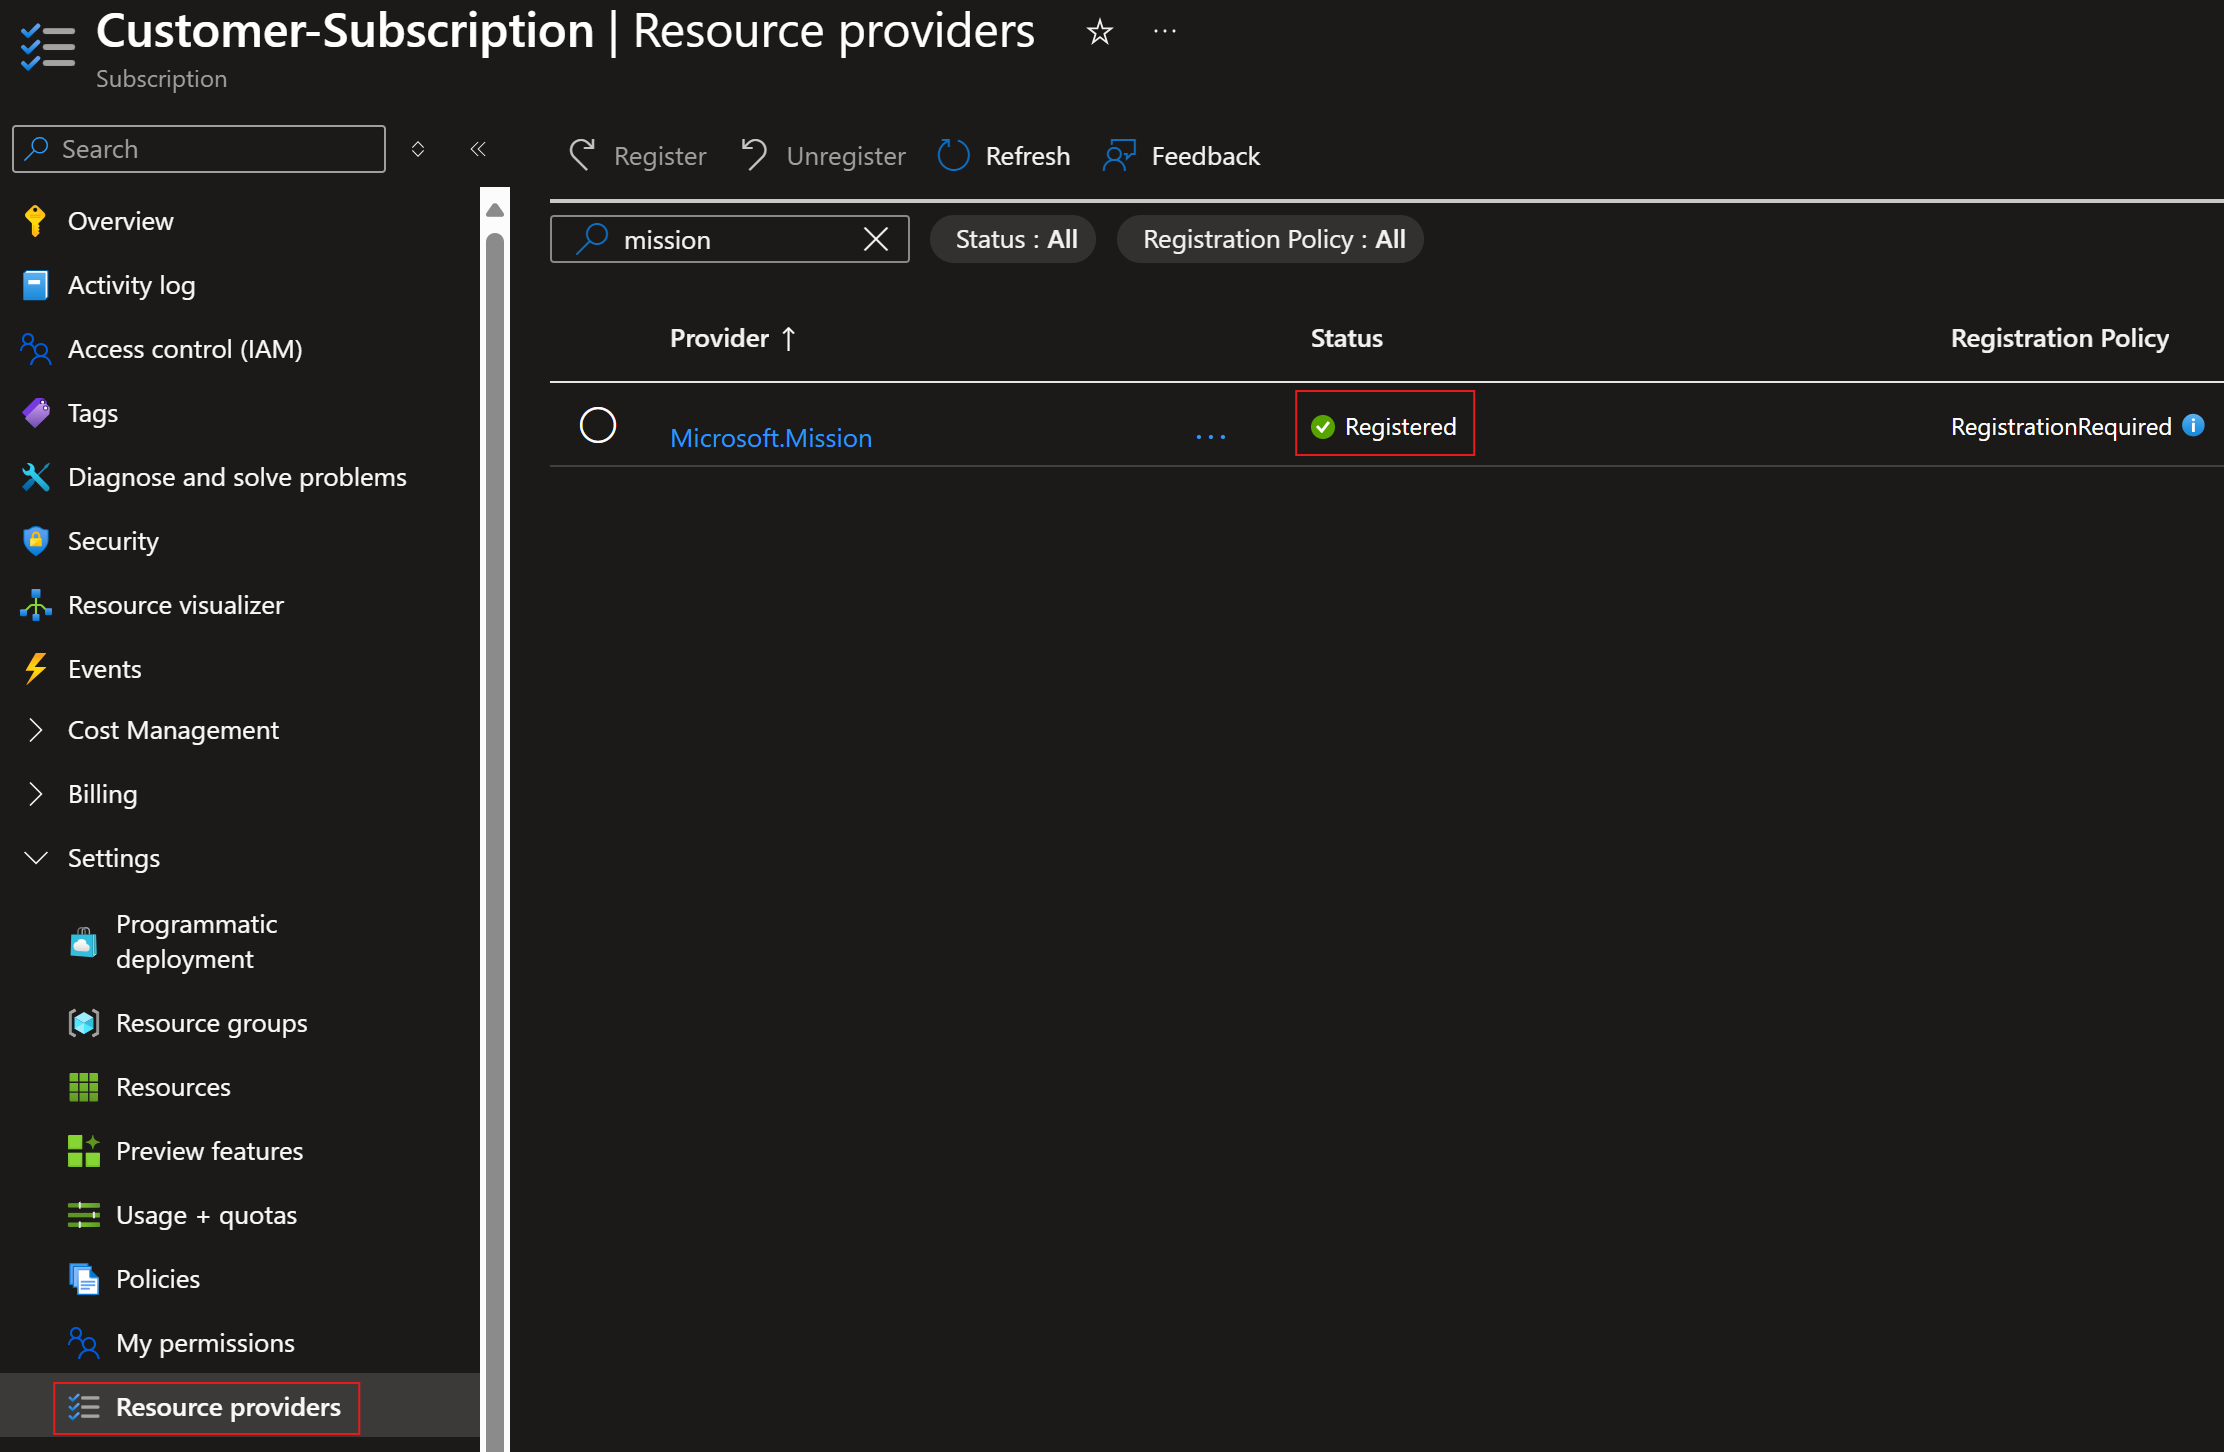
Proceed to Azure setup or next steps.


For reference, you can also review the generic instructions for enabling a preview feature.
Configure Network Watcher resource group
To avoid potential issues with virtual network flow log creation, set up the NetworkWatcherRG resource group manually in advance and assign the Mission Enclave app the Owner role on that resource group, or verify that setup and role assignment happened automatically before creating your first enclave in the subscription.
To mitigate this potential issue, for each subscription, manually create the NetworkWatcher resource group called NetworkWatcherRG in new subscriptions, and then grant the Mission Enclave Azure Enclave App Owner on the NetworkWatcherRG:
Select the
NetworkWatcherRGresource group, selectAccess control (IAM), then selectAddandAdd role assignment.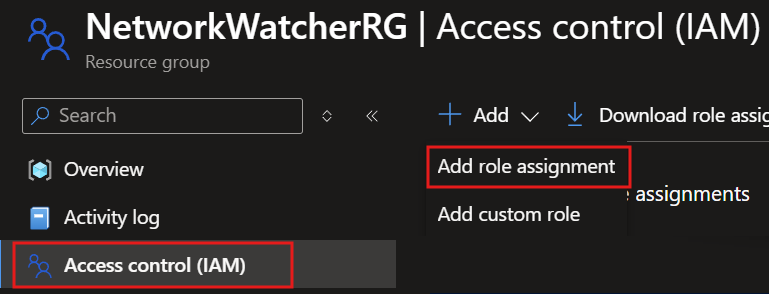
Select
Privileged administrator roles, selectowner, then selectNext.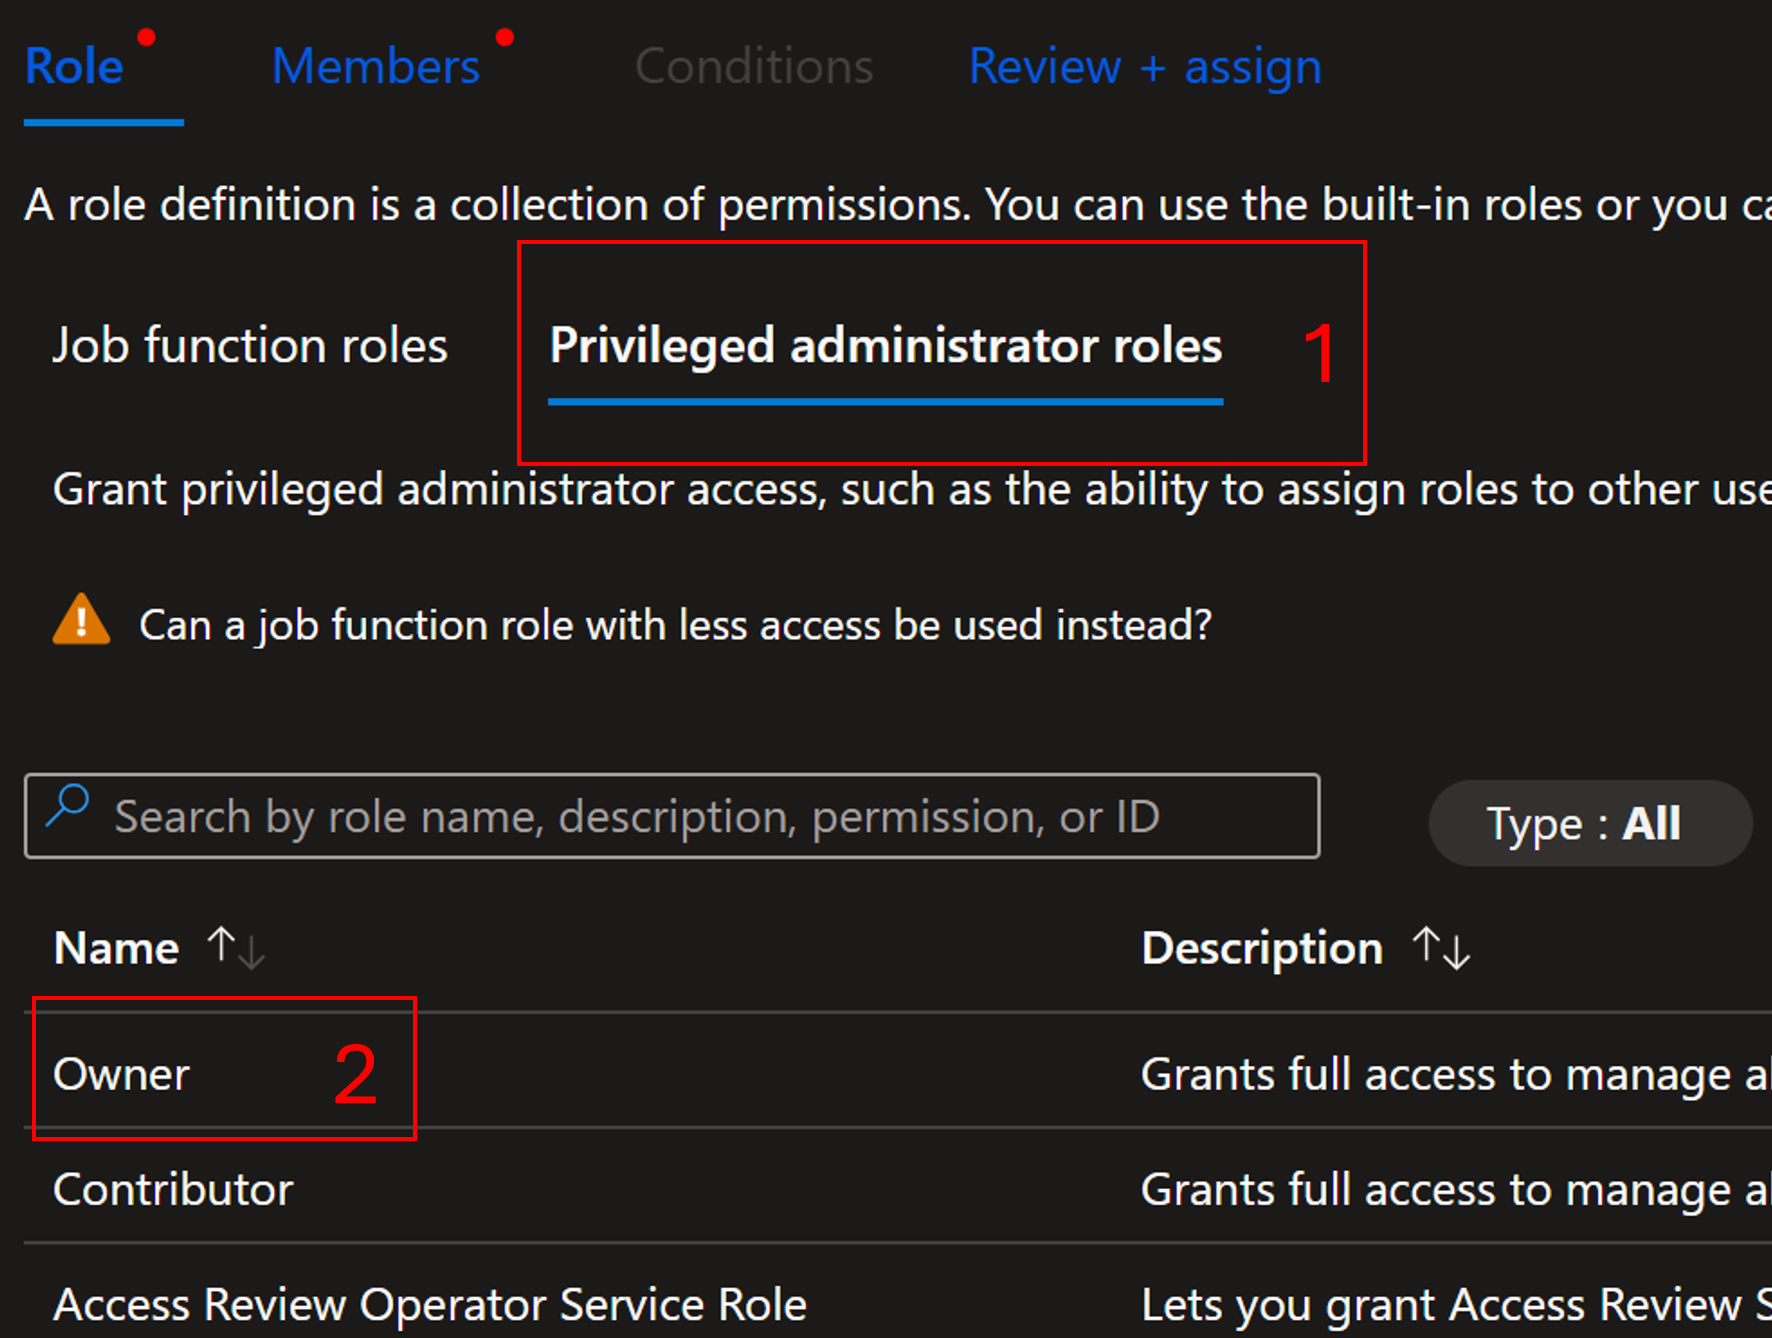
Select
Select members, typeMission Enclavein the search and select theMission Enclaveapp, selectSelect, thenNext.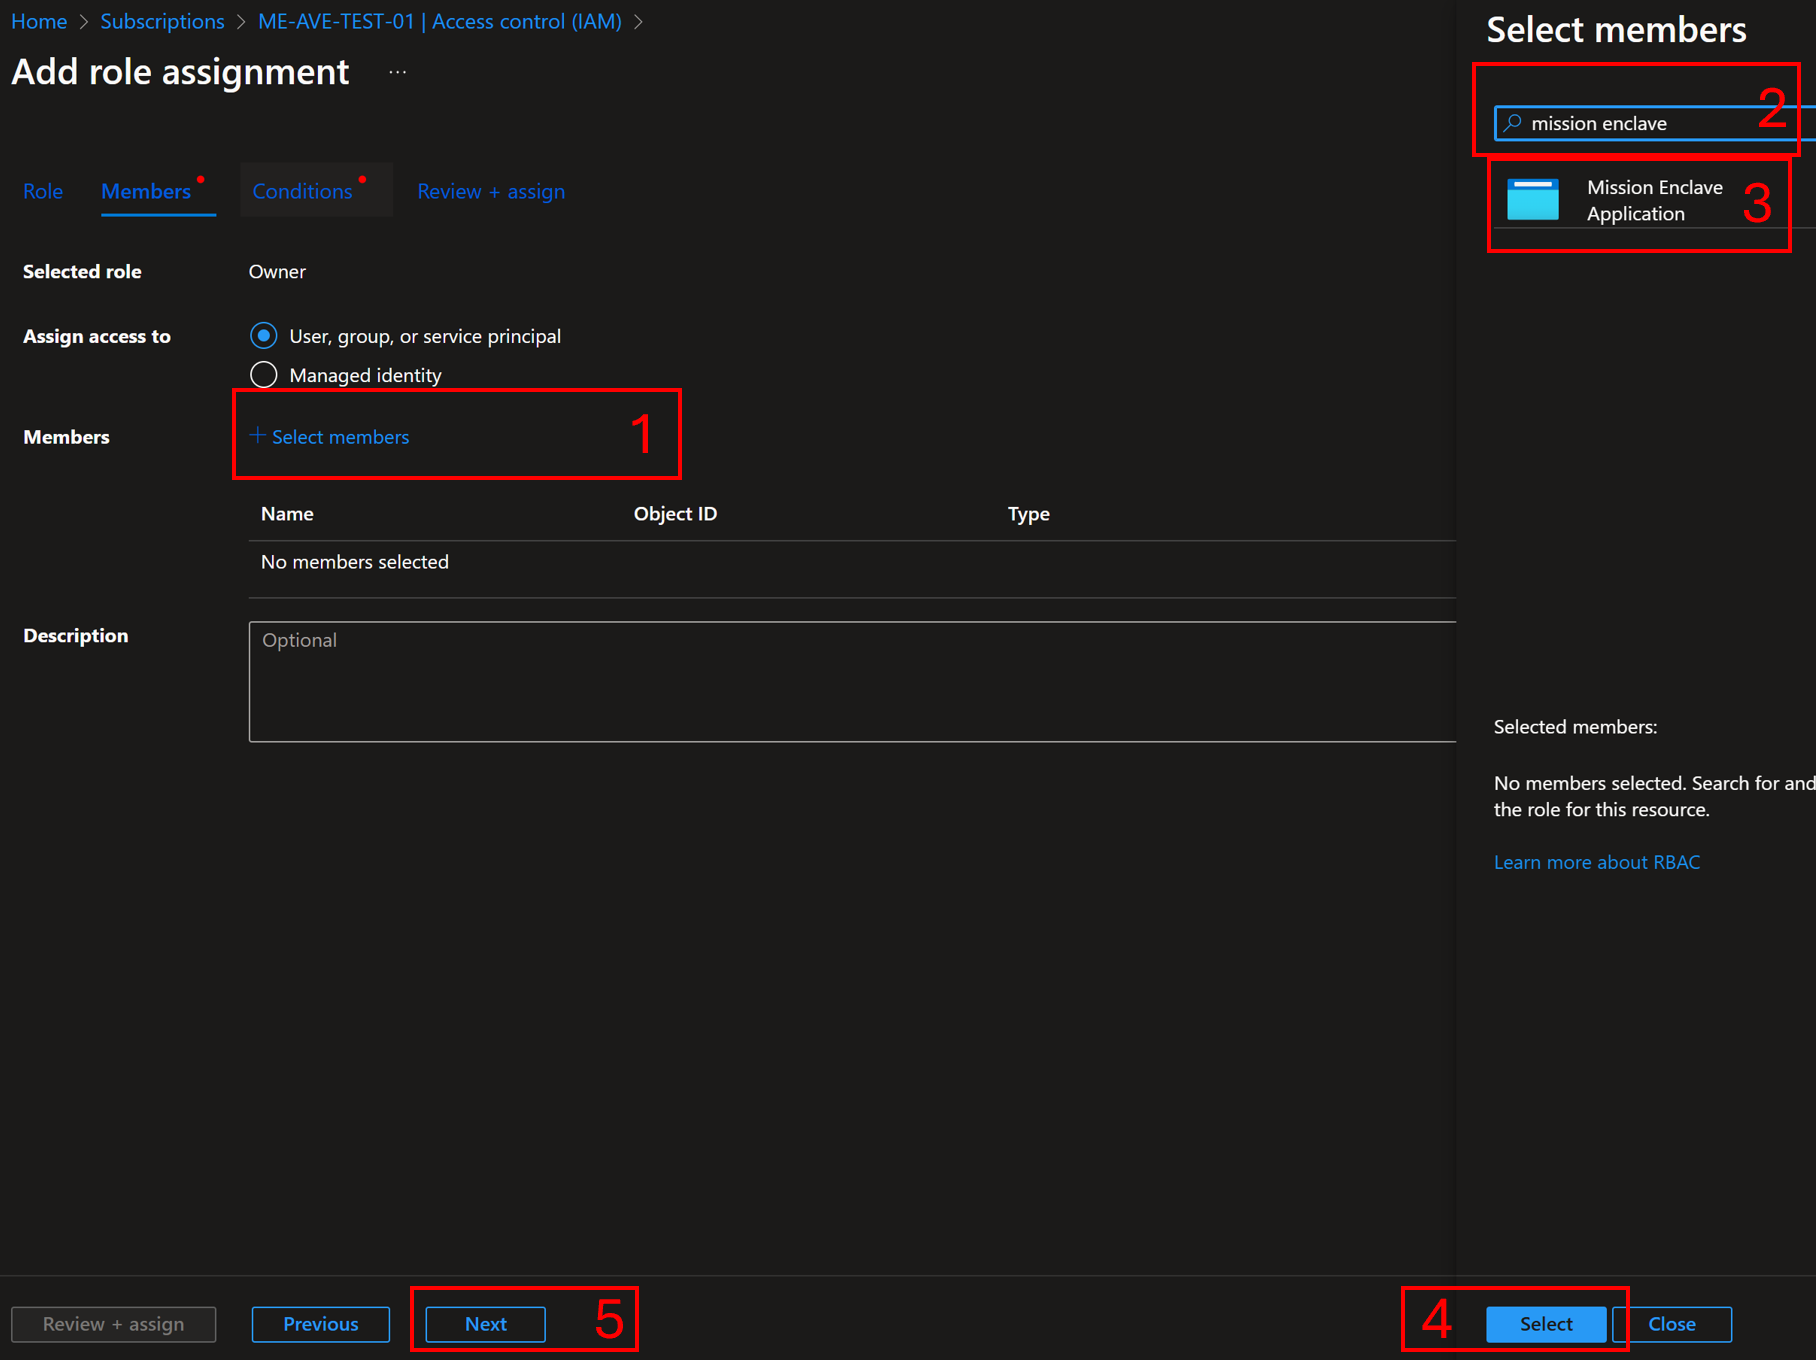
If your subscription requires a condition, select
Allow user to assign all roles except privileged administrator roles Owner, UAA, RBAC (Recommended), then selectReview + assign.
Once the update is complete, you can start deploying Azure Enclave resources.


When a community or enclave is created, Azure Enclave attempts the following steps:
- Check if the
NetworkWatcherRGexists. If not, attempt to create that resource group. - Check if the
Mission EnclaveApp has a permanentOwnerassignment onNetworkWatcherRG. If not, attempt to assign theMission EnclaveApp as a permanentOwnerassignment onNetworkWatcherRG. Even if an inheritedOwnerpermission exists, a permanentOwnerassignment creation is attempted. - If any step fails, enclave deployments might fail when attempting to create virtual network flow logs.
Transition steps for existing preview customers
Existing preview customers must re-register the Azure Enclave resource provider so their subscriptions can use the latest Azure Enclave API and service updates.
Complete these steps to use the latest Azure Enclave API:
- In the Azure portal, navigate to your subscription.
- Under Settings, open Resource providers.
- Search for and select
Microsoft.Mission, and then select Re-register. - Repeat these steps for any additional subscriptions.
Next steps
After registering the Azure Enclave resource provider, you can start deploying Azure Enclave resources into your subscription.
Start building your Azure Enclave community:
Establish network connectivity within your community:
Create resources within your workloads to meet your objectives:
- Create resources from the service catalog
- Create resources with a template or bicep template from these examples