Note
Access to this page requires authorization. You can try signing in or changing directories.
Access to this page requires authorization. You can try changing directories.
Note
In May 2024 we released a stand-alone FHIR® converter API decoupled from the FHIR service and packaged as a container (Docker) image for preview. In addition to enabling you to convert data from the source of record to FHIR R4 bundles, the FHIR converter offers many net new capabilities, such as:
- Bidirectional data conversion from source of record to FHIR R4 bundles and back. For example, the FHIR converter can convert data from FHIR R4 format back to HL7v2 format.
- Improved experience for customization of default Liquid templates.
- Samples that demonstrate how to create an ETL (extract, transform, load) pipeline with Azure Data Factory (ADF).
To implement the FHIR converter container image, see the FHIR converter GitHub project.
In this article, we detail how to use Azure Data Factory (ADF) with the $convert-data operation to transform HL7v2 data to FHIR® R4. The transformed results are then persisted within an Azure storage account with Azure Data Lake Storage (ADLS) Gen2 capabilities.
Prerequisites
Before getting started, follow these steps.
Deploy an instance of the FHIR service. The FHIR service is used to invoke the
$convert-dataoperation.By default, the ADF pipeline in this scenario uses the predefined templates provided by Microsoft for conversion. If your use case requires customized templates, set up your Azure Container Registry instance to host your own templates to be used for the conversion operation.
Create storage accounts with Azure Data Lake Storage Gen2 (ADLS Gen2) capabilities by enabling a hierarchical namespace and container to store the data to read from and write to.
You can create and use one or separate ADLS Gen2 accounts and containers to:
- Store the HL7v2 data to be transformed (for example: the source account and container from which the pipeline reads the data to be transformed).
- Store the transformed FHIR R4 bundles (for example: the destination account and container to which the pipeline writes the transformed result).
- Store the errors encountered during the transformation (for example: the destination account and container to which the pipeline writes execution errors).
Create an instance of ADF, which serves to orchestrate business logic. Ensure that a system-assigned managed identity is enabled.
Add the following Azure role-based access control (Azure RBAC) assignments to the ADF system-assigned managed identity:
- FHIR Data Converter role to grant permission to the FHIR service.
- Storage Blob Data Contributor role to grant permission to the ADLS Gen2 account.
Configure an Azure Data Factory pipeline
In this example, an ADF pipeline is used to transform HL7v2 data, and persist a transformed FHIR R4 bundle in a JSON file within the configured destination ADLS Gen2 account and container.
From the Azure portal, open your Azure Data Factory instance and select Launch Studio to begin.


Create a pipeline
Azure Data Factory pipelines are a collection of activities that perform a task. This section details the creation of a pipeline that performs the task of transforming HL7v2 data to FHIR R4 bundles. Pipeline execution can be done manually, or regularly based on defined triggers.
Select Author from the navigation menu. In the Factory Resources pane, select the + to add a new resource. Select Pipeline and then Template gallery from the menu.

In the Template gallery, search for HL7v2. Select the Transform HL7v2 health data to FHIR R4 format and write to ADLS Gen2 tile and then select Continue.
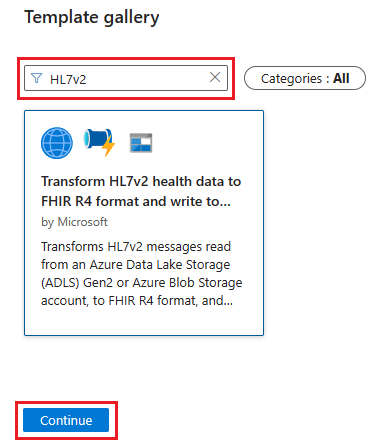
Select Use this template to create the new pipeline.
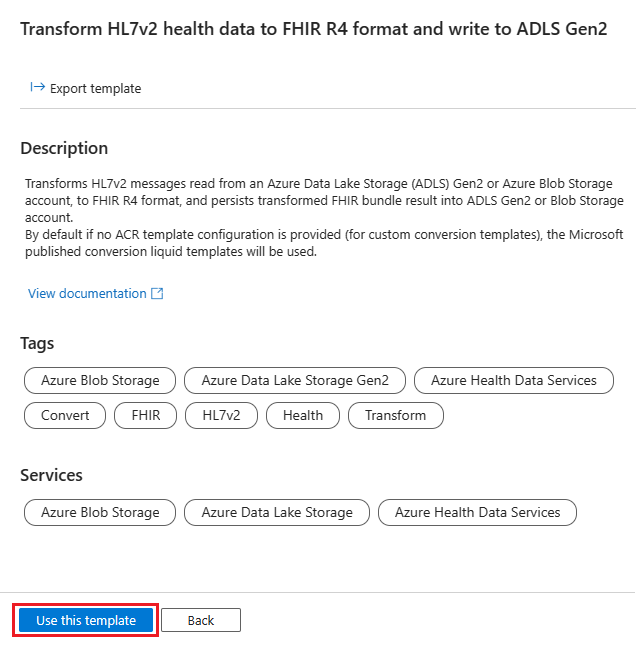
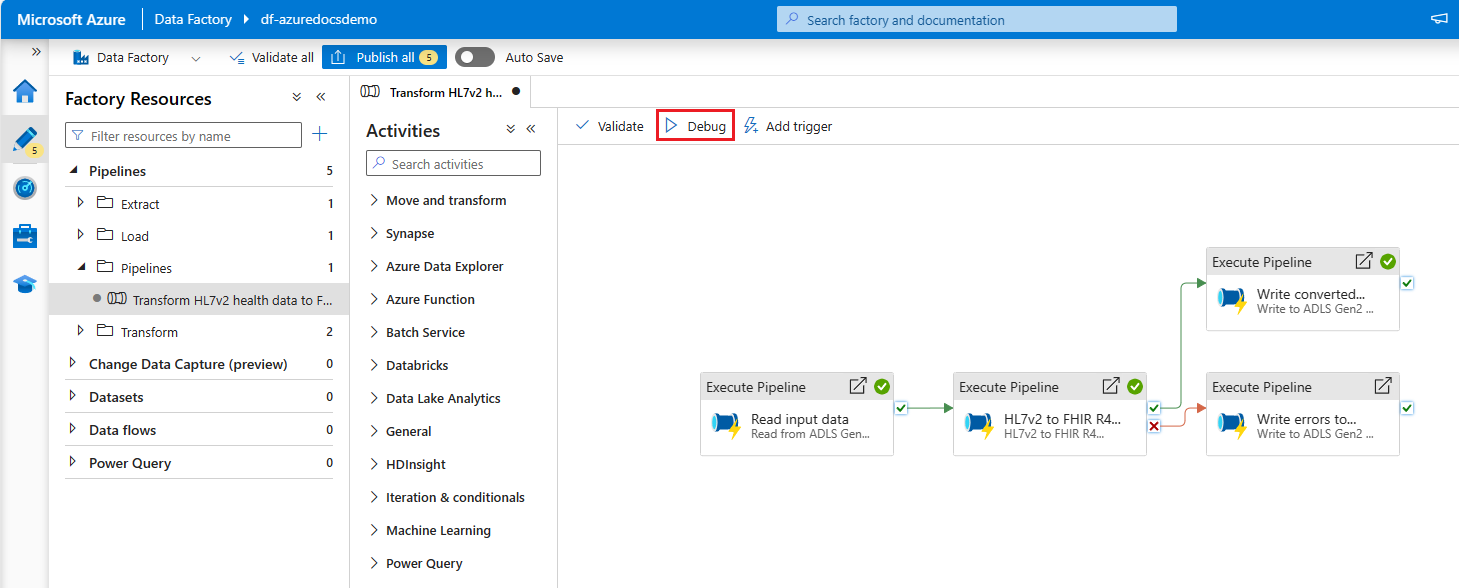
ADF imports the template, which is composed of an end-to-end main pipeline and a set of individual pipelines/activities. The main end-to-end pipeline for this scenario is named Transform HL7v2 health data to FHIR R4 format and write to ADLS Gen2 and can be accessed by selecting Pipelines. The main pipeline invokes the other individual pipelines/activities under the subcategories of Extract, Load, and Transform.
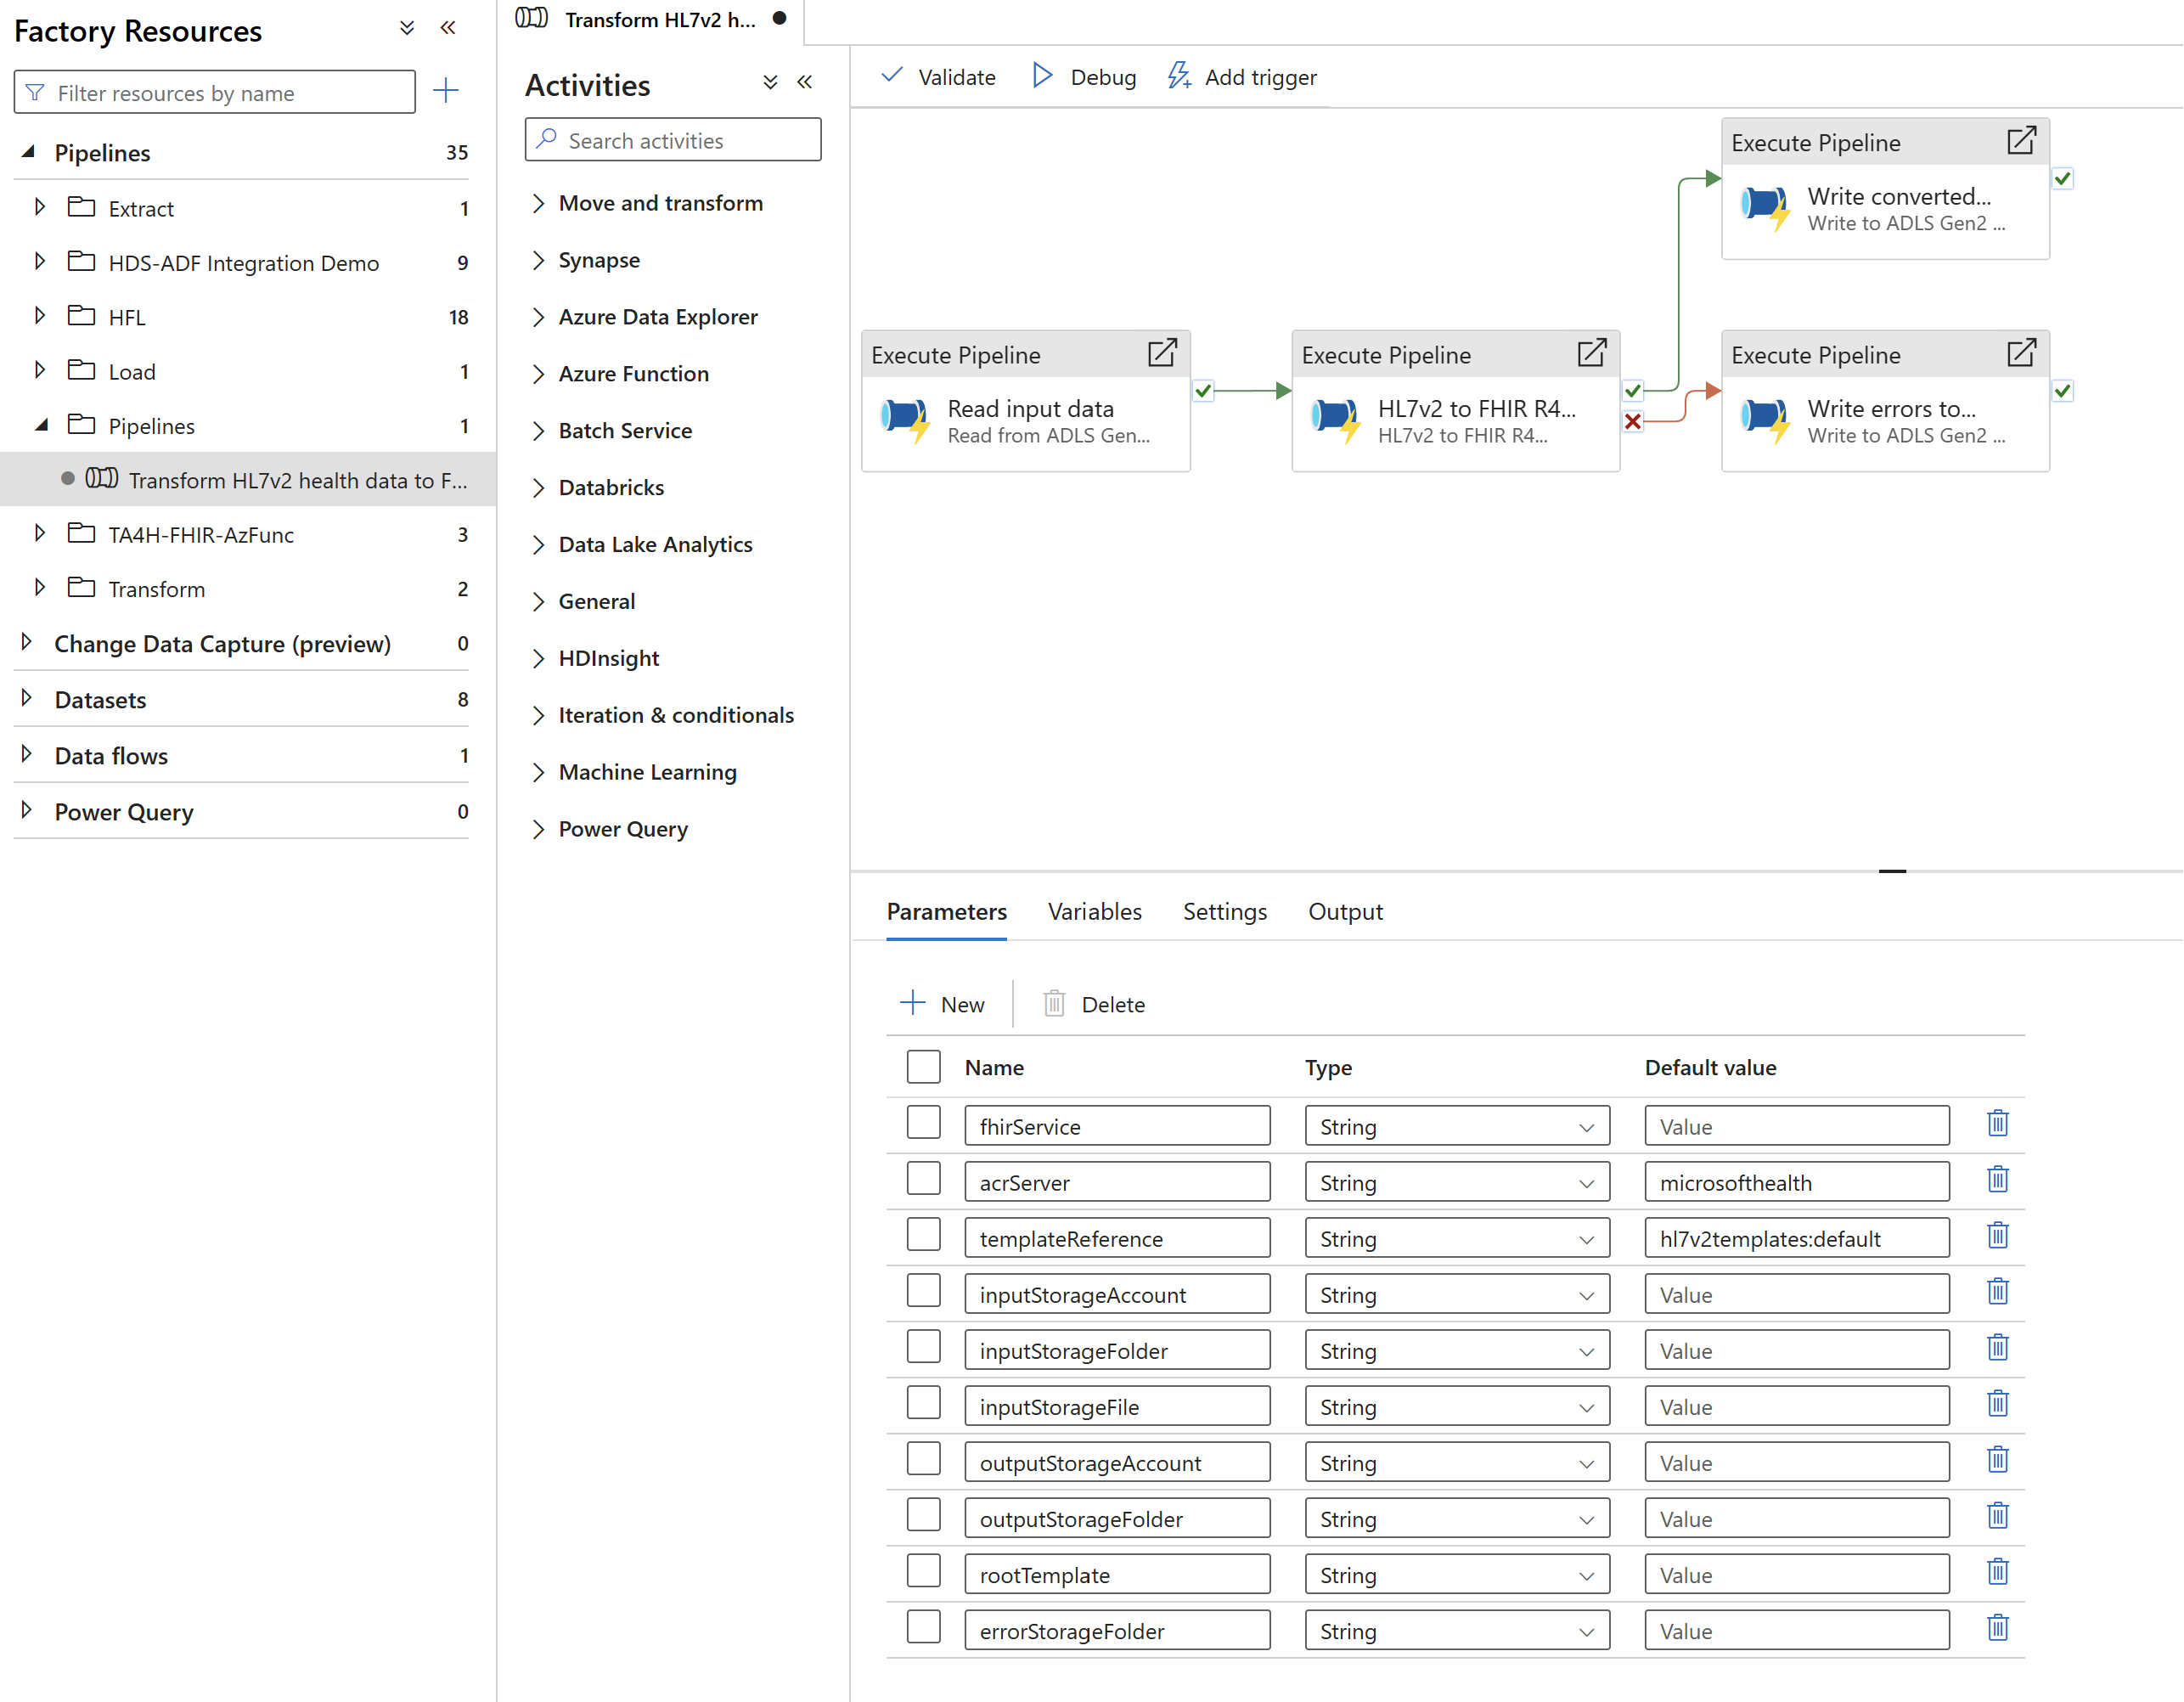
If needed, you can make any modifications to the pipelines/activities to fit your scenario (for example: if you don't intend to persist the results in a destination ADLS Gen2 storage account, you can modify the pipeline to remove the Write converted result to ADLS Gen2 pipeline altogether).
Select the Parameters tab and provide values based your configuration. Some of the values are based on the resources setup as part of the prerequisites.
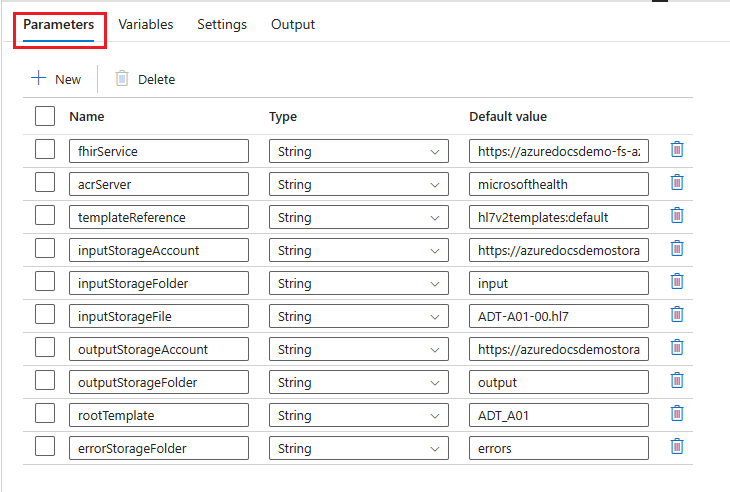
- fhirService – Provide the URL of the FHIR service to target for the
$convert-dataoperation. For example:https://**myservice-fhir**.fhir.azurehealthcareapis.com/ - acrServer – Provide the name of the ACR server to pull the Liquid templates to use for conversion. The default option is set to
microsofthealth, which contains the predefined template collection published by Microsoft. To use your own template collection, replace this value with your ACR instance that hosts your templates and is registered to your FHIR service. - templateReference – Provide the reference to the image within the ACR that contains the Liquid templates to use for conversion. The default option is set to
hl7v2templates:defaultto pull the latest published Liquid templates for HL7v2 conversion by Microsoft. To use your own template collection, replace this value with the reference to the image within your ACR that hosts your templates and is registered to your FHIR service. - inputStorageAccount – The primary endpoint of the ADLS Gen2 storage account containing the input HL7v2 data to transform. For example:
https://**mystorage**.blob.core.windows.net. - inputStorageFolder – The configured container and folder path. For example:
**mycontainer**/**myHL7v2folder**.
Note
This can be a static folder path, or can be left blank and dynamically configured when setting up storage account triggers for this pipeline execution (refer to the section titled Executing a pipeline).
- inputStorageFile – The name of the file within the configured container.
- inputStorageAccount and inputStorageFolder that contains the HL7v2 data to transform. For example:
**myHL7v2file**.hl7.
Note
This can be a static folder path, or can be left blank and dynamically configured when setting up storage account triggers for this pipeline execution (refer to the section titled Executing a pipeline).
- outputStorageAccount – The primary endpoint of the ADLS Gen2 storage account to store the transformed FHIR bundle. For example:
https://**mystorage**.blob.core.windows.net. - outputStorageFolder – The container and folder path within the configured outputStorageAccount to which the transformed FHIR bundle JSON files are written to.
- rootTemplate – The root template to use while transforming the provided HL7v2 data. For example: ADT_A01, ADT_A02, ADT_A03, ADT_A04, ADT_A05, ADT_A08, ADT_A11, ADT_A13, ADT_A14, ADT_A15, ADT_A16, ADT_A25, ADT_A26, ADT_A27, ADT_A28, ADT_A29, ADT_A31, ADT_A47, ADT_A60, OML_O21, ORU_R01, ORM_O01, VXU_V04, SIU_S12, SIU_S13, SIU_S14, SIU_S15, SIU_S16, SIU_S17, SIU_S26, MDM_T01, MDM_T02.
Note
This can be a static folder path, or can be left blank and dynamically configured when setting up storage account triggers for this pipeline execution (refer to the section titled Executing a pipeline).
- errorStorageFolder - The container and folder path within the configured outputStorageAccount to which the errors encountered during execution are written. For example:
**mycontainer**/**myerrorfolder**.
- fhirService – Provide the URL of the FHIR service to target for the
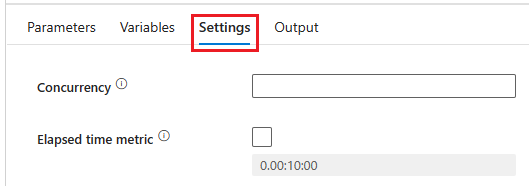
You can configure more pipeline settings under the Settings tab based on your requirements.
You can also optionally debug your pipeline to verify the setup. Select Debug.
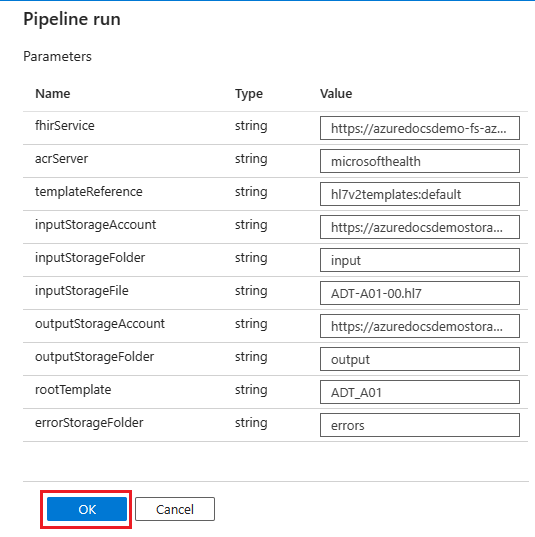
Verify your pipeline run parameters and select OK.
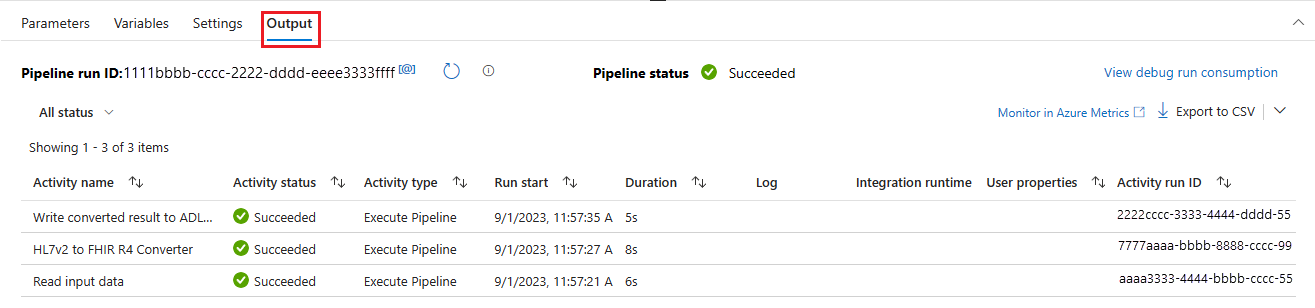
You can monitor the debug execution of the pipeline under the Output tab.
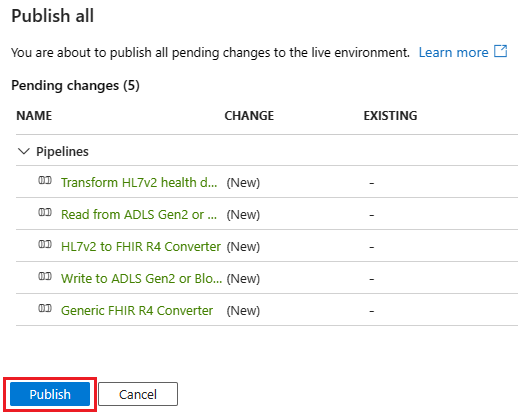
Once you're satisfied with your pipeline setup, select Publish all.

Select Publish to save your pipeline within your own ADF instance.


Executing a pipeline
You can execute (or run) a pipeline either manually, or by using a trigger. There are different types of triggers that can be created to help automate your pipeline execution. For example:
- Manual trigger
- Schedule trigger
- Tumbling window trigger
- Event-based trigger
For more information on the different trigger types and how to configure them, see Pipeline execution and triggers in Azure Data Factory or Azure Synapse Analytics.
By setting triggers, you can simulate batch transformation of HL7v2 data. The pipeline executes automatically based on the configured trigger parameters without requiring individual invocation of the $convert-data operation for each input message.
Important
In a scenario with batch processing of HL7v2 messages, this template does not take sequencing into account. Post processing will be needed if sequencing is a requirement.
Create a new storage event trigger
In the following example, a storage event trigger is used. The storage event trigger automatically triggers the pipeline whenever a new HL7v2 data blob file is uploaded for processing to the ADLS Gen2 storage account.
To configure the pipeline to automatically run whenever a new HL7v2 blob file in the source ADLS Gen2 storage account is available to transform, follow these steps.
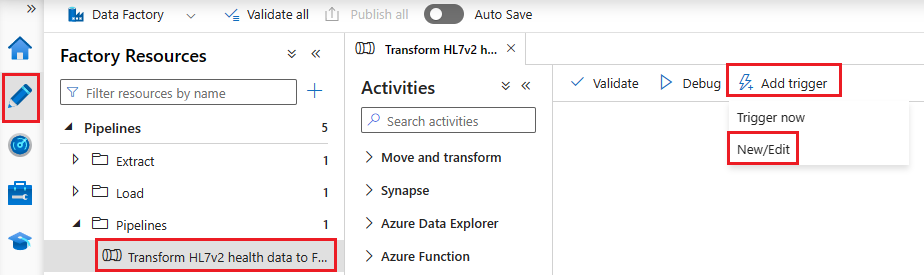
Select Author from the navigation menu. Select the pipeline configured in the previous section and select Add trigger and New/Edit from the menu bar.
In the Add triggers panel, select the Choose trigger dropdown, and then select New.
Enter a Name and Description for the trigger.
Select Storage events as the Type.
Configure the storage account details containing the source HL7v2 data to transform (for example: ADLS Gen2 storage account name, container name, blob path, etc.) to reference for the trigger.
Select Blob created as the Event.


- Select Continue to see the Data preview for the configured settings.
- Select Continue again at Data preview to continue configuring the trigger run parameters.
Configure trigger run parameters
Triggers not only define when to run a pipeline, they also include parameters that are passed to the pipeline execution. You can configure pipeline parameters dynamically using the trigger run parameters.
The storage event trigger captures the folder path and file name of the blob into the properties @triggerBody().folderPath and @triggerBody().fileName. To use the values of these properties in a pipeline, you must map the properties to pipeline parameters. After mapping the properties to parameters, you can access the values captured by the trigger through the @pipeline().parameters.parameterName expression throughout the pipeline. For more information, see Reference trigger metadata in pipeline runs.
For the Transform HL7v2 health data to FHIR R4 format and write to ADLS Gen2 template, the storage event trigger properties can be used to configure certain pipeline parameters.
Note
If no value is supplied during configuration, then the previously configured default value will be used for each parameter.
In the New trigger pane, within the Trigger Run Parameters options, use the following values:
- For inputStorageFolder use
@triggerBody().folderPath. This parameter provides the runtime value for this parameter based on the folder path associated with the event triggered (for example: folder path of the new HL7v2 blob created/updated in the storage account configured in the trigger). - For inputStorageFile use
@triggerBody().fileName. This parameter provides the runtime value for this parameter based on the file associated with the event triggered (for example: file name of the new HL7v2 blob created/updated in the storage account configured in the trigger). - For rootTemplate specify the name of the template to be used for the pipeline executions associated with this trigger (for example:
ADT_A01).
- For inputStorageFolder use
Select OK to create the new trigger. Be sure to select Publish on the menu bar to begin your trigger running on the defined schedule.


After the trigger is published, it can be triggered manually using the Trigger now option. If the start time was set for a value in the past, the pipeline starts immediately.
Monitoring pipeline runs
Triggered runs and their associated pipeline runs can be viewed in the Monitor tab. Here, users can browse when each pipeline ran, how long it took to execute, and potentially debug any problems that arose.

Pipeline execution results
Transformed FHIR R4 results
Successful pipeline executions result in the transformed FHIR R4 bundles as JSON files in the configured destination ADLS Gen2 storage account and container.

Errors
Errors encountered during conversion as part of the pipeline execution result in error details captured as a JSON file in the configured error destination ADLS Gen2 storage account and container. For information on how to troubleshoot $convert-data, see Troubleshoot $convert-data.

Next steps
Configure settings for $convert-data
Note
FHIR® is a registered trademark of HL7 and is used with the permission of HL7.