Note
Access to this page requires authorization. You can try signing in or changing directories.
Access to this page requires authorization. You can try changing directories.
Important
Azure Lab Services will be retired on June 28, 2027. For more information, see the retirement guide.
Canvas Learning Management System (LMS) is a cloud-based learning management system that provides one place for course content, quizzes, and grades for both educators and students. In this article, you learn how to add the Azure Lab Services app to Canvas. Educators can create labs from within Canvas and students will see their lab VMs alongside their other material for a course.
Learn more about the benefits of using Azure Lab Services within Canvas.
To configure Canvas to use Azure Lab Services, go through the one-time step to enable the Azure Lab Services app in Canvas. Next, you can then add the Azure Lab Services app to your course.
If you've already configured your course to use Azure Lab Services, learn how you can Create and manage labs in Canvas.
Note
This article references features available in lab plans, which replaced lab accounts.
Prerequisites
- An Azure lab plan. If you don't have a lab plan yet, follow the steps in Quickstart: Set up resources to create labs.
Your Canvas account needs Admin permissions to add the Azure Lab Services app to Canvas.
To link lab plans, your Azure account needs the following permissions. Learn how to assign Microsoft Entra roles to users.
- Reader role on the Azure subscription.
- Contributor role on the resource group that contains your lab plan.
- Write access to the lab plan.
Enable the Azure Lab Services app in Canvas
The first step to let users access their labs and lab plans through Canvas is to enable the Azure Lab Services app in Canvas. To use a third-party application, such as Azure Lab Services, in Canvas, you have to enable the corresponding developer key in Canvas.
The Canvas developer key for the Azure Lab Services app is an inherited key, also referred to as a global developer key. Learn more about developer keys in the Canvas Community Hub.
To enable the developer key for the Azure Lab Services app:
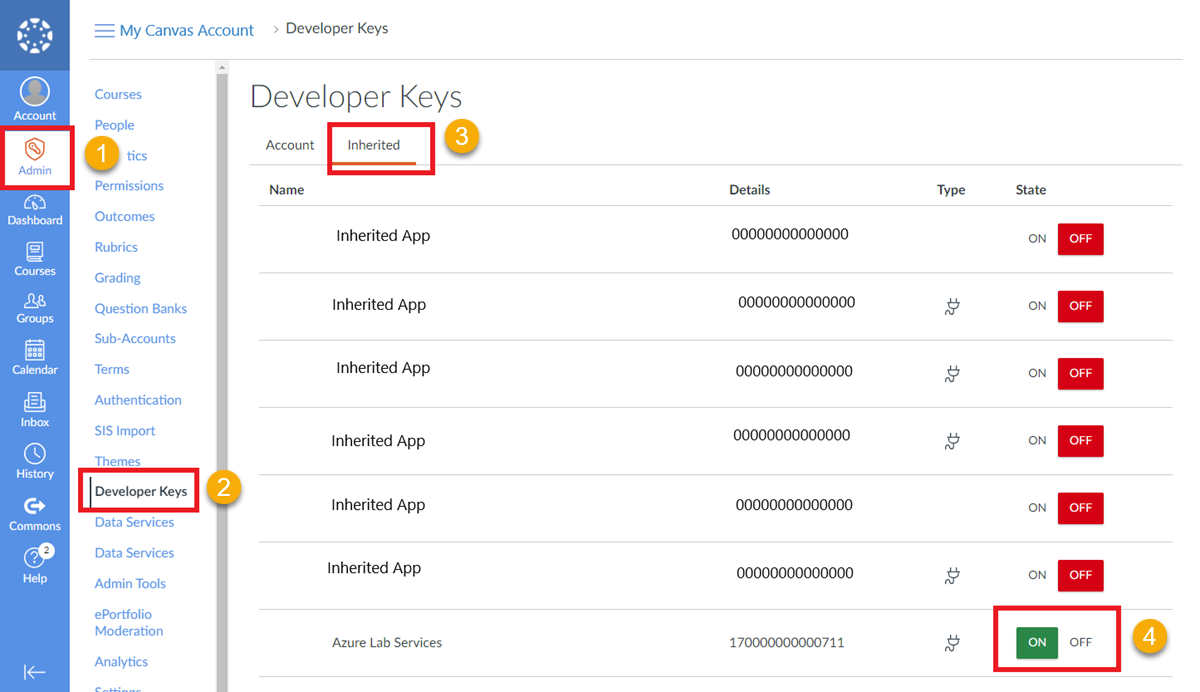
In Canvas, select the Admin page.
Select Developer Keys in the left navigation.
Select the Inherited tab of the developer keys.
In the list, change the state of the Azure Lab Services entry to On.

Add Azure Lab Services app to an account (optional)
You can enable the Azure Lab Services app for a Canvas course in either of two ways:
Add the Azure Lab Services app at the Canvas account level.
Add the Azure Lab Services app for a specific course in Canvas.
When you add the app at the Canvas account level, you avoid that you have to add the app for every individual course. If you have multiple courses that use Azure Lab Services, adding the app at the account level might be quicker. After adding the app for the Canvas account, you only have to enable the Azure Lab Services app in the course navigation.
To add the app at the Canvas account level:
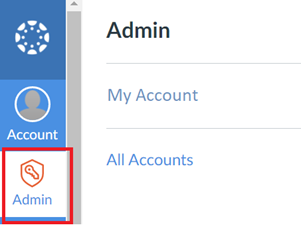
In Canvas, select the Admin menu.
Select the account that you want to add the Azure Lab Services app to. Alternatively, select All Accounts to add the Azure Lab Services app to all accounts for the Canvas Learning Management System (LMS) instance.
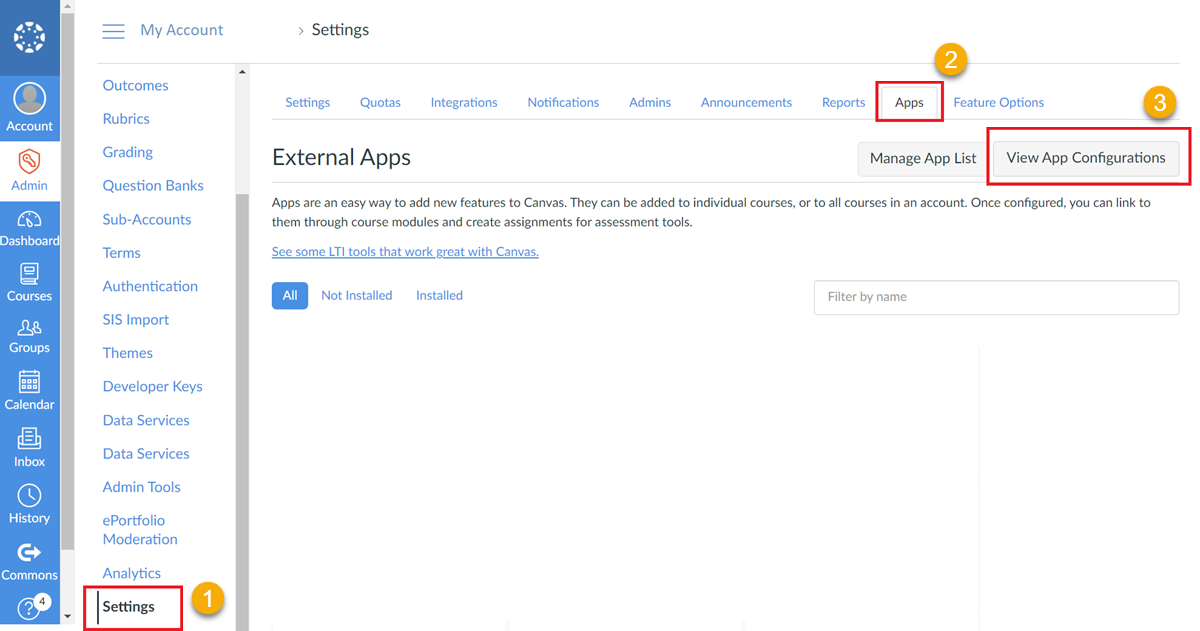
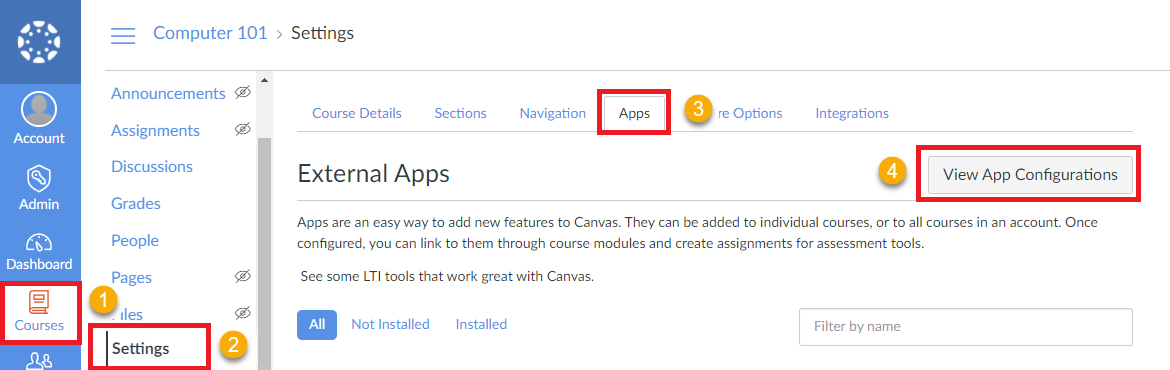
Choose Settings, and then select the Apps tab.
Select View App Configurations button at the top right of the page.
Select the + App button at the top right of the page.
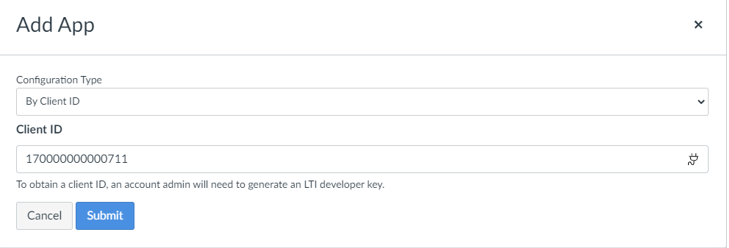
On the Add App dialog, in the Configuration Type dropdown, choose By Client ID. Enter the Azure Lab Services client ID, which is 170000000000711, into the Client ID field. Select the Submit button.
When the Add App dialog asks Tool "Azure Lab Services" found for client ID 170000000000711. Would you like to install it?, select Install.

The Azure Lab Services app is now available for all courses in that account.
Add Azure Lab Services to a course
Next, you associate the Azure Lab Services app with a course in Canvas. You have two options to configure a course in Canvas to use Azure Lab Services:
If you added the Azure Lab Services app at the Canvas account level, enable the app in the course navigation.
Otherwise, add the Azure Lab Services app to a course.
Add the Azure Lab Services app to a course
You now add the Azure Lab Services app to a specific course in Canvas.
In Canvas, go to the course that will use Azure Lab Services.
Choose Settings, and then select the Apps tab.
Select View App Configurations button at the top right of the page.
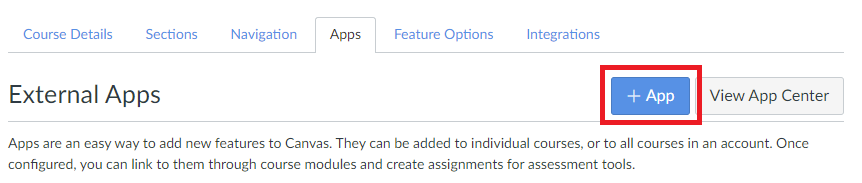
Select the + App button at the top right of the page.
On the Add App dialog, in the Configuration Type dropdown, choose By Client ID. Enter the Azure Lab Services client ID, which is 170000000000711, into the Client ID field. Select the Submit button.
When the Add App dialog asks Tool "Azure Lab Services" found for client ID 170000000000711. Would you like to install it?, select Install.
The Azure Lab Services app takes a few moments to show in the course navigation list.

You can skip to Link a lab plan to a course to finalize the configuration of Canvas.
Enable Azure Lab Services in course navigation
If you previously added the app at the Canvas account level, you don't have to add the app for a specific course. Instead, you enable the app in the Canvas course navigation:
In Canvas, go to the course that uses Azure Lab Services.
Choose Settings, then select the Navigation tab.
Find the Azure Lab Services entry, select the three vertical dots, and then select Enable.

Select Save.
Link lab plans to Canvas
After you enable the Azure Lab Services app in Canvas and associate it with a course, you link specific lab plans to Canvas. You can only use linked lab plans for creating labs in Canvas.
To link lab plans to Canvas, your Canvas account must be a Canvas administrator. In addition, your Azure account must have the following permissions on the lab plan.
- Reader role on the subscription.
- Contributor role on the resource group that contains your lab plan.
Perform the following steps to link lab plans to Canvas:
In Canvas, go to a course for which you previously added the Azure Lab Services app.
Open the Azure Lab Services app in the course.
Select the tool icon in the upper right to see the list all the lab plans.
Choose the lab plans you want to link to Canvas from the list.
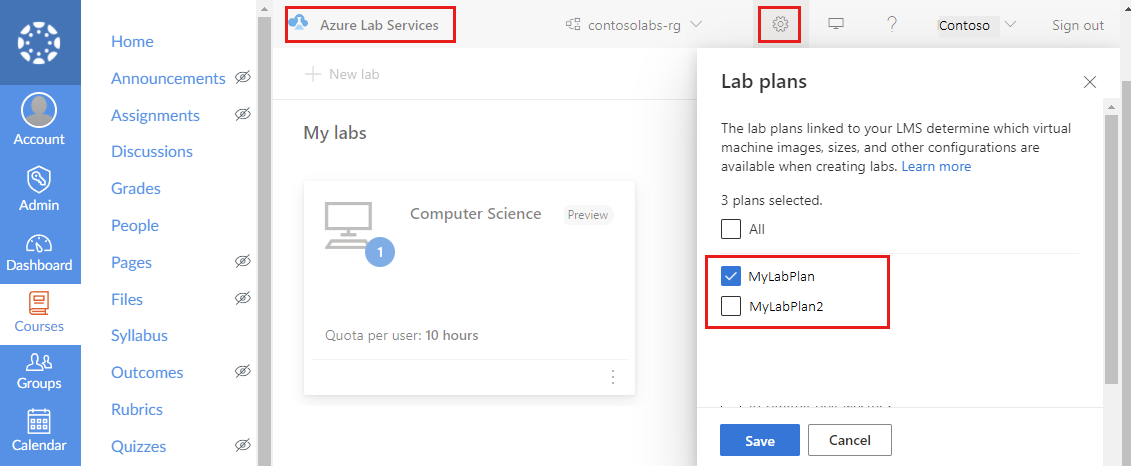
Select Save.
In the Azure portal, the LMS settings page for the lab plan shows that you linked the lab plan successfully to Canvas.


Next steps
You've successfully configured Canvas to access Azure Lab Services. You can now continue to create and manage labs for your courses in Canvas.
See the following articles:
- As an admin, add educators as lab creators to the lab plan in the Azure portal.
- As an educator, create and manage labs in Canvas.
- As an educator, manage user lists in Canvas.
- As a student, access a lab VM within Canvas.