Collect production data from models deployed for real-time inferencing
APPLIES TO:
 Azure CLI ml extension v2 (current)
Python SDK azure-ai-ml v2 (current)
Azure CLI ml extension v2 (current)
Python SDK azure-ai-ml v2 (current)
In this article, you learn how to use Azure Machine Learning Data collector to collect production inference data from a model that is deployed to an Azure Machine Learning managed online endpoint or a Kubernetes online endpoint.
You can enable data collection for new or existing online endpoint deployments. Azure Machine Learning data collector logs inference data in Azure Blob Storage. Data collected with the Python SDK is automatically registered as a data asset in your Azure Machine Learning workspace. This data asset can be used for model monitoring.
If you're interested in collecting production inference data for an MLflow model that is deployed to a real-time endpoint, see Data collection for MLflow models.
Prerequisites
Before following the steps in this article, make sure you have the following prerequisites:
The Azure CLI and the
mlextension to the Azure CLI. For more information, see Install, set up, and use the CLI (v2).Important
The CLI examples in this article assume that you are using the Bash (or compatible) shell. For example, from a Linux system or Windows Subsystem for Linux.
An Azure Machine Learning workspace. If you don't have one, use the steps in the Install, set up, and use the CLI (v2) to create one.
- Azure role-based access controls (Azure RBAC) are used to grant access to operations in Azure Machine Learning. To perform the steps in this article, your user account must be assigned the owner or contributor role for the Azure Machine Learning workspace, or a custom role allowing
Microsoft.MachineLearningServices/workspaces/onlineEndpoints/*. For more information, see Manage access to an Azure Machine Learning workspace.
Have a registered model that you can use for deployment. If you don't have a registered model, see Register your model as an asset in Machine Learning.
Create an Azure Machine Learning online endpoint. If you don't have an existing online endpoint, see Deploy and score a machine learning model by using an online endpoint.
Perform custom logging for model monitoring
Data collection with custom logging allows you to log pandas DataFrames directly from your scoring script before, during, and after any data transformations. With custom logging, tabular data is logged in real time to your workspace Blob Storage or a custom blob storage container. Your model monitors can consume the data from storage.
Update your scoring script with custom logging code
To begin, add custom logging code to your scoring script (score.py). For custom logging, you need the azureml-ai-monitoring package. For more information on this package, see the comprehensive PyPI page for the data collector SDK.
Import the
azureml-ai-monitoringpackage by adding the following line to the top of the scoring script:from azureml.ai.monitoring import CollectorDeclare your data collection variables (up to five of them) in your
init()function:Note
If you use the names
model_inputsandmodel_outputsfor yourCollectorobjects, the model monitoring system automatically recognizes the automatically registered data assets to provide for a more seamless model monitoring experience.global inputs_collector, outputs_collector inputs_collector = Collector(name='model_inputs') outputs_collector = Collector(name='model_outputs')By default, Azure Machine Learning raises an exception if there's a failure during data collection. Optionally, you can use the
on_errorparameter to specify a function to run if logging failure happens. For instance, using theon_errorparameter in the following code, Azure Machine Learning logs the error rather than throwing an exception:inputs_collector = Collector(name='model_inputs', on_error=lambda e: logging.info("ex:{}".format(e)))In your
run()function, use thecollect()function to log DataFrames before and after scoring. Thecontextis returned from the first call tocollect(), and it contains information to correlate the model inputs and model outputs later.context = inputs_collector.collect(data) result = model.predict(data) outputs_collector.collect(result, context)Note
Currently, the
collect()API logs only pandas DataFrames. If the data is not in a DataFrame when passed tocollect(), it won't get logged to storage and an error will be reported.
The following code is an example of a full scoring script (score.py) that uses the custom logging Python SDK.
import pandas as pd
import json
from azureml.ai.monitoring import Collector

def init():
  global inputs_collector, outputs_collector, inputs_outputs_collector

  # instantiate collectors with appropriate names, make sure align with deployment spec
  inputs_collector = Collector(name='model_inputs')
  outputs_collector = Collector(name='model_outputs')

def run(data):
  # json data: { "data" : {  "col1": [1,2,3], "col2": [2,3,4] } }
  pdf_data = preprocess(json.loads(data))

  # tabular data: {  "col1": [1,2,3], "col2": [2,3,4] }
  input_df = pd.DataFrame(pdf_data)

  # collect inputs data, store correlation_context
  context = inputs_collector.collect(input_df)

  # perform scoring with pandas Dataframe, return value is also pandas Dataframe
  output_df = predict(input_df)

  # collect outputs data, pass in correlation_context so inputs and outputs data can be correlated later
  outputs_collector.collect(output_df, context)

  return output_df.to_dict()

def preprocess(json_data):
  # preprocess the payload to ensure it can be converted to pandas DataFrame
  return json_data["data"]

def predict(input_df):
  # process input and return with outputs
  ...

  return output_df
Update your scoring script to log custom unique IDs
In addition to logging pandas DataFrames directly within your scoring script, you can log data with unique IDs of your choice. These IDs can come from your application, an external system, or you can generate them. If you don't provide a custom ID, as detailed in this section, the Data collector will autogenerate a unique correlationid to help you correlate your model's inputs and outputs later. If you supply a custom ID, the correlationid field in the logged data will contain the value of your supplied custom ID.
First complete the steps in the previous section, then import the
azureml.ai.monitoring.contextpackage by adding the following line to your scoring script:from azureml.ai.monitoring.context import BasicCorrelationContextIn your scoring script, instantiate a
BasicCorrelationContextobject and pass in theidyou wish to log for that row. We recommend that thisidbe a unique ID from your system, so that you can uniquely identify each logged row from your Blob Storage. Pass this object into yourcollect()API call as a parameter:# create a context with a custom unique id artificial_context = BasicCorrelationContext(id='test') # collect inputs data, store correlation_context context = inputs_collector.collect(input_df, artificial_context)Ensure that you pass in the context into your
outputs_collectorso that your model inputs and outputs have the same unique ID logged with them, and they can be easily correlated later:# collect outputs data, pass in context so inputs and outputs data can be correlated later outputs_collector.collect(output_df, context)
The following code is an example of a full scoring script (score.py) that logs custom unique IDs.
import pandas as pd
import json
from azureml.ai.monitoring import Collector
from azureml.ai.monitoring.context import BasicCorrelationContext
def init():
global inputs_collector, outputs_collector, inputs_outputs_collector
# instantiate collectors with appropriate names, make sure align with deployment spec
inputs_collector = Collector(name='model_inputs')
outputs_collector = Collector(name='model_outputs')
def run(data):
# json data: { "data" : { "col1": [1,2,3], "col2": [2,3,4] } }
pdf_data = preprocess(json.loads(data))
# tabular data: { "col1": [1,2,3], "col2": [2,3,4] }
input_df = pd.DataFrame(pdf_data)
  # create a context with a custom unique id
  artificial_context = BasicCorrelationContext(id='test')

  # collect inputs data, store correlation_context
  context = inputs_collector.collect(input_df, artificial_context)
# perform scoring with pandas Dataframe, return value is also pandas Dataframe
output_df = predict(input_df)
  # collect outputs data, pass in context so inputs and outputs data can be correlated later
  outputs_collector.collect(output_df, context)
return output_df.to_dict()
def preprocess(json_data):
# preprocess the payload to ensure it can be converted to pandas DataFrame
return json_data["data"]
def predict(input_df):
# process input and return with outputs
...
return output_df
Collect data for model performance monitoring
If you want to use your collected data for model performance monitoring, it's important that each logged row has a unique correlationid that can be used to correlate the data with ground truth data, when such data becomes available. The data collector will autogenerate a unique correlationid for each logged row and include this autogenerated ID in the correlationid field in the JSON object. For more information on the JSON schema, see store collected data in blob storage.
If you want to use your own unique ID for logging with your production data, we recommend that you log this ID as a separate column in your pandas DataFrame, since the data collector batches requests that are in close proximity to one another. By logging the correlationid as a separate column, it will be readily available downstream for integration with ground truth data.
Update your dependencies
Before you can create your deployment with the updated scoring script, you need to create your environment with the base image mcr.microsoft.com/azureml/openmpi4.1.0-ubuntu20.04 and the appropriate conda dependencies. Thereafter, you can build the environment, using the specification in the following YAML.
channels:
  - conda-forge
dependencies:
  - python=3.8
  - pip=22.3.1
  - pip:
      - azureml-defaults==1.38.0
      - azureml-ai-monitoring~=0.1.0b1
name: model-env
Update your deployment YAML
Next, you create the deployment YAML. To create the deployment YAML, include the data_collector attribute and enable data collection for the Collector objects, model_inputs and model_outputs, that you instantiated earlier via the custom logging Python SDK:
data_collector:
  collections:
    model_inputs:
      enabled: 'True'
    model_outputs:
      enabled: 'True'
The following code is an example of a comprehensive deployment YAML for a managed online endpoint deployment. You should update the deployment YAML according to your scenario. For more examples on how to format your deployment YAML for inference data logging, see Azure model data collector examples.
$schema: https://azuremlschemas.azureedge.net/latest/managedOnlineDeployment.schema.json
name: blue
endpoint_name: my_endpoint
model: azureml:iris_mlflow_model@latest
environment:
  image: mcr.microsoft.com/azureml/openmpi4.1.0-ubuntu20.04
  conda_file: model/conda.yaml
code_configuration:
  code: scripts
  scoring_script: score.py
instance_type: Standard_F2s_v2
instance_count: 1
data_collector:
  collections:
    model_inputs:
      enabled: 'True'
    model_outputs:
      enabled: 'True'
Optionally, you can adjust the following extra parameters for your data_collector:
data_collector.rolling_rate: The rate to partition the data in storage. Choose from the values:Minute,Hour,Day,Month, orYear.data_collector.sampling_rate: The percentage, represented as a decimal rate, of data to collect. For instance, a value of1.0represents collecting 100% of data.data_collector.collections.<collection_name>.data.name: The name of the data asset to register with the collected data.data_collector.collections.<collection_name>.data.path: The full Azure Machine Learning datastore path where the collected data should be registered as a data asset.data_collector.collections.<collection_name>.data.version: The version of the data asset to be registered with the collected data in blob storage.
Collect data to a custom blob storage container
You can use the data collector to collect your production inference data to a custom blob storage container by following these steps:
Connect the storage container to an Azure Machine Learning datastore. For more information on connecting the storage container to the Azure Machine Learning datastore, see create datastores.
Check that your Azure Machine Learning endpoint has the necessary permissions to write to the datastore destination.
The data collector supports both system assigned managed identities (SAMIs) and user assigned managed identities (UAMIs). Add the identity to your endpoint. Assign the
Storage Blob Data Contributorrole to this identity with the Blob storage container to be used as the data destination. To learn how to use managed identities in Azure, see assign Azure roles to a managed identity.Update your deployment YAML to include the
dataproperty within each collection.- The required parameter,
data.name, specifies the name of the data asset to be registered with the collected data. - The required parameter,
data.path, specifies the fully formed Azure Machine Learning datastore path, which is connected to your Azure Blob Storage container. - The optional parameter,
data.version, specifies the version of the data asset (defaults to 1).
The following YAML configuration shows an example of how to include the
dataproperty within each collection.data_collector: collections: model_inputs: enabled: 'True' data: name: my_model_inputs_data_asset path: azureml://datastores/workspaceblobstore/paths/modelDataCollector/my_endpoint/blue/model_inputs version: 1 model_outputs: enabled: 'True' data: name: my_model_outputs_data_asset path: azureml://datastores/workspaceblobstore/paths/modelDataCollector/my_endpoint/blue/model_outputs version: 1Note
You can also use the
data.pathparameter to point to datastores in different Azure subscriptions by providing a path that follows the format:azureml://subscriptions/<sub_id>/resourcegroups/<rg_name>/workspaces/<ws_name>/datastores/<datastore_name>/paths/<path>- The required parameter,
Create your deployment with data collection
Deploy the model with custom logging enabled:
$ az ml online-deployment create -f deployment.YAML
For more information on how to format your deployment YAML for data collection with Kubernetes online endpoints, see the CLI (v2) Azure Arc-enabled Kubernetes online deployment YAML schema.
For more information on how to format your deployment YAML for data collection with managed online endpoints, see CLI (v2) managed online deployment YAML schema.
Perform payload logging
In addition to custom logging with the provided Python SDK, you can collect request and response HTTP payload data directly without the need to augment your scoring script (score.py).
To enable payload logging, in your deployment YAML, use the names
requestandresponse:$schema: http://azureml/sdk-2-0/OnlineDeployment.json endpoint_name: my_endpoint name: blue model: azureml:my-model-m1:1 environment: azureml:env-m1:1 data_collector: collections: request: enabled: 'True' response: enabled: 'True'Deploy the model with payload logging enabled:
$ az ml online-deployment create -f deployment.YAML
With payload logging, the collected data is not guaranteed to be in tabular format. Therefore, if you want to use collected payload data with model monitoring, you'll be required to provide a preprocessing component to make the data tabular. If you're interested in a seamless model monitoring experience, we recommend using the custom logging Python SDK.
As your deployment is used, the collected data flows to your workspace Blob storage. The following JSON code is an example of an HTTP request collected:
{"specversion":"1.0",
"id":"19790b87-a63c-4295-9a67-febb2d8fbce0",
"source":"/subscriptions/d511f82f-71ba-49a4-8233-d7be8a3650f4/resourceGroups/mire2etesting/providers/Microsoft.MachineLearningServices/workspaces/mirmasterenvws/onlineEndpoints/localdev-endpoint/deployments/localdev",
"type":"azureml.inference.request",
"datacontenttype":"application/json",
"time":"2022-05-25T08:59:48Z",
"data":{"data": [  [1,2,3,4,5,6,7,8,9,10], [10,9,8,7,6,5,4,3,2,1]]},
"path":"/score",
"method":"POST",
"contentrange":"bytes 0-59/*",
"correlationid":"f6e806c9-1a9a-446b-baa2-901373162105","xrequestid":"f6e806c9-1a9a-446b-baa2-901373162105"}
And the following JSON code is another example of an HTTP response collected:
{"specversion":"1.0",
"id":"bbd80e51-8855-455f-a719-970023f41e7d",
"source":"/subscriptions/d511f82f-71ba-49a4-8233-d7be8a3650f4/resourceGroups/mire2etesting/providers/Microsoft.MachineLearningServices/workspaces/mirmasterenvws/onlineEndpoints/localdev-endpoint/deployments/localdev",
"type":"azureml.inference.response",
"datacontenttype":"application/json",
"time":"2022-05-25T08:59:48Z",
"data":[11055.977245525679, 4503.079536107787],
"contentrange":"bytes 0-38/39",
"correlationid":"f6e806c9-1a9a-446b-baa2-901373162105","xrequestid":"f6e806c9-1a9a-446b-baa2-901373162105"}
Store collected data in blob storage
Data collection allows you to log production inference data to a Blob storage destination of your choice. The data destination settings are configurable at the collection_name level.
Blob storage output/format:
By default, the collected data is stored at the following path in your workspace Blob Storage:
azureml://datastores/workspaceblobstore/paths/modelDataCollector.The final path in the blob will be appended with
{endpoint_name}/{deployment_name}/{collection_name}/{yyyy}/{MM}/{dd}/{HH}/{instance_id}.jsonl.Each line in the file is a JSON object representing a single inference request/response that was logged.
Note
collection_name refers to the data collection name (e.g., model_inputs or model_outputs).
instance_id is a unique id identifying the grouping of data which was logged.
The collected data follows the following JSON schema. The collected data is available from the data key and additional metadata is provided.
{"specversion":"1.0",
"id":"725aa8af-0834-415c-aaf5-c76d0c08f694",
"source":"/subscriptions/636d700c-4412-48fa-84be-452ac03d34a1/resourceGroups/mire2etesting/providers/Microsoft.MachineLearningServices/workspaces/mirmasterws/onlineEndpoints/localdev-endpoint/deployments/localdev",
"type":"azureml.inference.inputs",
"datacontenttype":"application/json",
"time":"2022-12-01T08:51:30Z",
"data":[{"label":"DRUG","pattern":"aspirin"},{"label":"DRUG","pattern":"trazodone"},{"label":"DRUG","pattern":"citalopram"}],
"correlationid":"3711655d-b04c-4aa2-a6c4-6a90cbfcb73f","xrequestid":"3711655d-b04c-4aa2-a6c4-6a90cbfcb73f",
"modelversion":"default",
"collectdatatype":"pandas.core.frame.DataFrame",
"agent":"monitoring-sdk/0.1.2",
"contentrange":"bytes 0-116/117"}
Tip
Line breaks are shown only for readability. In your collected .jsonl files, there won't be any line breaks.
Store large payloads
If the payload of your data is greater than 4 MB, there will be an event in the {instance_id}.jsonl file contained within the {endpoint_name}/{deployment_name}/request/.../{instance_id}.jsonl path that points to a raw file path, which should have the following path: blob_url/{blob_container}/{blob_path}/{endpoint_name}/{deployment_name}/{rolled_time}/{instance_id}.jsonl. The collected data will exist at this path.
Store binary data
With collected binary data, we show the raw file directly, with instance_id as the file name. Binary data is placed in the same folder as the request source group path, based on the rolling_rate. The following example reflects the path in the data field. The format is json, and line breaks are only shown for readability:
{
"specversion":"1.0",
"id":"ba993308-f630-4fe2-833f-481b2e4d169a",
"source":"/subscriptions//resourceGroups//providers/Microsoft.MachineLearningServices/workspaces/ws/onlineEndpoints/ep/deployments/dp",
"type":"azureml.inference.request",
"datacontenttype":"text/plain",
"time":"2022-02-28T08:41:07Z",
"data":"https://masterws0373607518.blob.core.windows.net/modeldata/mdc/%5Byear%5D%5Bmonth%5D%5Bday%5D-%5Bhour%5D_%5Bminute%5D/ba993308-f630-4fe2-833f-481b2e4d169a",
"path":"/score?size=1",
"method":"POST",
"contentrange":"bytes 0-80770/80771",
"datainblob":"true"
}
Data collector batching
If requests are sent within short time intervals of one another, the data collector batches them together into the same JSON object. For example, if you run a script to send sample data to your endpoint, and the deployment has data collection enabled, some of the requests can get batched together, depending on the time interval between them. If you're using data collection with Azure Machine Learning model monitoring, the model monitoring service handles each request independently. However, if you expect each logged row of data to have its own unique correlationid, you can include the correlationid as a column in the pandas DataFrame you're logging with the data collector. For more information on how you can include your unique correlationid as a column in the pandas DataFrame, see Collect data for model performance monitoring.
Here is an example of two logged requests that are batched together:
{"specversion":"1.0",
"id":"720b8867-54a2-4876-80eb-1fd6a8975770",
"source":"/subscriptions/79a1ba0c-35bb-436b-bff2-3074d5ff1f89/resourceGroups/rg-bozhlinmomoignite/providers/Microsoft.MachineLearningServices/workspaces/momo-demo-ws/onlineEndpoints/credit-default-mdc-testing-4/deployments/main2",
"type":"azureml.inference.model_inputs",
"datacontenttype":"application/json",
"time":"2024-03-05T18:16:25Z",
"data":[{"LIMIT_BAL":502970,"AGE":54,"BILL_AMT1":308068,"BILL_AMT2":381402,"BILL_AMT3":442625,"BILL_AMT4":320399,"BILL_AMT5":322616,"BILL_AMT6":397534,"PAY_AMT1":17987,"PAY_AMT2":78764,"PAY_AMT3":26067,"PAY_AMT4":24102,"PAY_AMT5":-1155,"PAY_AMT6":2154,"SEX":2,"EDUCATION":2,"MARRIAGE":2,"PAY_0":0,"PAY_2":0,"PAY_3":0,"PAY_4":0,"PAY_5":0,"PAY_6":0},{"LIMIT_BAL":293458,"AGE":35,"BILL_AMT1":74131,"BILL_AMT2":-71014,"BILL_AMT3":59284,"BILL_AMT4":98926,"BILL_AMT5":110,"BILL_AMT6":1033,"PAY_AMT1":-3926,"PAY_AMT2":-12729,"PAY_AMT3":17405,"PAY_AMT4":25110,"PAY_AMT5":7051,"PAY_AMT6":1623,"SEX":1,"EDUCATION":3,"MARRIAGE":2,"PAY_0":-2,"PAY_2":-2,"PAY_3":-2,"PAY_4":-2,"PAY_5":-1,"PAY_6":-1}],
"contentrange":"bytes 0-6794/6795",
"correlationid":"test",
"xrequestid":"test",
"modelversion":"default",
"collectdatatype":"pandas.core.frame.DataFrame",
"agent":"azureml-ai-monitoring/0.1.0b4"}
View the data in the studio UI
To view the collected data in Blob Storage from the studio UI:
Go to the Data tab in your Azure Machine Learning workspace:

Navigate to Datastores and select your workspaceblobstore (Default):
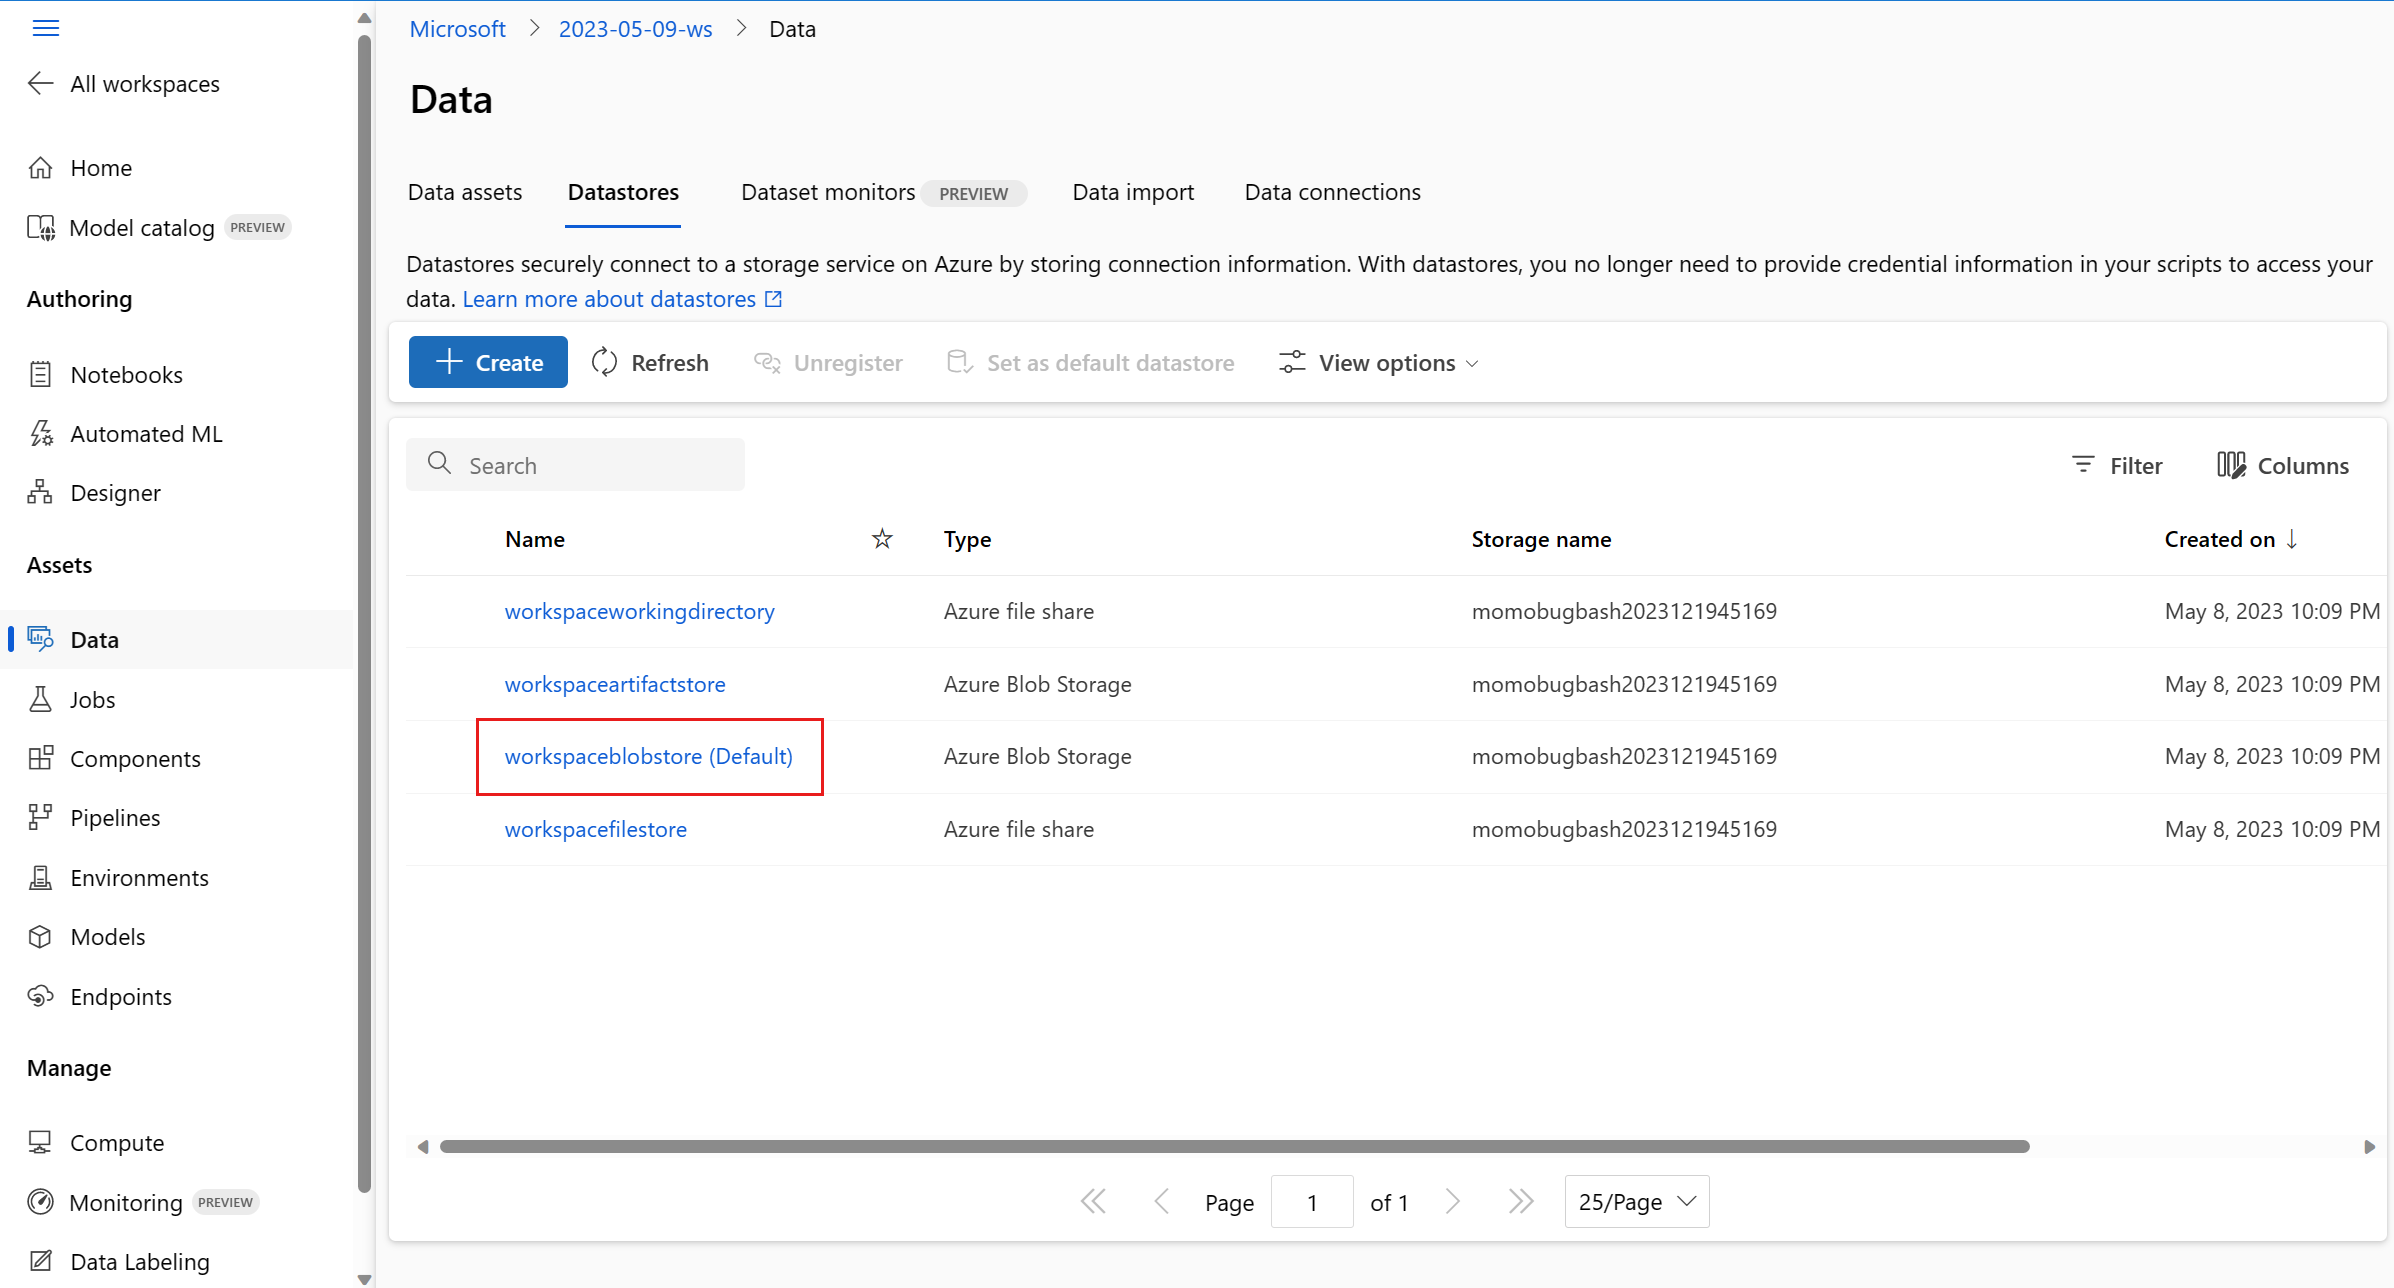
Use the Browse menu to view the collected production data:


Collect data for MLflow models
If you're deploying an MLflow model to an Azure Machine Learning online endpoint, you can enable production inference data collection with single toggle in the studio UI. If data collection is toggled on, Azure Machine Learning auto-instruments your scoring script with custom logging code to ensure that the production data is logged to your workspace Blob Storage. Your model monitors can then use the data to monitor the performance of your MLflow model in production.
While you're configuring the deployment of your model, you can enable production data collection. Under the Deployment tab, select Enabled for Data collection.
After you've enabled data collection, production inference data will be logged to your Azure Machine Learning workspace Blob Storage and two data assets will be created with names <endpoint_name>-<deployment_name>-model_inputs and <endpoint_name>-<deployment_name>-model_outputs. These data assets are updated in real time as you use your deployment in production. Your model monitors can then use the data assets to monitor the performance of your model in production.
Related content
Feedback
Coming soon: Throughout 2024 we will be phasing out GitHub Issues as the feedback mechanism for content and replacing it with a new feedback system. For more information see: https://aka.ms/ContentUserFeedback.
Submit and view feedback for