Note
Access to this page requires authorization. You can try signing in or changing directories.
Access to this page requires authorization. You can try changing directories.
This article describes the seamless integration between prompt flow and Semantic Kernel, and demonstrates how to evaluate Semantic Kernel plugins and planners by using prompt flow. In the rapidly evolving landscape of AI orchestration, a comprehensive evaluation of your plugins and planners is important for optimal performance.
Semantic Kernel is an open-source SDK that lets you easily combine Foundry Tools with programming languages like C# and Python to create AI apps that combine the best of both worlds. Semantic Kernel provides plugins and planners, which are powerful tools that use AI capabilities to optimize operations, thus driving efficiency and accuracy in planning.
As you build and add more plugins to planners, the error potential increases, so it's important to make sure they work as intended. Testing plugins and planners used to be a manual, time-consuming process. Now you can use prompt flow to automate this process.
The integration of Semantic Kernel with prompt flow allows you to:
- Harness the powerful AI orchestration capabilities of Semantic Kernel to enhance the efficiency and effectiveness of your prompt flows.
- Use prompt flow evaluation and experiment management to comprehensively assess the quality of your Semantic Kernel plugins and planners.
Prerequisites
Before you start developing the flow, you must add the Semantic Kernel package to your requirements.txt for the executor to install. For more information, see Manage prompt flow compute session.
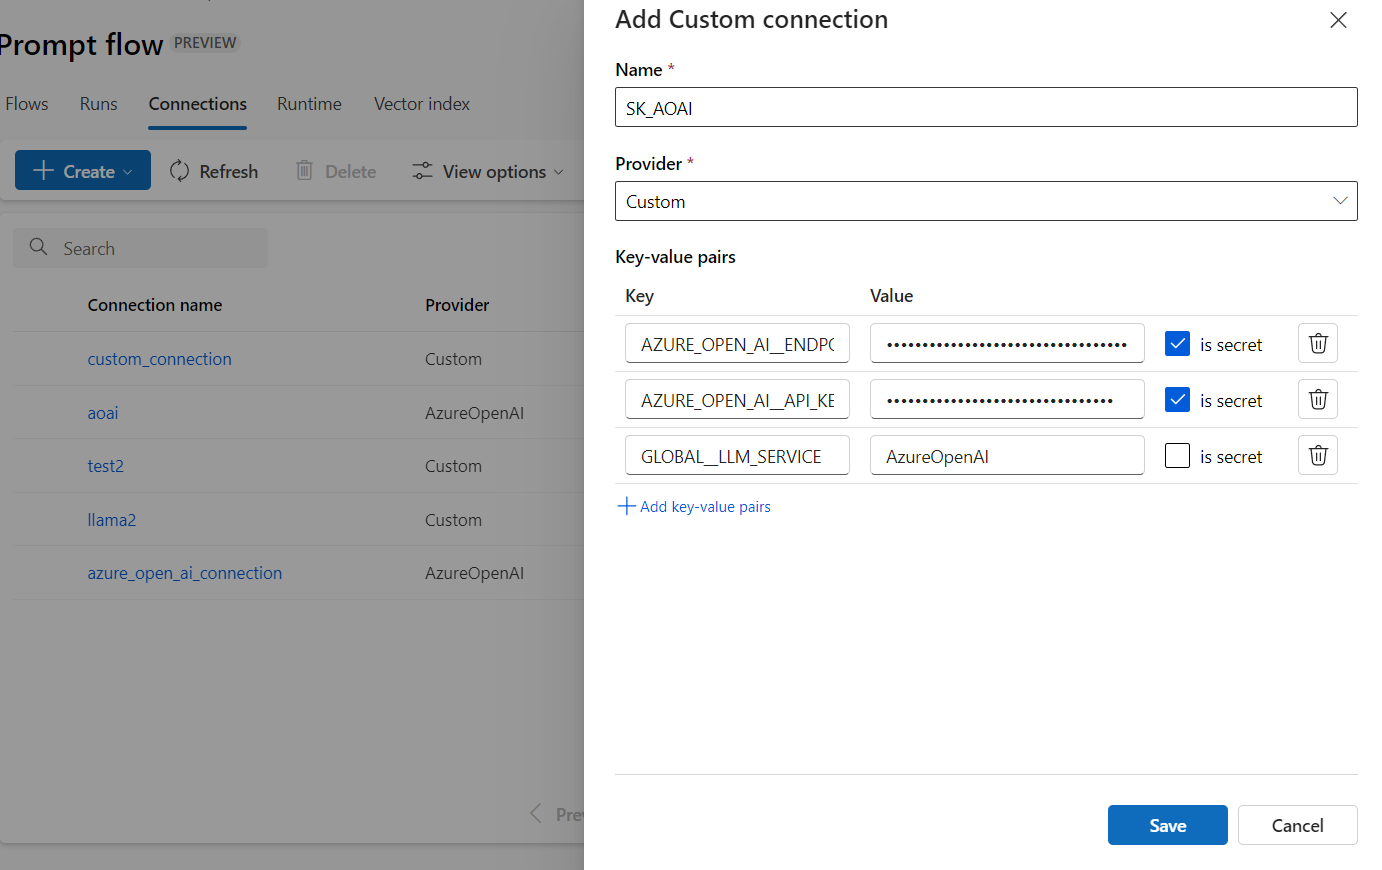
To use Semantic Kernel to consume Azure OpenAI or OpenAI resources in a prompt flow, you must create a custom connection.
Obtain the keys you specified for the resources in environment variables or an .env file.
Select Create from the Connection tab on the Azure Machine Learning studio Prompt flow page, and select Custom provider.
Convert the keys from environment variables to key-value pairs in the custom connection.
You can now use this custom connection to invoke your Azure OpenAI or OpenAI model within the flow.
Create a flow with Semantic Kernel
Similar to the integration of LangChain with prompt flow, Semantic Kernel supports Python and can operate in a Python node within a prompt flow.
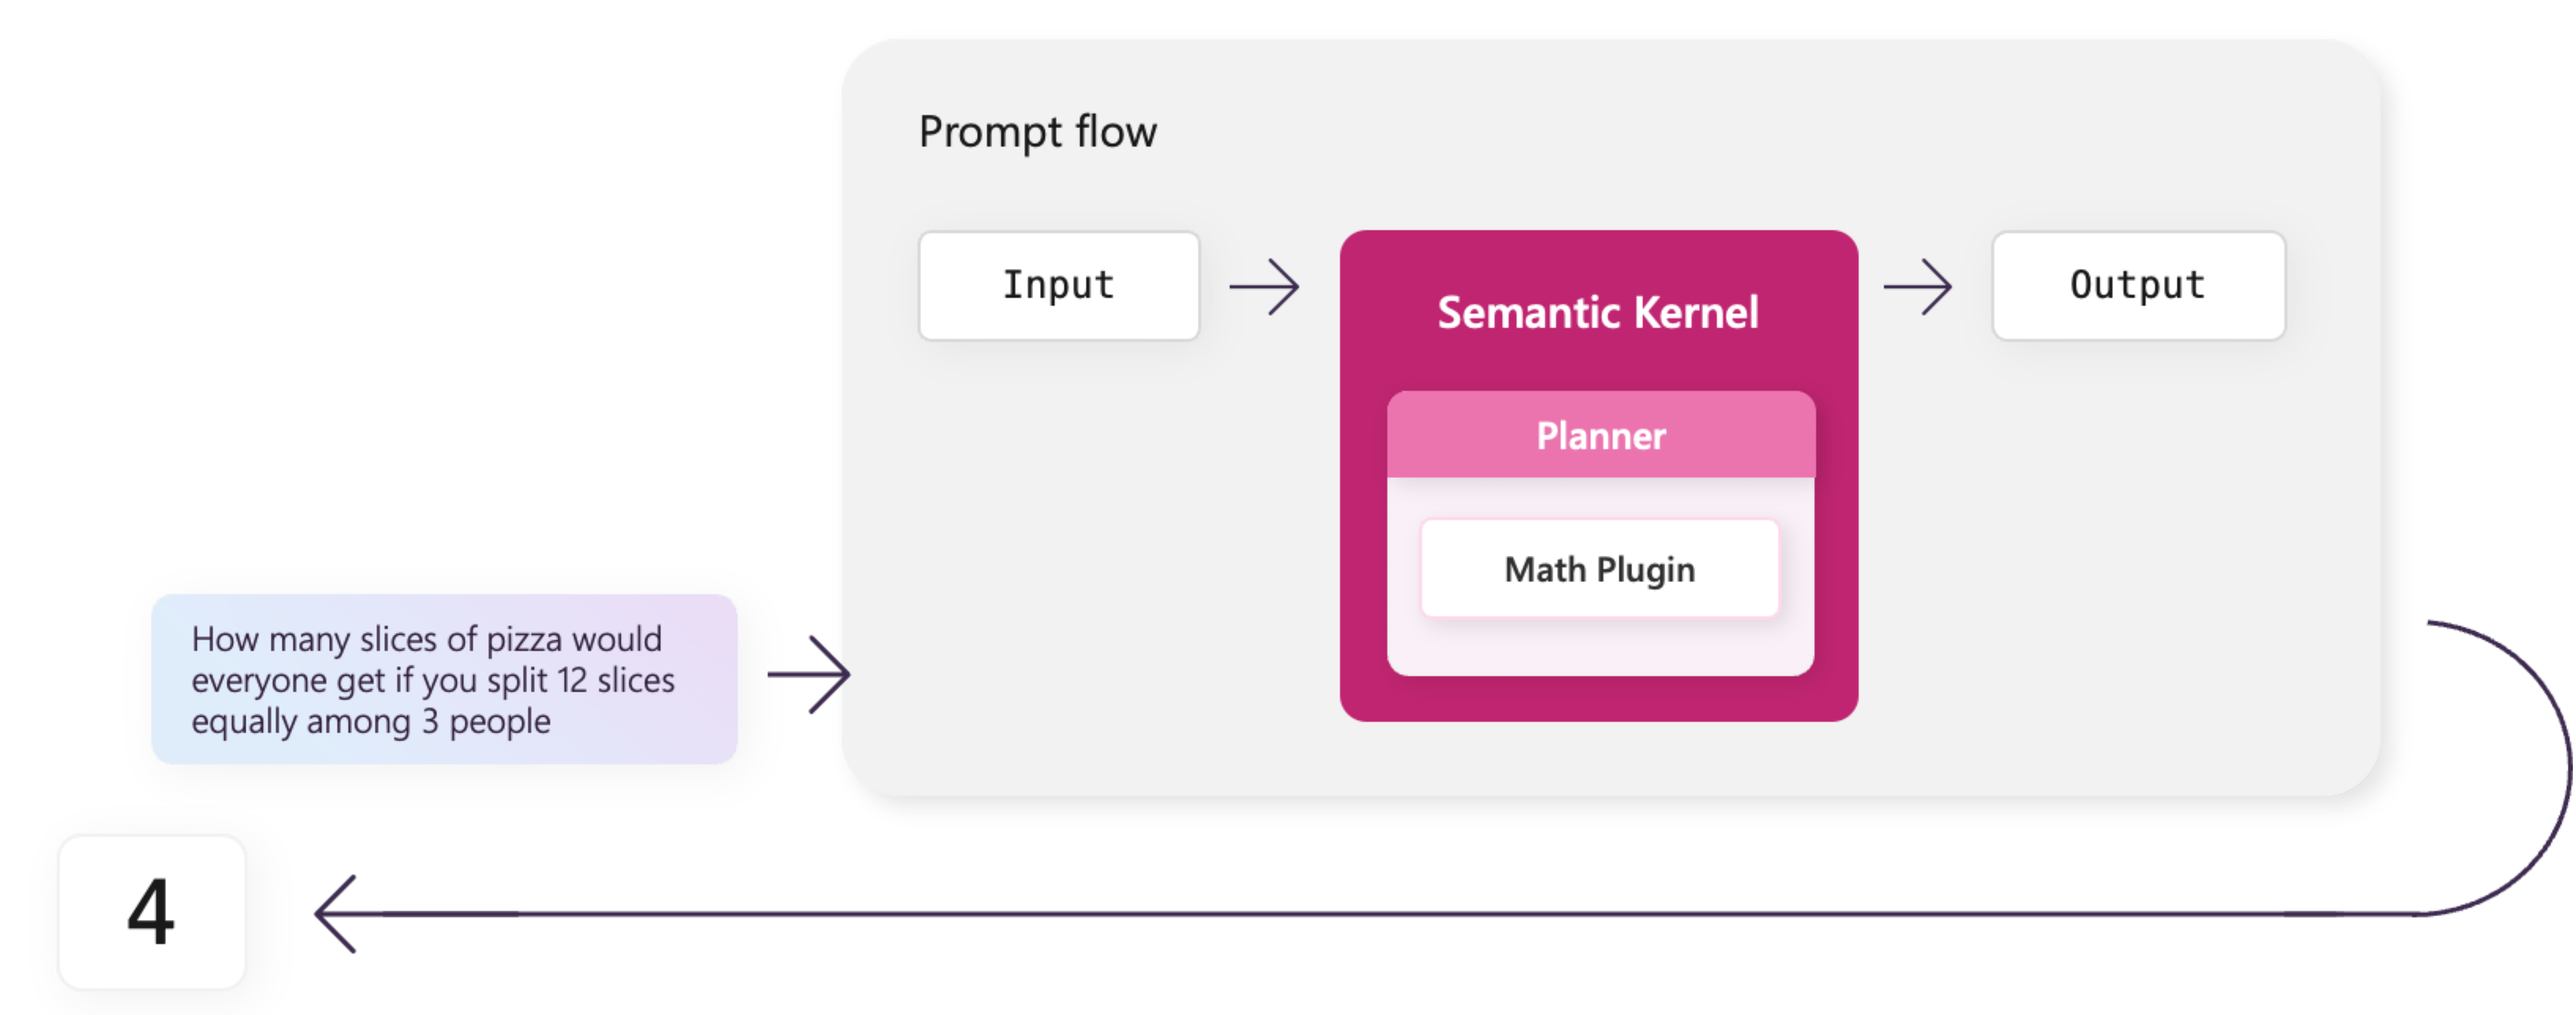
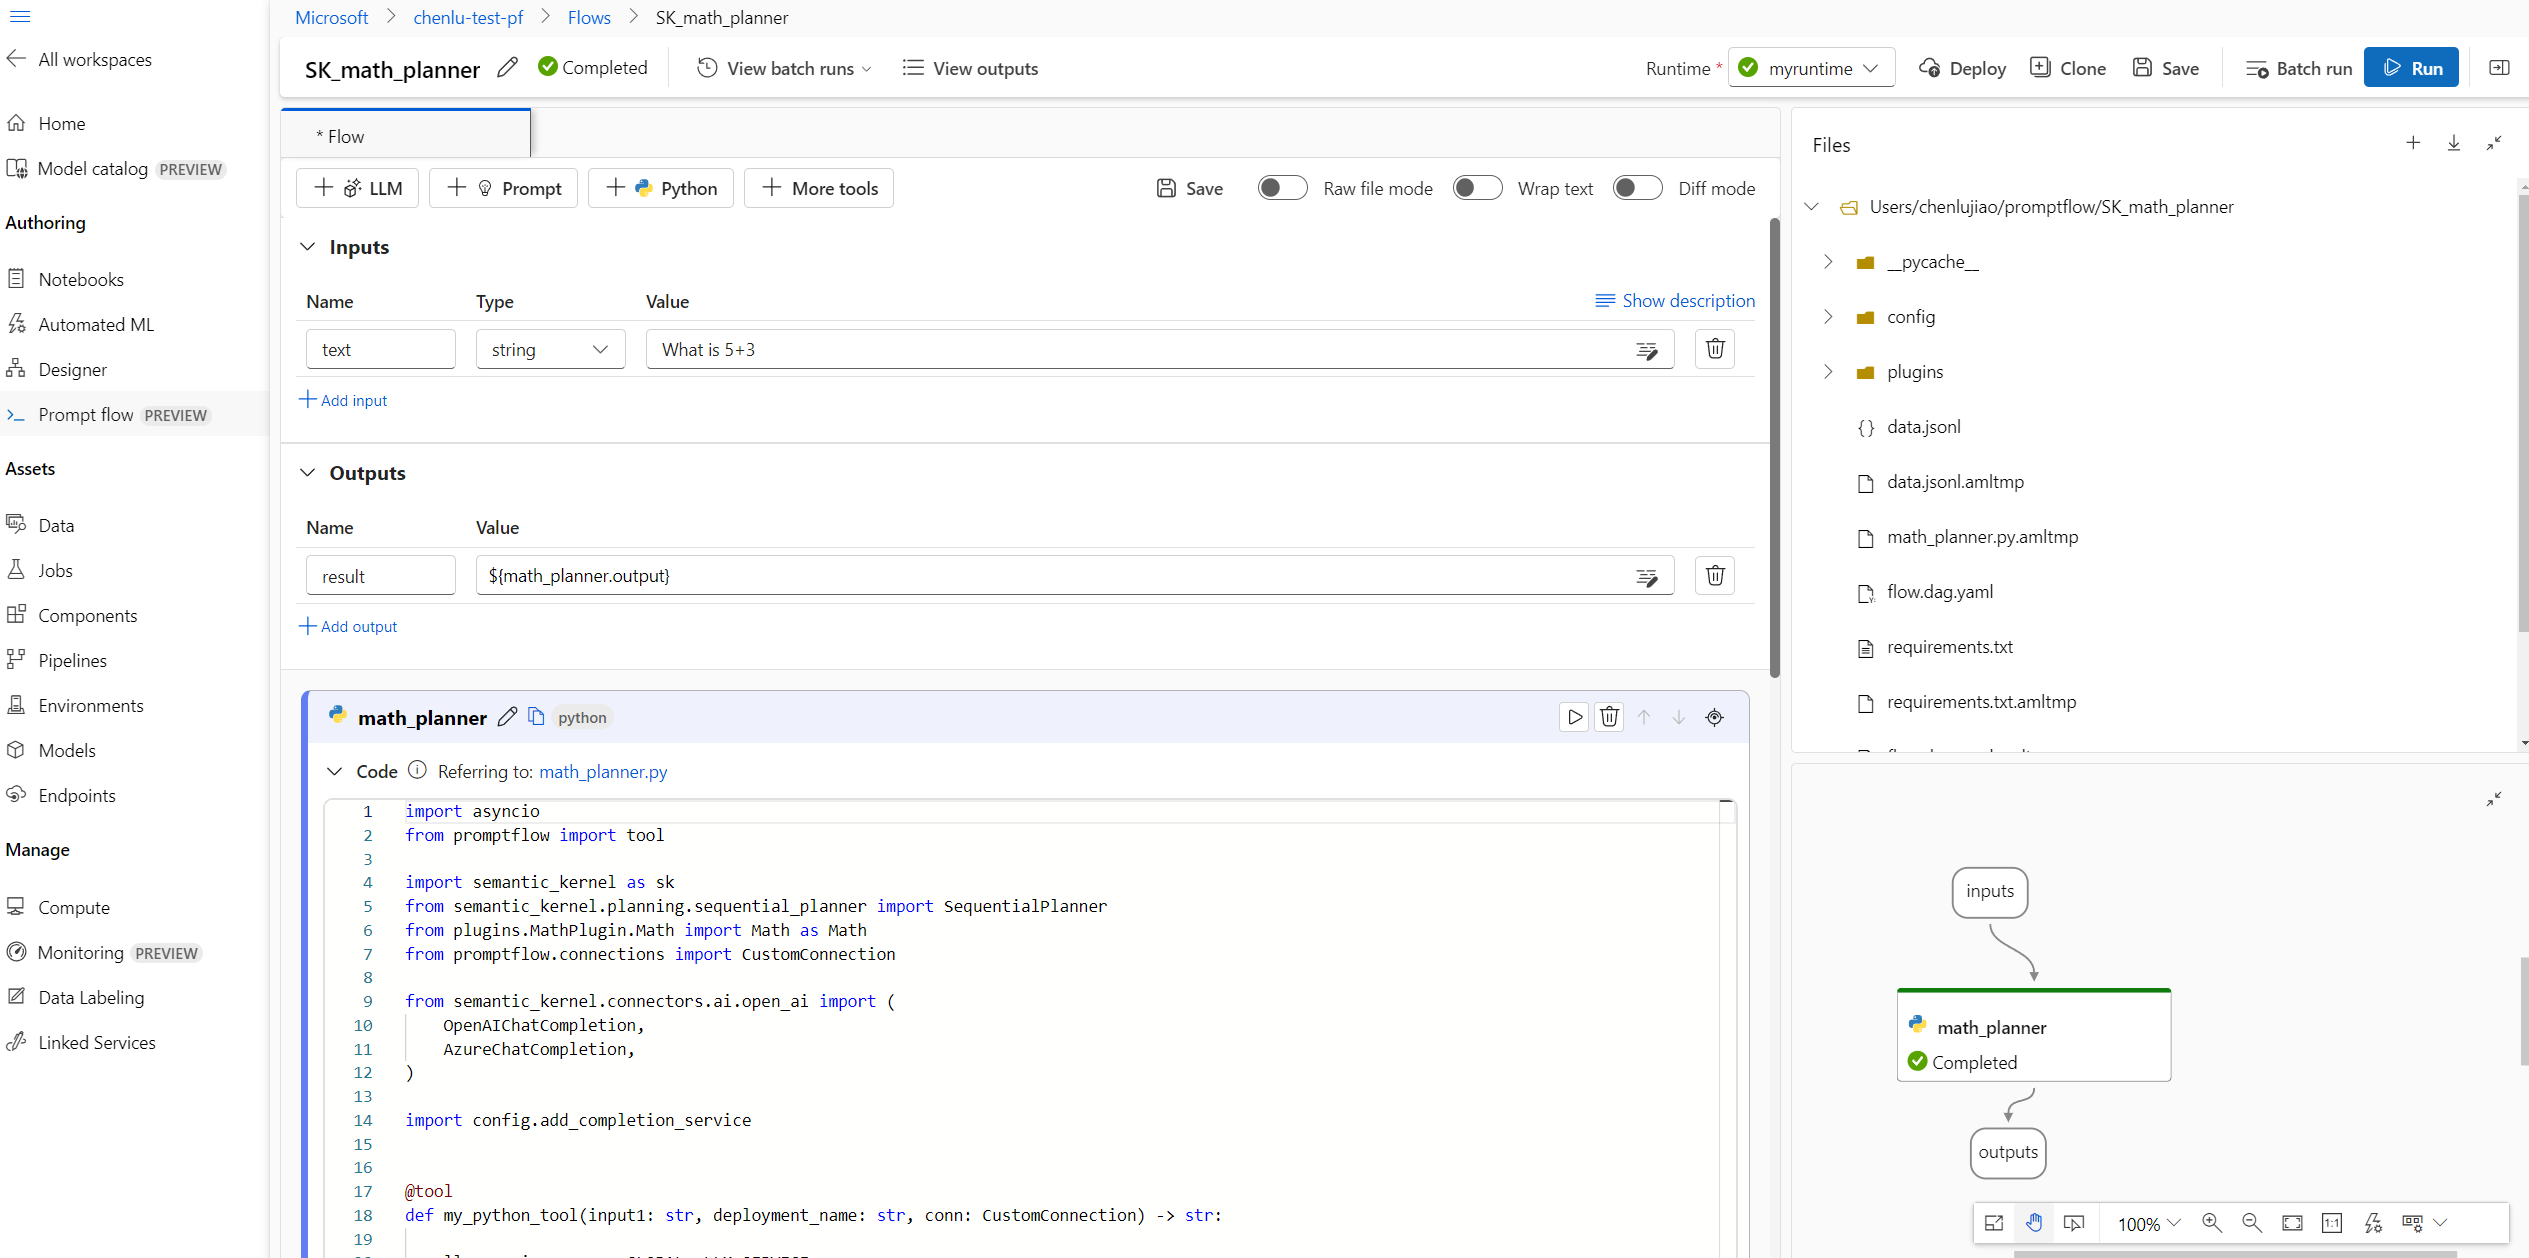
For this example, you create a flow with a Semantic Kernel planner that solves math problems.
From the Prompt flow page, select Create.
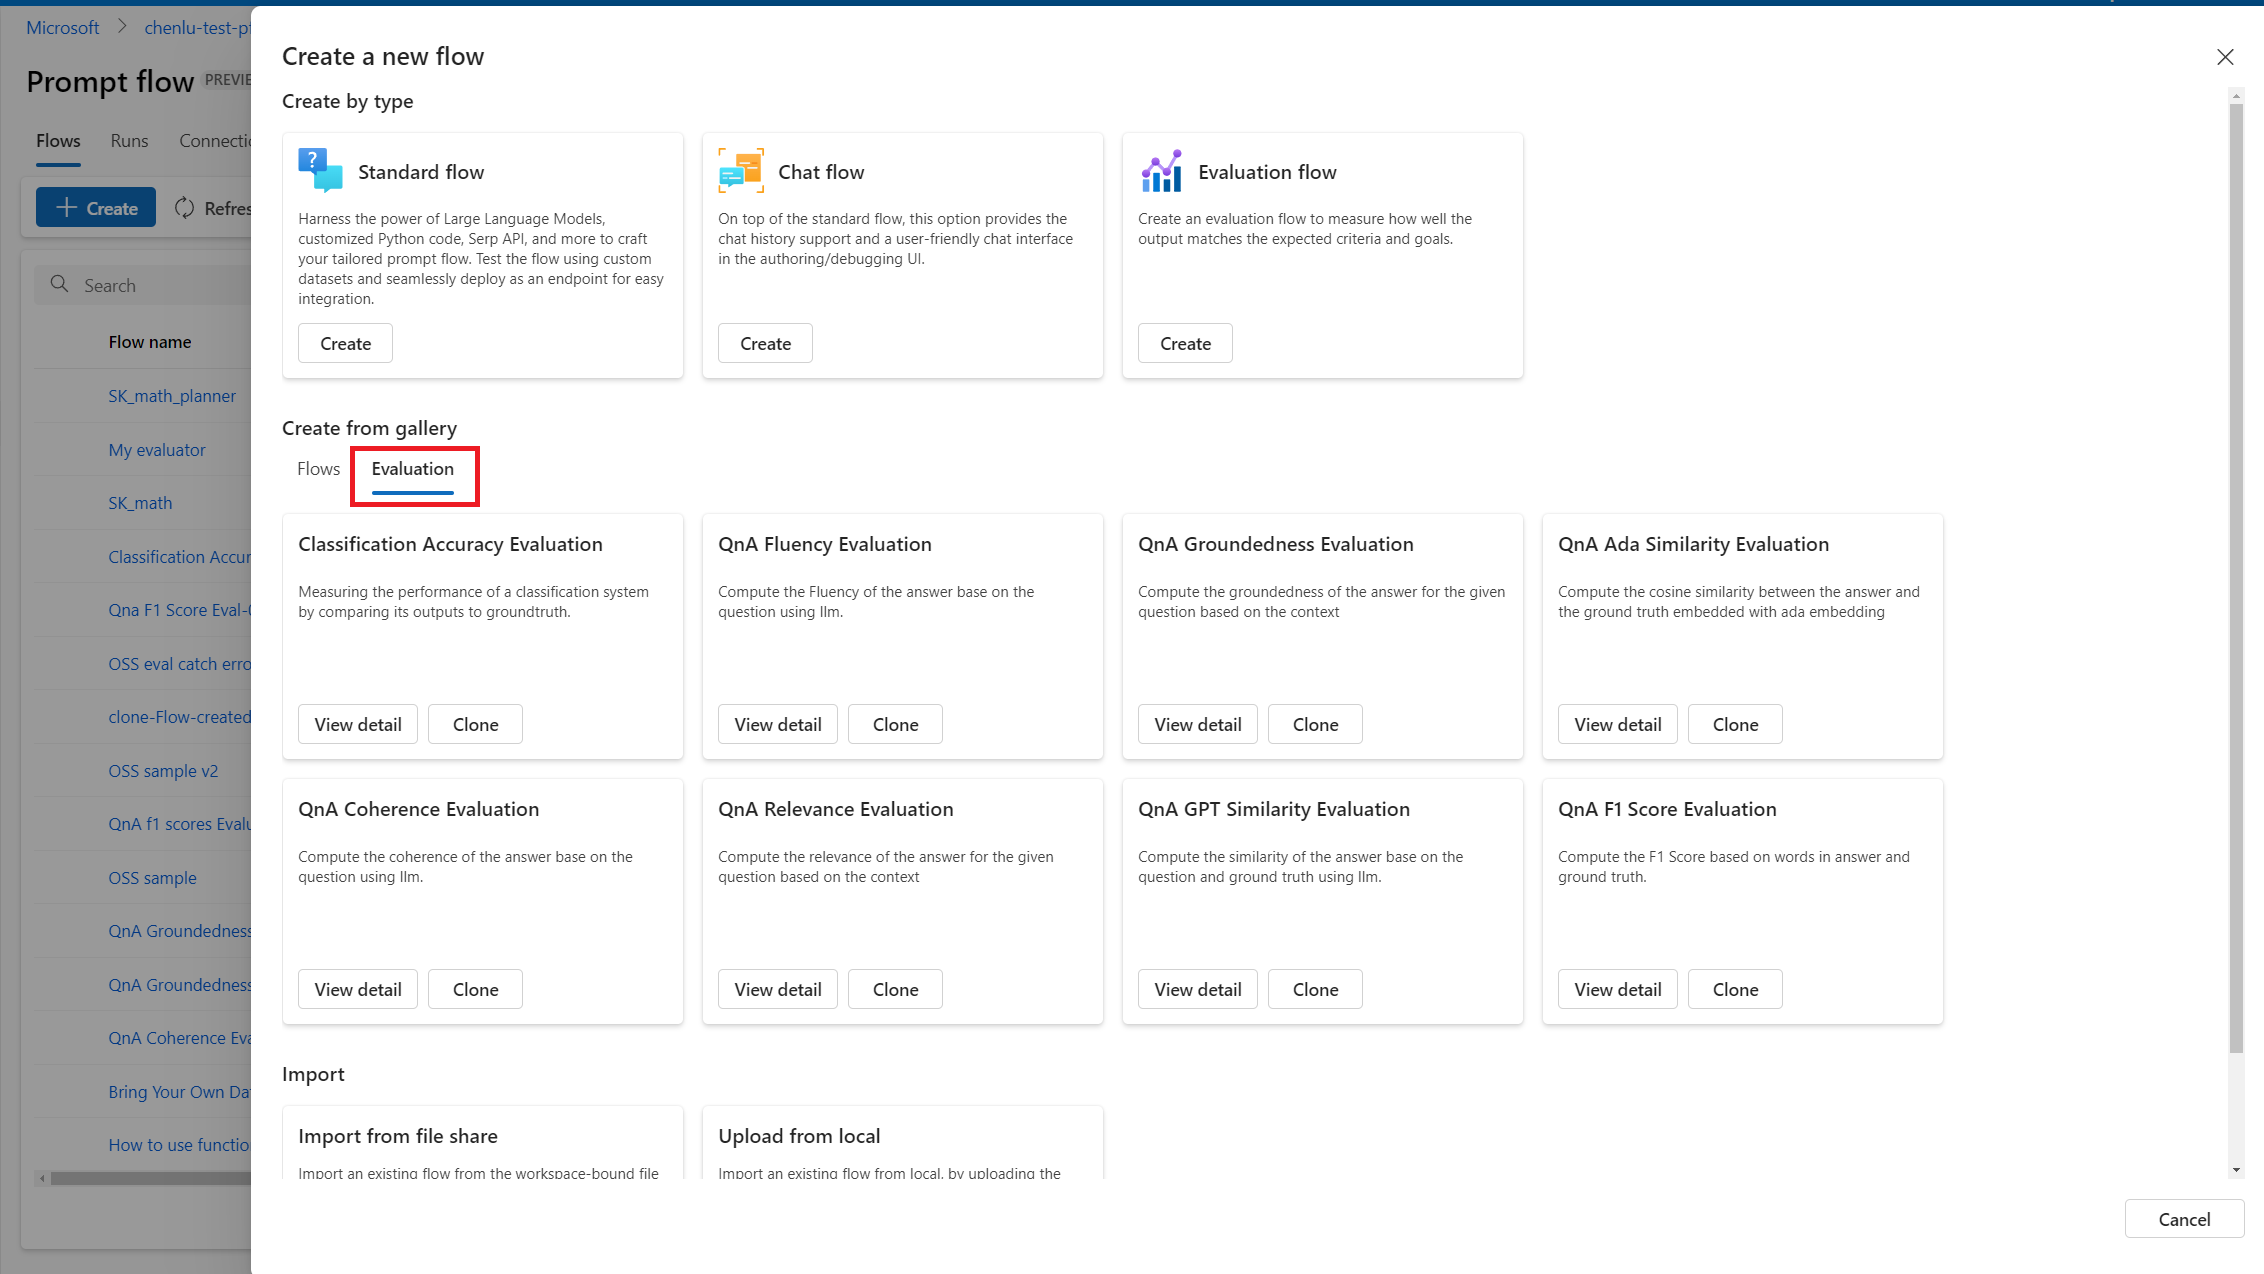
On the Create a new flow screen, select Create in the Standard flow tile.
At the top of the new flow, select + Python to create a new Python node, and name the node math_planner.
Select + at the top of the Files tab to upload reference files such as the MathPlugin from the Semantic Kernel package.
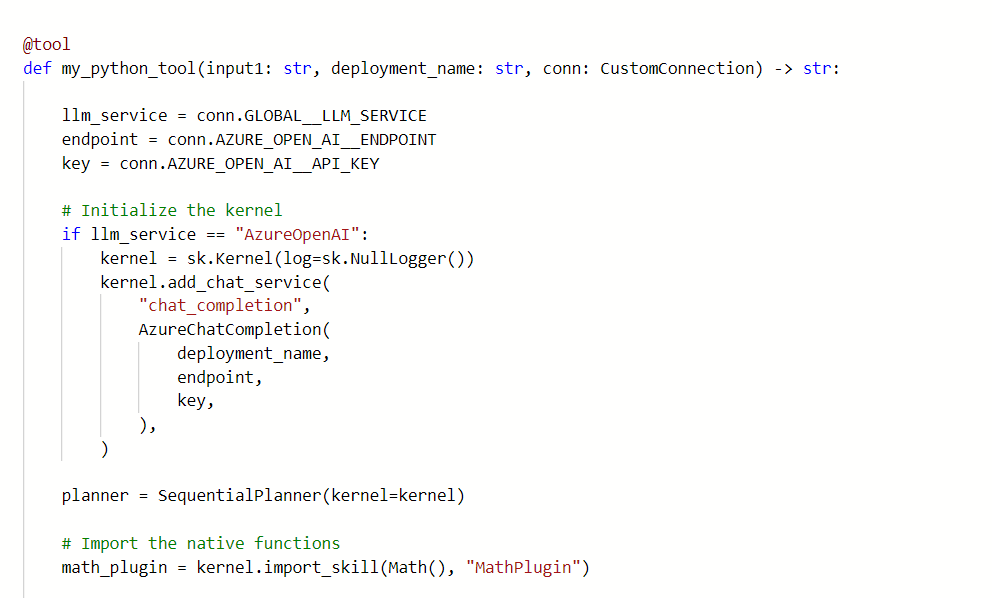
Update the math_planner.py code to set up the connection and define the input and output of the planner node.
Select the Connection object in the node input, and set the deployment_name for Azure OpenAI or model_name for OpenAI.
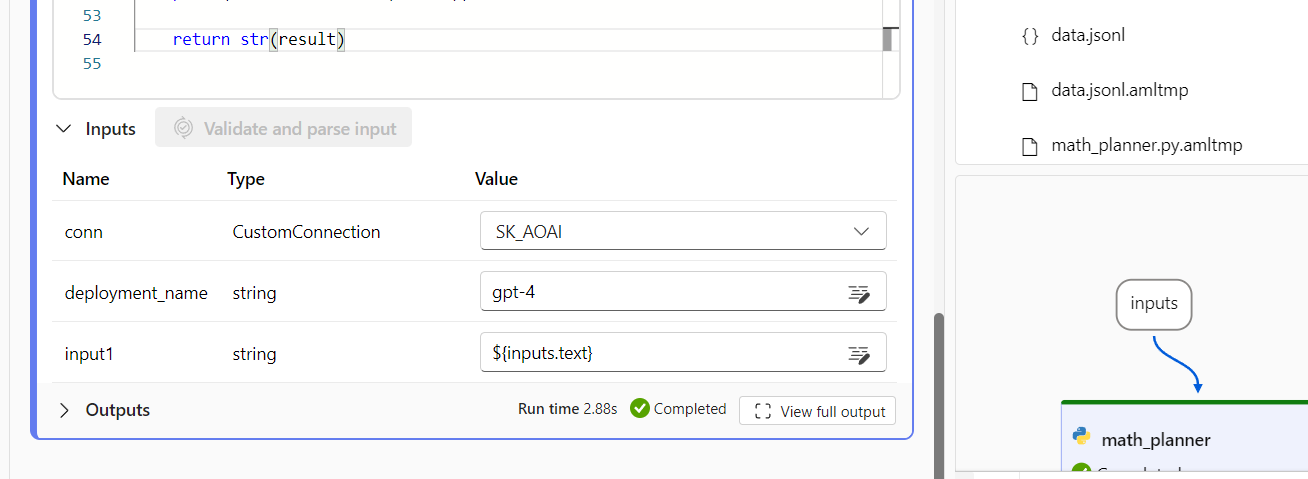
Start the compute session, and select Run for a single test.
Batch test your plugins and planners
Instead of manually testing each different scenario, you can automatically run large batches of tests using prompt flow and benchmark data.
Use batches with prompt flow to run batch tests on your planner that uses the math plugin. By defining several word problems, you can quickly test any changes to your plugins or planners so you can catch regressions early.
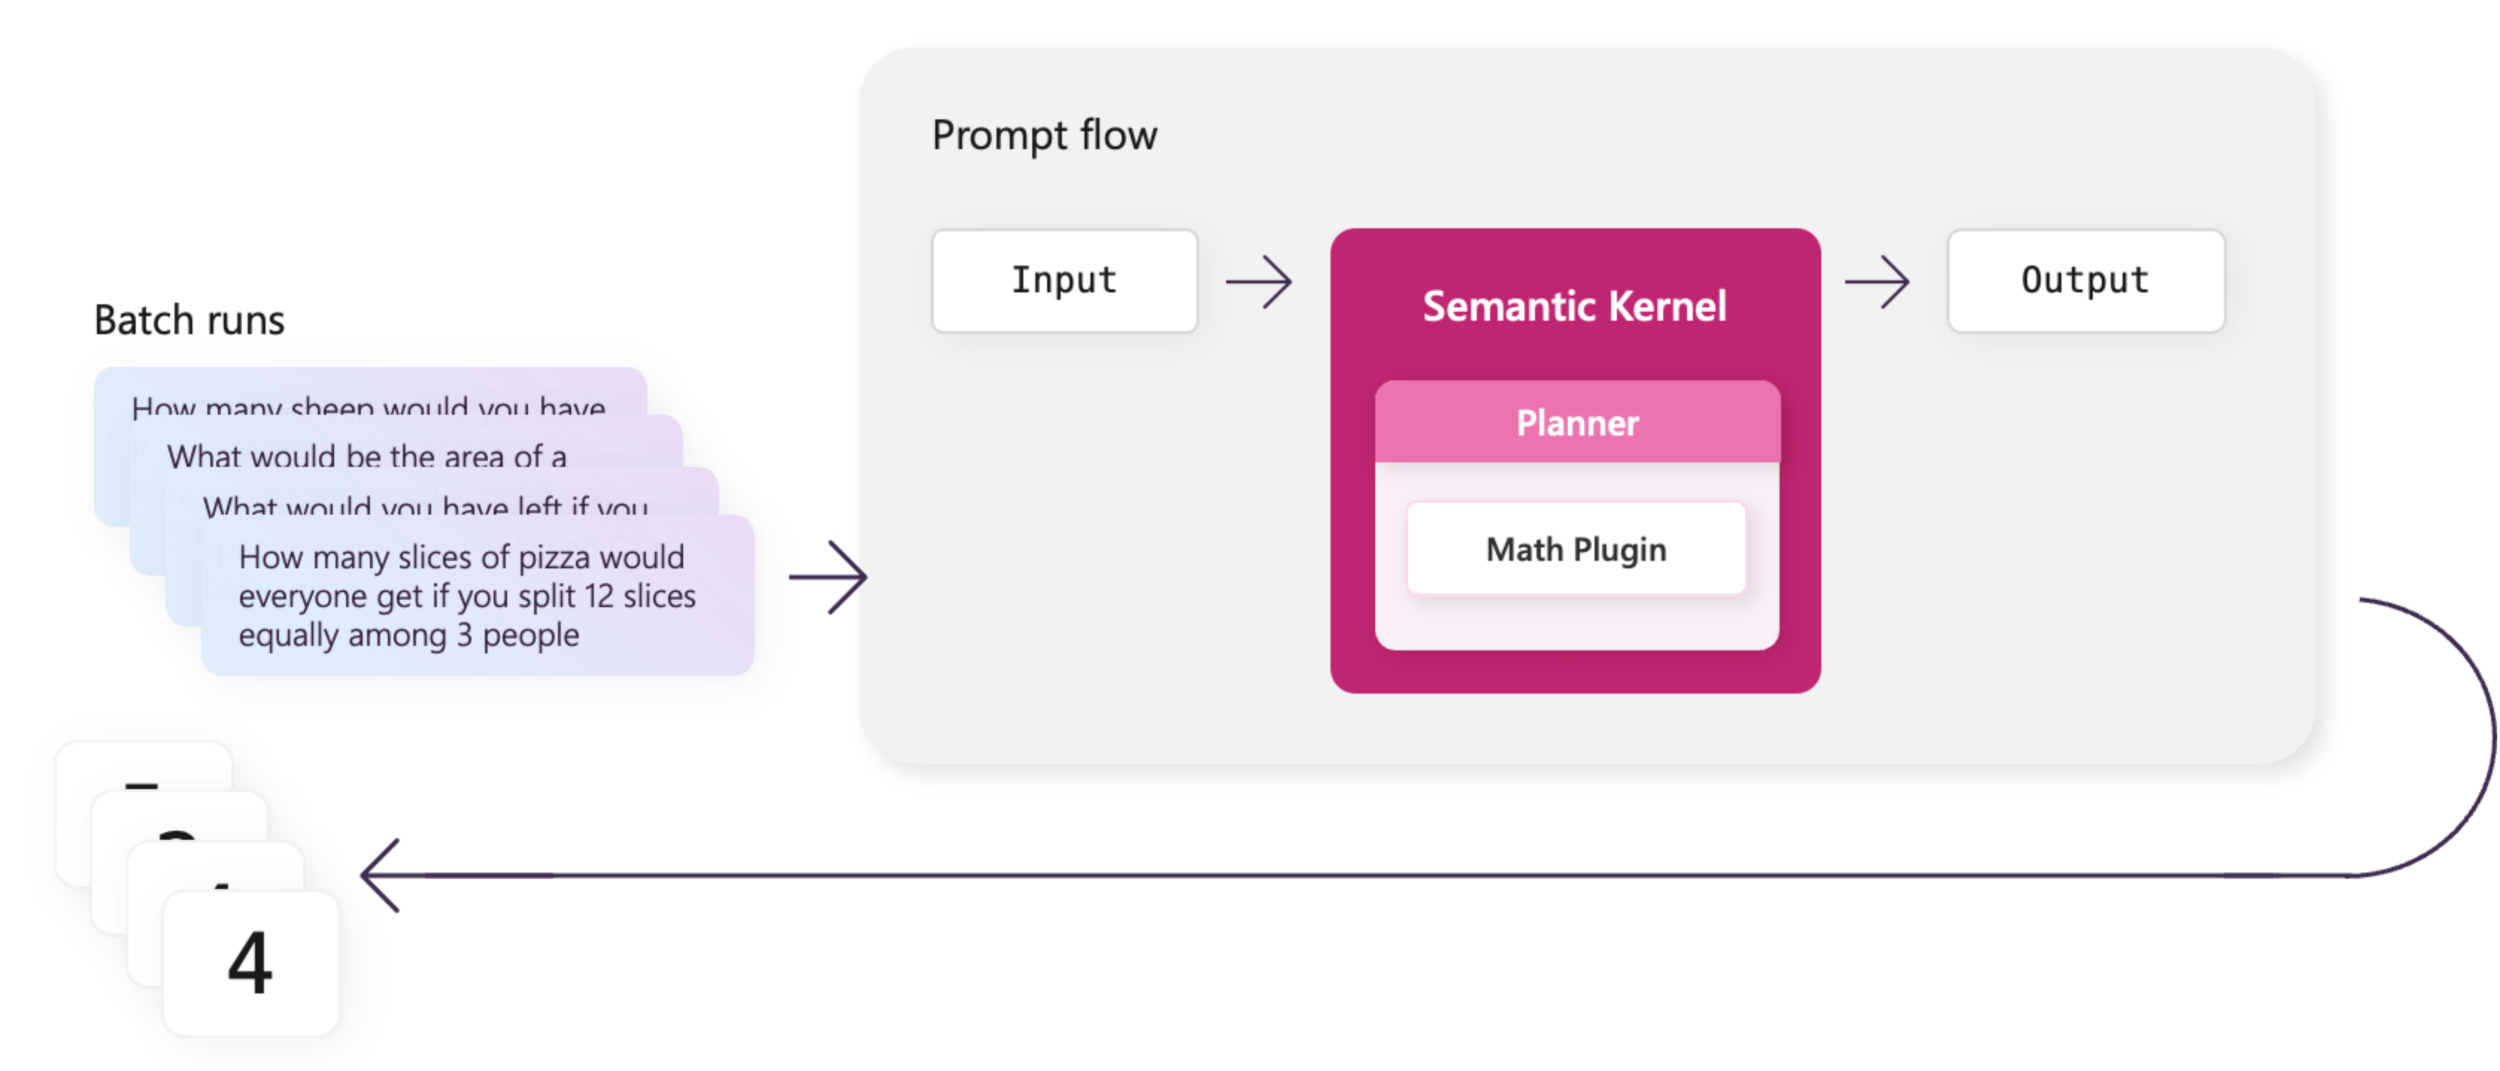
Once your flow passes a single test run, you can create a batch test in prompt flow.
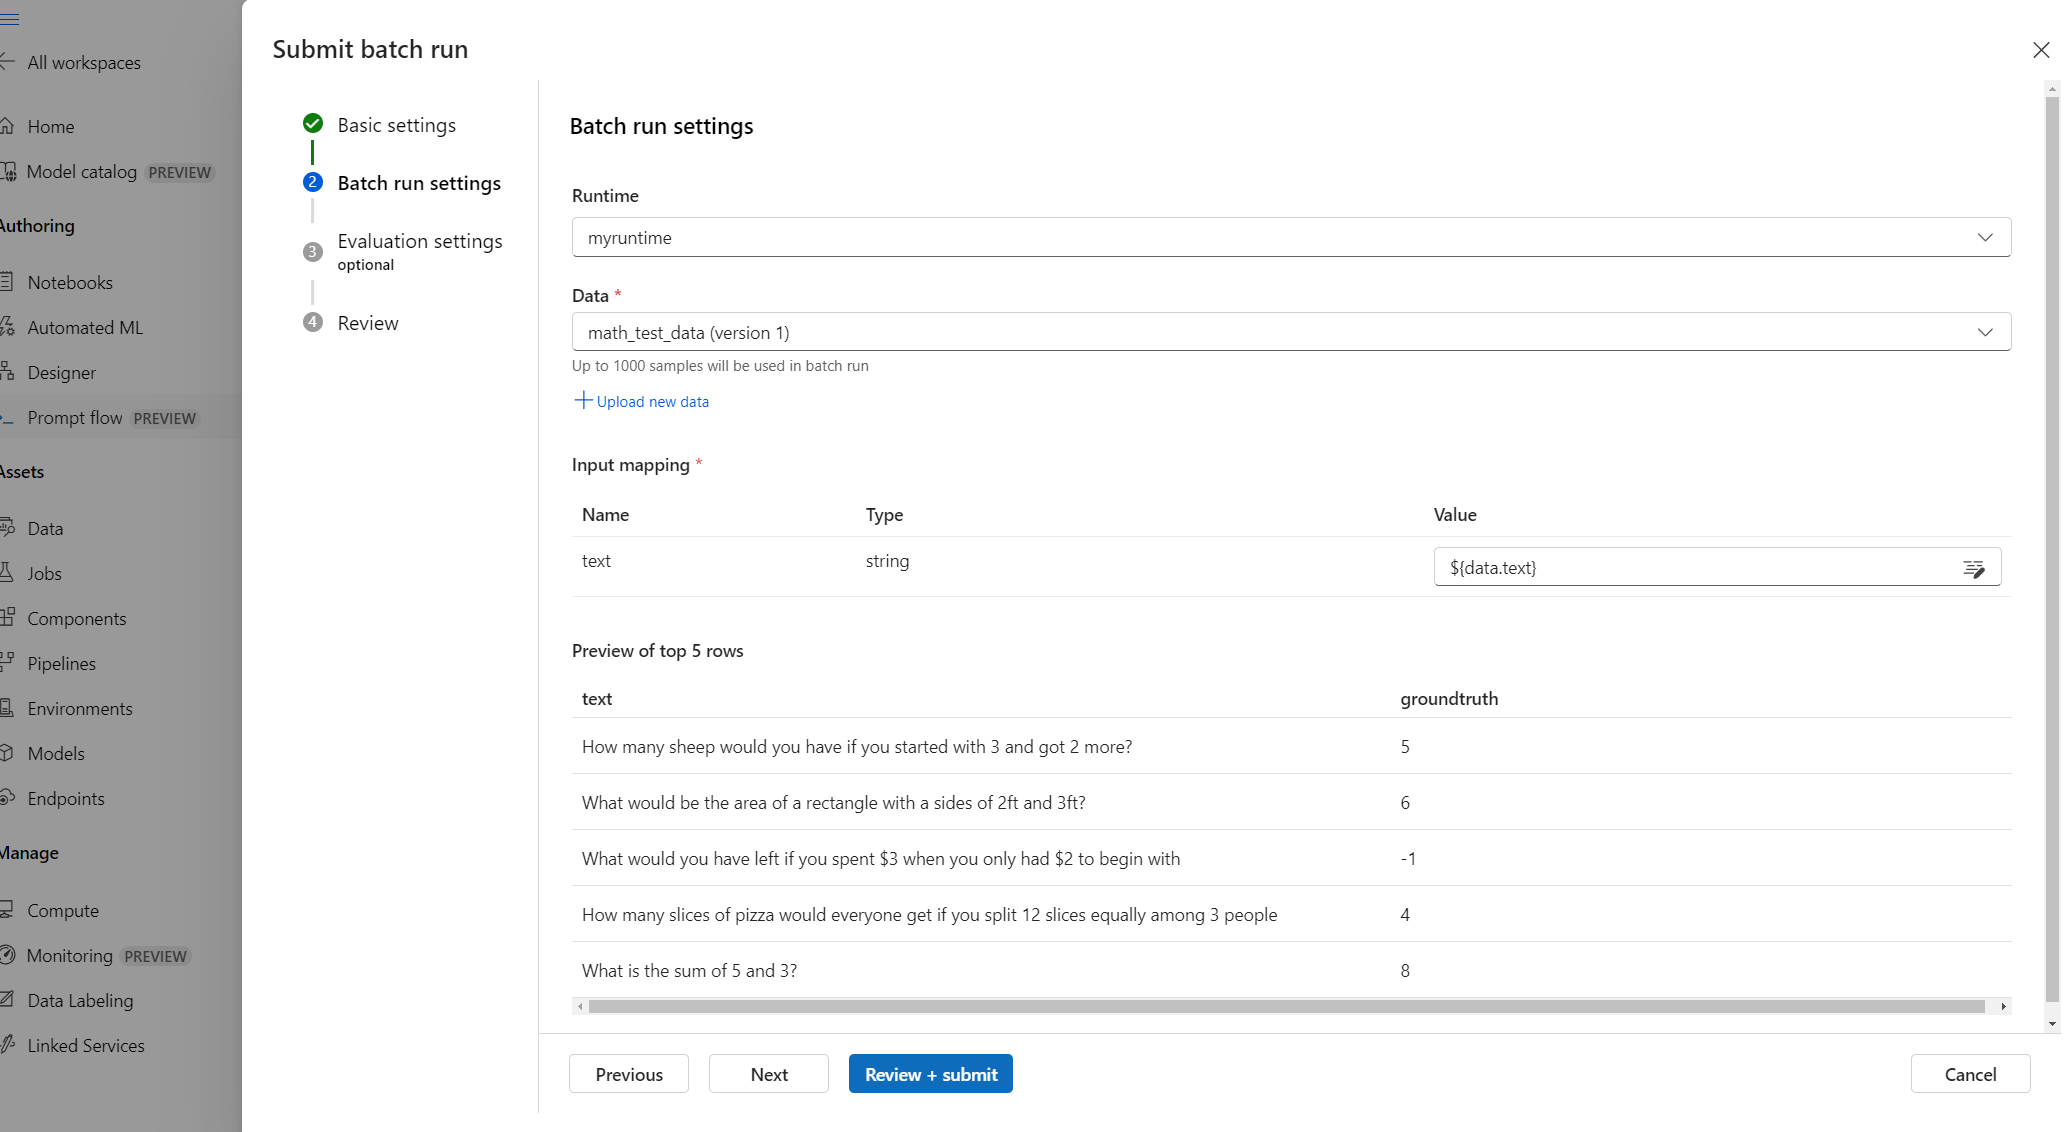
Create your benchmark data in a .jsonl file as a list of JSON objects that contain the input and the correct ground truth.
In the prompt flow, select Evaluate from the top menu.
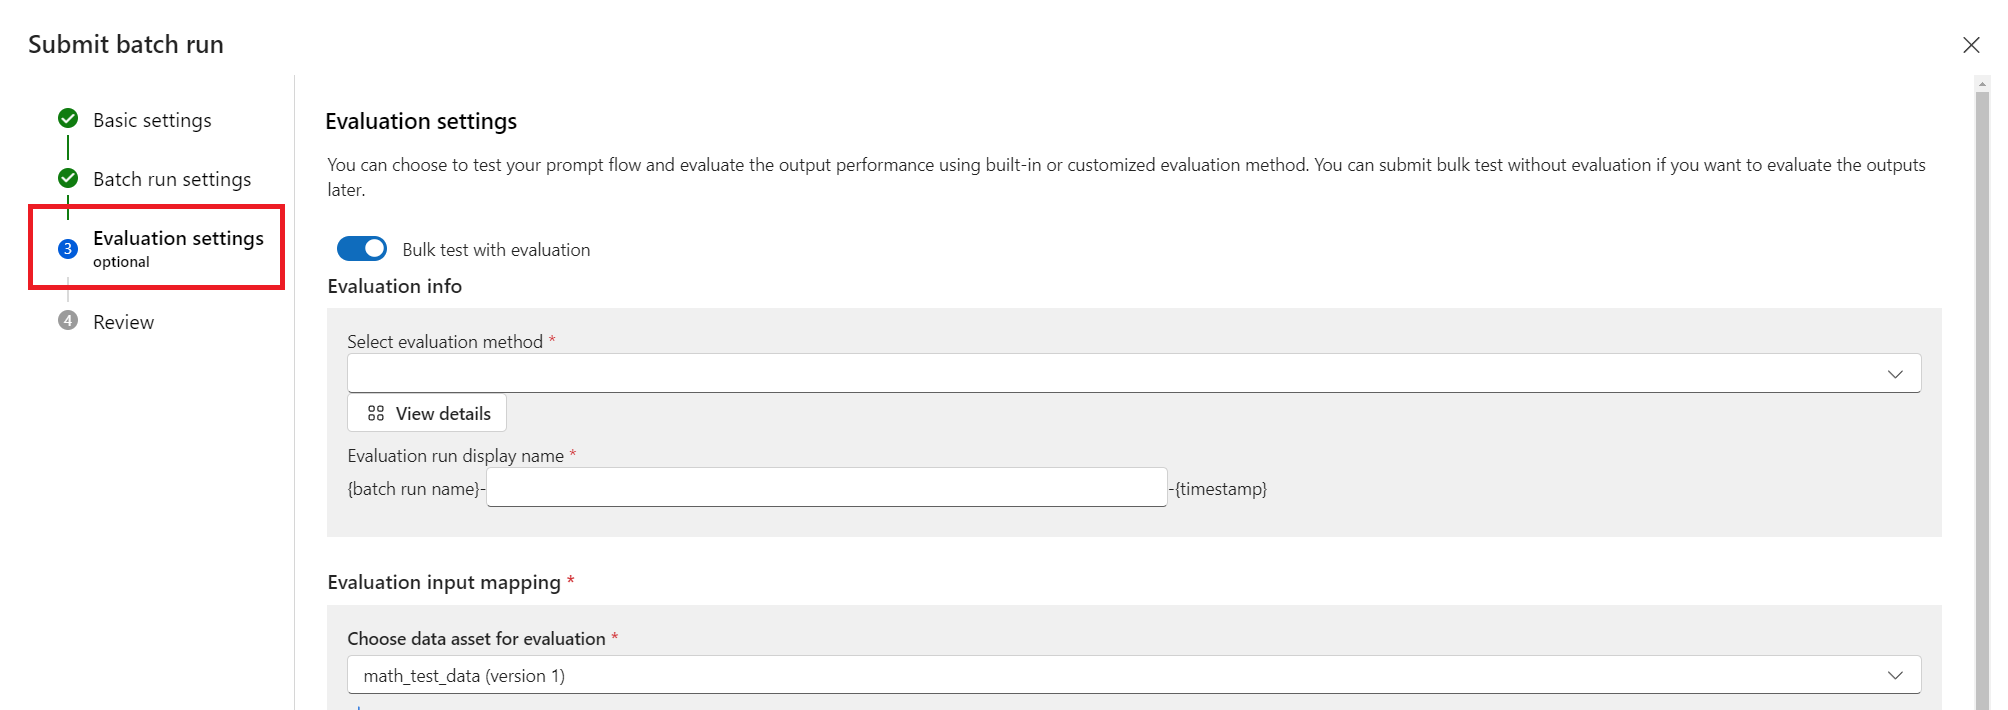
Complete the Basic settings, upload your data file, and complete the Batch run settings.
For this test, skip the optional Evaluation settings and select Review + submit, then select Submit to submit the batch run.
When the run finishes, select the run name on the prompt flow Runs page.
At the top of the run page, select Details.
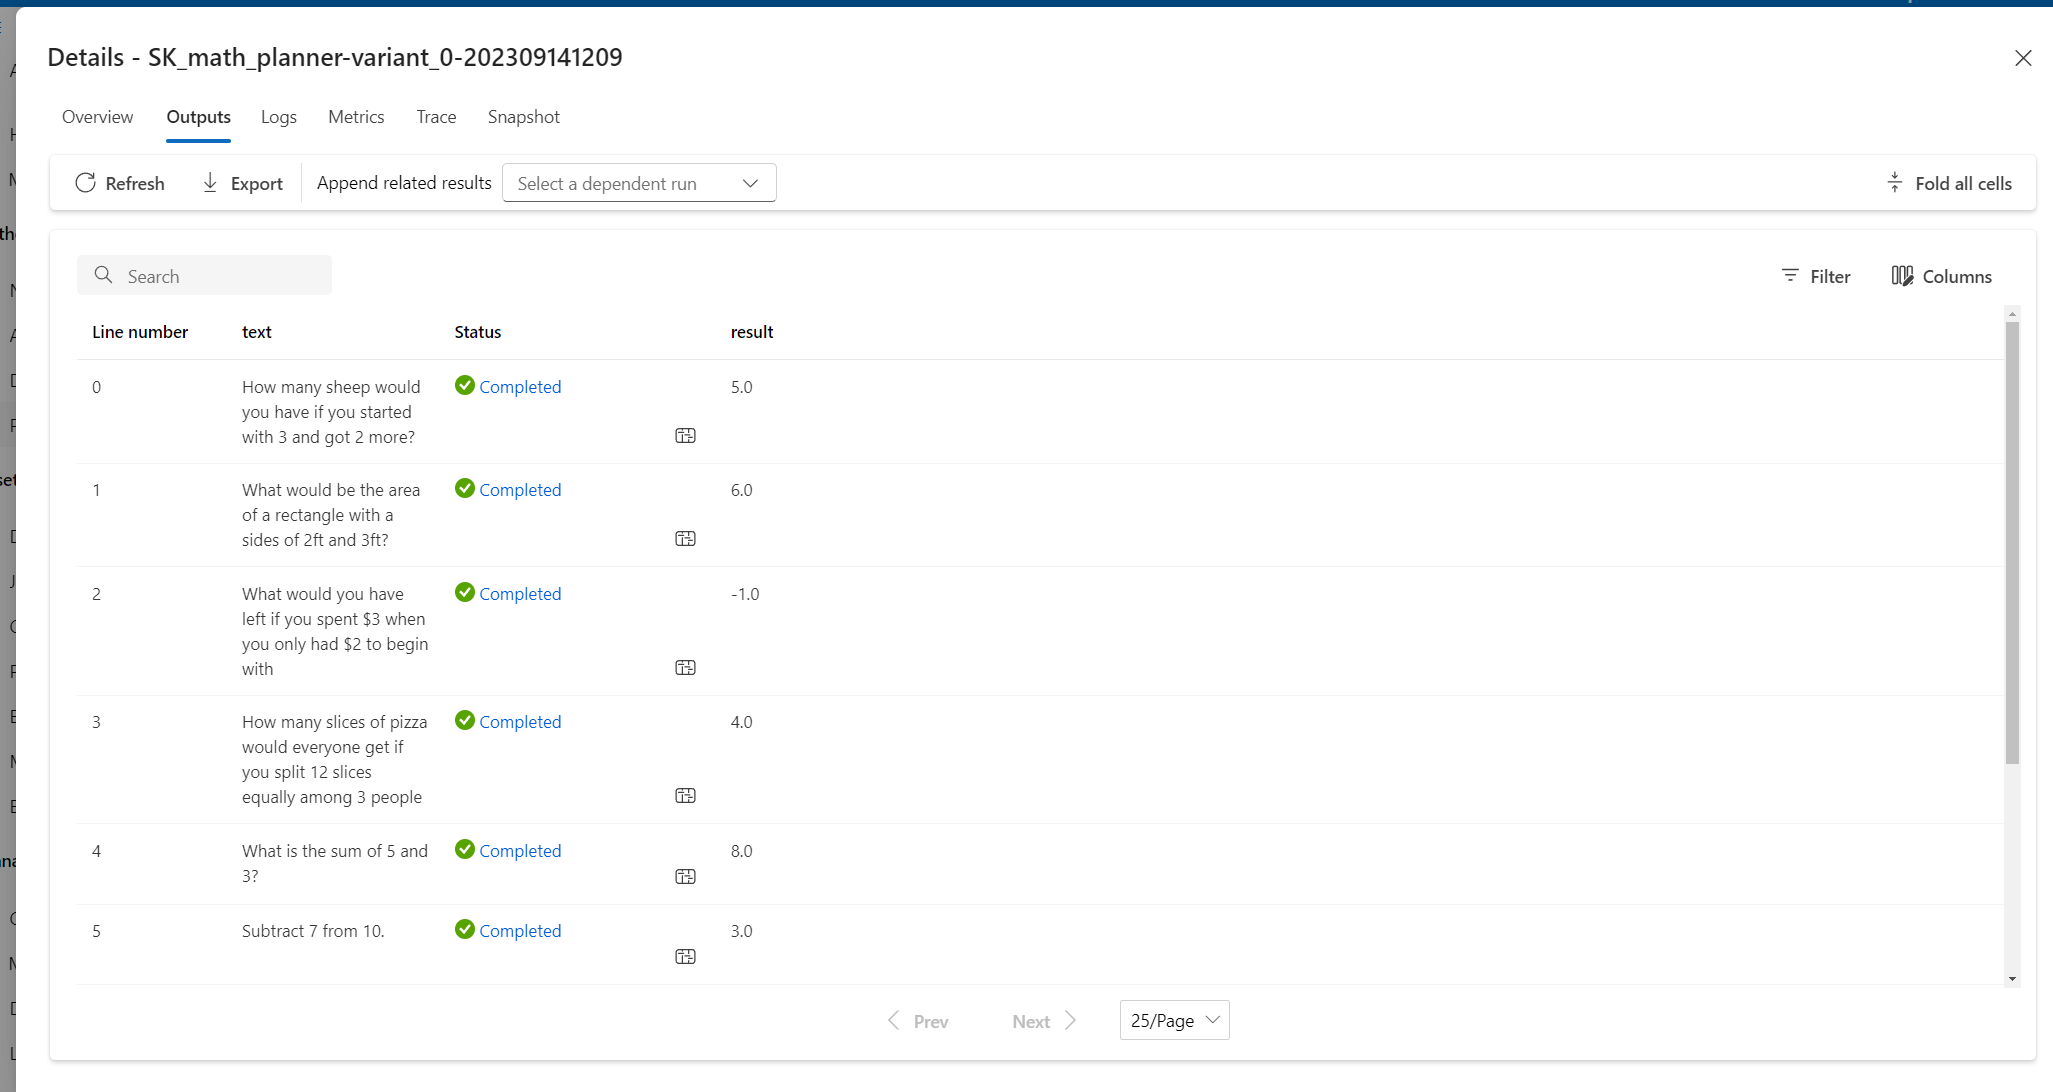
On the Details page, select the Outputs tab to see the results.
Evaluate accuracy
After you complete a batch run, you need an easy way to determine the adequacy of the test results. You can then use this information to develop accuracy scores, which can be incrementally improved.
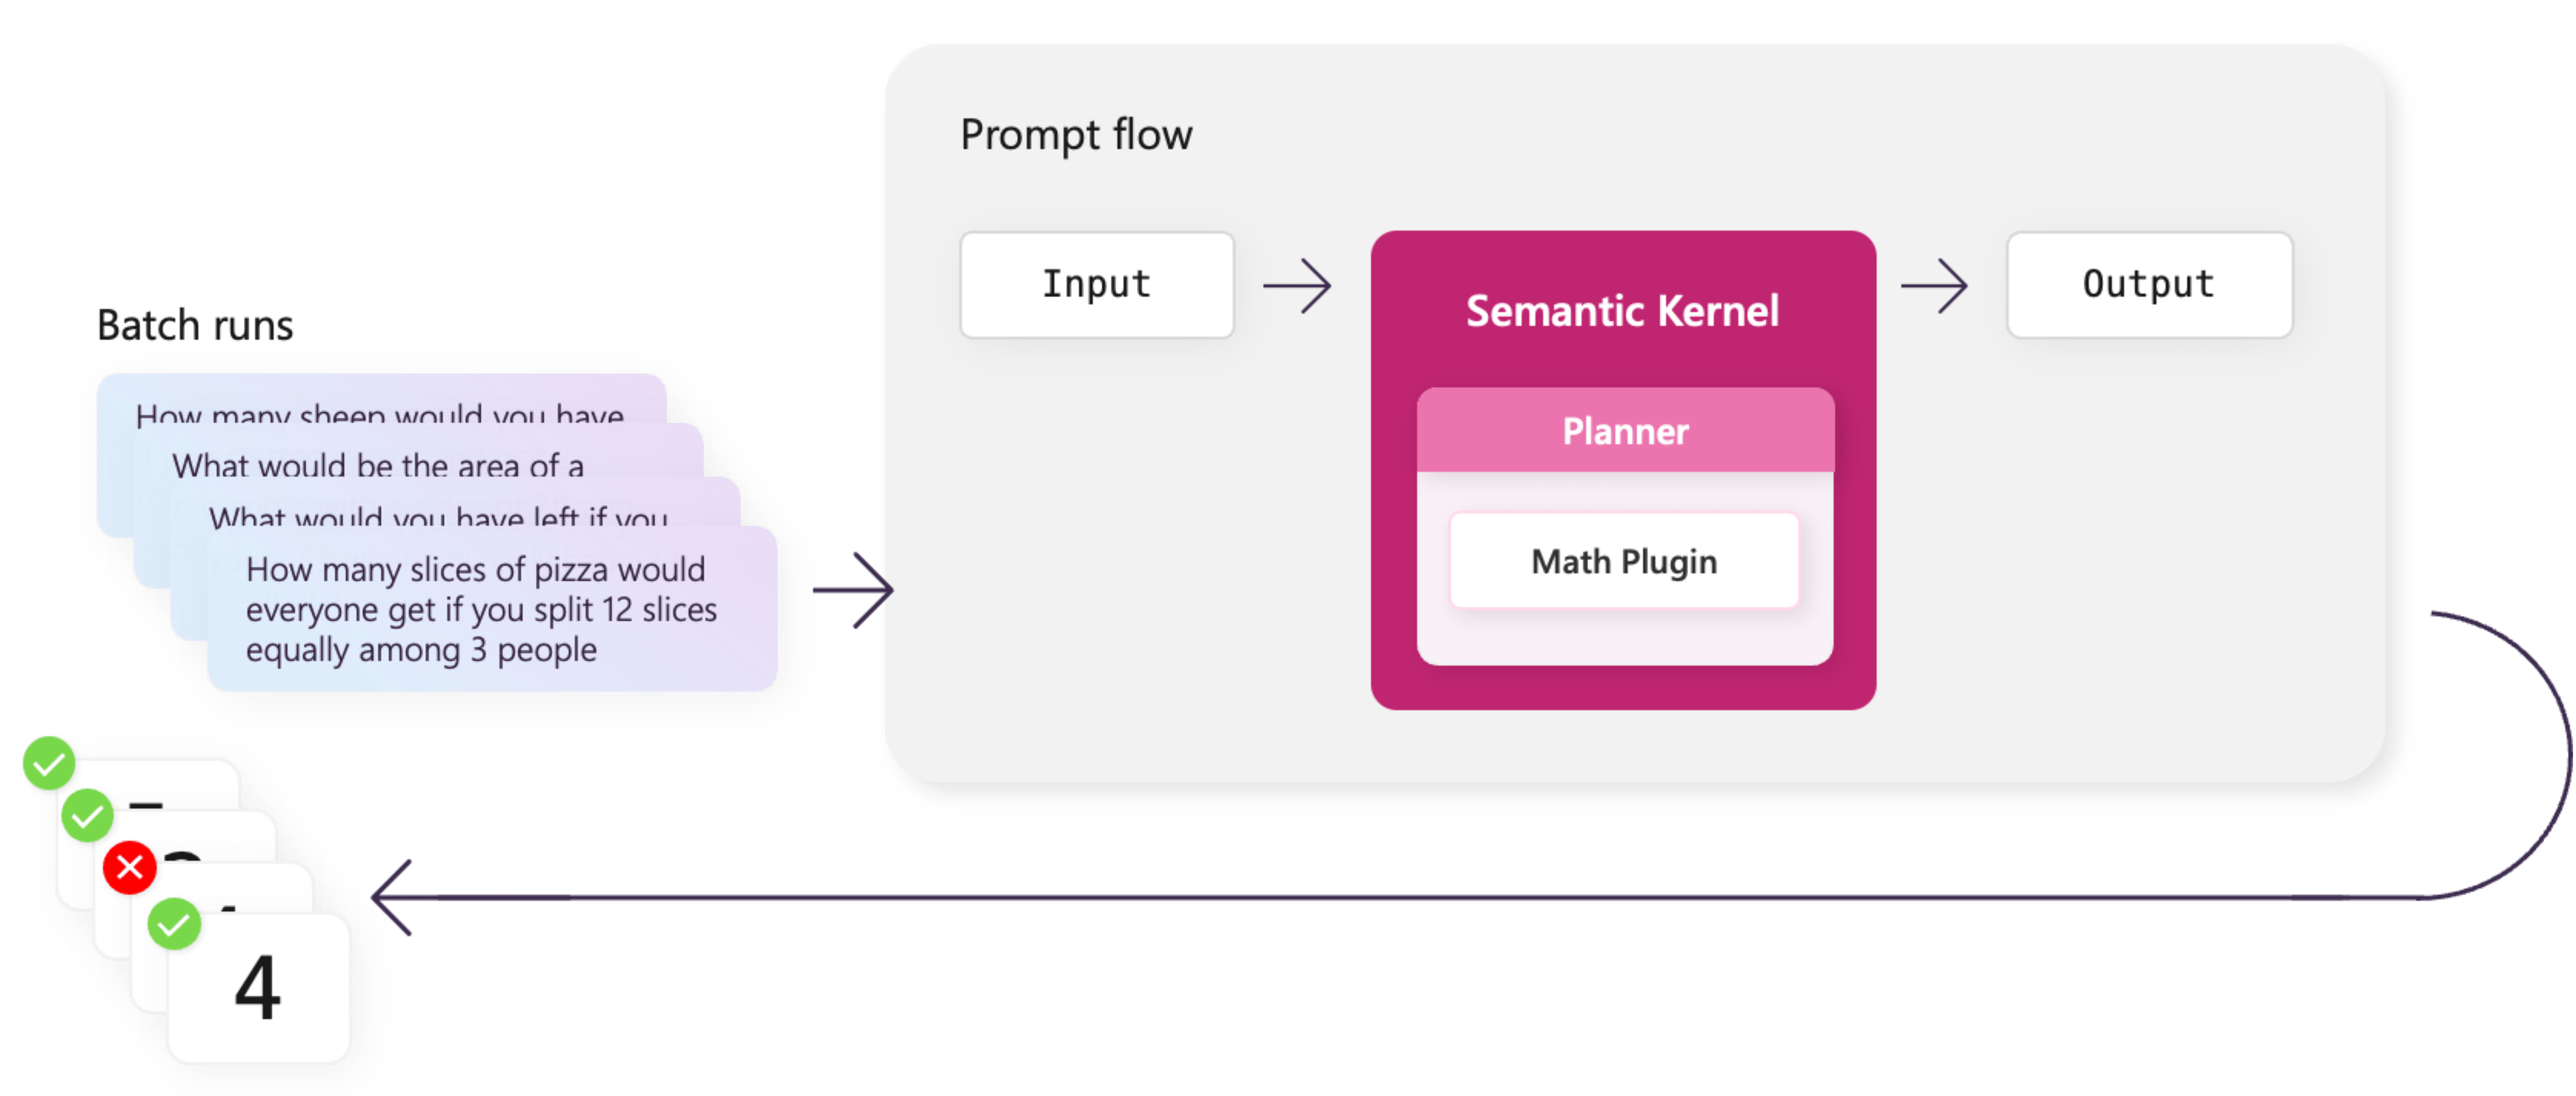
Evaluation flows in prompt flow enable this functionality. Using the sample evaluation flows, you can assess various metrics such as classification accuracy, perceived intelligence, and groundedness. You can also develop your own custom evaluators if needed.
You can quickly create an evaluation run based on a completed batch run.
Open your previously completed batch run, and select Evaluate from the top menu.
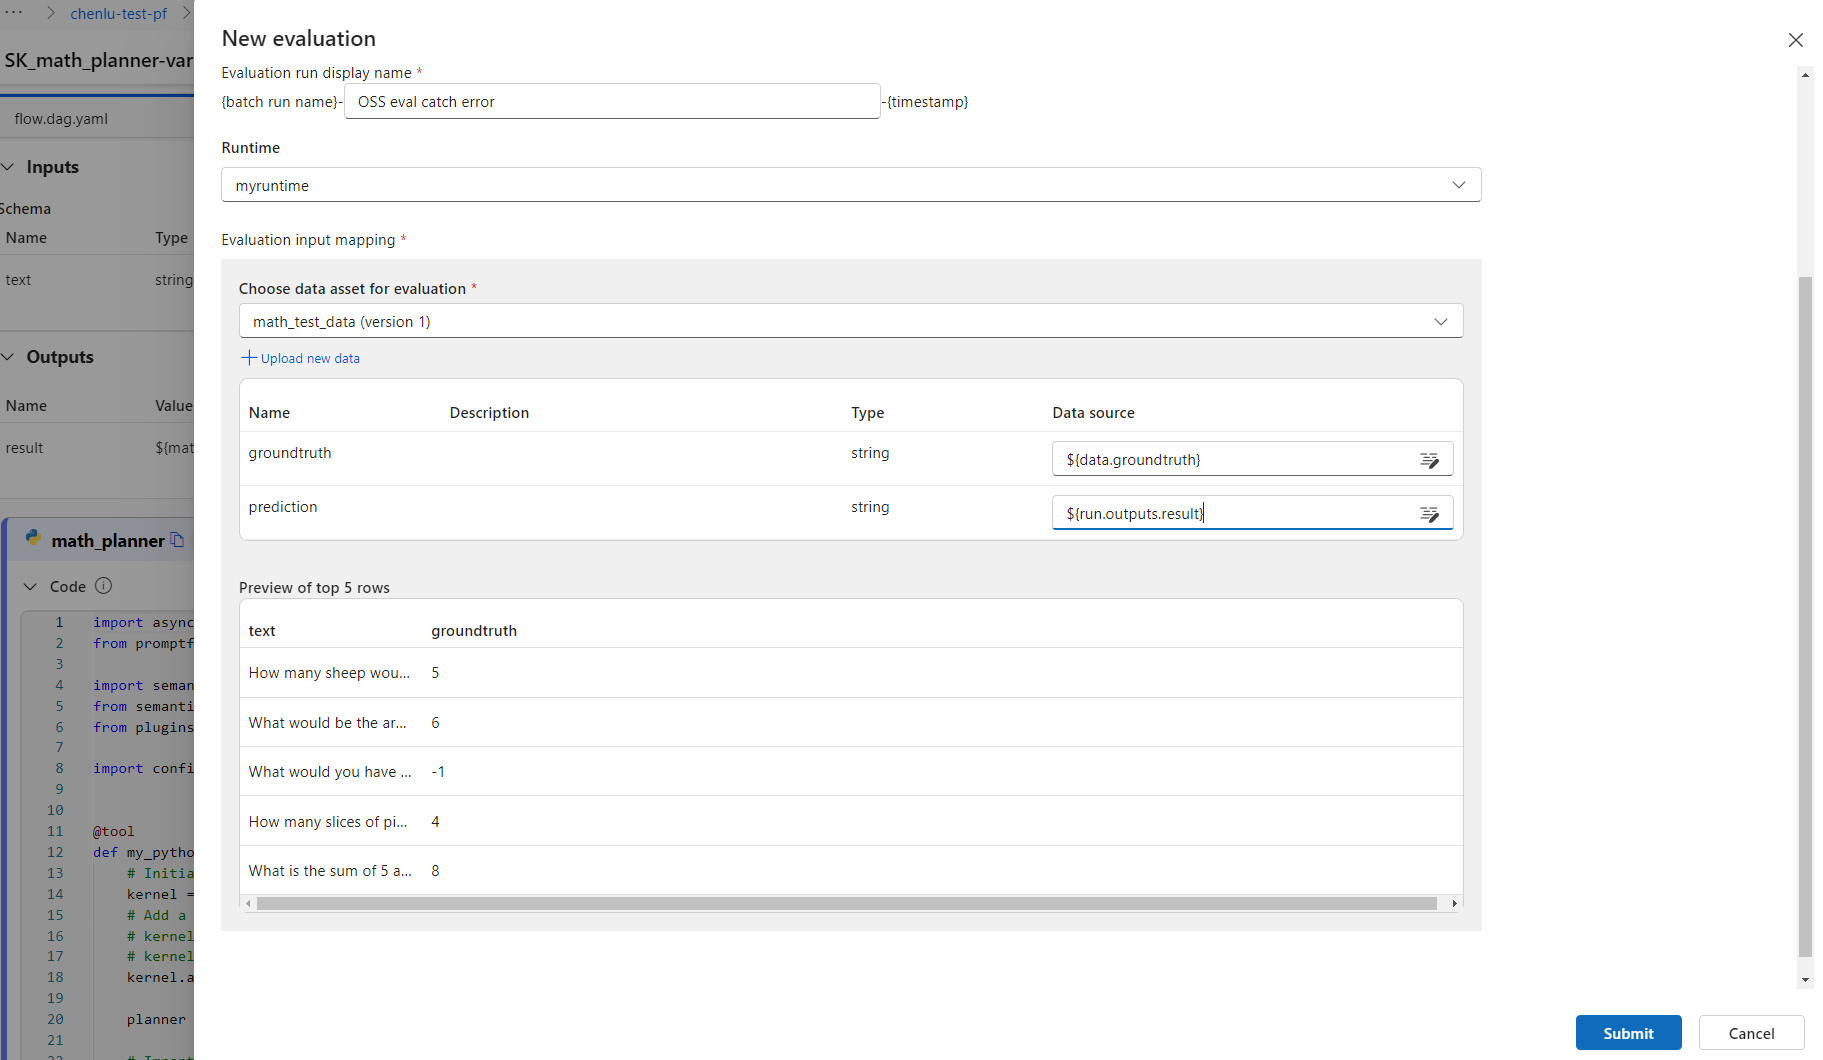
On the New evaluation screen, select an evaluator to use, select Next and configure the input mapping, and then select Submit.
After the evaluator runs, it returns a summary of results and metrics. You can use runs that yield less than ideal results as motivation for immediate improvement.
To view results, select Details at the top of the evaluator flow run page. On the Details page, select the Outputs tab to view evaluation output.
You can check the aggregated metric in the Metrics tab.
Experiment for quality improvement
If you find that your plugins and planners aren't performing as well as they should, you can take steps to make them better. The following high-level recommendations can improve the effectiveness of your plugins and planners.
- Use a more advanced model like GPT-4 instead of GPT-3.5-turbo.
- Improve your plugin descriptions so they’re easier for the planner to use.
- Inject more help to the planner when you send the user request.
A combination of these three actions can turn a failing planner into a winning one. By the end of the enhancement and evaluation process, you should have a planner that can correctly answer all of the benchmark data.
Throughout the process of enhancing your plugins and planners in prompt flow, you can use the runs to monitor your experimental progress. Each iteration allows you to submit a batch run with an evaluation run at the same time.
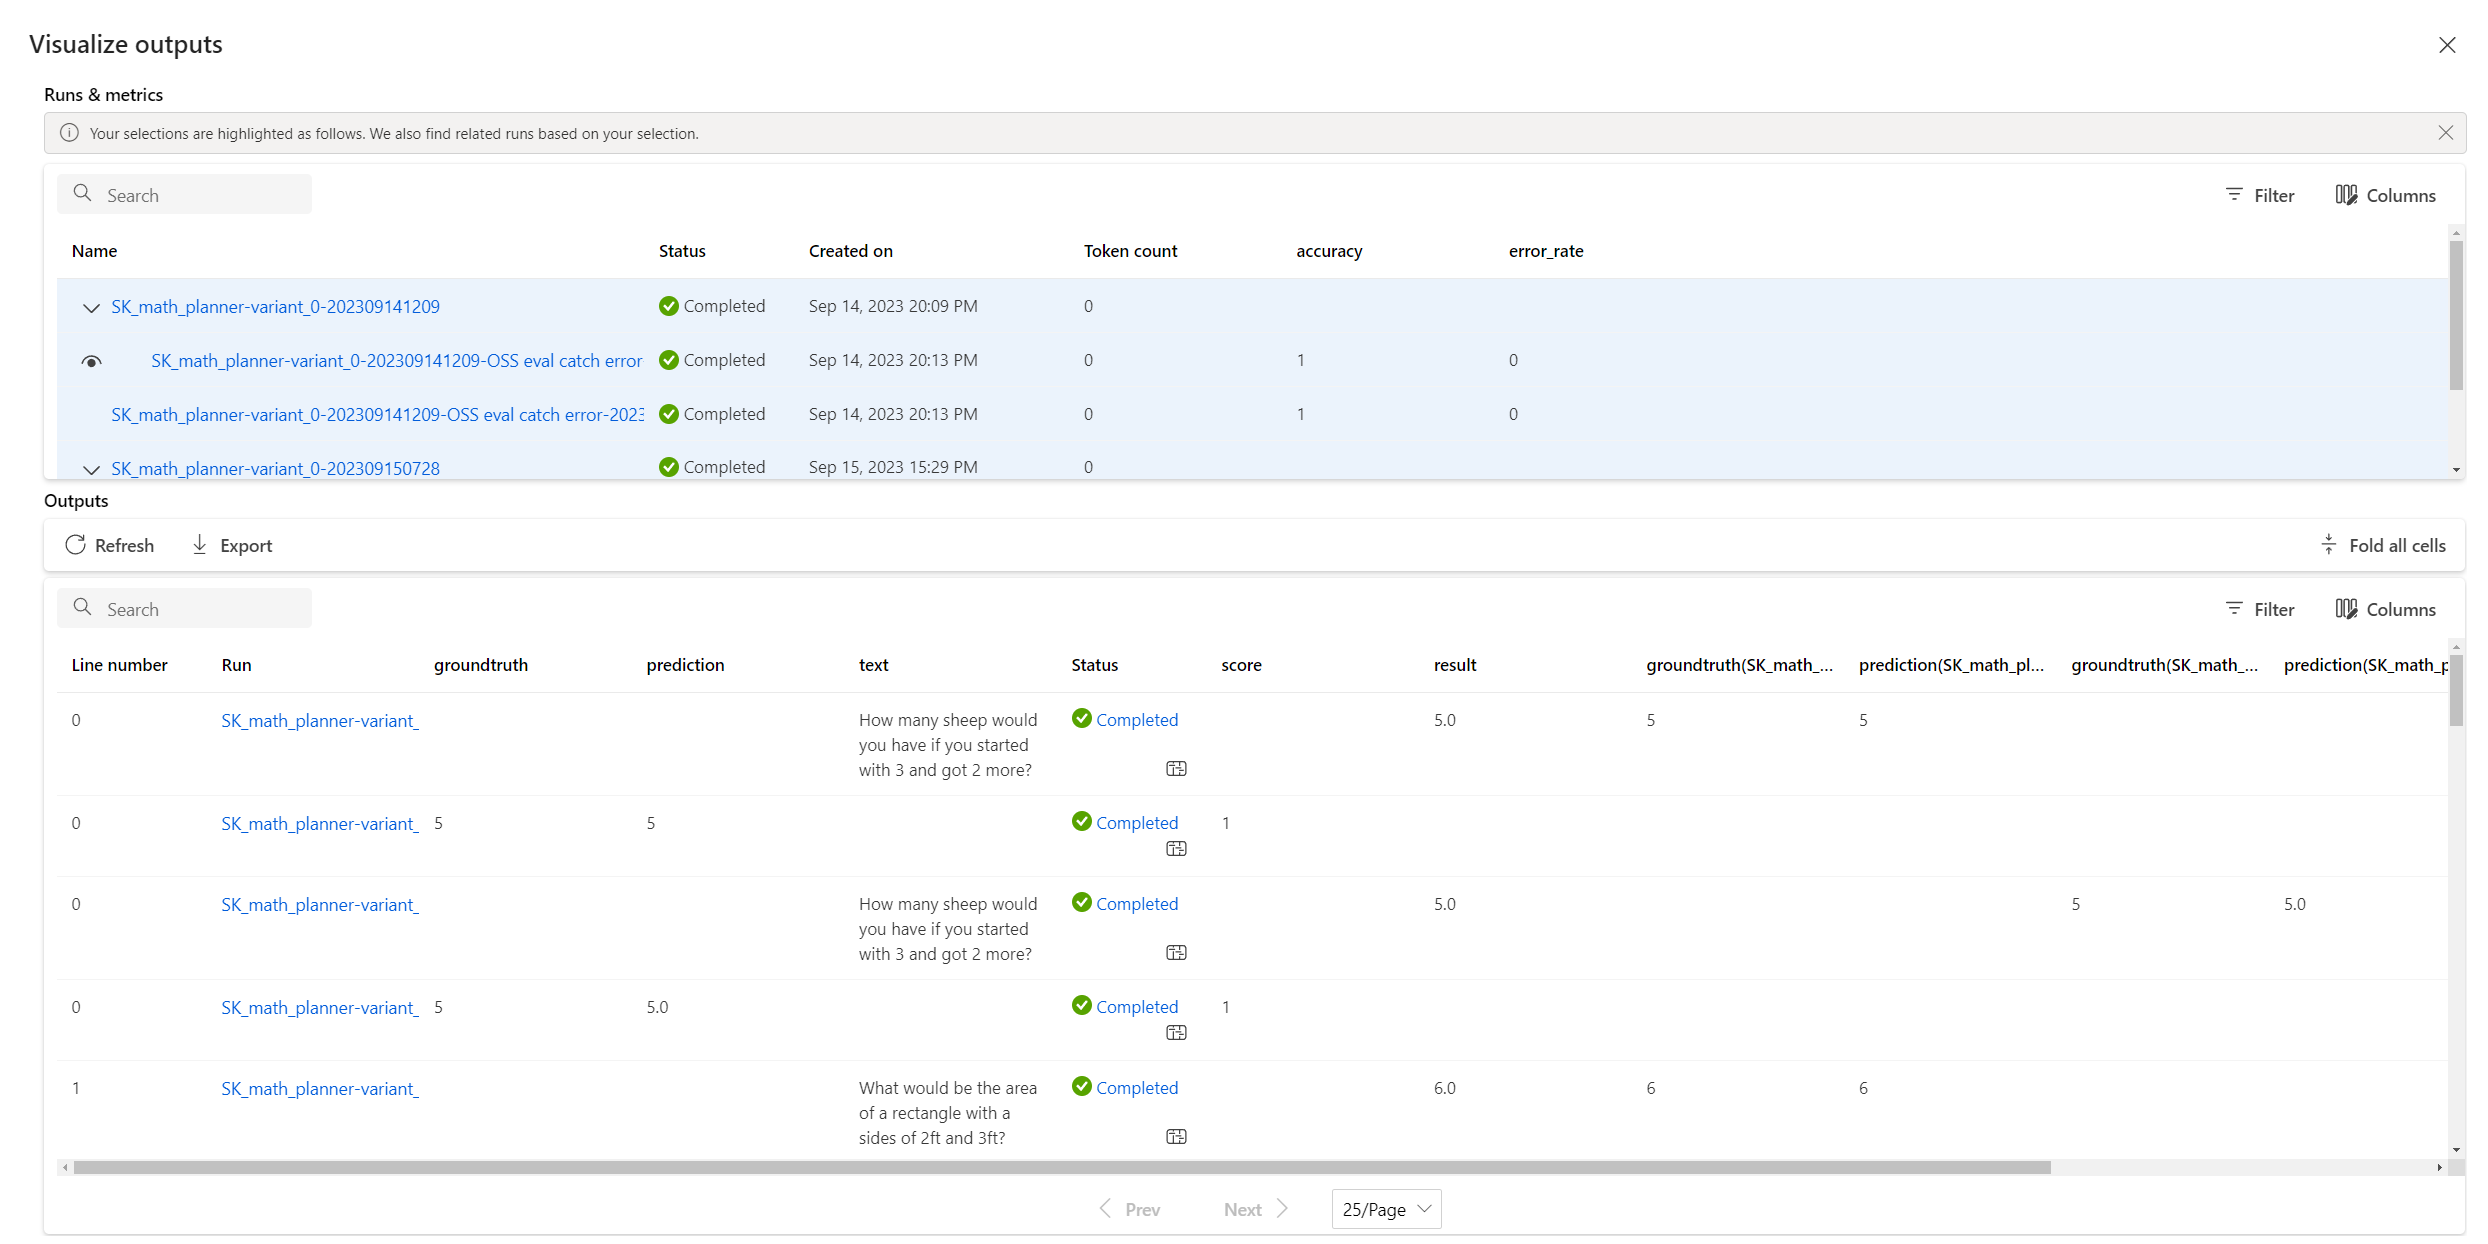
This capability enables you to conveniently compare the results of various runs, helping you identify which modifications are beneficial. To compare, select the runs you want to analyze, then select Visualize outputs.
The Visualize outputs screen shows a detailed table with a line-by-line comparison of the results from selected runs.
