Note
Access to this page requires authorization. You can try signing in or changing directories.
Access to this page requires authorization. You can try changing directories.
This quickstart describes the process of creating a Site Network Service (SNS) using the Azure portal. The Site Network Service (SNS) is an essential part of a Network Service Instance and is associated with a specific site. Each Site Network Service (SNS) instance references a particular version of a Network Service Design (NSD).
Prerequisites
An Azure account with an active subscription is required. If you don't have an Azure subscription, follow the instructions here Start free to create an account before you begin.
This quickstart assumes you followed the prerequisites in these quickstarts:
- Quickstart: Prerequisites for Operator and Virtualized Network Function (VNF)
- Quickstart: Create a Virtualized Network Functions (VNF) Site
Create Site Network Service (SNS)
Create resource
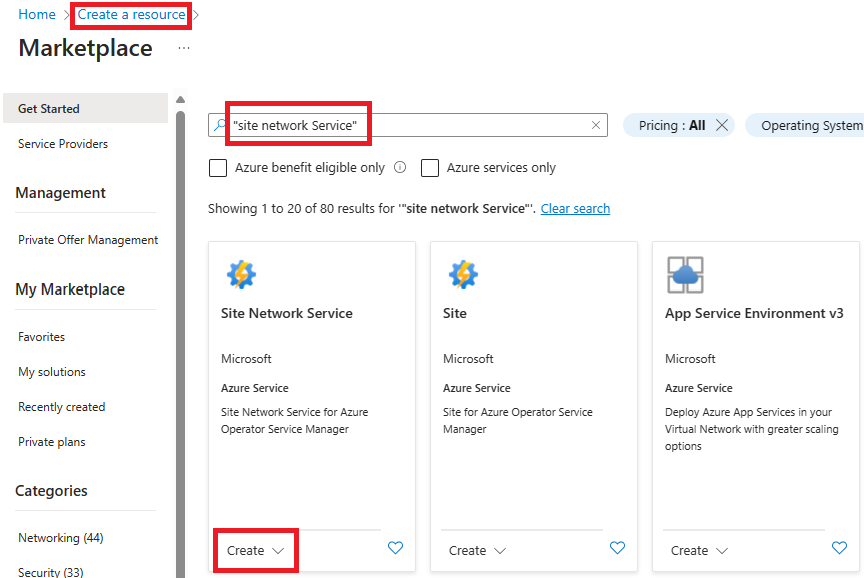
In Azure portal, enter "Site Network Services" into the search and select Site Network Service from the results.
Select + Create.
In the Basics tab, enter or select the following information. Accept the defaults for the remaining settings.
Setting Value Subscription Select your subscription. Resource group Select operatorresourcegroup. Name Enter ubuntu-sns. Region Select the location you used for your prerequisite resources. Site Enter ubuntu-vm-site. Managed Identity Type User Assigned. User Assigned Identity Select identity-for-ubuntu-vm-sns. 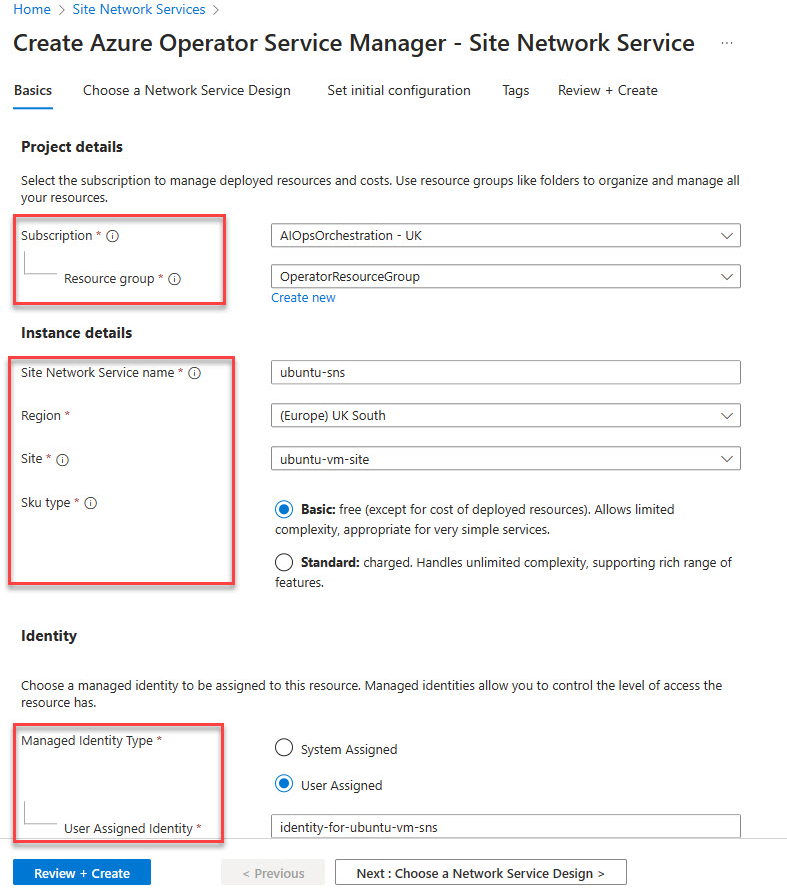


Choose Network Service Design
On the Choose a Network Service Design page, select the Publisher, Network Service Design Resource and Network Service Design Version that you published earlier.
Setting Value Publisher Offering Location Select UK South Publisher Select ubuntu-publisher Network Service Design resource Select ubuntu-nsdg Network Service Design version Select 1.0.0 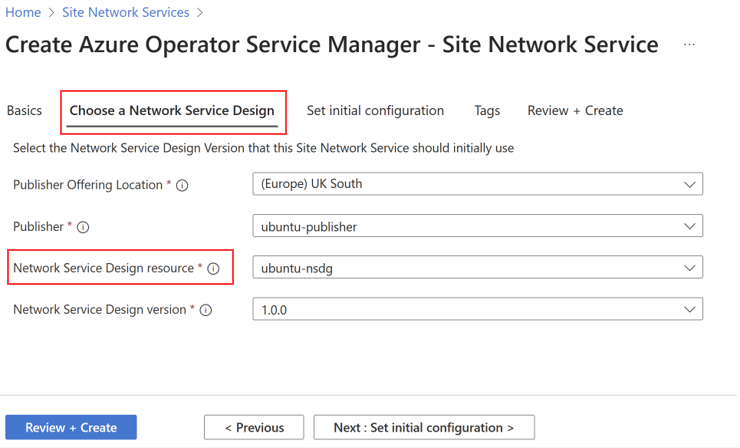
Select Next.

Set initial configuration
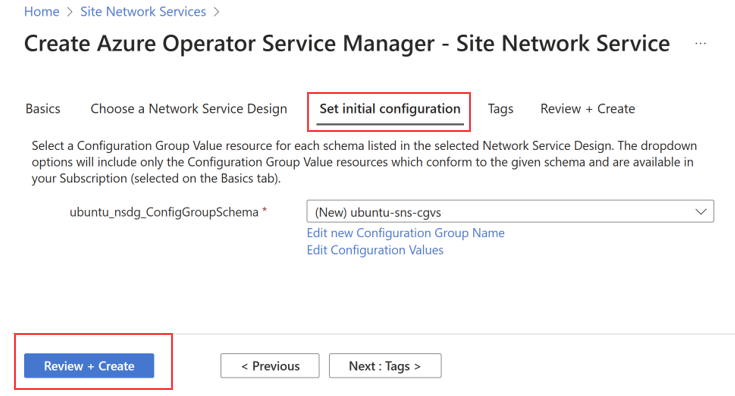
From the Set initial configuration tab, choose Create New.
Enter ubuntu-sns-cgvs into the name field.
Copy and paste the following JSON file into the ubuntu-sns-cgvs dialog that appears. Edit the place holders to contain your virtual network ID, your managed identity, and your SSH public key values.
{
  "ubuntu-vm-nfdg": {
    "deployParameters": [
      {
        "ubuntu-template": {
          "subnetName": "ubuntu-vm-subnet",
          "virtualNetworkId": "/subscriptions/<subscription_id>/resourceGroups/<pre-requisites resource group>/providers/Microsoft.Network/virtualNetworks/ubuntu-vm-vnet",
          "sshPublicKeyAdmin": "<Your public ssh key>"
        }
      }
    ],
    "managedIdentityId": "<managed-identity-resource-id>",
    "nfdv": "1.0.0"
  }
}
Refer to Quickstart: Prerequisites for Operator and Virtualized Network Function (VNF) in the Resource ID for the managed identity section to see how to retrieve the managedIdentity resource ID.
Additionally, the sshPublicKeyadmin can be listed by executing
cat ~/.ssh/id_rsa.puborcat ~/.ssh/id_dsa.pubor can be created following Generate new keys and Get public keys .Select Review + create.
Select Create.

Wait for deployment
Wait for the deployment to reach the 'Succeeded' state. After completion, your Virtual Network Function (VNF) should be up and running.
Access your Virtual Network Function (VNF)
- To access your Virtual Network Function (VNF), go to the Site Network Service object in the Azure portal.
- Select the link under Current State -> Resources. The link takes you to the managed resource group created by Azure Operator Service Manager.
Congratulations! You have successfully created a Site Network Service for Ubuntu Virtual Machine (VM) as a Virtual Network Function (VNF) in Azure. You can now manage and monitor your Virtual Network Function (VNF) through the Azure portal.
When you have finished, remember to delete the resources. To do this:
- Delete the Operator Resource Group.
- When step 1 is complete, delete the Publisher Resource Group.