Note
Access to this page requires authorization. You can try signing in or changing directories.
Access to this page requires authorization. You can try changing directories.
Install Clarity on WordPress platform using Clarity Plugin
Note
These steps apply to WordPress sites and to WooCommerce sites on WordPress.
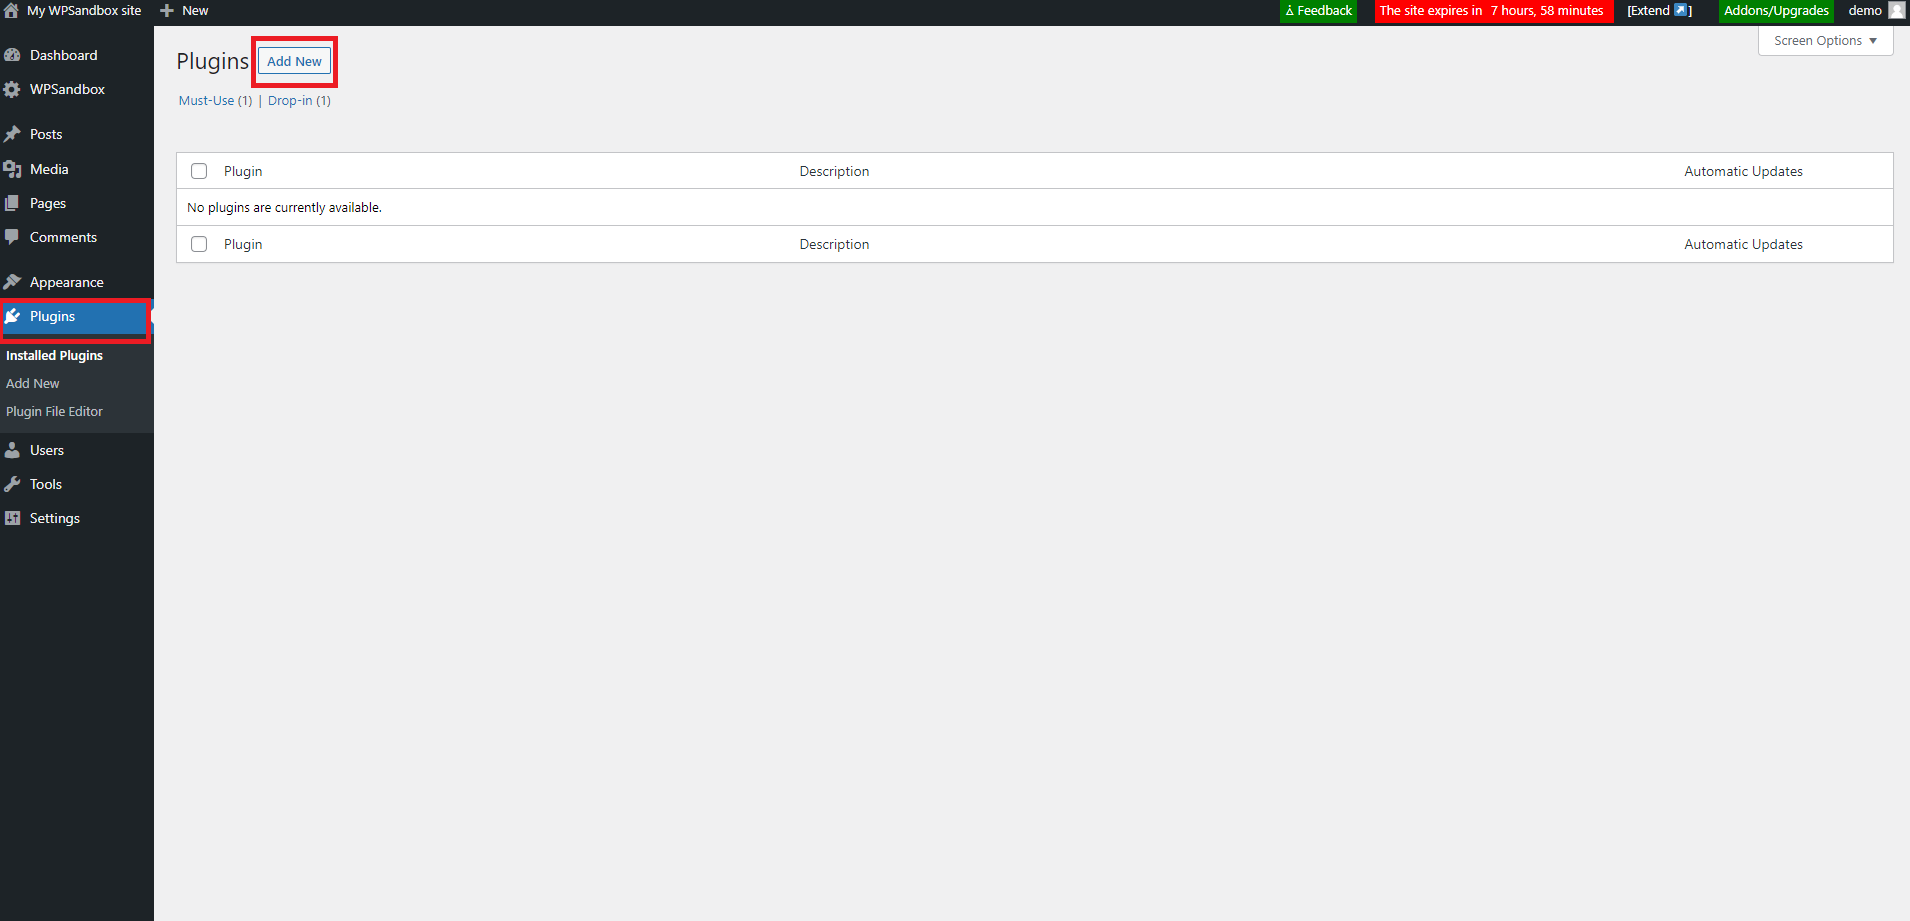
Step 1
Sing in to your WordPress dashboard. Navigate to Plugins. Select Add new plugin.
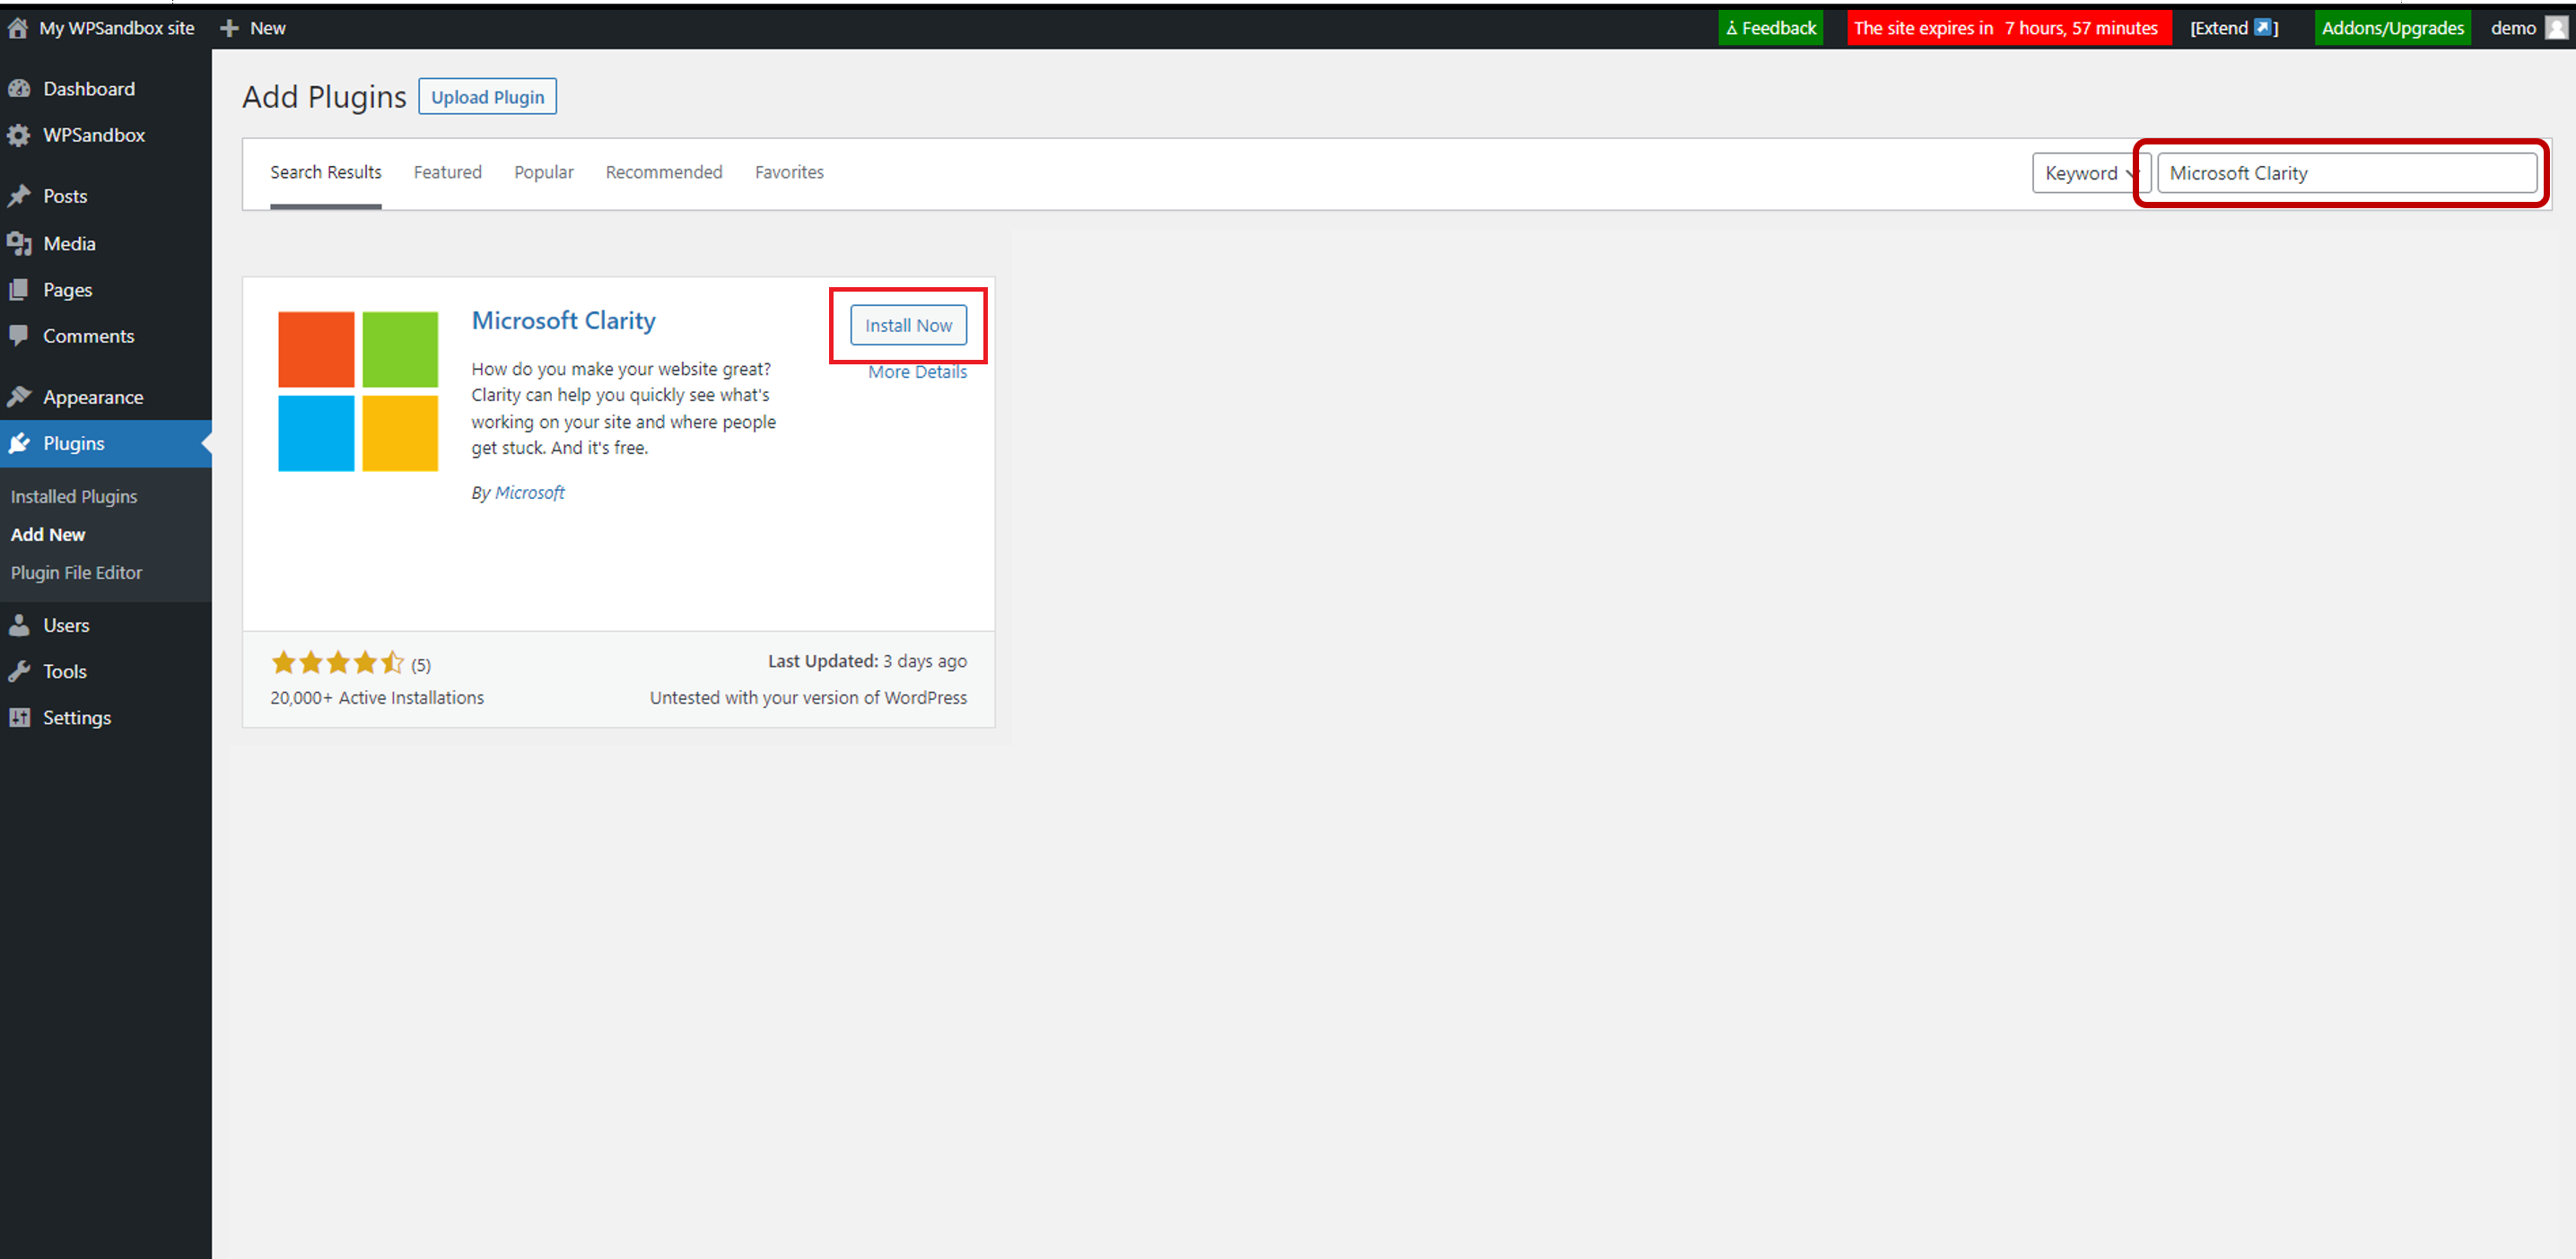
Step 2
Search for Microsoft Clarity and select Install and Activate.
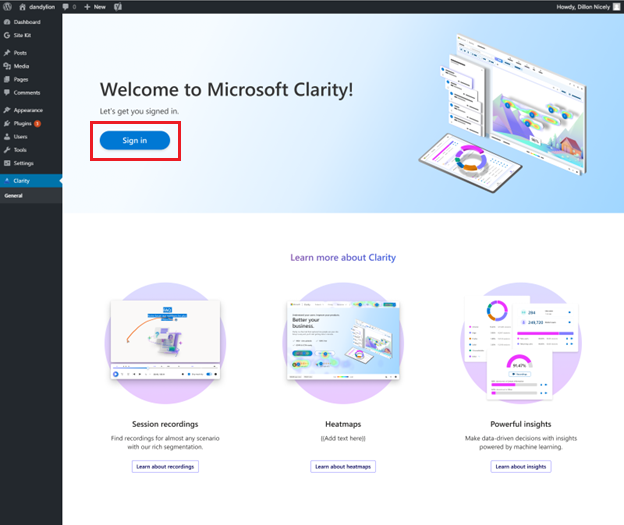
Step 3
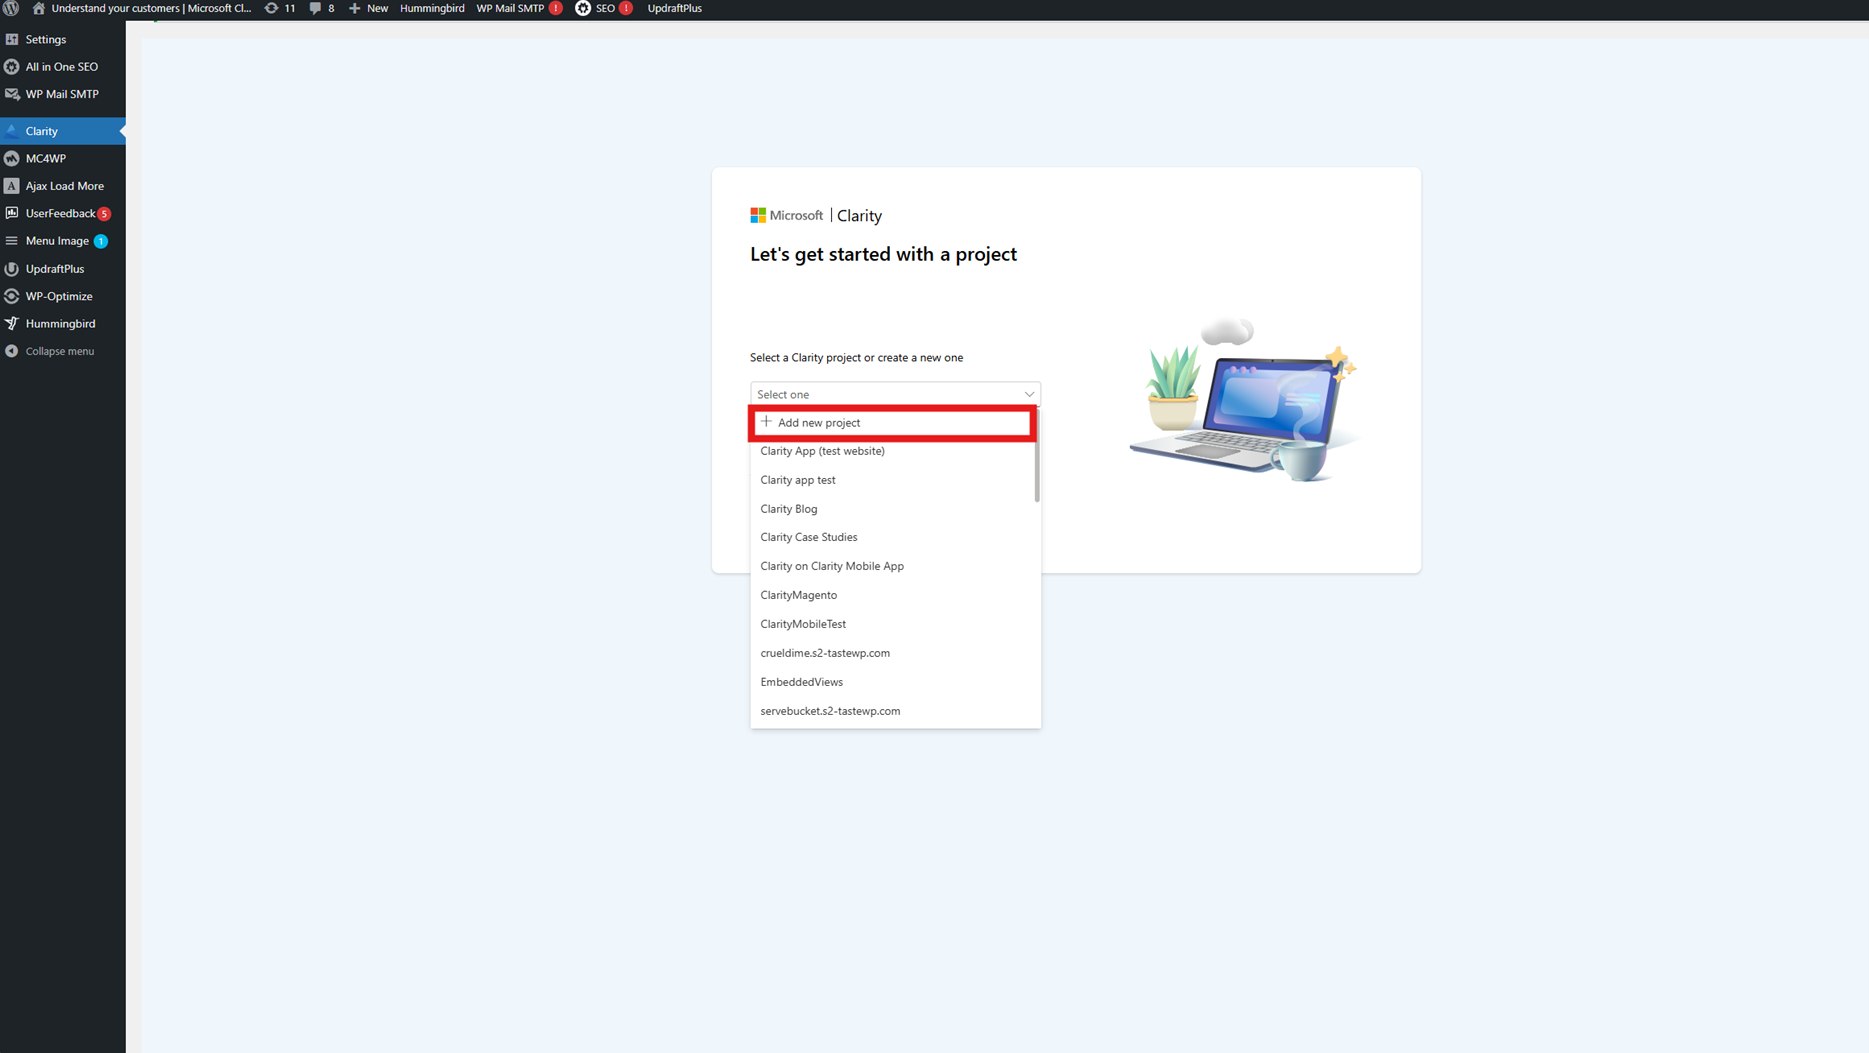
From the nav menu, open the Clarity plugin. Select Sign in to start connecting existing projects or create a new project.
Step 4
Choose a project from the list of existing projects and select Continue.
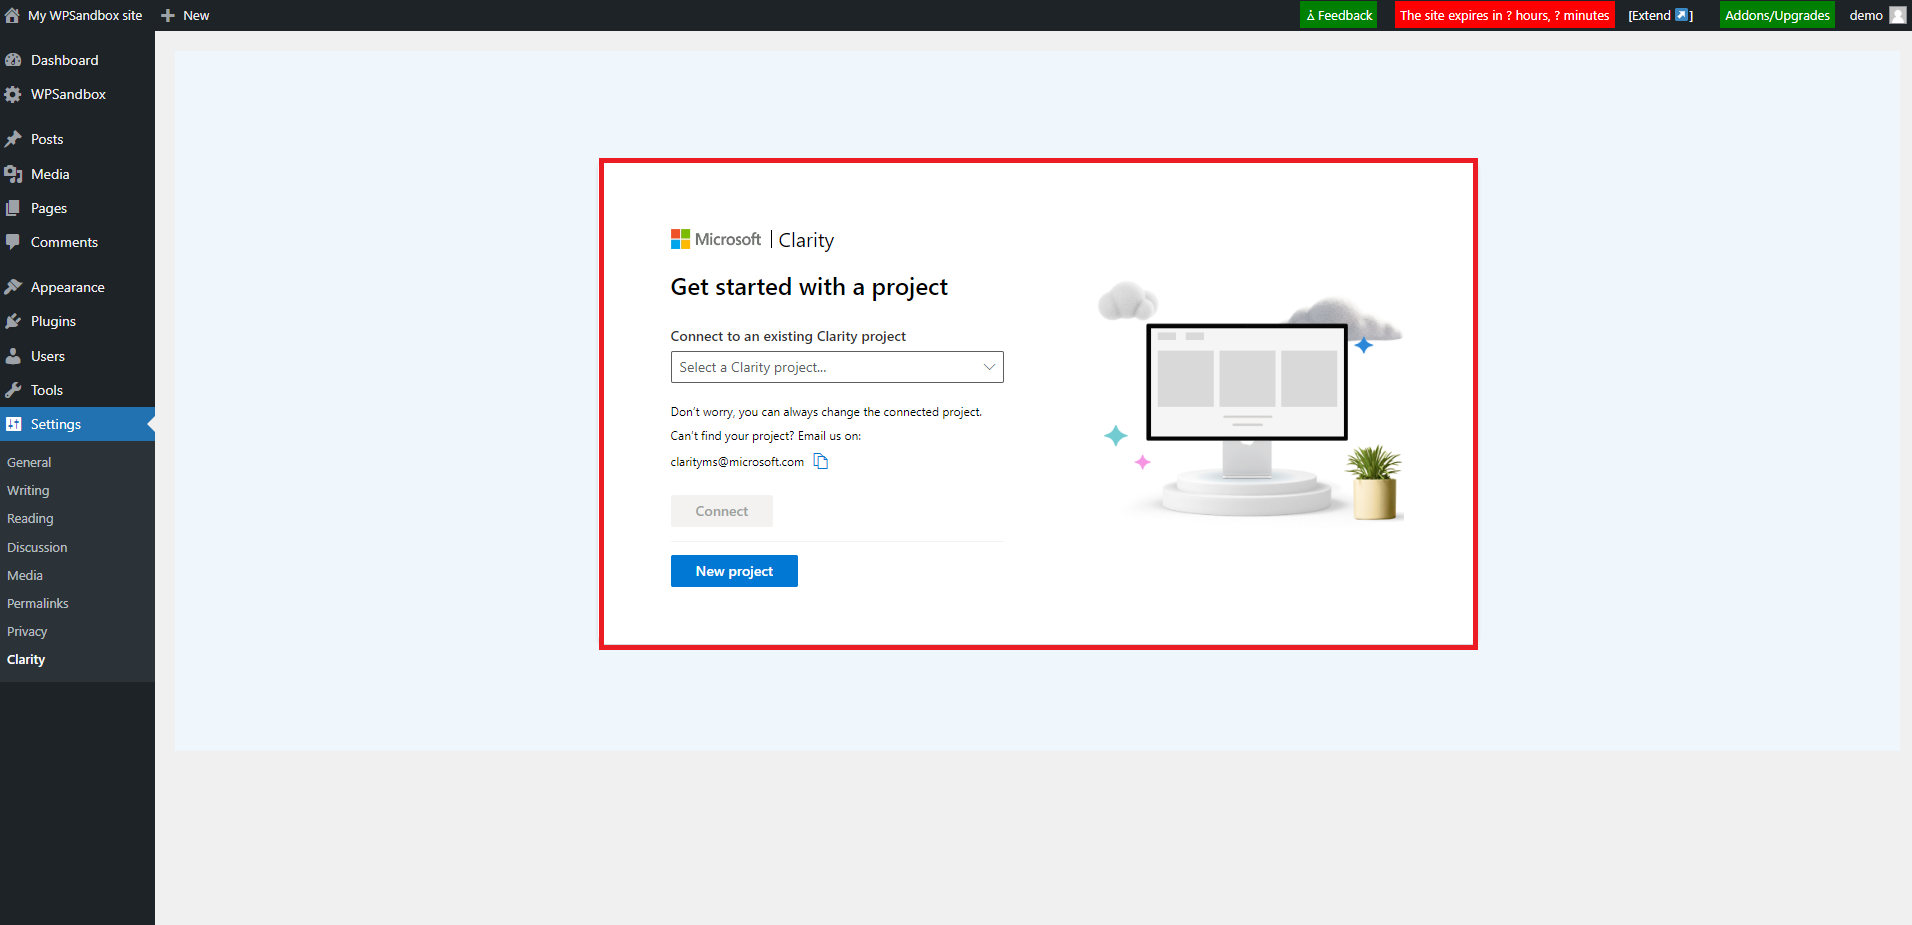
Or
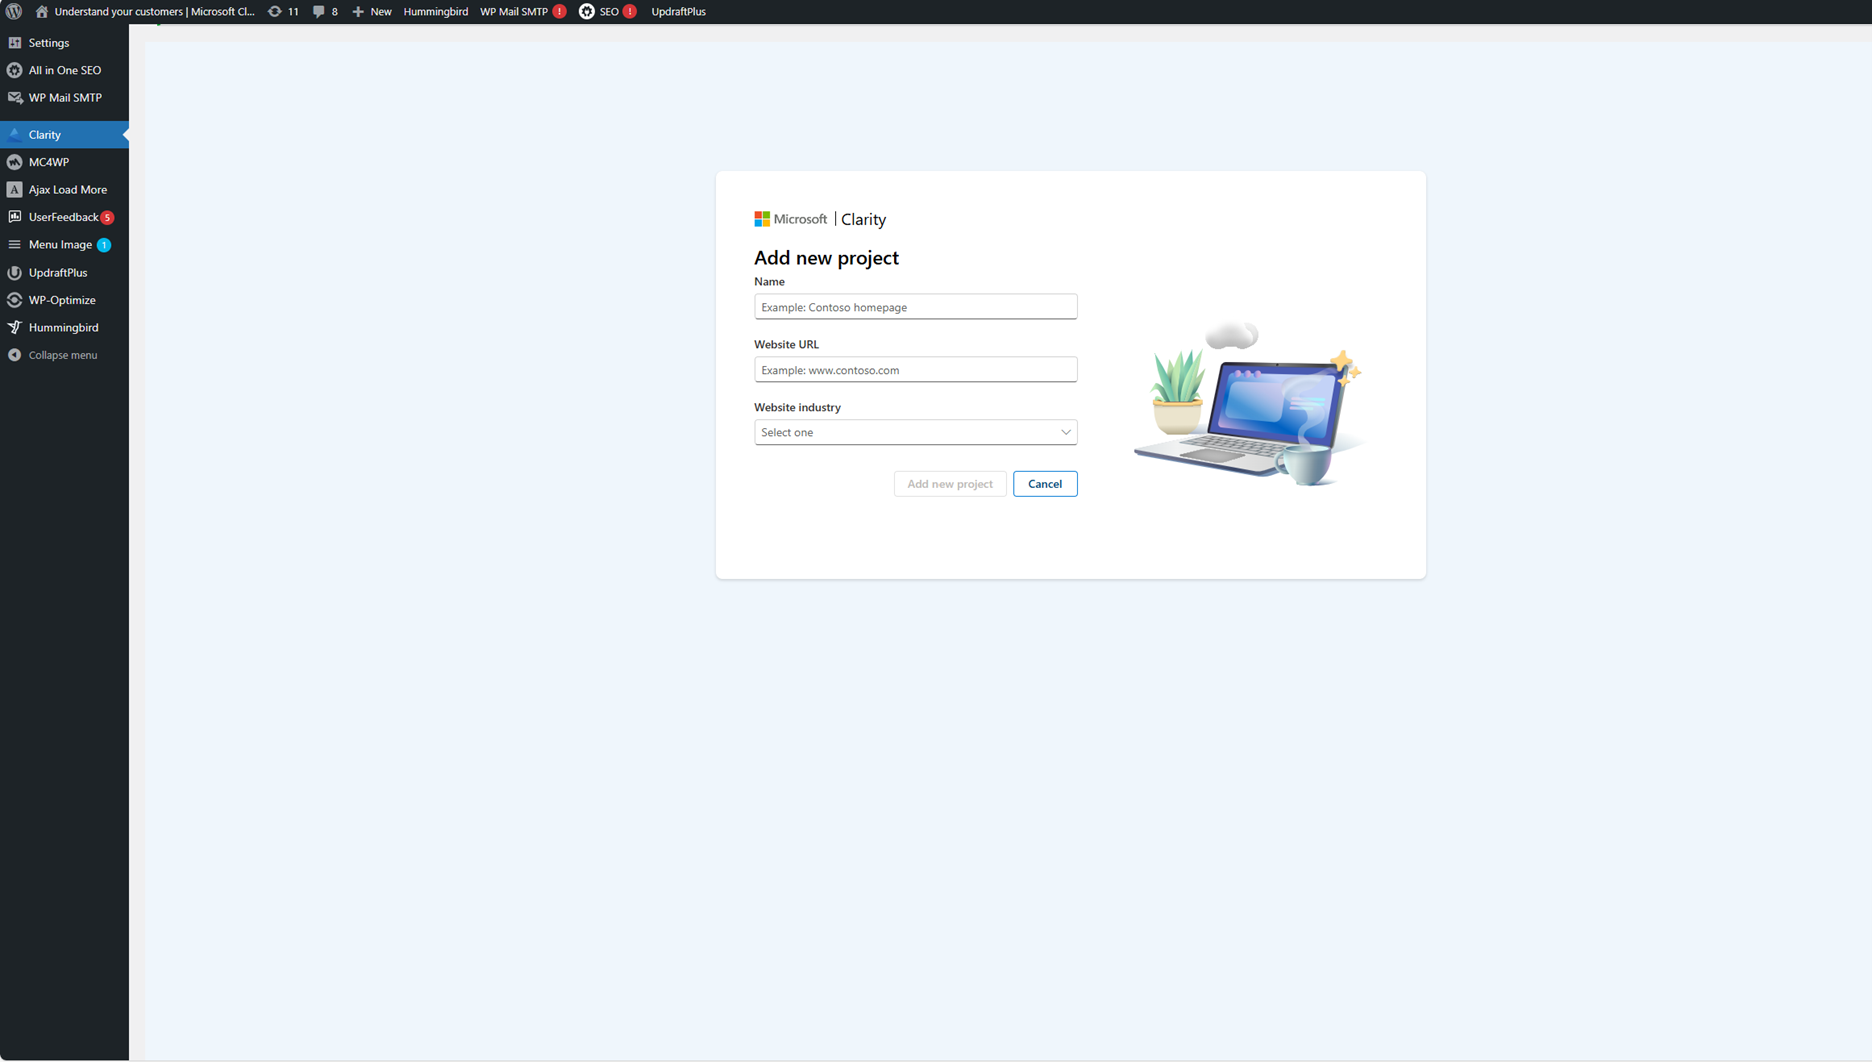
Select New project to create a new project and enter the details.
Step 5
Once the project is successfully integrated, you can view Clarity's Dashboard, Recordings, Heatmaps, and Insights.
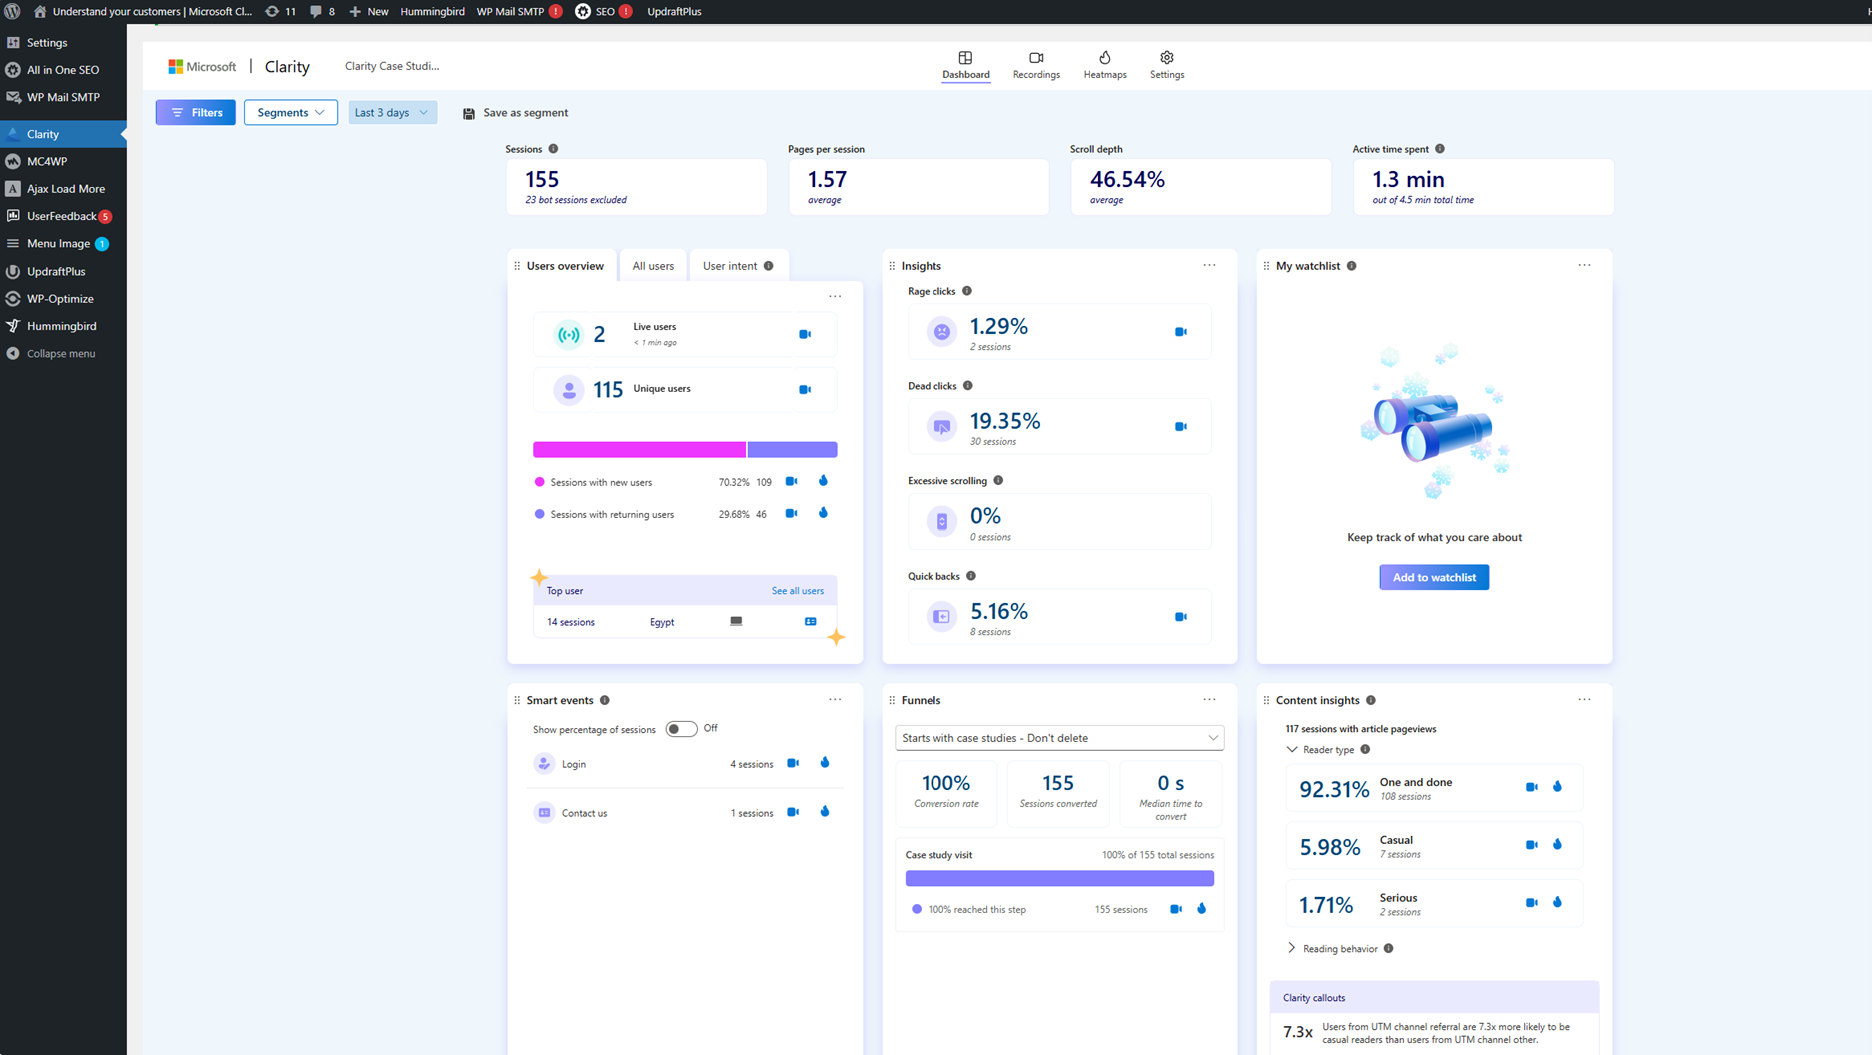
Your WordPress site is now configured to track user behavior on your site.
Configure Content Insights Metrics for your WordPress Blog
If your website is a blog, you can follow these steps to view the Content Insights Metrics through Clarity embedded experience inside WordPress.
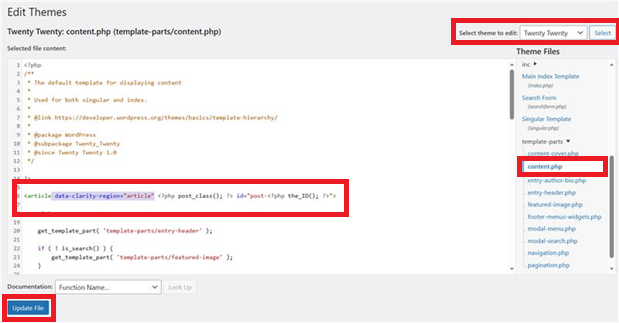
Step 1: Accessing the WordPress Theme File Editor
Navigate to Menu -> Appearance and select Theme File Editor.

Step 2: Locating the Appropriate Theme File
- Identify the theme file responsible for displaying individual blog post content. The file name might vary based on your WordPress theme.
- Example: For the theme Twenty Twenty, the file could be found under Template-parts with the name content.php.
Step 3: Editing the Theme File and Adding Data Attribute
- In the Theme File Editor, locate and open the file corresponding to the blog post content.
- Within the content area section of the file, find the opening tag of the
<article>element. - Insert the data attribute
data-clarity-region="article"into the article tag. - Review the modifications to ensure accuracy and select Update File to save the changes.
Step 4: Verifying Content Insights Integration
- Visit one of your blog posts on the live website.
- Right-click on the blog post content and select Inspect or Inspect Element from the context menu (depending on your browser).
- In the developer tools, navigate to the HTML section and locate the
<article>tag of your blog post content. - Verify that the data attribute
data-clarity-region="article"is present in the<article>tag.
Note
Direct modification of theme files can be risky, especially if you are unfamiliar with coding and WordPress development. If you run into any problems, it's recommended to consult a developer or consider using a child theme to make modifications securely.
FAQ
For more answers, refer to Setup FAQ.