Note
Access to this page requires authorization. You can try signing in or changing directories.
Access to this page requires authorization. You can try changing directories.
Use case templates to configure case management settings for supported case types in the Microsoft Defender portal. Case templates help admins standardize custom fields, custom statuses, and SLA policies for their organization's SecOps workflows.
For an overview of Case Management, see Case management in the Microsoft Defender portal.
Configure custom fields
Use custom fields to capture organization-specific information on cases. Custom fields help analysts track the information your security operations center requires for triage, investigation, remediation, handoff, or reporting.
Create a custom field
To create a custom field:
Sign in to the Microsoft Defender portal.
Select Cases.
Select Case management settings.
Select the case type you want to configure:
- Incidents
- Generic
Select Custom fields.
Select Create.
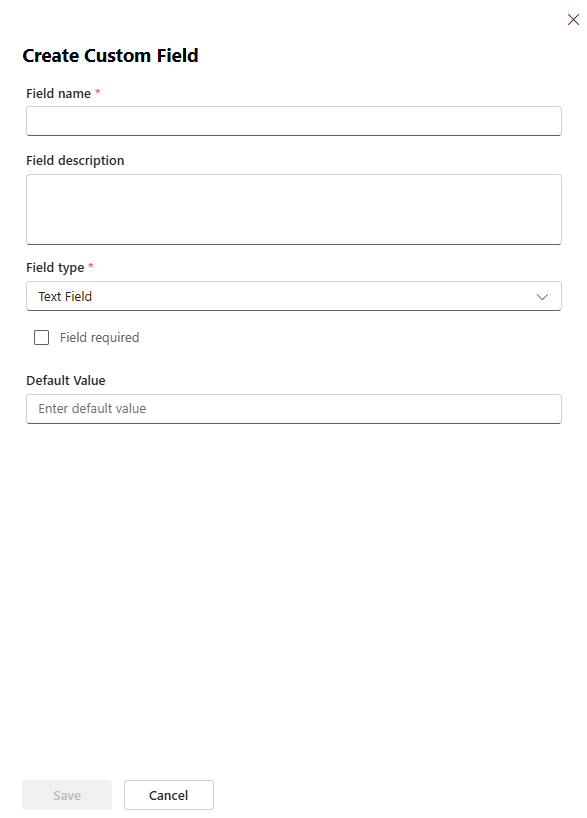
In Field name, enter a name for the custom field.
In Field description, enter a description.
In Field type, select the field type.
Configure the field options.
Note
Available options can vary depending on the field type.
To require analysts to fill in the field, select Field required.
If needed, set a default value.
Select Save.
Edit a custom field
To edit a custom field:
Sign in to the Microsoft Defender portal.
Select Cases.
Select Case management settings.
Select the case type you want to configure:
- Incidents
- Generic
Select Custom fields.
Select the custom field you want to edit.
Select Edit.
Update the field settings.
Select Save.
Disable a custom field
To disable a custom field:
Sign in to the Microsoft Defender portal.
Select Cases.
Select Case management settings.
Select the case type you want to configure:
- Incidents
- Generic
Select Custom fields.
Select the custom field you want to disable.
Select Disable.
Delete a custom field
To delete a custom field:
Sign in to the Microsoft Defender portal.
Select Cases.
Select Case management settings.
Select the case type you want to configure:
- Incidents
- Generic
Select Custom fields.
Select the custom field you want to delete.
Select Delete.
Select Confirm.
Configure custom statuses
Use custom statuses to add organization-specific statuses to the case lifecycle. Custom statuses are grouped under the New, Open, and Closed lifecycle categories.
Default statuses can't be deleted.
Create a custom status
Sign in to the Microsoft Defender portal.
Select Cases.
Select Case management settings.
Select the case type you want to configure:
- Incident
- Generic
Select Custom statuses.
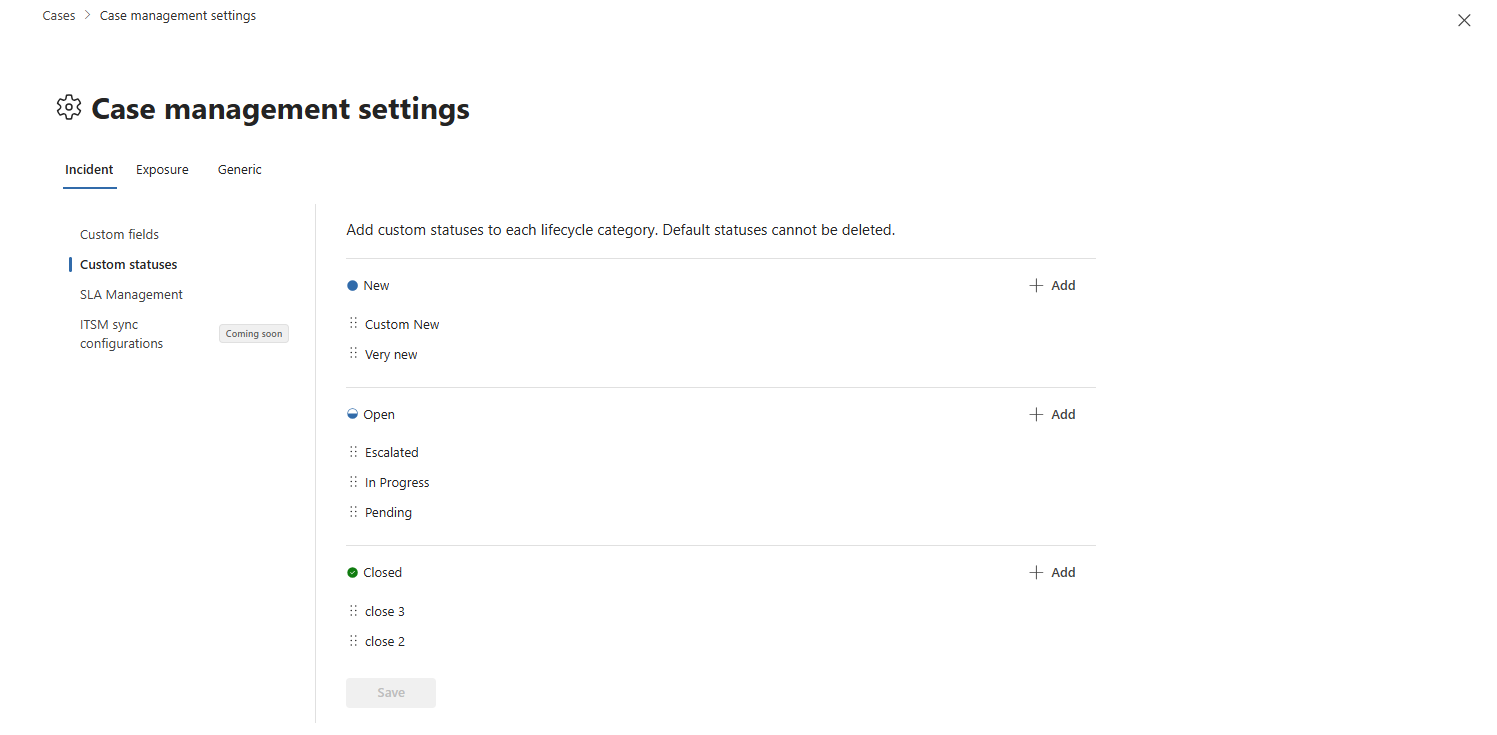
Under the lifecycle category where you want to add the status, select Add.
Enter a name for the custom status.
Select the check mark to add the status.
Select Save.
Edit a custom status
Sign in to the Microsoft Defender portal.
Select Cases.
Select Manage case templates.
Select Incident.
Select Custom statuses.
Find the custom status you want to change.
Select Edit.
Update the status name.
Select the check mark.
Select Save.
Reorder a custom status
You can change the order of custom statuses within their lifecycle category.
On the Custom statuses page, find the custom status you want to move.
Select More options (...).
Select Move up or Move down.
Select Save.
Delete a custom status
On the Custom statuses page, find the custom status you want to delete.
Select More options (...).
Select Delete.
Select Save.
Configure SLA policies
Use SLA policies to define and track response-time expectations for cases. SLA policies help teams monitor whether cases are handled within required timeframes and identify cases that are at risk or breached.
For more information about how SLA policies work, see SLA policies for cases in the Microsoft Defender portal.
Create an SLA policy
Sign in to the Microsoft Defender portal.
Select Cases.
Select Case management settings.
Select the case type you want to configure:
- Incidents
- Generic
Select SLA management.
Select Create.
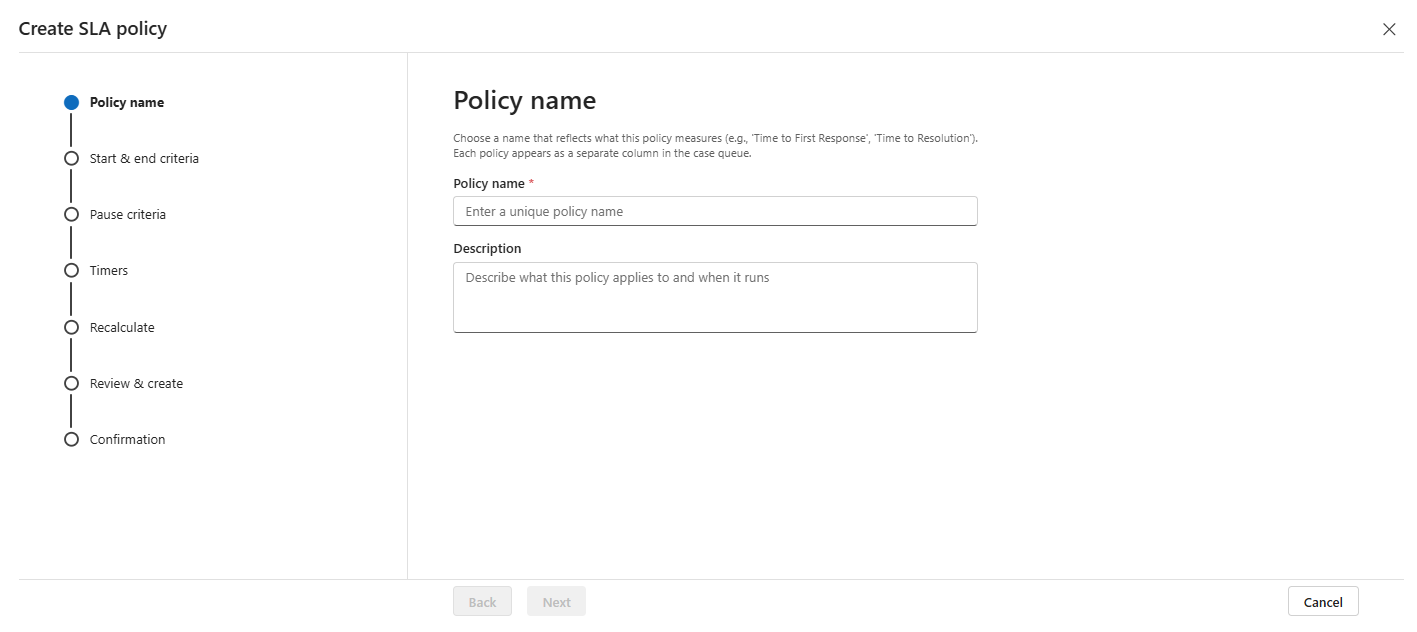
On the Policy name step, enter a policy name and description.
Select Next.
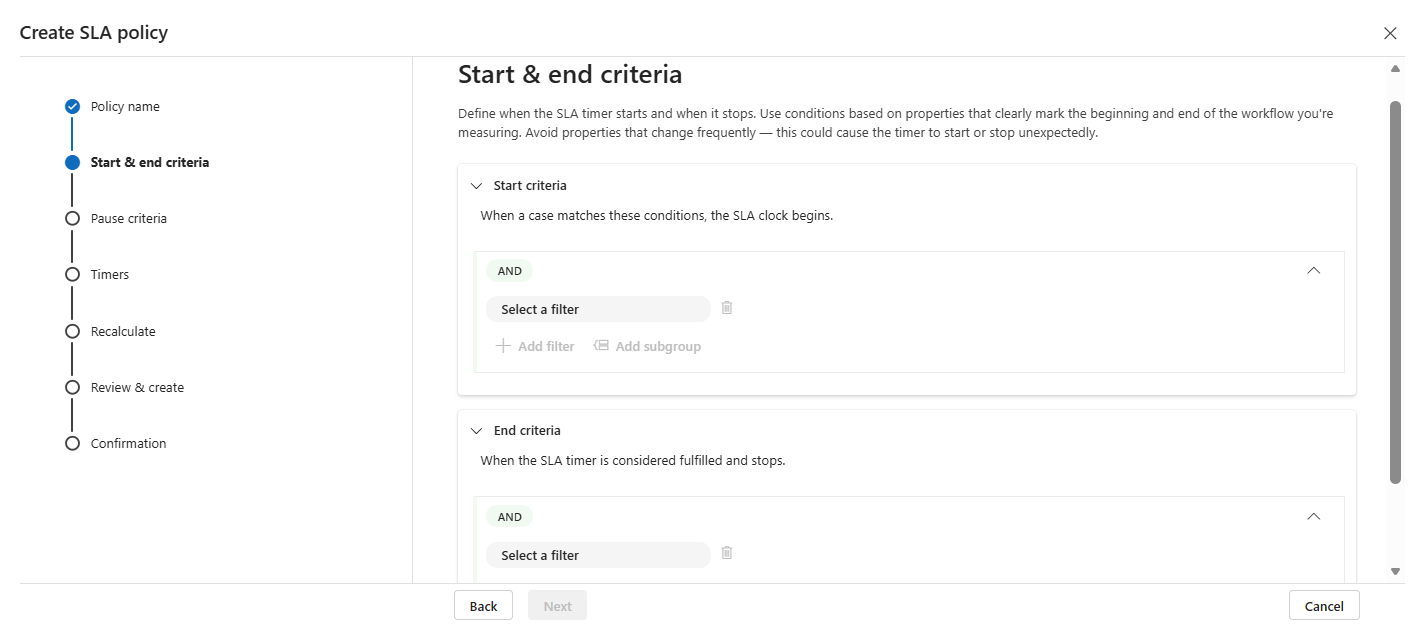
On the Start & end criteria step, define when the SLA timer starts and stops.
Select Next.
On the Pause criteria step, define when the SLA timer pauses.
Select Next.
On the Timers step, define the SLA time limits.
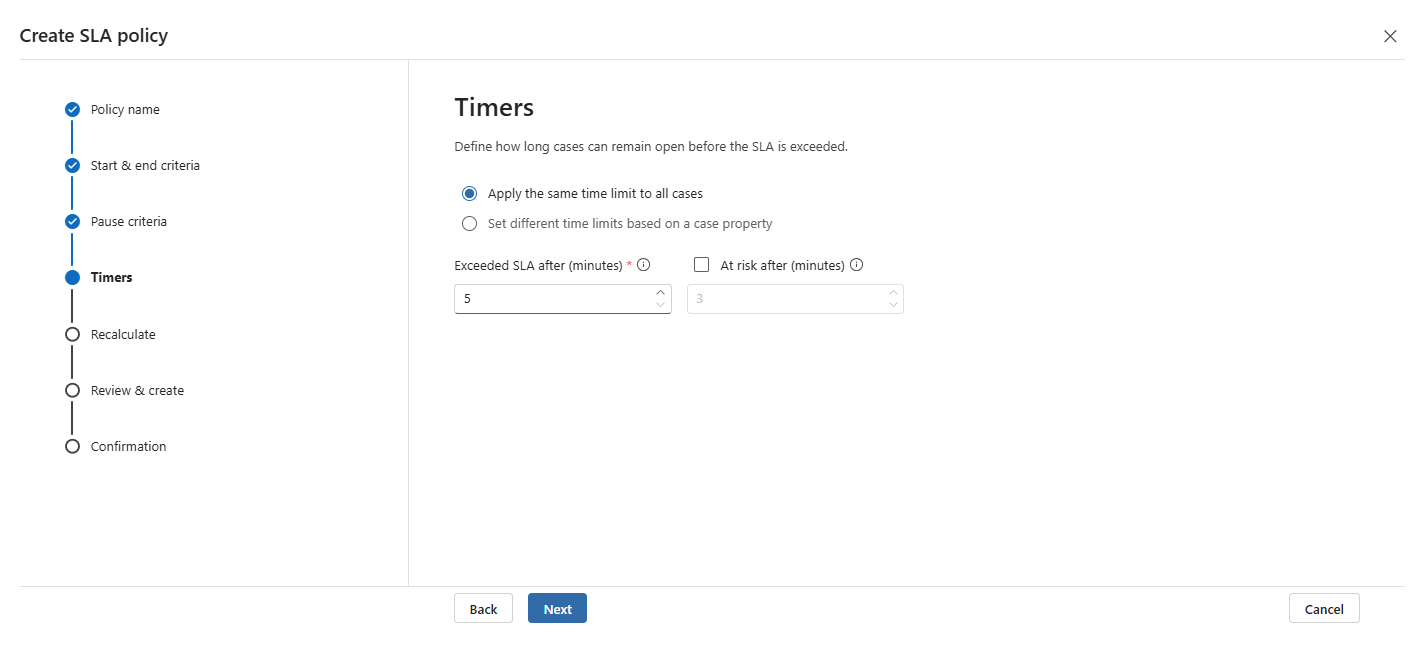
Set the time limit for when the SLA is exceeded.
If needed, set when the SLA is considered at risk.
Select Next.
On the Recalculate step, choose how the SLA timer responds when a case property used in timer conditions changes.
- Don't recalculate: The timer continues running with the original time limit.
- Recalculate and carry on: The timer switches to the new time limit and keeps the elapsed time.
- Recalculate and reset: The timer switches to the new time limit and restarts from zero.
Select Next.
Review the policy settings.
Under Applies to, confirm the case type or case types that the SLA policy evaluates.
To start evaluating new cases immediately after creation, set the policy to Active.
Select Create.
Edit an SLA policy
Sign in to the Microsoft Defender portal.
Select Cases.
Select Case management settings.
Select the case type you want to configure:
- Incidents
- Generic
Select SLA management.
Select the SLA policy you want to edit.
Select Edit.
Update the policy settings.
Select Save.
Delete an SLA policy
Sign in to the Microsoft Defender portal.
Select Cases.
Select Case management settings.
Select the case type you want to configure:
- Incidents
- Generic
Select SLA management.
Select the SLA policy you want to delete.
Select Delete.
Select Confirm.