Note
Access to this page requires authorization. You can try signing in or changing directories.
Access to this page requires authorization. You can try changing directories.
Generic cases help analysts track and manage security operations work that isn't tied to a single incident. Use generic cases to track ownership, priority, status, tasks, comments, activity history, attachments, linked objects, custom fields, due dates, and due times.
For an overview of Case Management, see Case management in the Microsoft Defender portal.
Prerequisites
Before you begin, make sure that you have one of the following Microsoft Defender unified RBAC permissions:
To view generic cases: Security data basics (read) in the Security operations group.
To create and manage generic cases: Alerts (manage) in the Security operations group.
For more information, see Microsoft Defender unified role-based access control (RBAC).
Create a generic case
Create a generic case to track security operations work that isn't managed as an incident case or exposure case.
To create a generic case:
Sign in to the Microsoft Defender portal.
Select Cases.
Select Generic.
Select Create.
Enter the required case details.
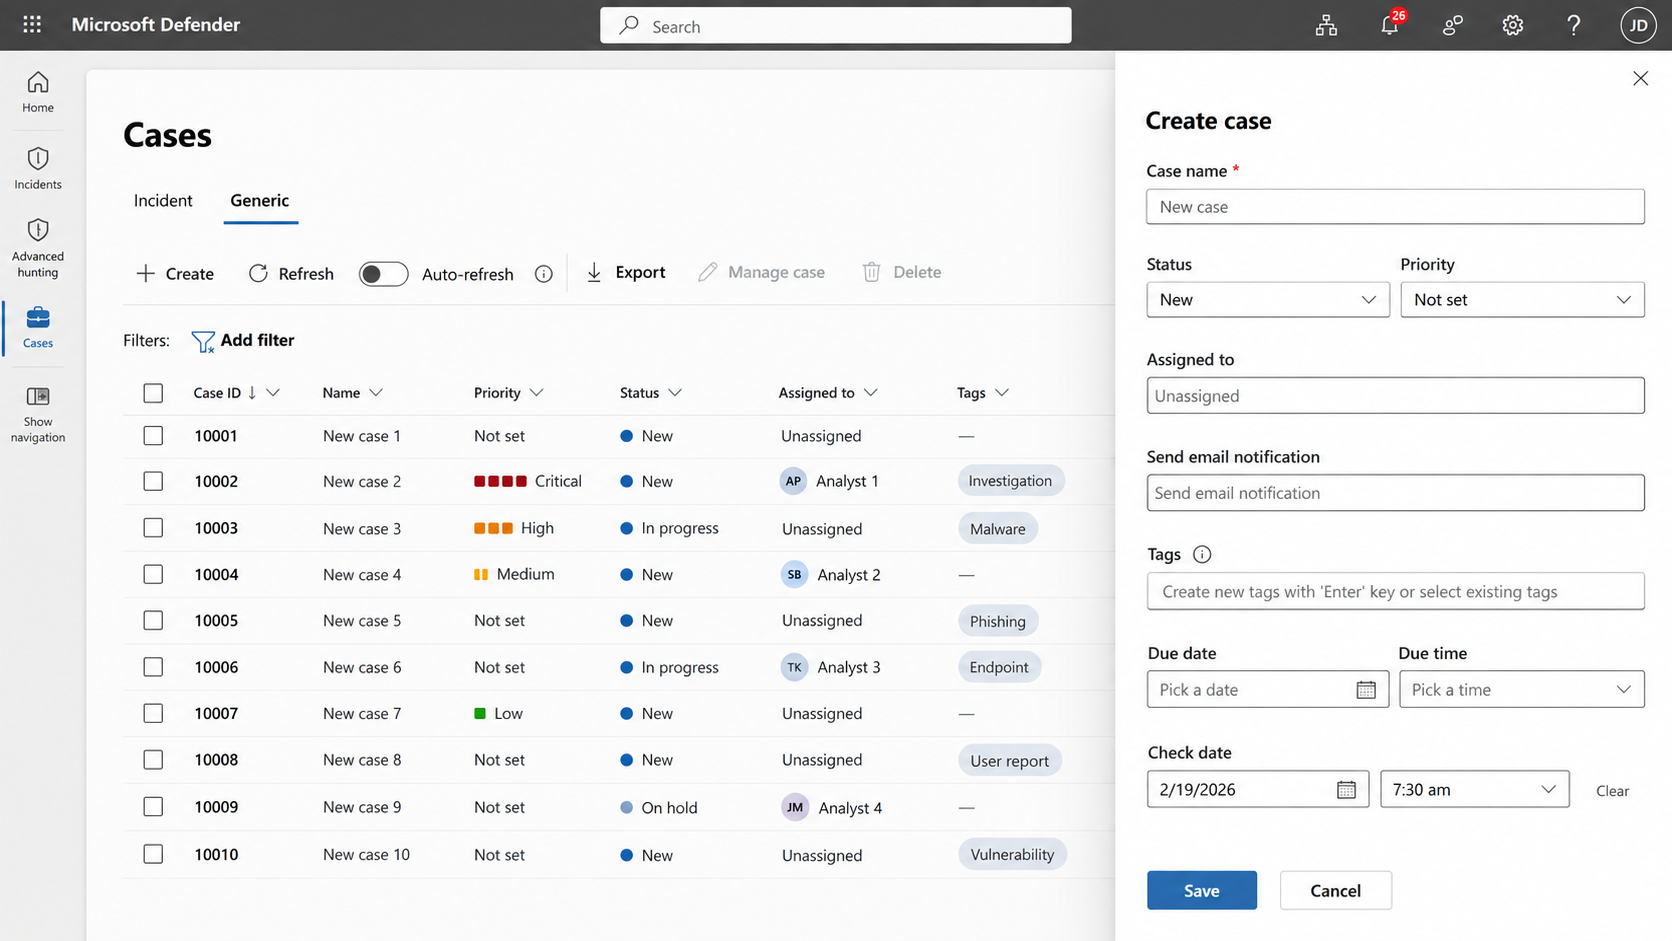
Select Save.
Available fields can vary by tenant configuration and preview scope.
Access the Manage case pane
Most generic case management tasks are available from the Manage case pane.
To access the Manage case pane:
Sign in to the Microsoft Defender portal.
Select Cases.
Select Generic.
Select a generic case.
Select Manage case.
Update the fields you need.
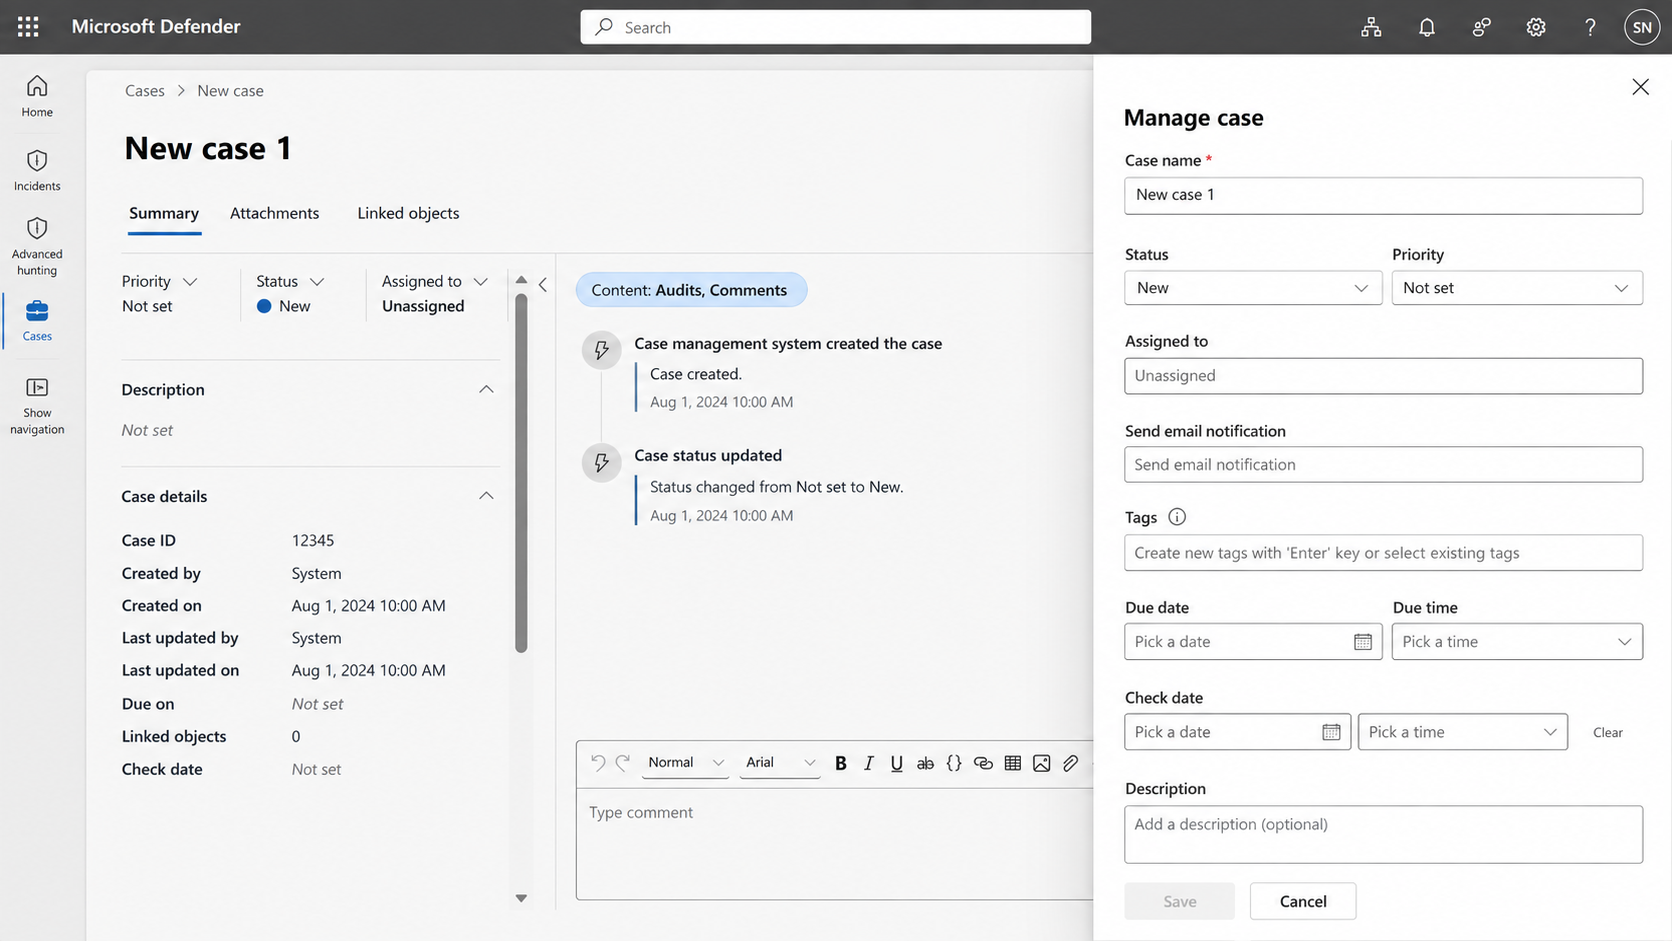
Select Save.
Available fields can vary by tenant configuration and preview scope.
Rename a generic case
Use the case name to help analysts understand the purpose of the case.
To rename a generic case:
Sign in to the Microsoft Defender portal.
Select Cases.
Select Generic.
Select the relevant generic case.
Select Manage case.
In Case name, enter the updated name.
Select Save.
Assign a generic case to an owner
Assign a generic case to an owner to track responsibility and support handoff between analysts or teams.
To assign an owner:
Sign in to the Microsoft Defender portal.
Select Cases.
Select Generic.
Select the relevant generic case.
Select Manage case.
In Assigned to field, select the user or group you want to assign the generic case to.
To remove an existing assignment, clear the current value.
Select Save.
Change generic case priority
Priority helps teams decide which generic cases require the most immediate attention.
To change priority:
Sign in to the Microsoft Defender portal.
Select Cases.
Select Generic.
Select the relevant generic case.
Select Manage case.
In Priority, select the priority value.
Select Save.
Change generic case status
Use status to track where the generic case is in the response lifecycle.
To change status:
Sign in to the Microsoft Defender portal.
Select Cases.
Select Generic.
Select the relevant generic case.
Select Manage case.
In Status, select the status value.
Select Save.
Add or update custom fields
Custom fields are configured by admins in case templates. Use custom fields to capture organization-specific information required by your security operations process.
To update custom fields:
Sign in to the Microsoft Defender portal.
Select Cases.
Select Generic.
Select the relevant generic case.
Select Manage case.
Update the custom fields that apply to your workflow.
Select Save.
For more information about configuring custom fields, see Configure case templates in the Microsoft Defender portal.
Set or update the due date and due time
Use the due date and due time to track response expectations for the generic case.
To update the due date and due time:
Sign in to the Microsoft Defender portal.
Select Cases.
Select Generic.
Select the relevant generic case.
Select Manage case.
In Due date, select the required date.
In Due time, select the required time.
Select Save.
If your organization uses SLA policies, the due date and due time might be affected by the SLA policy configured for generic cases.
For more information, see Configure case templates in the Microsoft Defender portal.
Add or update tags
Use tags to add context to a generic case and help analysts filter, group, or identify related work.
To add or update tags:
Sign in to the Microsoft Defender portal.
Select Cases.
Select Generic.
Select the relevant generic case.
Select Manage case.
In Tags, add or remove tags as needed.
Select Save.
Send email notifications
Use email notifications to notify users or groups about updates to a generic case.
To send an email notification:
Sign in to the Microsoft Defender portal.
Select Cases.
Select Generic.
Select the relevant generic case.
Select Manage case.
In Send email notification, enter or select the users or groups you want to notify.
Update the fields you need.
Select Save.
Add attachments
Use attachments to keep reports and other relevant files in one place.
To add an attachment:
Sign in to the Microsoft Defender portal.
Select Cases.
Select Generic.
Select the relevant generic case.
Select Attachments.
Select Upload.
Select the file you want to upload.
Uploaded files are added to the generic case attachments list. From the Attachments tab, you can also download or remove an attachment. For files added with a comment, you can use Locate last comment to find the associated comment.
Link objects to a generic case
Use linked objects to connect related security information to a generic case.
Generic cases can include linked objects such as:
- Incidents
- Indicators
- Recommendations
To link an object:
Sign in to the Microsoft Defender portal.
Select Cases.
Select Generic.
Select the relevant generic case.
Select Linked objects.
Select Incidents.
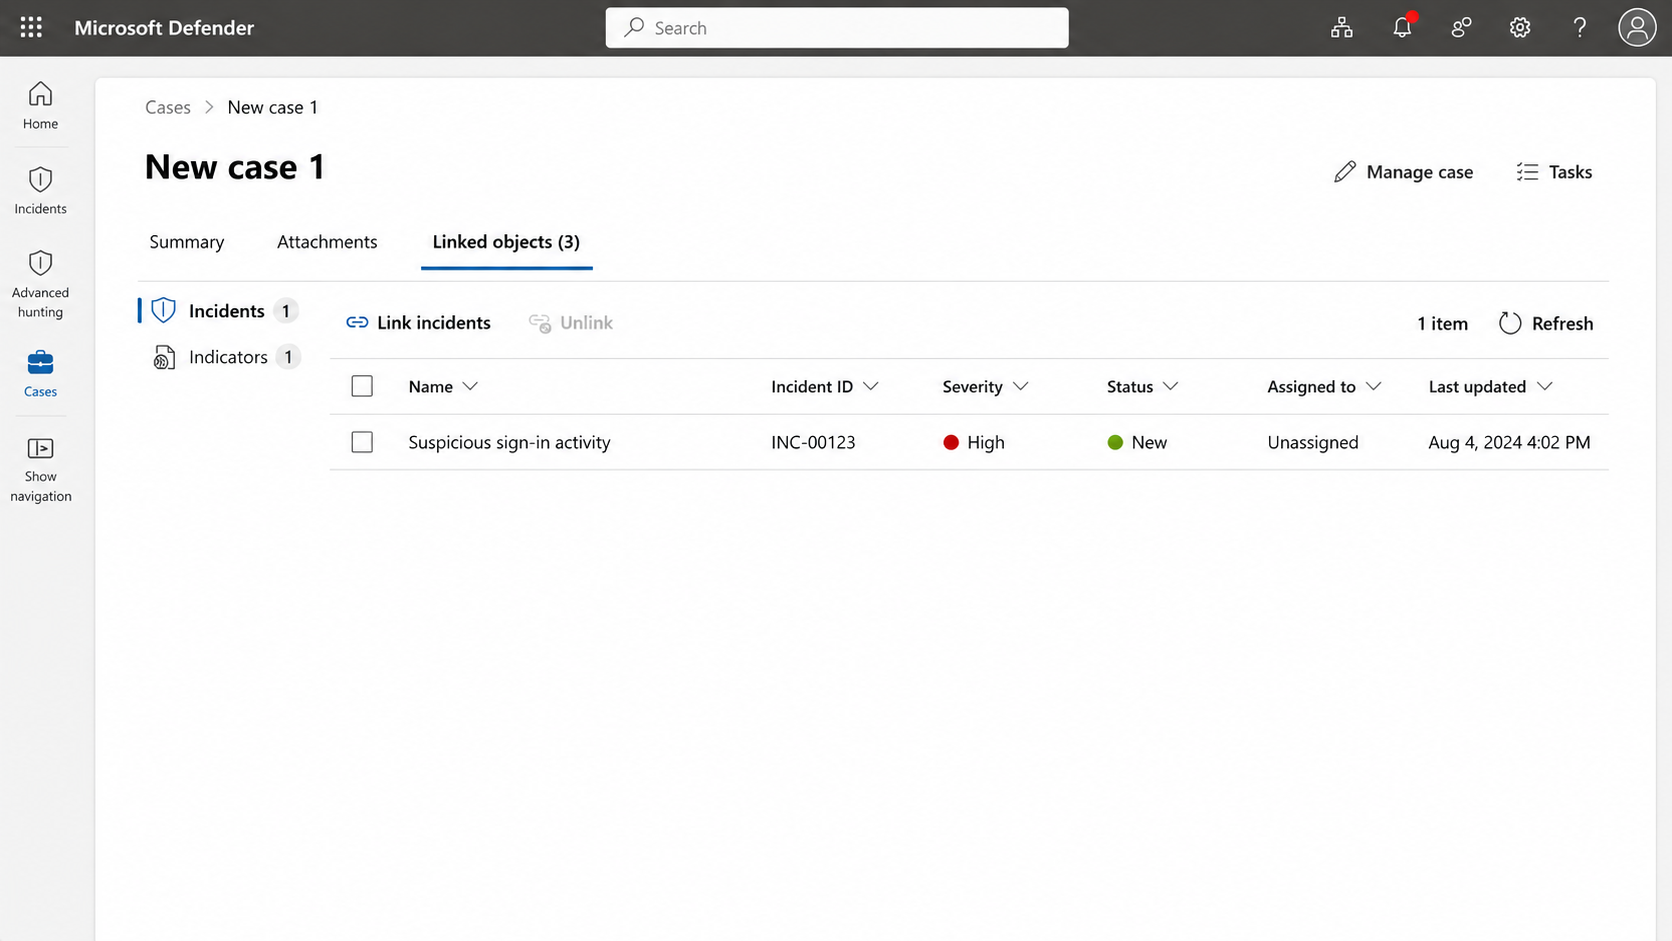
Select Link incidents.
Select the objects you want to link.
Select Save.
Link indicators (preview)
Important
Projects in Microsoft Defender Threat Intelligence are deprecated. To organize and investigate threat indicators, link indicators to a case in the Microsoft Defender portal.
Link relevant indicators of compromise (IoCs) to a generic case to provide additional context for an investigation.
To link indicators from a generic case:
Sign in to the Microsoft Defender portal.
Select Cases.
Select Generic.
Select the relevant generic case.
Select Linked objects.
Select Indicators.
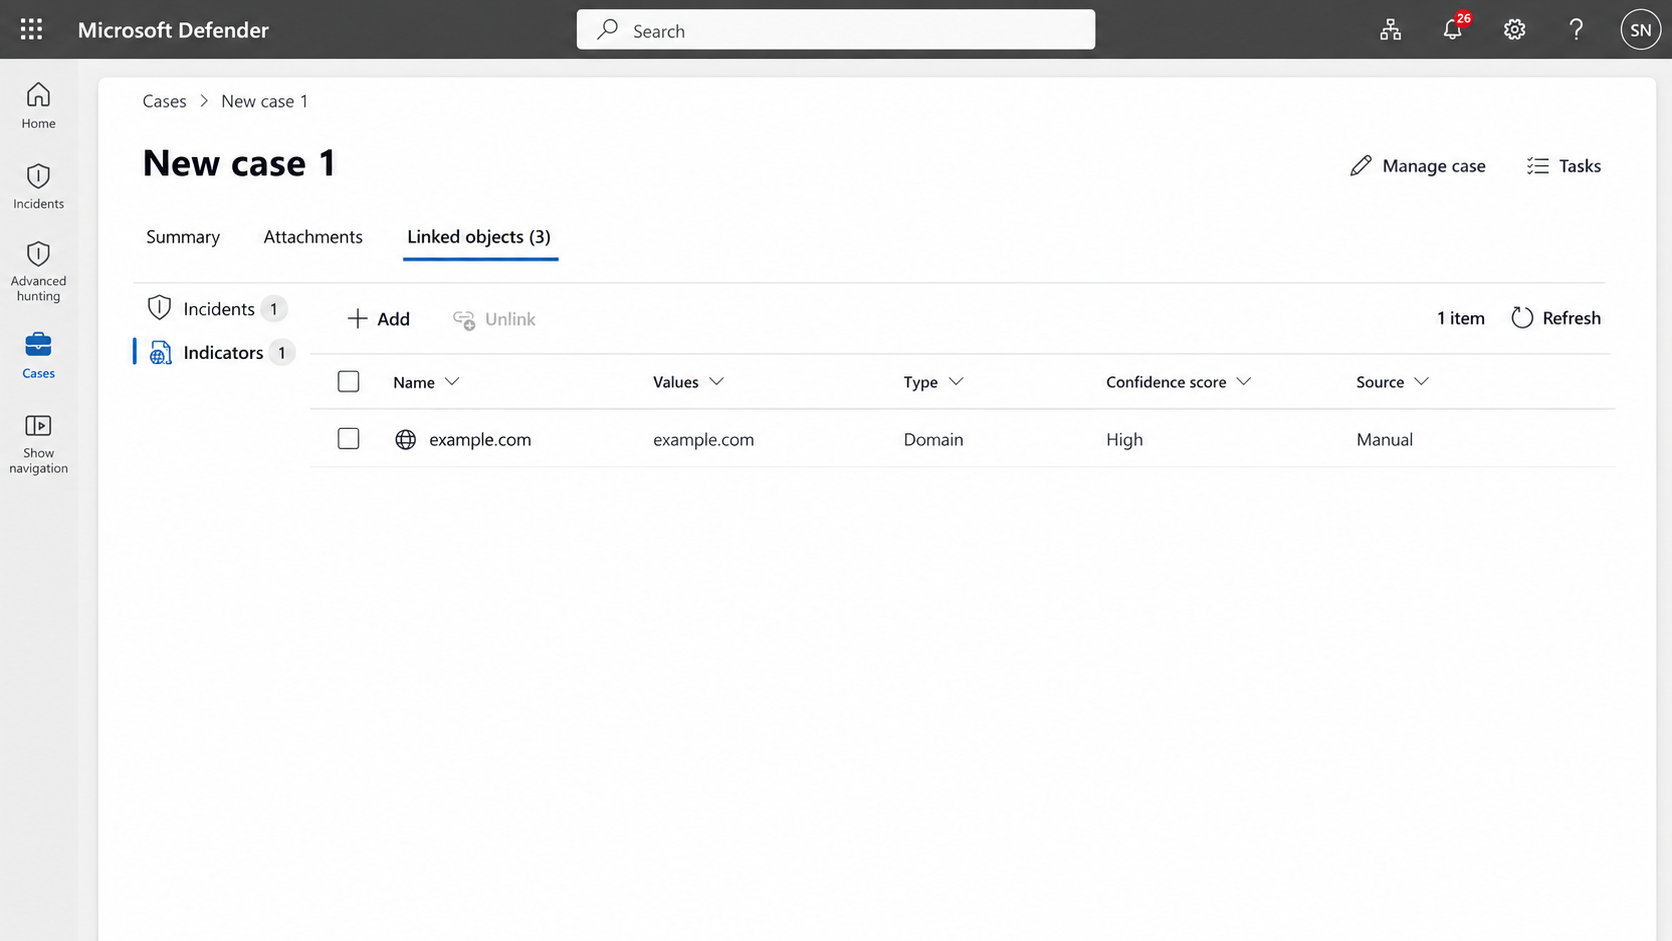
Select Add.
Select the workspace that contains the indicator.
Select the indicator you want to link.
Select Link.
You can also link an indicator from its details page in Intel management. Select the indicator, and then select Link cases.
Unlink objects from a generic case
Unlink objects when they no longer apply to the generic case.
To unlink an object:
Sign in to the Microsoft Defender portal.
Select Cases.
Select Generic.
Select the relevant generic case.
Select Linked objects.
Select the object type.
Select the object you want to unlink.
Select Unlink.
Add comments
Use comments to document investigation progress, decisions, handoffs, and resolution details. You can also attach relevant files when you add a comment.
To add a comment:
Sign in to the Microsoft Defender portal.
Select Cases.
Select Generic.
Select the relevant generic case.
On the Summary tab, enter your comment in the comments area.
Use the formatting options as needed.
To attach a file to the comment, select the attachment icon, and then select the file.
Select Send.
The comment is added to the case activity. Files attached to a comment are also available from the Attachments tab.
Review activity history
Activity history shows changes and actions performed on the generic case.
Use activity history to review:
- Case creation
- Assignment changes
- Status changes
- Priority changes
- Due date changes
- Task updates
- Comments
- Automation updates
- Other workflow changes
To review activity history:
Sign in to the Microsoft Defender portal.
Select Cases.
Select Generic.
Select the relevant generic case.
Go to Summary.
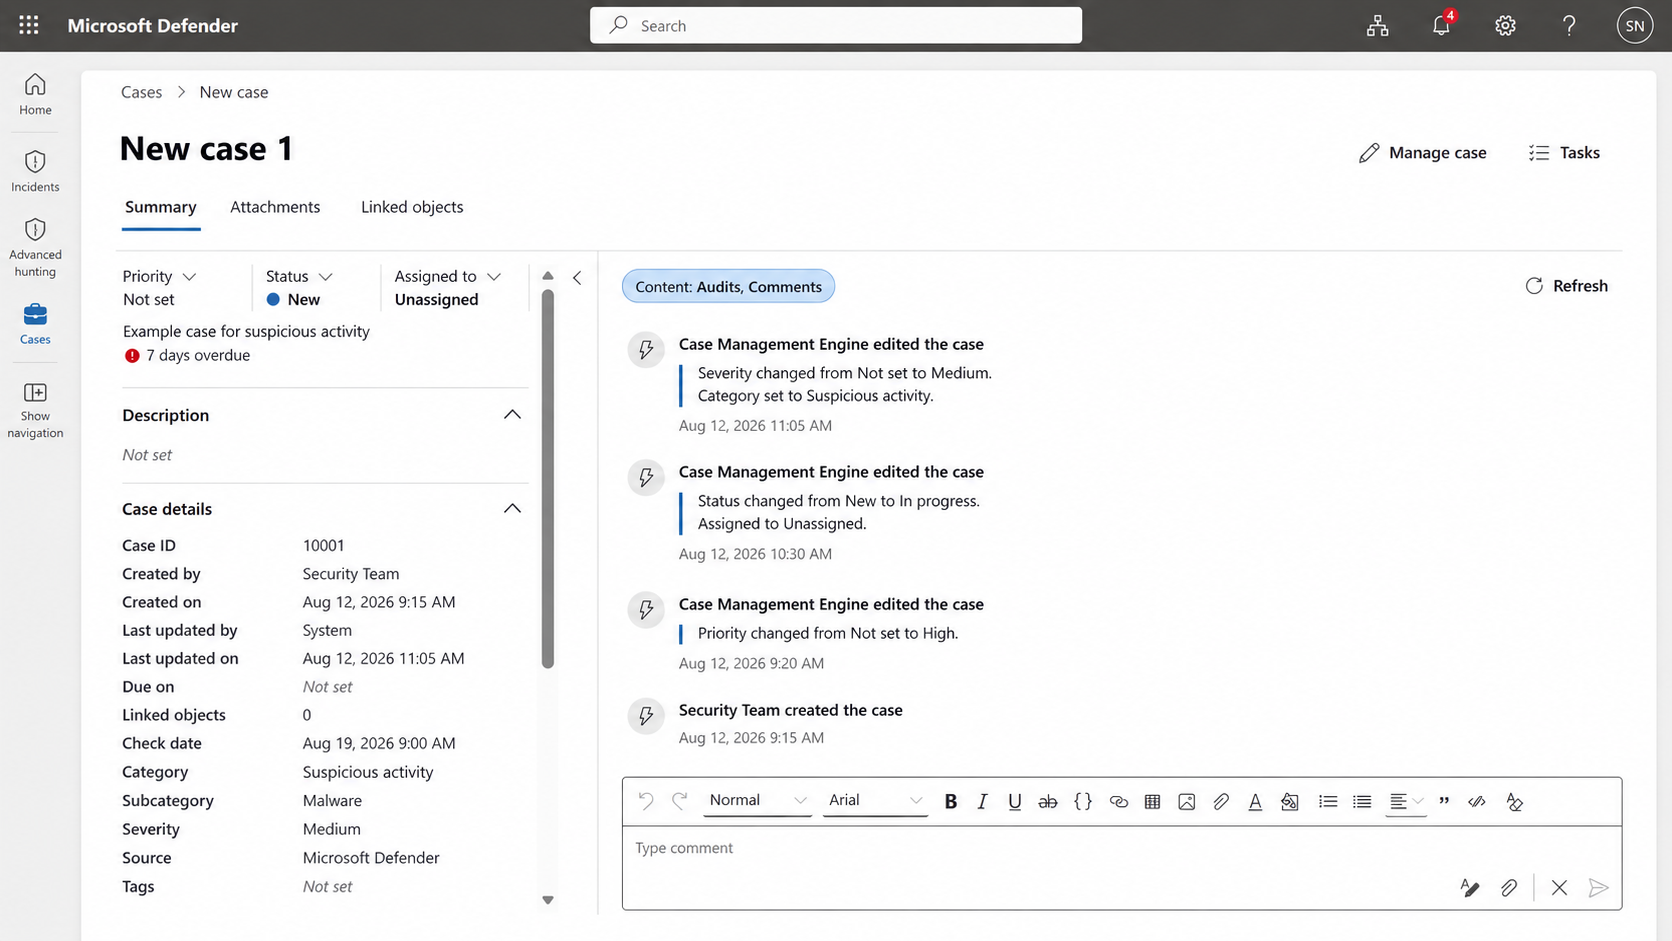
Review the activity feed.
Filter the feed as needed.
Select an activity item to review more details.
Filter generic cases
Use filters to find generic cases by case details, ownership, dates, tags, or custom fields.
To filter generic cases:
Sign in to the Microsoft Defender portal.
Select Cases.
Select Generic.
Select Add filter.
Choose the filter you want to apply.
Select the filter value.
Generic case filters can vary based on tenant configuration, case templates, and custom fields.
Manage generic case tasks
Use tasks to break generic case work into smaller action items, assign ownership, track progress, and document outcomes.
For step-by-step guidance, see Manage generic case tasks in the Microsoft Defender portal.