Note
Access to this page requires authorization. You can try signing in or changing directories.
Access to this page requires authorization. You can try changing directories.
Note
The Retail Interest Group by Dynamics 365 Commerce has moved from Yammer to Viva Engage. If you don't have access to the new Viva Engage community, fill out this form (https://aka.ms/JoinD365commerceVivaEngageCommunity) to be added and stay engaged in the latest discussions.
This article describes how to create a new online channel in Microsoft Dynamics 365 Commerce.
Dynamics 365 Commerce supports multiple retail channels. These retail channels include online stores, call centers, and retail stores (also known as brick-and-mortar stores). Online stores give customers the option of purchasing products from the retailer's online store in addition to its retail stores.
To create an online store in Commerce, you must first create an online channel. Before you create a new online channel, make sure that you complete the Channel set up prerequisites.
Before you can create a new site, you must create at least one online store in Commerce. For more information, see Create an e-commerce site.
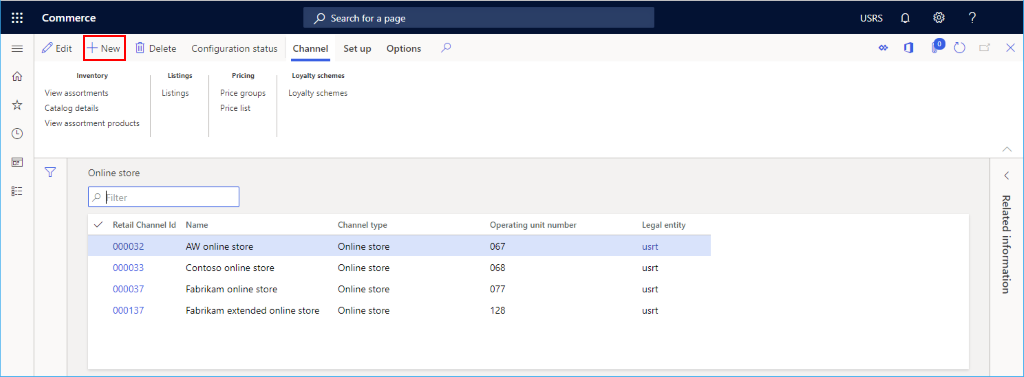
Create and configure a new online channel
To create and configure a new online channel, follow these steps:
- In the navigation pane, go to Modules > Channels > Online Stores.
- On the action pane, select New.
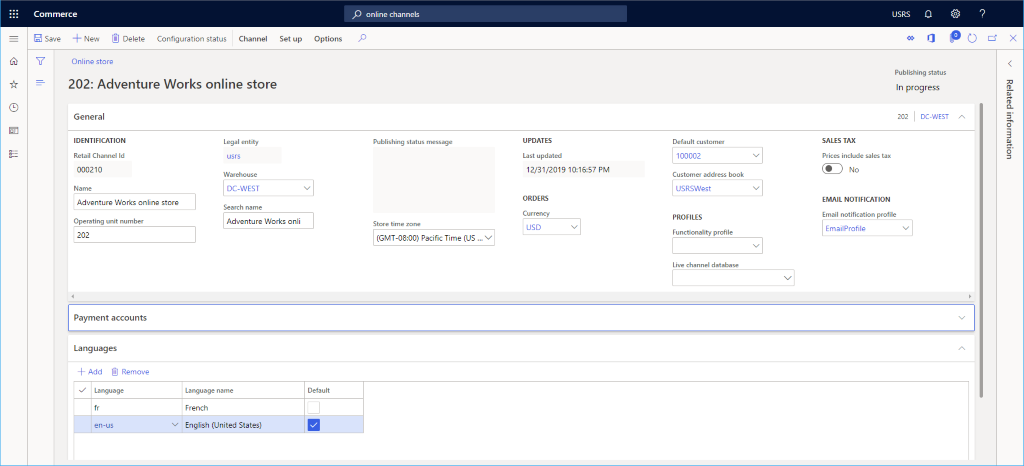
- In the Name field, enter a name for the new channel.
- In the Legal entity drop-down, select the appropriate legal entity.
- In the Warehouse drop-down, select the appropriate warehouse.
- In the Store time zone field, select the appropriate time zone.
- In the Currency field, select the appropriate currency.
- In the Default customer field, enter a valid default customer.
- In the Customer address book field, enter a valid address book.
- In the Functionality profile field, select a functionality profile if applicable.
- In the Email notification profile field, enter a valid email notification profile.
- On the action pane, select Save.
The following image shows the creation of a new online channel.
The following image shows an example online channel.
Note
Be cautious about changing the warehouse for a running online channel. E-commerce site carts that aren't yet checked out (unless you modify them) still fulfill from the old warehouse. This situation affects the inventory availability calculation.
Assign the channel to a Commerce Scale Unit
Assign your new channel to a Commerce Scale Unit. For instructions, see Configure channels to use Commerce Scale Unit.
Set up languages
If your e-commerce site supports multiple languages, expand the Languages section, and add extra languages as needed.
Set up payment account
In the Payment account section, add a payment provider. For information on setting up an Adyen payment connector, see Dynamics 365 Payment Connector for Adyen.
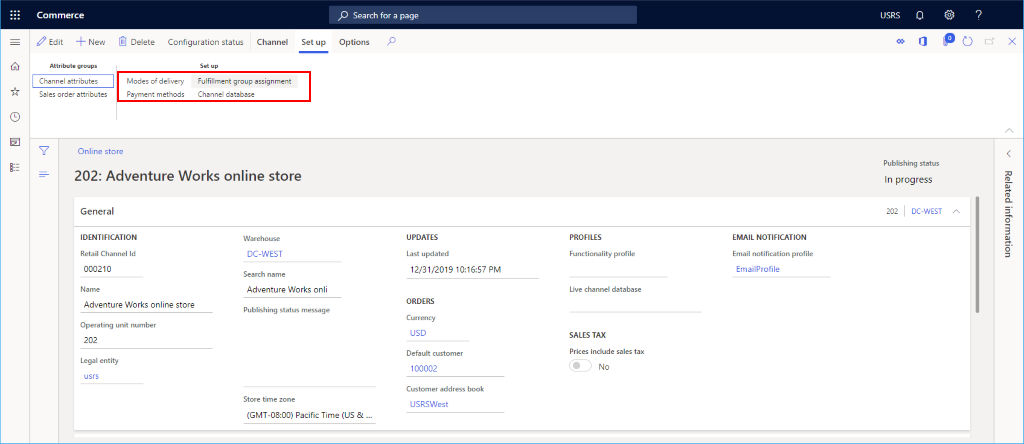
Additional channel setup
Additional tasks that are required for online channel setup include setting up payment methods, modes of delivery, and the fulfillment group assignment.
The following image shows Modes of delivery, Payment methods, and Fulfillment group assignment setup options on the Set up tab.
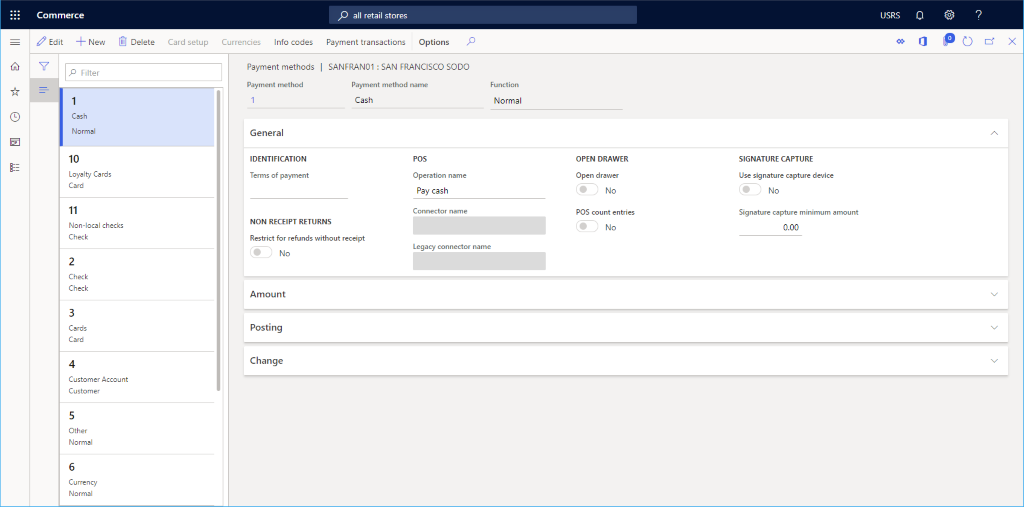
Set up payment methods
To set up payment methods, follow these steps for each payment type that the channel supports:
- On the action pane, select the Set Up tab, and then select Payment methods.
- On the action pane, select New.
- In the navigation pane, select the payment method you want.
- In the General section, enter an Operation name and configure any other settings you want.
- Configure any other settings required for the payment type.
- On the action pane, select Save.
The following image shows an example of a cash payment method.
Set up modes of delivery
You can see the configured modes of delivery by selecting Modes of delivery from the Set up tab on the action pane.
To change or add a mode of delivery, follow these steps:
- In the navigation pane, go to Modules > Inventory management > Modes of delivery.
- On the action pane, select New to create a new mode of delivery, or select an existing mode.
- In the Retail channels section, select Add line to add the channel. Adding channels by using organization nodes instead of adding each channel individually can streamline adding channels.
The following image shows an example of a mode of delivery.

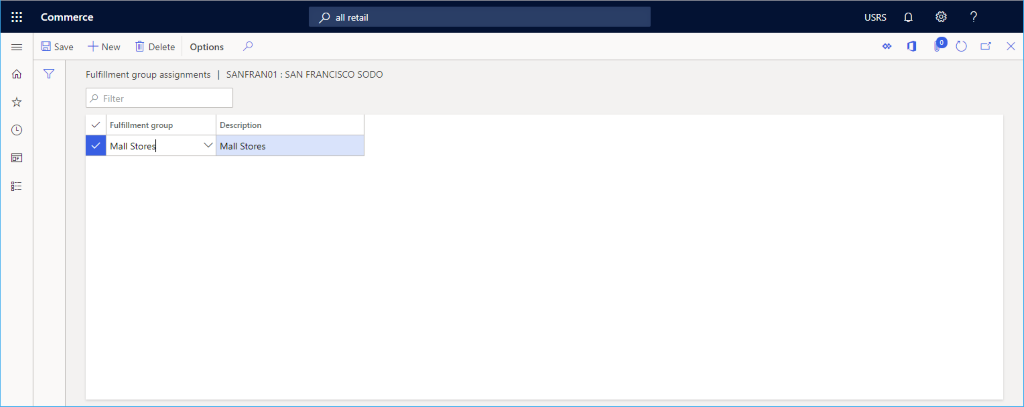
Set up a fulfillment group assignment
To set up a fulfillment group assignment, follow these steps:
- On the action pane, select the Set up tab, and then select Fulfillment group assignment.
- On the action pane, select New.
- In the Fulfillment group drop-down list, select a fulfillment group.
- In the Description drop-down list, enter a description.
- On the action pane, select Save.
The following image shows an example of a fulfillment group assignment setup.