Note
Access to this page requires authorization. You can try signing in or changing directories.
Access to this page requires authorization. You can try changing directories.
Note
The Retail Interest Group by Dynamics 365 Commerce has moved from Yammer to Viva Engage. If you don't have access to the new Viva Engage community, fill out this form (https://aka.ms/JoinD365commerceVivaEngageCommunity) to be added and stay engaged in the latest discussions.
This article describes how to create a new retail channel in Microsoft Dynamics 365 Commerce.
Dynamics 365 Commerce supports multiple retail channels. These retail channels include online stores, call centers, and retail stores (also known as brick-and-mortar stores). Each retail store channel can have its own payment methods, price groups, point of sale (POS) registers, income accounts and expense accounts, and staff. You must set up all these elements before you can create a retail store channel.
Before you create a retail channel, make sure you follow the channel prerequisites.
Create and configure a new retail channel
To create and configure a new retail channel, follow these steps:
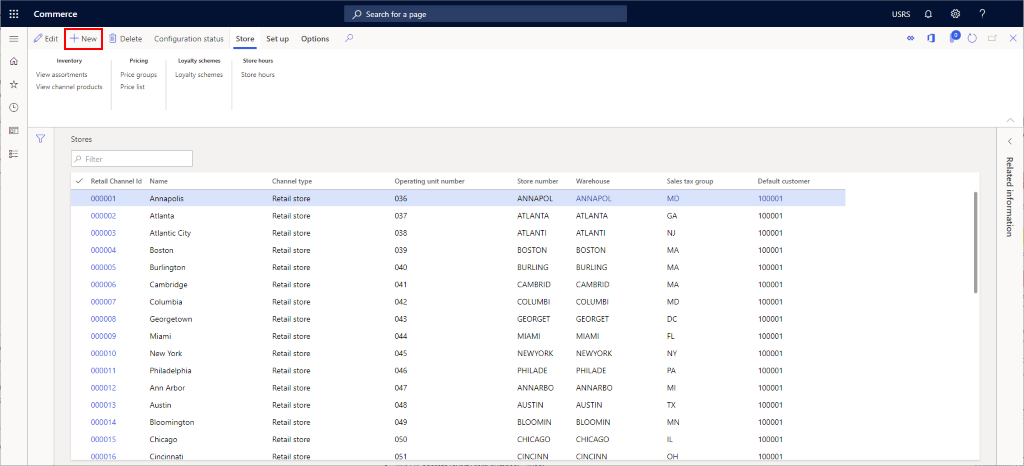
- In the navigation pane, go to Modules > Retail and Commerce > Channels > Stores > All stores.
- On the action pane, select New.
- In the Name field, enter a name for the new channel.
- In the Store number field, enter a unique store number. The number can be alphanumeric with a maximum of 10 characters.
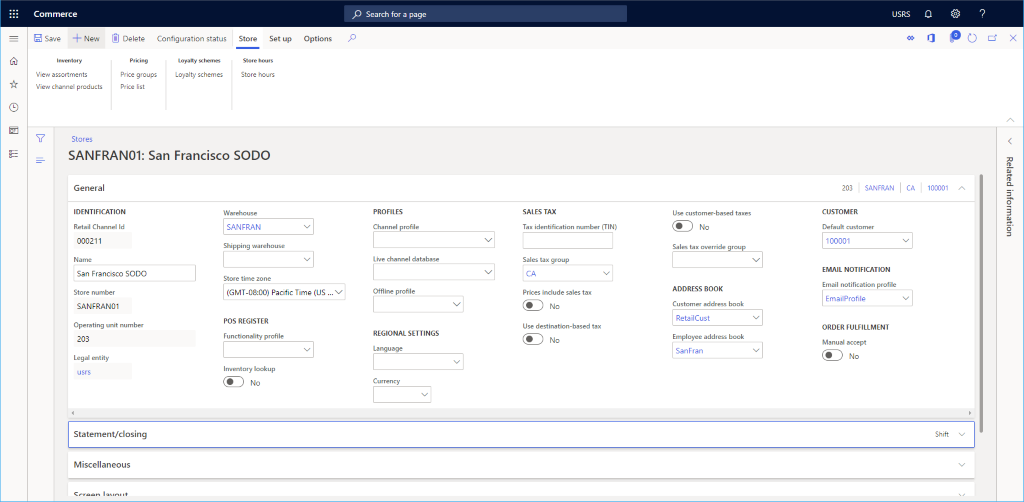
- In the Legal entity drop-down list, select the appropriate legal entity.
- In the Warehouse drop-down list, select the appropriate warehouse.
- In the Store time zone field, select the appropriate time zone.
- In the Sales tax group drop-down list, select an appropriate sales tax group for the store.
- In the Currency field, select the appropriate currency.
- In the Customer address book field, enter a valid address book.
- In the Default customer field, enter a valid default customer.
- In the Functionality profile field, select a functionality profile if applicable.
- In the Email notification profile field, enter a valid email notification profile.
- On the action pane, select Save.
The following image shows the creation of a new retail channel.
The following image shows an example retail channel.
Other settings
You can set many other optional settings in the Statement/closing and Miscellaneous sections, based on the needs of the retail store.
For information about setting up the default screen layout in the Screen layout section, see Screen layouts for the point of sale (POS). For setup information about the Hardware stations section, see Configure and install Retail hardware station.
The following image shows an example retail channel setup configuration.

Additional channel set up
You need to set up additional items for a channel. You can find these items on the Action Pane under the Set up section.
Additional tasks that are required for online channel setup include setting up payment methods, cash declaration, modes of delivery, income and expense account, sections, the fulfillment group assignment, and safes.
The following image shows various other retail channel setup options on the Set up tab.

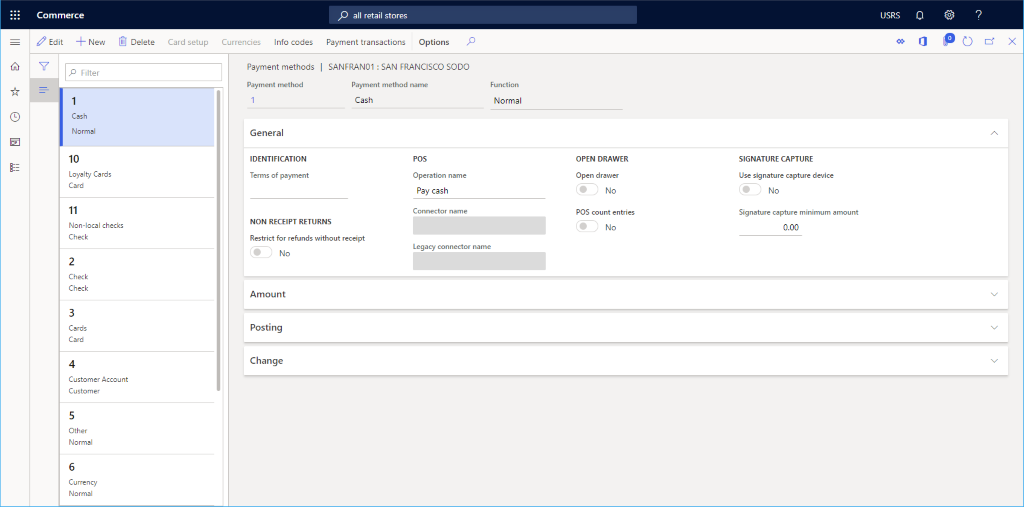
Set up payment methods
To set up payment methods, for each payment type that the channel supports, follow these steps:
- On the Action Pane, select the Set Up tab, and then select Payment methods.
- On the action pane, select New.
- In the navigation pane, select a payment method.
- In the General section, enter an Operation name and configure any other settings.
- Configure any other settings as required for the payment type.
- On the action pane, select Save.
The following image shows an example of a cash payment method.
The following image shows an example of a cash payment method and the Amount tab configuration.
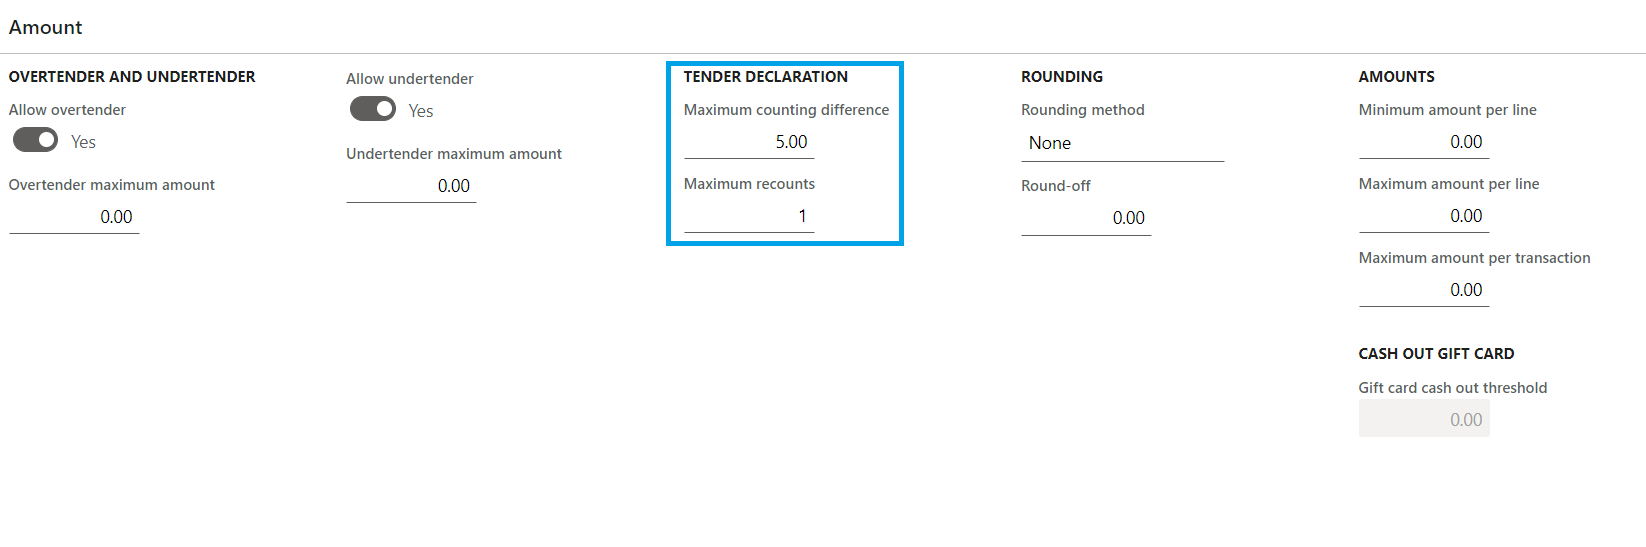
Note
The Retail Server caches values for the Amount tab. These values don't take effect immediately after you run the Distribution Schedule jobs. To immediately apply these values for testing, you might need to restart the Cloud Scale Unit.
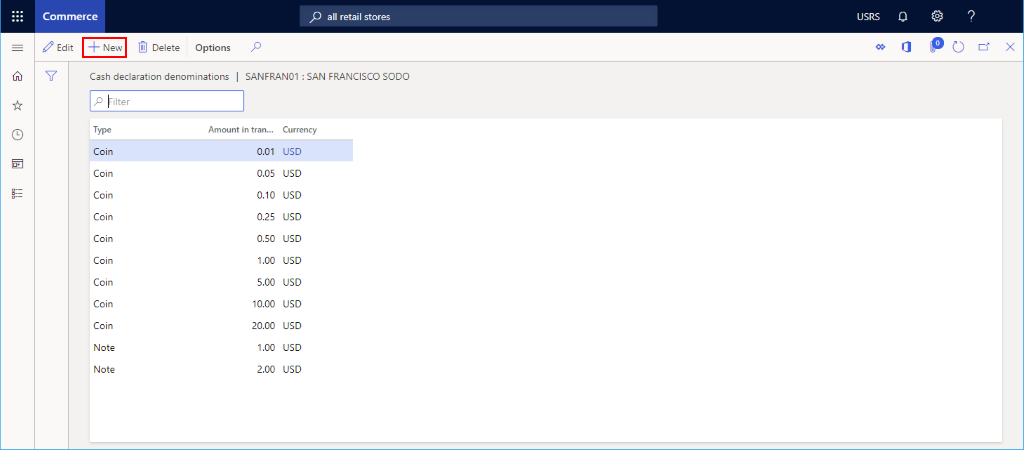
Set up cash declaration
- On the Action Pane, select the Set Up tab, and then select Cash declaration.
- On the Action Pane, select New, and then create all Coin and Note denominations that apply.
The following image shows an example of a cash declaration.
Set up modes of delivery
You can see the configured modes of delivery by selecting Modes of delivery from the Set up tab on the Action Pane.
To change or add a mode of delivery, follow these steps:
- In the navigation pane, go to Modules > Inventory management > Modes of delivery.
- On the Action Pane, select New to create a new mode of delivery, or select an existing mode.
- In the Retail channels section, select Add line to add the channel. Adding channels by using organization nodes instead of adding each channel individually can streamline adding channels.
The following image shows an example of a mode of delivery.

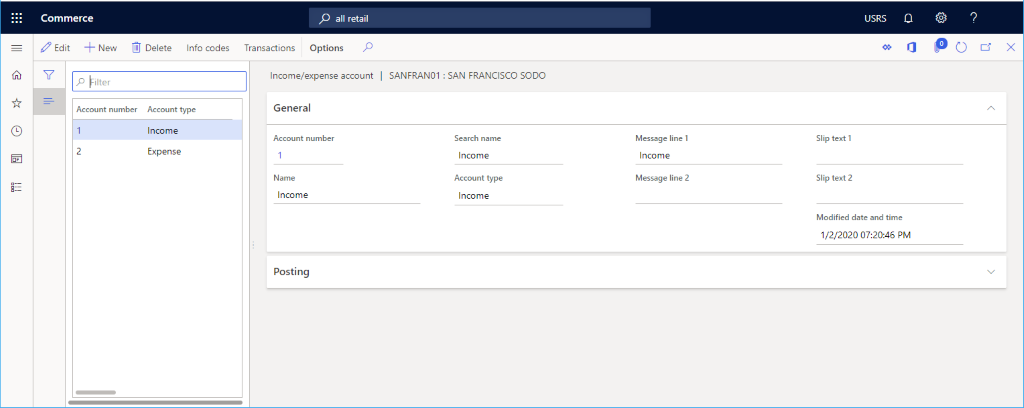
Set up income/expense account
To set up an income/expense account, follow these steps:
- On the Action Pane, select the Set Up tab, and then select Income/Expense account.
- On the action pane, select New.
- Under Name, enter a name.
- Under Search name, enter a search name.
- Under Account type, enter the account type.
- Enter text for Message line 1, Message line 2, Slip text 1, and Slip text 2 as needed.
- Under Posting, enter posting information.
- On the action pane, select Save.
The following image shows an example of an income/expense account.
Set up sections
To set up sections, follow these steps:
- On the Action Pane, select the Set Up tab, and then select Sections.
- On the action pane, select New.
- Under Section number, enter a section number.
- Under Description, enter a description.
- Under Section size, enter a section size.
- Configure other settings for General and Sales statistics as needed.
- On the action pane, select Save.
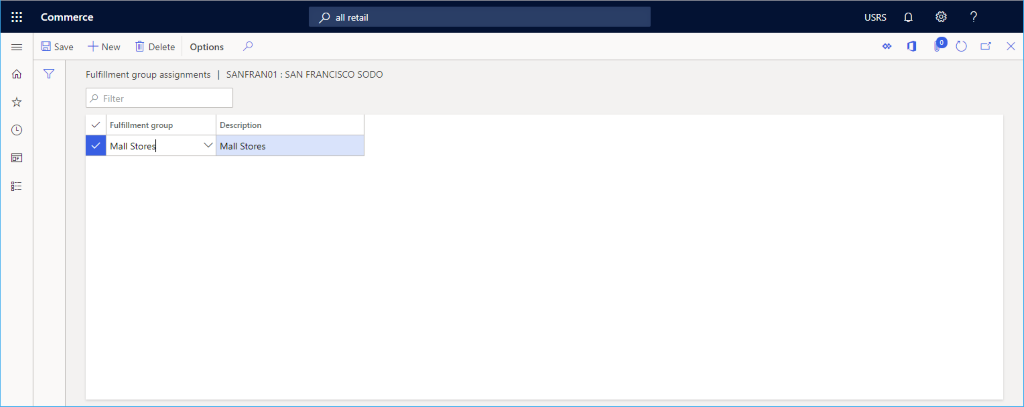
Set up a fulfillment group assignment
To set up a fulfillment group assignment, follow these steps:
- On the Action Pane, select the Set up tab, and then select Fulfillment group assignment.
- On the action pane, select New.
- In the Fulfillment group drop-down list, select a fulfillment group.
- In the Description drop-down list, enter a description.
- On the Action Pane, select Save.
The following image shows an example of a fulfillment group assignment setup.
Set up safes
To set up safes, follow these steps:
- On the Action Pane, select the Set Up tab, and then select Safes.
- On the action pane, select New.
- Enter a name for the safe.
- On the action pane, select Save.
Ensure unique transaction IDs
The point of sale (POS) generates transaction IDs that are sequential and include the following parts:
- A fixed part, which concatenates the store ID and terminal ID.
- A sequential part, which is a number sequence.
Because the system generates transaction IDs in both offline and online modes, duplicate transaction IDs can occur. Eliminating duplicate transaction IDs can require a significant amount of manual data fixing.
To prevent duplicate transaction IDs, the system introduces a new transaction ID format that uses a 13-digit number generated by calculating the time in milliseconds since 1970. This new format makes transaction IDs nonsequential and ensures that they're always unique.
The new transaction ID format is <store ID>-<terminal ID>-<milliseconds since 1970>. You can enable the new transaction ID format feature from the Feature management workspace in Commerce headquarters.
Note
- Use transaction IDs for internal system use only, so they don't need to be sequential. However, many countries/regions require receipt IDs to be sequential, so check your organization's requirements before enabling the new transaction ID format feature.
- After you enable the new transaction ID format feature, you can't disable this feature in headquarters.
- The new transaction ID format feature is enabled by default starting with Commerce version 10.0.41.
To enable the new transaction ID format, follow these steps:
- In headquarters, go to System administration > Workspaces > Feature management.
- Filter for the "retail and commerce" module.
- Search for the Enable new transaction id to avoid duplicate transaction ids feature name.
- Select the feature, and then in the right pane, select Enable Now.
- Go to Retail and Commerce > Retail and Commerce IT > Distribution schedule.
- Run the 1070 Channel configuration and 1170 POS task recorder jobs to synchronize the enabled feature to the stores.
- After the changes are sent to the stores, close and reopen the POS terminals to use the new transaction ID format.
Set up store location for store selector
Store location data, including latitude and longitude, is used in store selector scenarios in both POS and e-commerce sites.
To set up the store location in Commerce headquarters, follow these steps:
- Go to Organization administrator > Organizations > Operating units.
- In the left navigation pane, filter the operating unit by name or the operating unit number of the channel, and then select it.
- On the Addresses FastTab, select More options > Advanced to access the Manage addresses form.
- On the General tab, enter the applicable values for Latitude and Longitude.
- On the Action Pane, select Save.