Design a new ER solution to print ZPL labels
This article explains how a user in the System Administrator, Electronic Reporting Developer, or Electronic Reporting Functional Consultant role can configure parameters of the Electronic reporting (ER) framework, design the required ER configurations of a new ER solution to access the data of the Warehouse management system, and generate custom warehouse location labels in Zebra Programming Language (ZPL) II format. These steps can be completed in the USRT company.
Business scenario
You represent a company that implemented warehouse management in Microsoft Dynamics 365 Finance. Every warehouse location must be labeled with a self-adhesive label that includes a bar code. Warehouse workers will use handheld bar code readers to scan the bar codes.
All warehouse locations have been labeled in the scope of pre-go-live activities. However, you must also be able to print warehouse location labels on demand if existing labels become damaged or warehouse shelving is reconfigured. By using recently released ER functionality, you can configure a new ER solution that lets a warehouse supervisor print labels directly to a thermal label printer.
Configure the ER framework
Follow the steps in Configure the ER framework to set up the minimal set of ER parameters. You must complete this setup before you start to use the ER framework to design a new ER solution.
Design a domain-specific data model
Create a new ER configuration that contains a data model component for the Warehouse management domain. This data model will be used as a data source later, when you design an ER format to generate warehouse location labels.
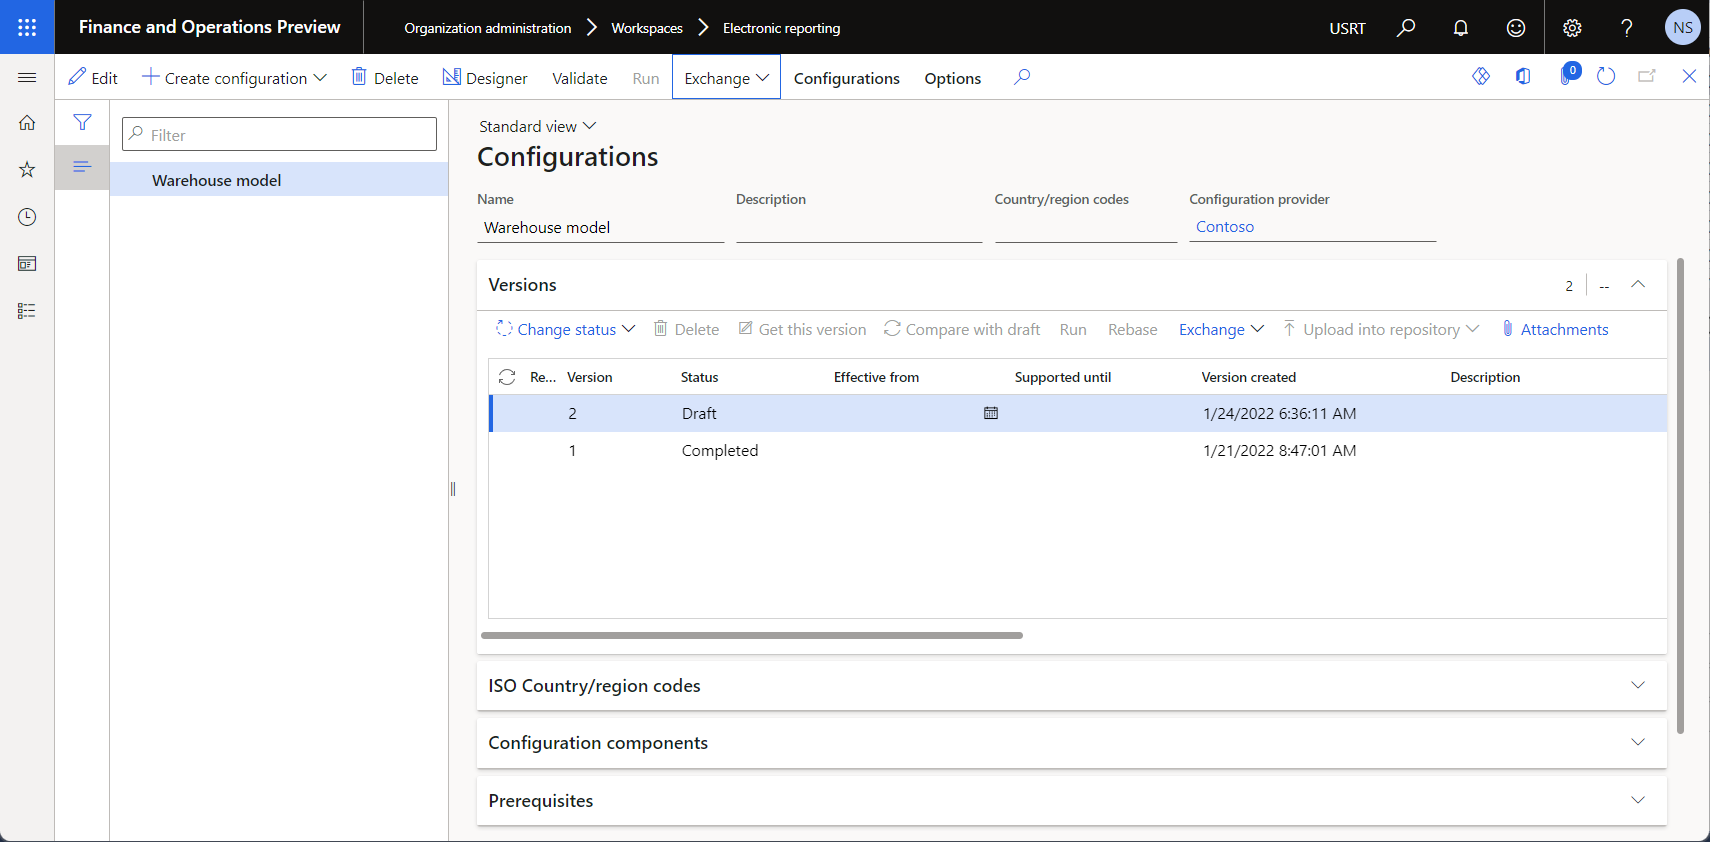
Import a data model configuration
Follow these steps to import the required data model from an XML file that is provided by Microsoft. Alternatively, you can create your own data model as described in the next section.
- Download the Warehouse model.version.1.xml file, and save it to your local computer.
- Go to Organization administration > Workspaces > Electronic reporting.
- In the Electronic reporting workspace, select Reporting configurations.
- On the Configurations page, on the Action Pane, select Exchange > Load from XML file.
- Select Browse, and then find and select the Warehouse model.version.1.xml file.
- Select OK to import the configuration.
Create a data model configuration
Instead of importing the Microsoft-provided data model file, you can create a data model from scratch. For an example that shows how to complete this task, see Create a new data model configuration.
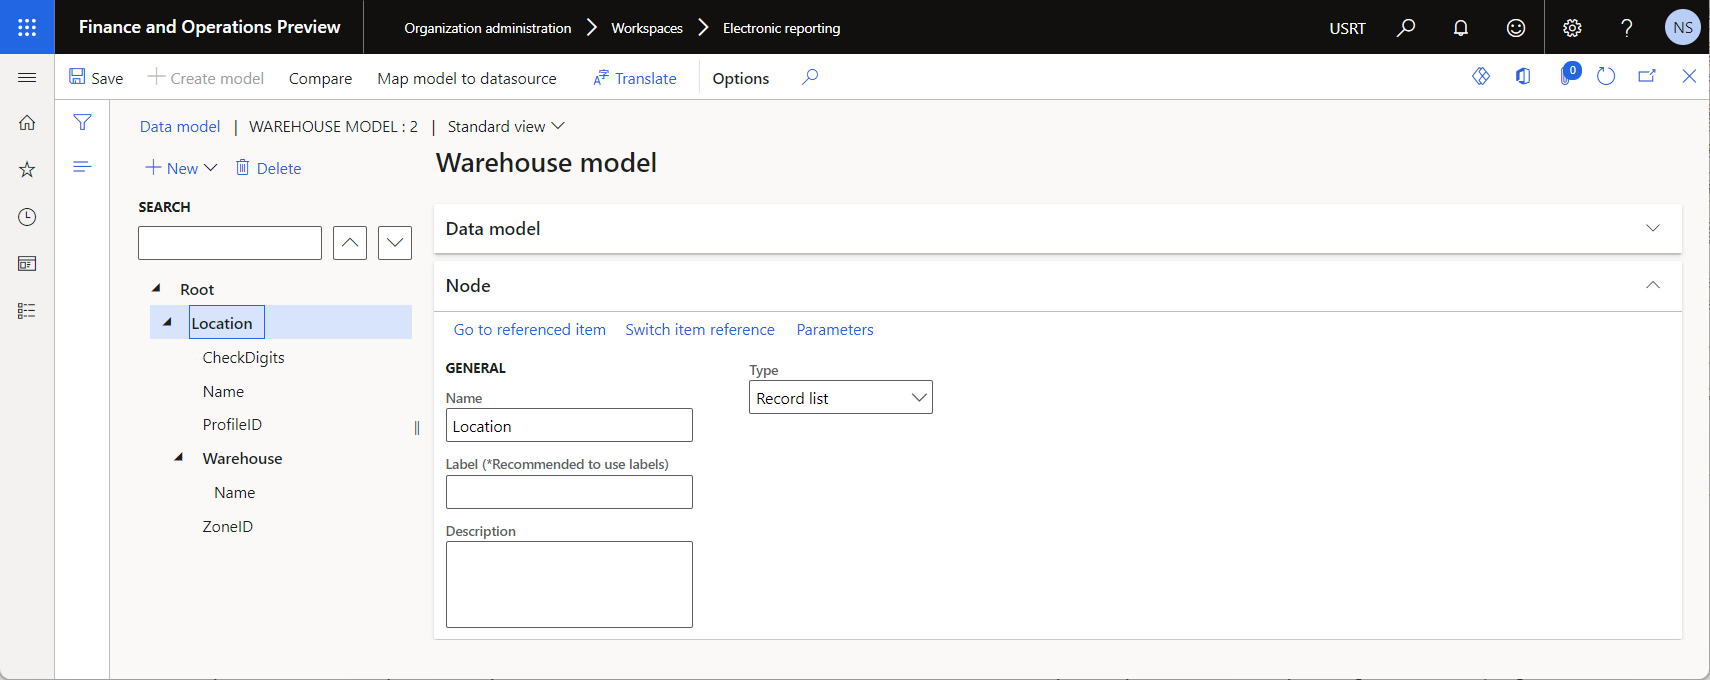
Review the data model
You can view an editable version of the configured data model on the Data model designer page.
Design a model mapping for the configured data model
As a user in the Electronic Reporting Developer role, you must create a new ER configuration that contains a model mapping component for the Warehouse data model. This component implements the configured data model for Dynamics 365 Finance and is specific to that app. You must configure it to specify the application objects that will be used to fill in the configured data model with application data at runtime. To complete this task, you must understand how the data structure of the Warehouse management business domain is implemented in Finance.
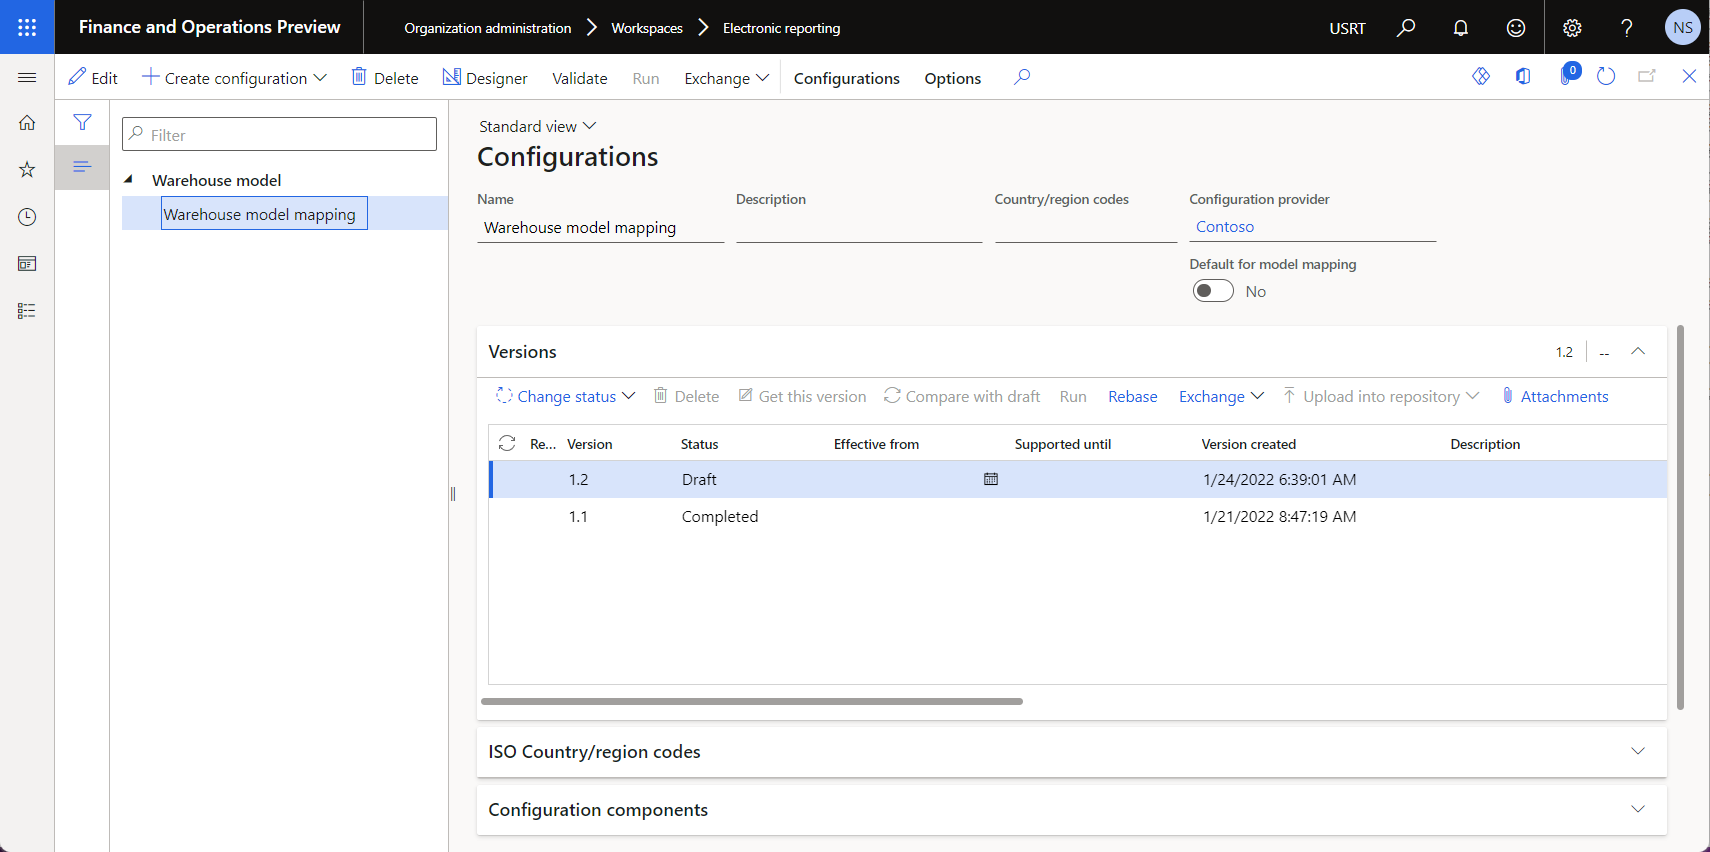
Import a model mapping configuration
Follow these steps to import the required model mapping from an XML file that is provided by Microsoft. Alternatively, you can create your own model mapping as described in the next section.
- Download the Warehouse model mapping.version.1.1.xml file, and save it to your local computer.
- Go to Organization administration > Workspaces > Electronic reporting.
- In the Electronic reporting workspace, select Reporting configurations.
- On the Configurations page, on the Action Pane, select Exchange > Load from XML file.
- Select Browse, and then find and select the Warehouse model mapping.version.1.1.xml file.
- Select OK to import the configuration.
Create a model mapping configuration
Instead of importing the Microsoft-provided model mapping file, you can create a model mapping from scratch. For an example that shows how to complete this task, see Create a new model mapping configuration.
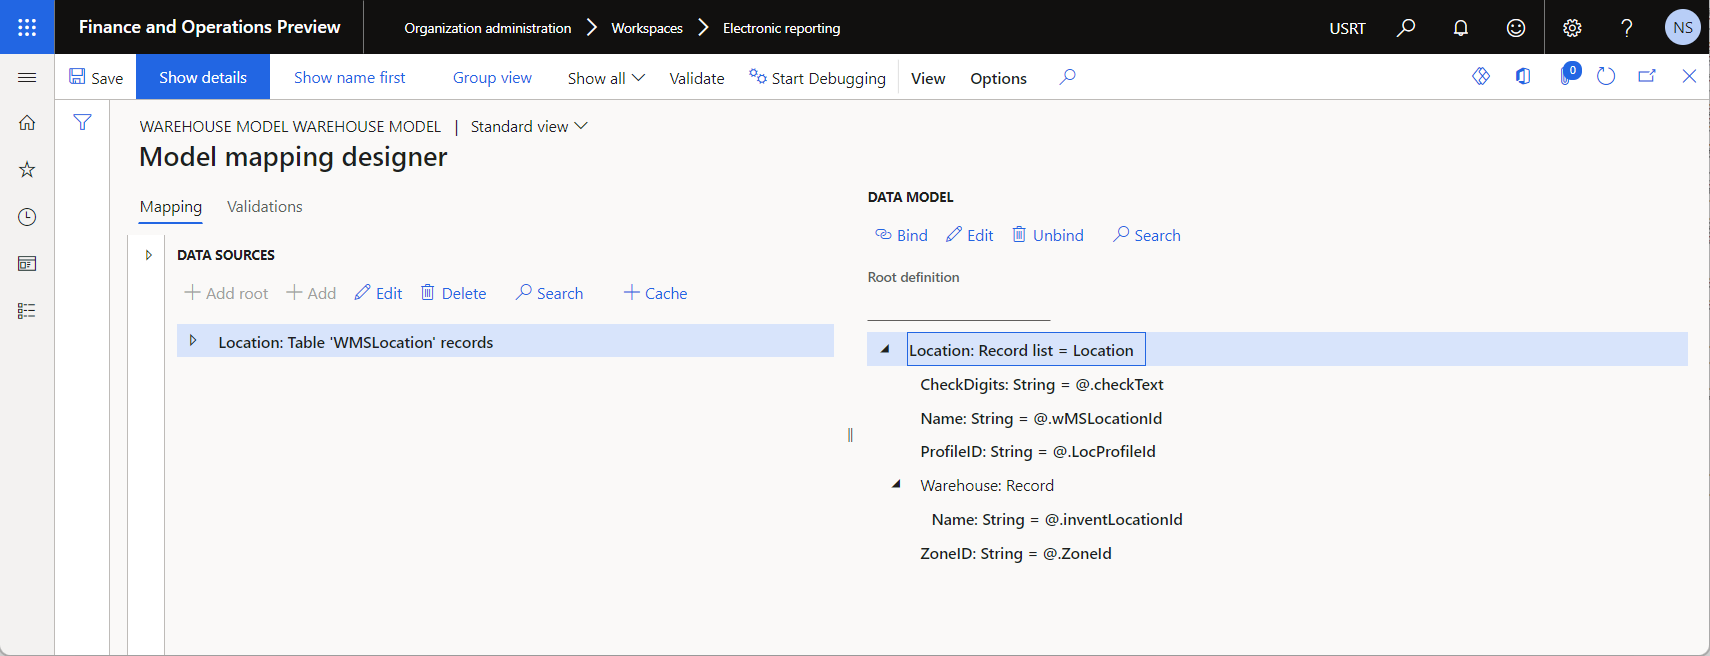
Review the model mapping
You can view an editable version of the configured model mapping on the Model mapping designer page.
Design a format
As a user in the Electronic Reporting Functional Consultant role, you must create a new ER configuration that contains a format component. To configure this component, you will use ZPL II code to specify the layout of your warehouse location label.
Import a format configuration
Follow these steps to import the required format from an XML file that is provided by Microsoft. Alternatively, you can create your own format as described in the next section.
- Download the Warehouse location labels.version.1.1.xml file, and save it to your local computer.
- Go to Organization administration > Workspaces > Electronic reporting.
- In the Electronic reporting workspace, select Reporting configurations.
- On the Configurations page, on the Action Pane, select Exchange > Load from XML file.
- Select Browse, and then find and select the Warehouse location labels.version.1.1.xml file.
- Select OK to import the configuration.
Create a format configuration
Instead of importing the Microsoft-provided format file, you can create a format from scratch. For an example that shows how to complete this task, see Create a new format configuration.
Review the format
You can view an editable version of the configured format on the Format designer page.

The model.Location.Label data source of this format is configured to generate labels that contain the following information:
- The warehouse title as text
- The warehouse title as a bar code
- The location title
- Check digits
On the Formula designer page for the data source, the ER formula that is used to generate labels includes a CONCATENATE function that combines the information in the desired layout.
Tip
The label layout is designed so that the location title and the check digits are aligned in the center of the label. However, ZPL II doesn't support center alignment for bar codes. Therefore, the formula of the model.Location.Warehouse.Alignment data source is used to align the bar code in the center of the label. This formula calculates the left offset of the bar code, based on the number of characters in the warehouse title.
Prepare your environment for previewing generated labels
The following example uses a printer emulator application for ZPL labels to show a preview of generated labels on the screen. Follow these steps to enable this option.
- Add the Printer ER destination for the Warehouse location label ER format, and configure it to send generated labels from Finance to the Document routing agent (DRA).
- Install and configure the DRA to route generated labels from Finance to a local printer that is accessible from the current workstation.
- Add a local printer for the current workstation, and configure it to pass generated labels from the DRA to a printer emulator application.
- Install a printer emulator application as an extension of the Chrome web browser, and configure it to pass generated labels from a local printer to a web service that will render generated labels and return them to the printer emulator for preview.
|
Finance ER report Printer destination |
 |
Document routing agent | |
Local printer | |
Printer emulator |  |
Rendering web service |
Install and configure a printer emulator application
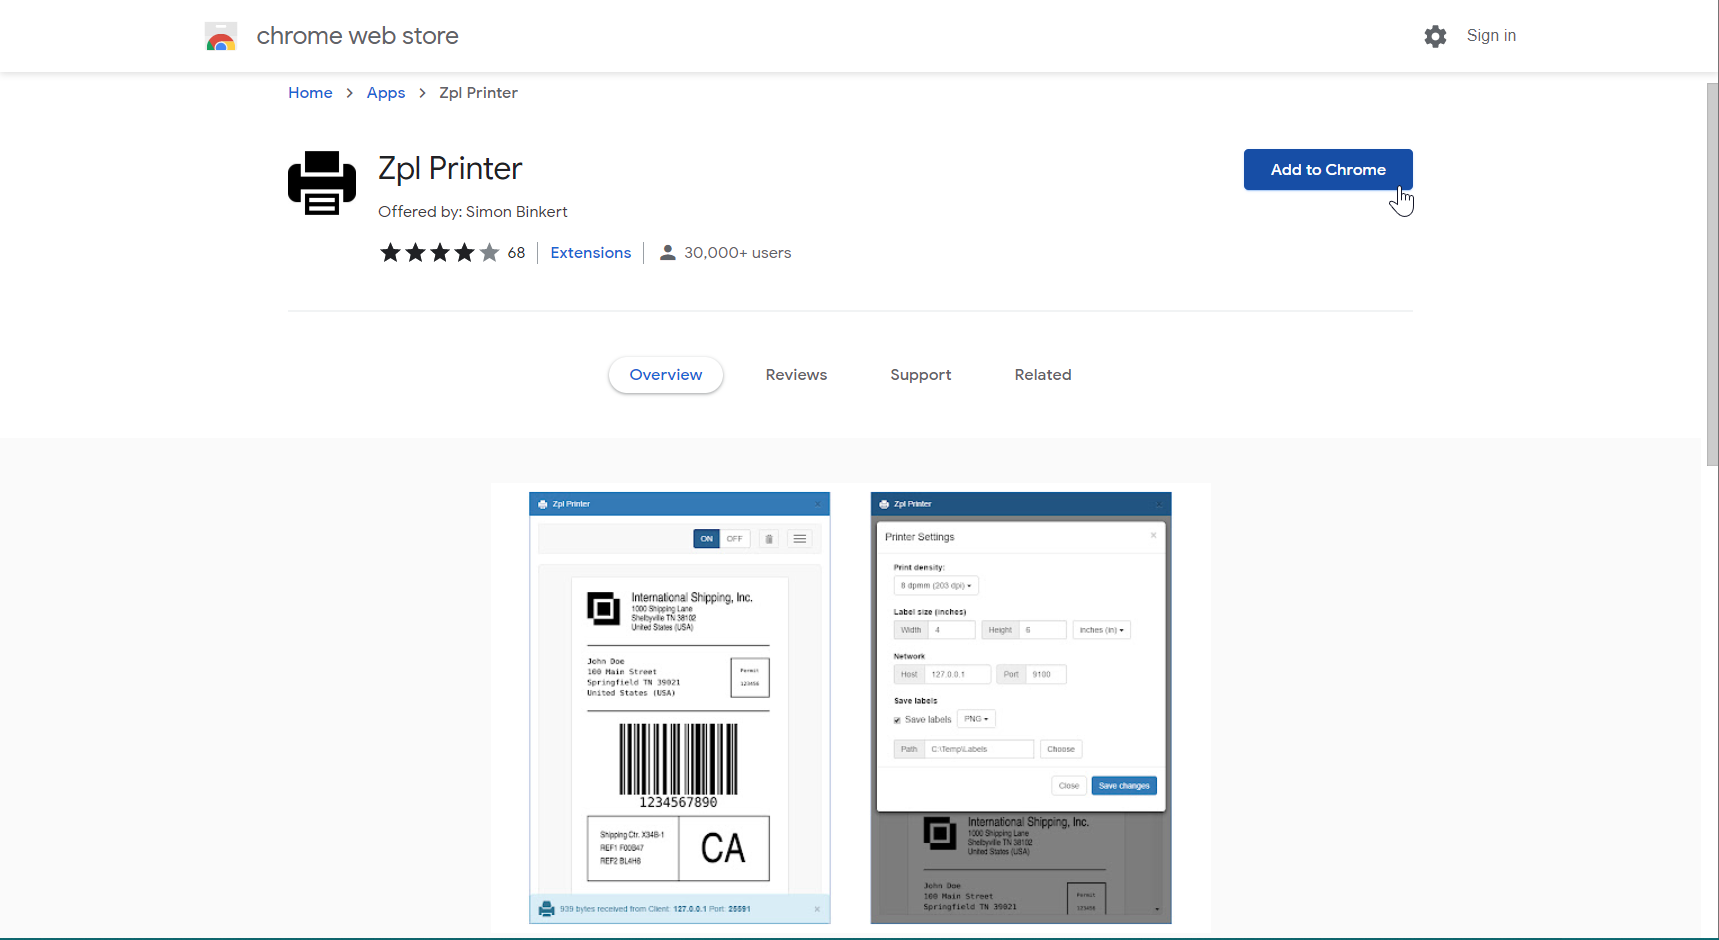
Add a printer emulator application for the ZPL rendering engine to your Chrome web browser. This example uses the Zpl Printer emulator that is based on the Labelary ZPL web service. The printer emulator application will pass generated labels in ZPL format from a local printer to the web service and then return labels as PDF or PNG files for preview.
In the Chrome web store, find and select the printer emulator application that you want to use. Then select Add to Chrome to add it to your Chrome web browser.
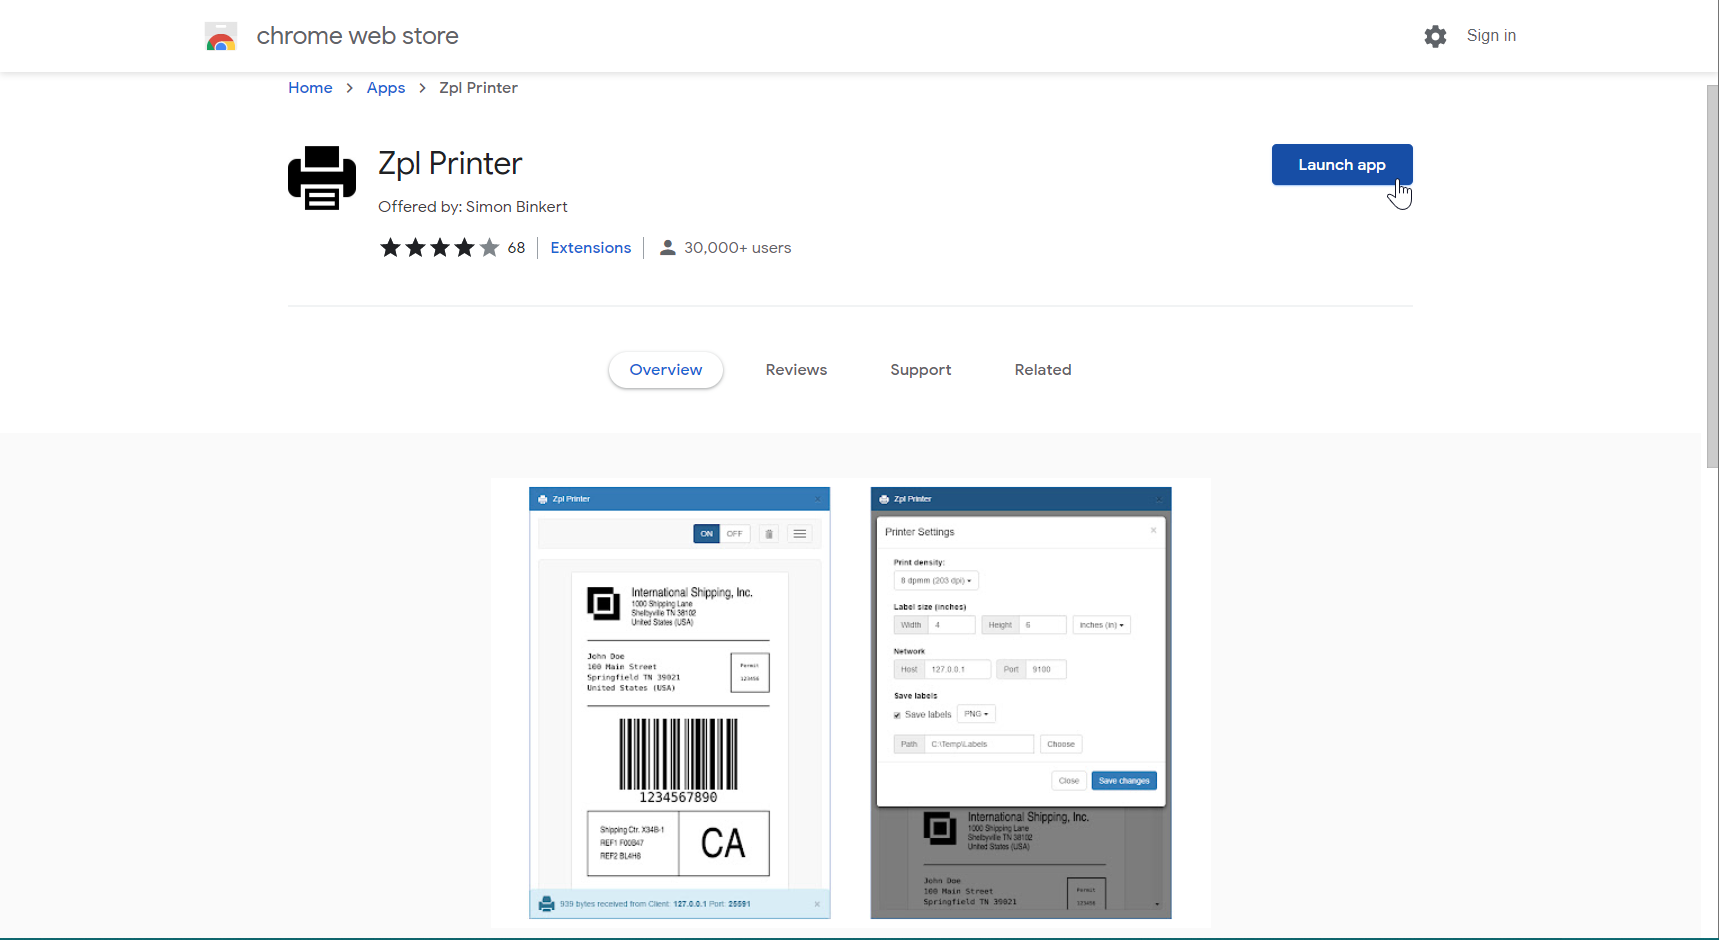
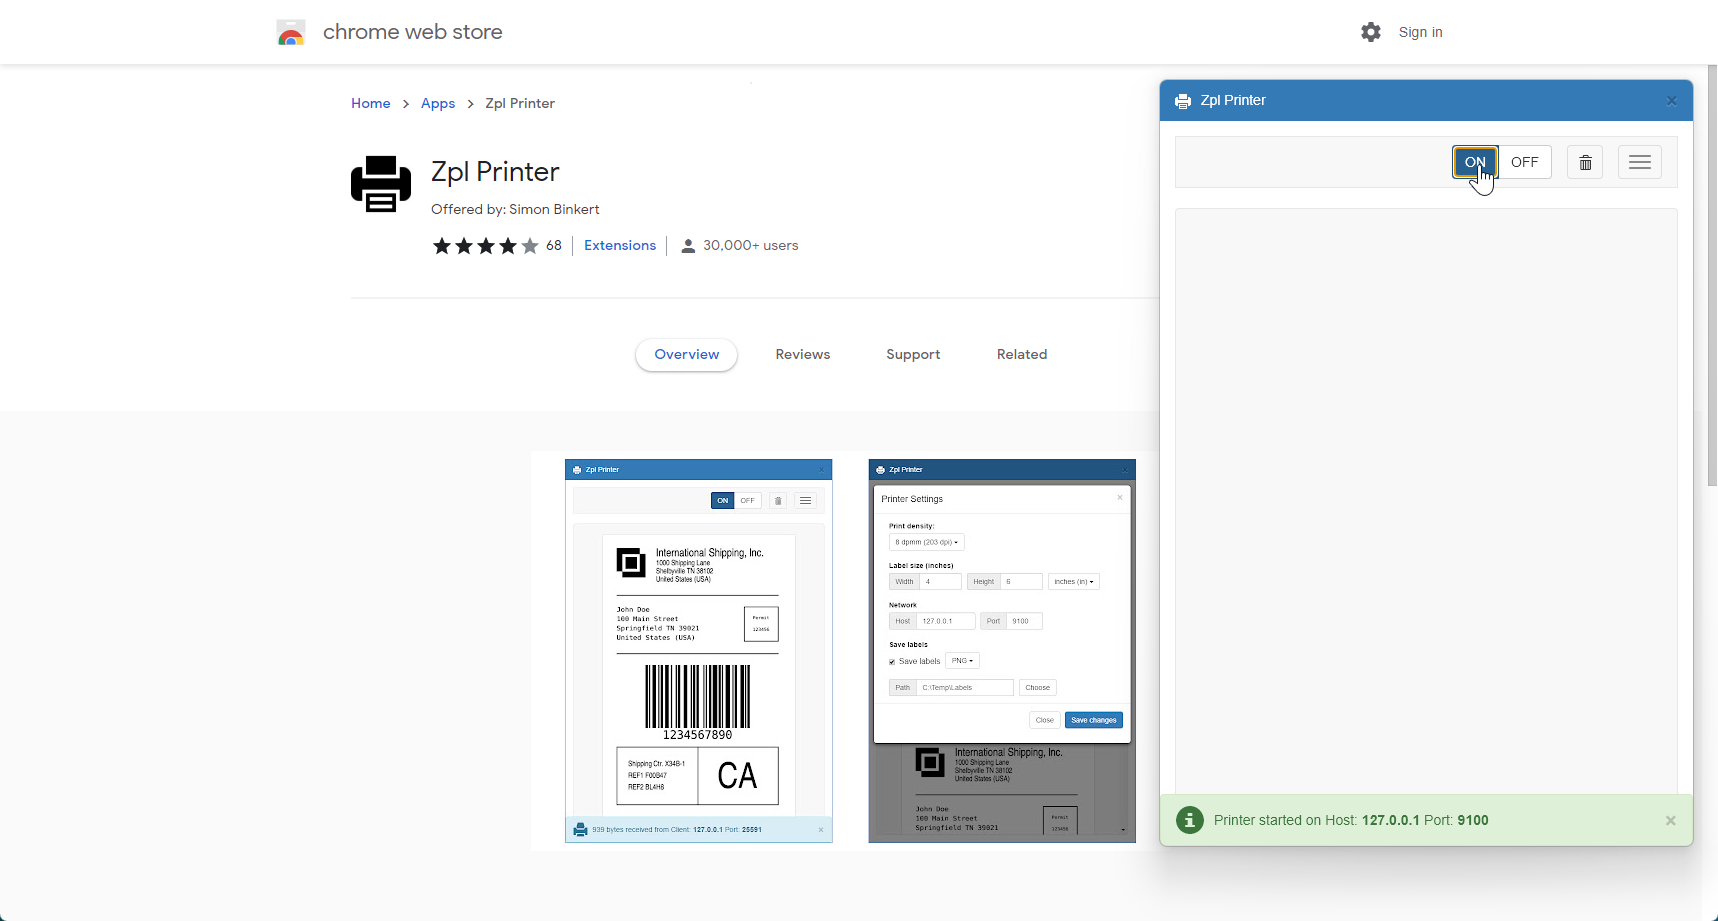
Select Launch app to run the printer emulator application from the Chrome web browser.
Configure the running application:
Turn the application off.
In the printer settings, set the host to 127.0.0.1.
Set the port to 9100.
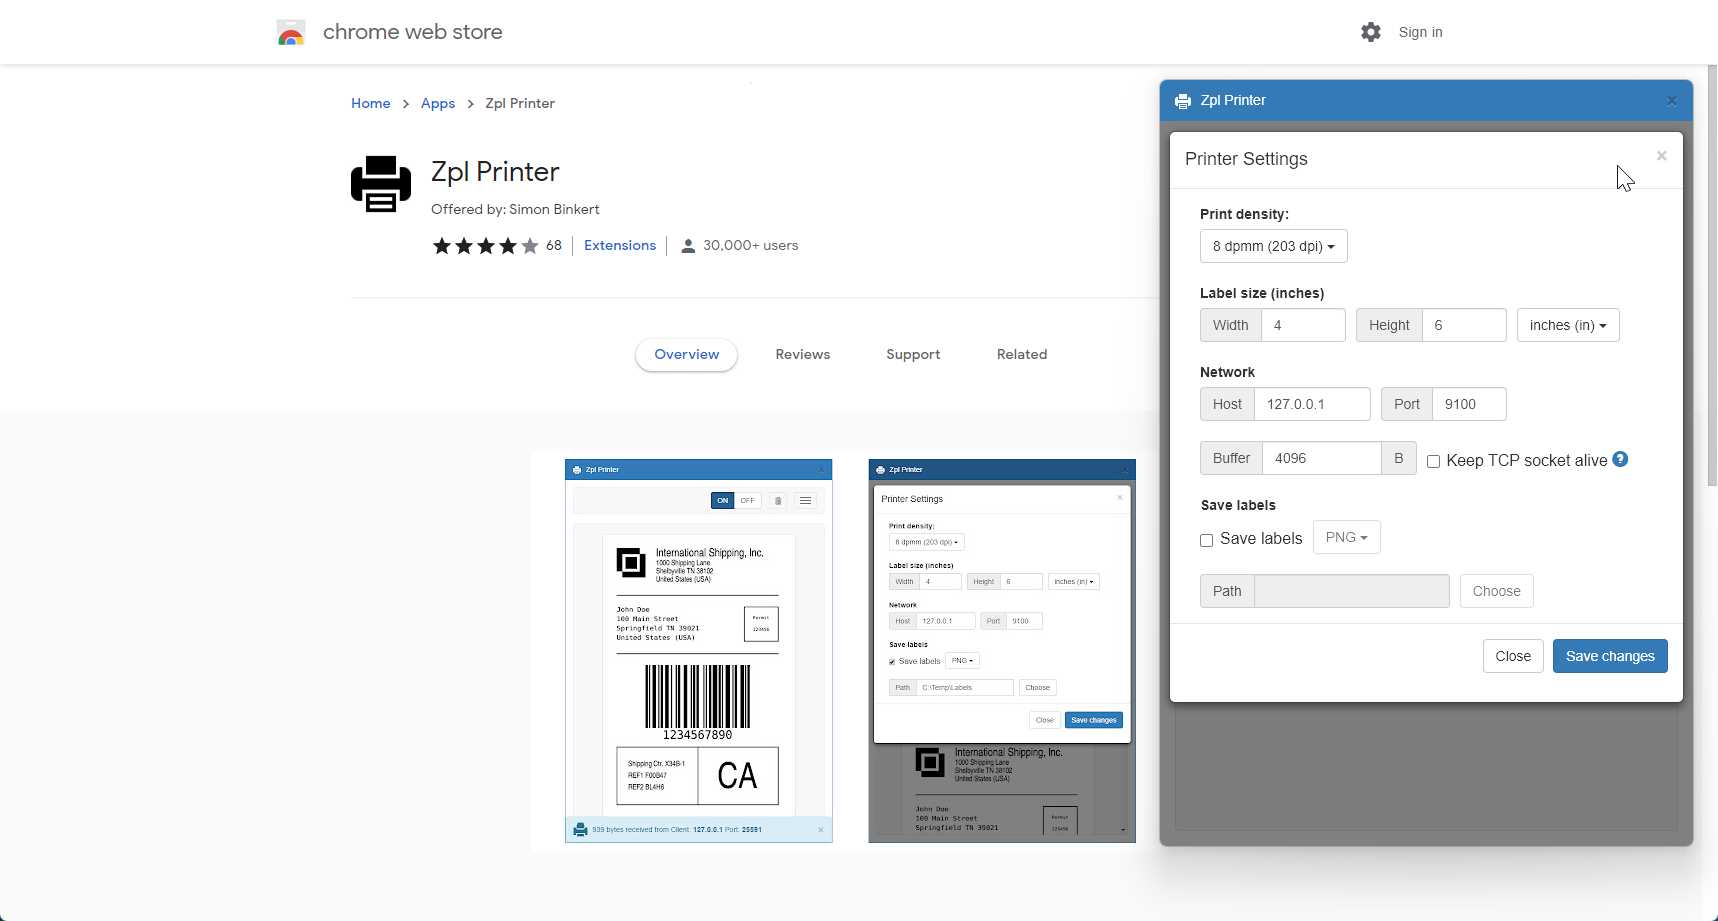
Turn the application back on. You should receive a message that states that the printer was started on the specified host and port.
Note
Because the printer emulator application that is used in this example relies on a web service to render labels, make sure that your security settings allow you to communicate with the service. Otherwise, the application won't receive the rendered labels, and no preview of those labels will be available.
Add and configure a local printer
Add a new local printer that the current device can use to pass generated labels from the DRA to the printer emulator application.
In Windows, select Start > Settings > Devices > Printers & scanners.
Select Printers & scanners settings.
For Add a printer or scanner, select Add device.
For The printer that I want isn't listed, select Add manually.
In the Find a printer by other options field, select Add a local printer or network printer with manual settings.
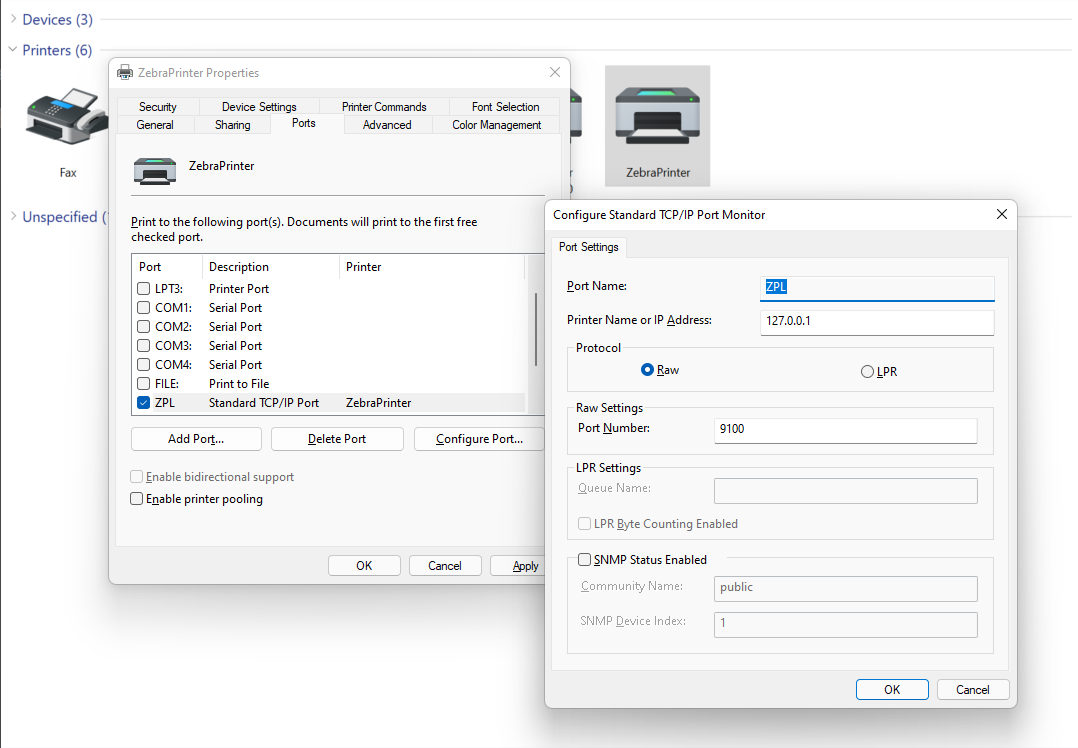
In the Choose a printer port field, select Create a new port, and then follow these steps:
In the Type of port field, select Standard TCP/IP Port.
In the Hostname or IP address field, enter 127.0.0.1.
In the Port name field, enter ZPL.
Wait until the Detecting TCP/IP port operation has been completed.
In the Device type field, select Custom, and then select Settings.
Make sure that the following port settings are specified:
- Port name: ZPL
- Printer name or IP address: 127.0.0.1
- Protocol: Raw
- Port number: 9100
In the Install the printer driver field, select Generic / Text only.
In the Printer name field, enter ZebraPrinter.
Install and configure the DRA
Prepare the DRA to pass generated labels from Finance to the configured local printer.
- Install the DRA.
- Configure the DRA.
- Register the local printer in the DRA.
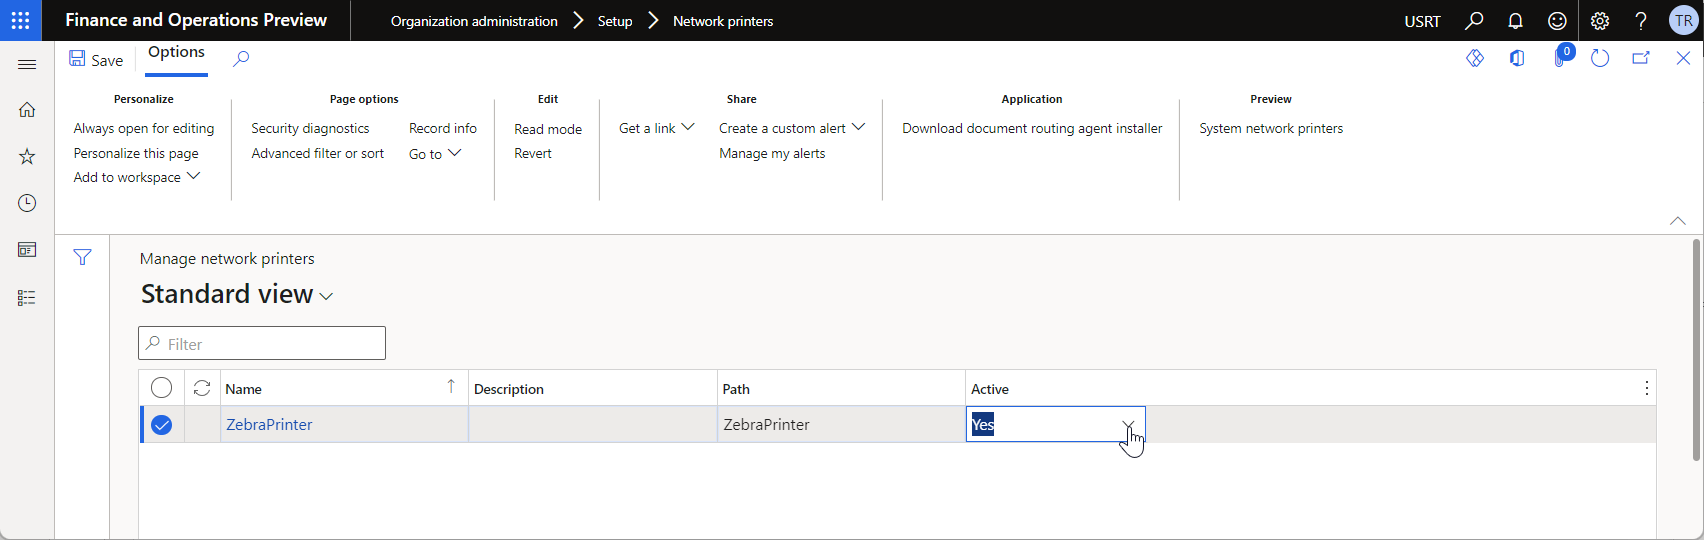
- Activate the local printer in your Finance environment.
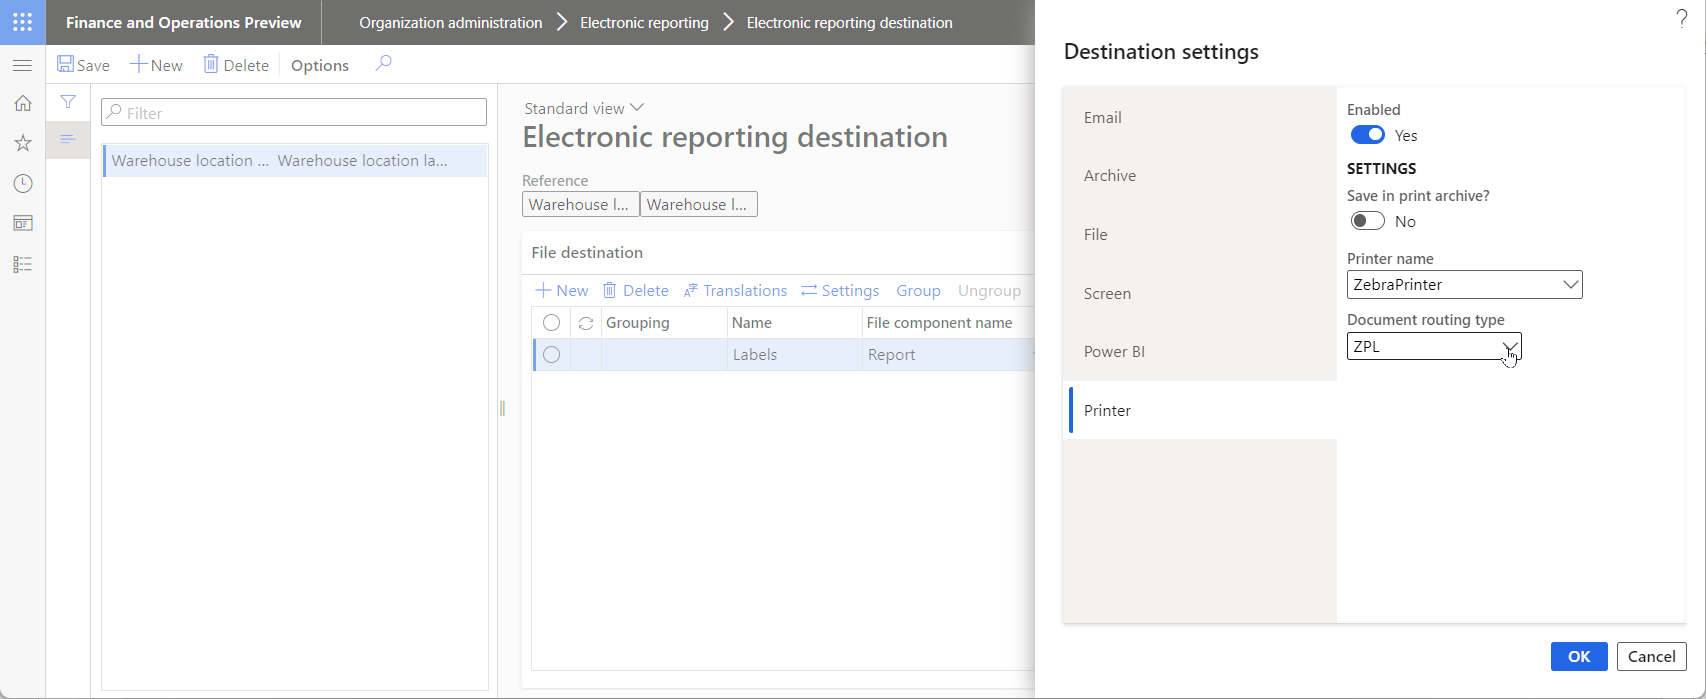
Configure the ER destination
Prepare the ER destination to pass generated labels from Finance to the DRA.
- Go to Organization administration > Electronic reporting > Electronic reporting destination.
- On the Electronic reporting destination page, on the Action Pane, select New.
- In the Reference field, select Warehouse location labels.
- On the File destination FastTab, select New.
- In the Name field, enter Labels.
- In the File component name field, select Report.
- Select Settings.
- In the Destination settings dialog box, on the Printer tab, set the Enabled option to Yes.
- In the Printer name field, select ZebraPrinter.
- In the Document routing type field, select ZPL.
- Select OK.
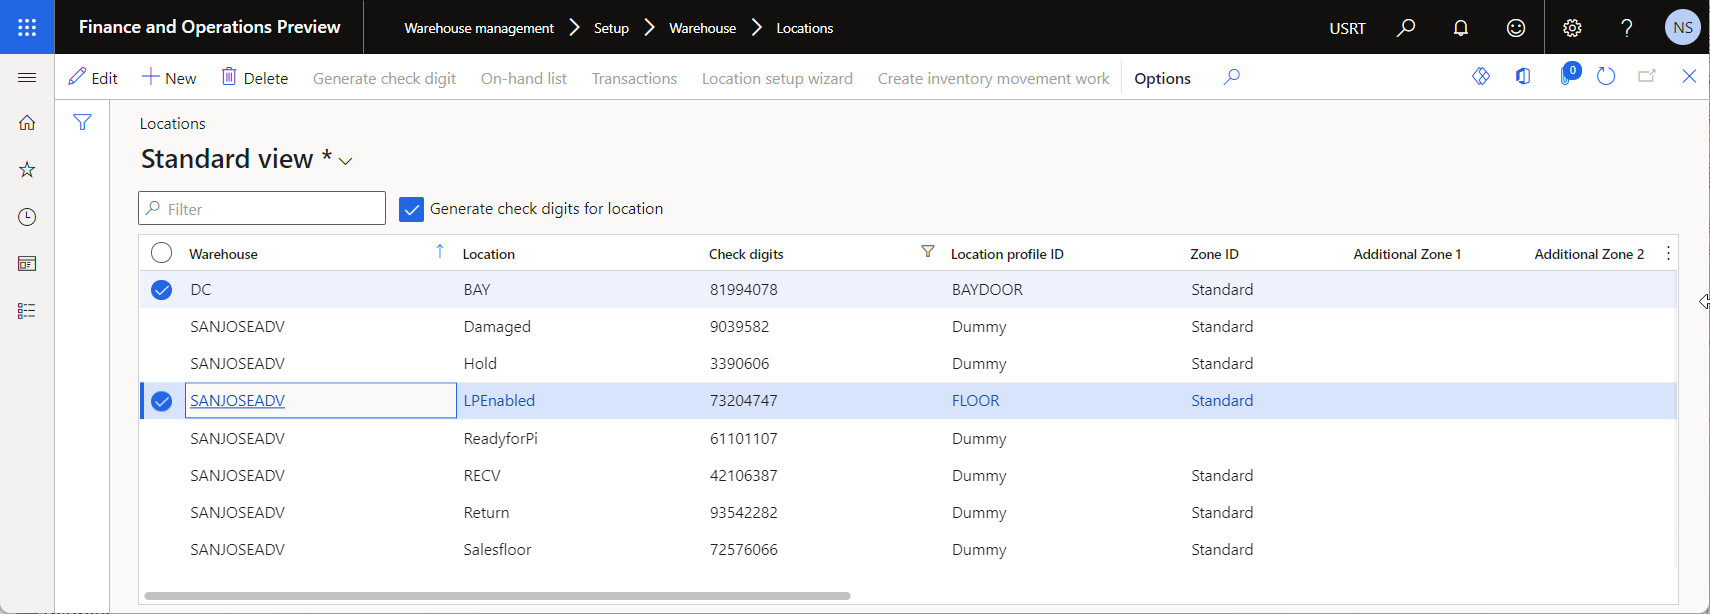
Review warehouse locations
- Go to Warehouse management > Setup > Warehouse > Locations.
- On the Locations page, filter to view only locations that have a value in the Check digits field.
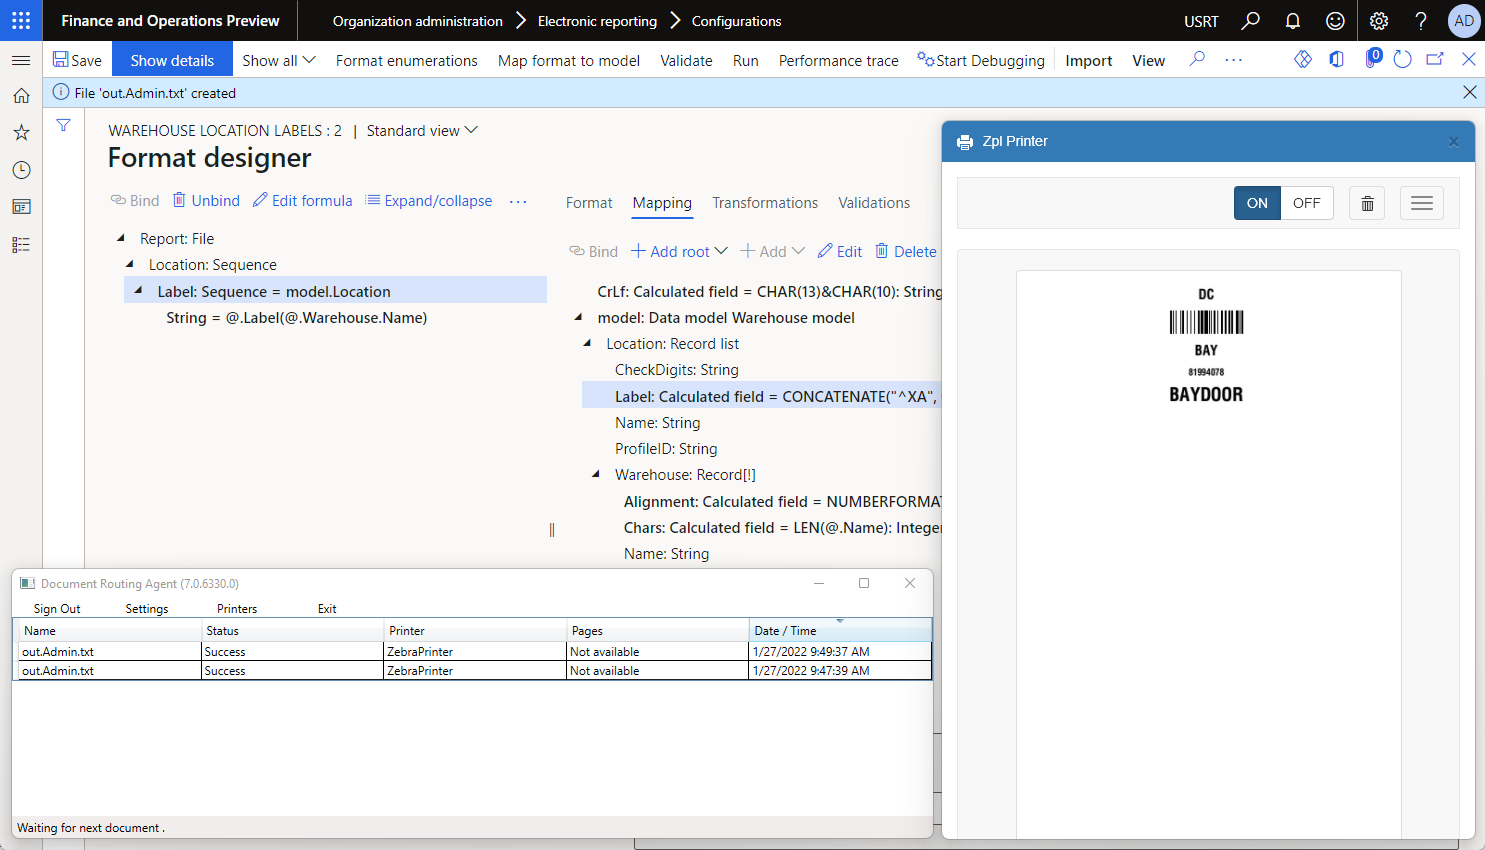
Print warehouse location labels
- Go to Organization administration > Electronic reporting > Configurations.
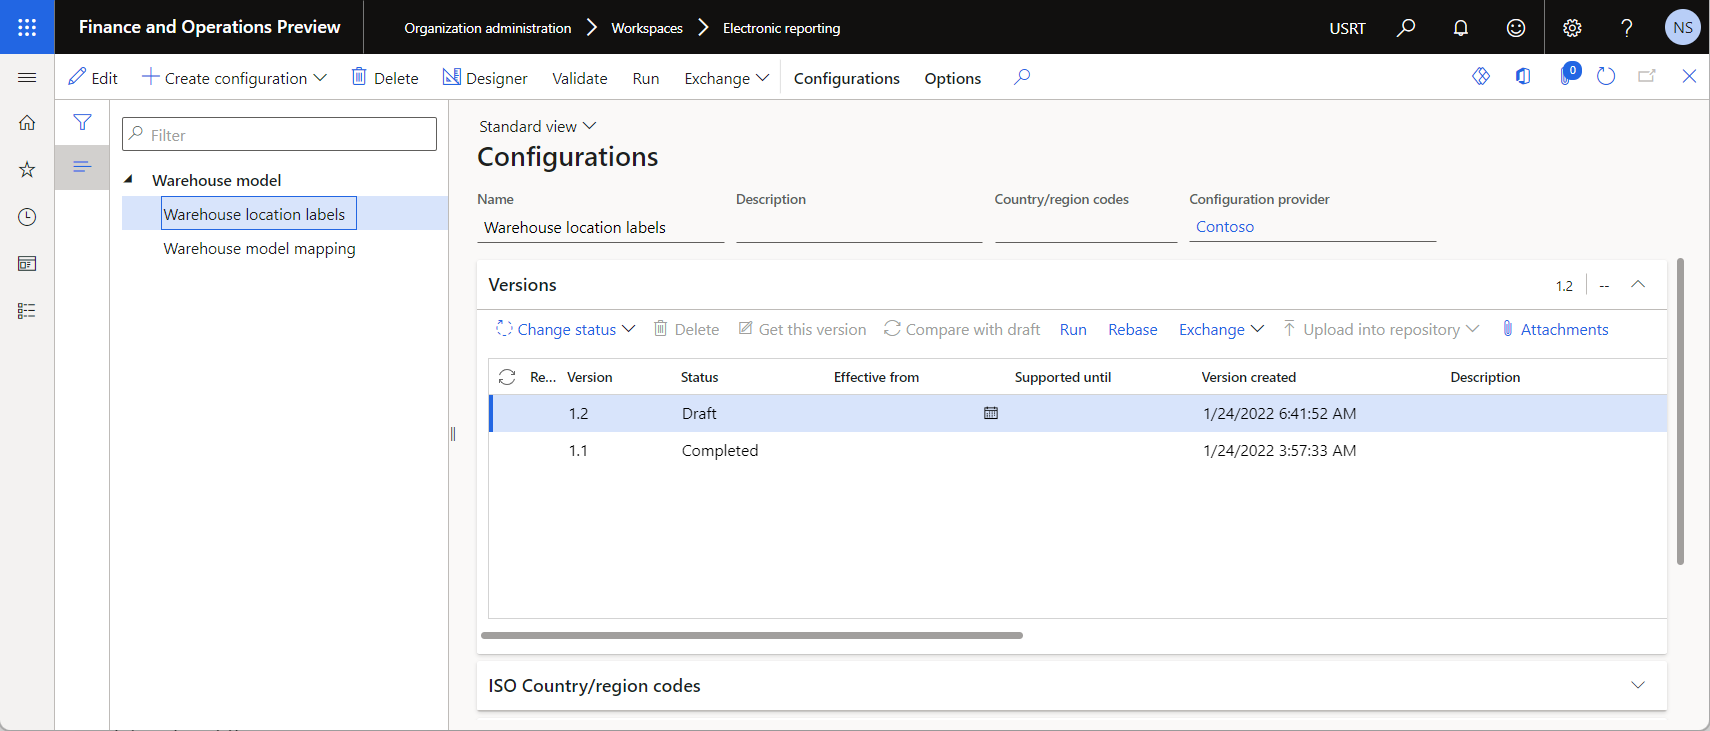
- On the Configurations page, in the configuration tree, expand Warehouse model, and select Warehouse location labels.
- On the Action Pane, select Run.
- In the Electronic report parameters dialog box, on the Records to include tab, select Filter.
- On the Range tab, find the row where the Table field is set to Locations and the Field field is set to Location. In the Criteria field, enter LPEnabled.
- Select OK.
- Select OK. A label is generated and shown on the preview page in the printer emulator application.

Modify the layout of a label
You can change the current layout of your warehouse location labels. The following example shows how to change the layout so that generated labels include a location profile ID.
Go to Organization administration > Electronic reporting > Configurations.
Set the Use destinations for draft status ER user parameter to Yes.
On the Configurations page, in the configuration tree, expand Warehouse model, and select Warehouse location labels.
Select Designer.
On the Format designer page, on the Mapping tab, select the
model.Location.Labeldata source.In the Data source properties dialog box, select Edit > Edit formula.
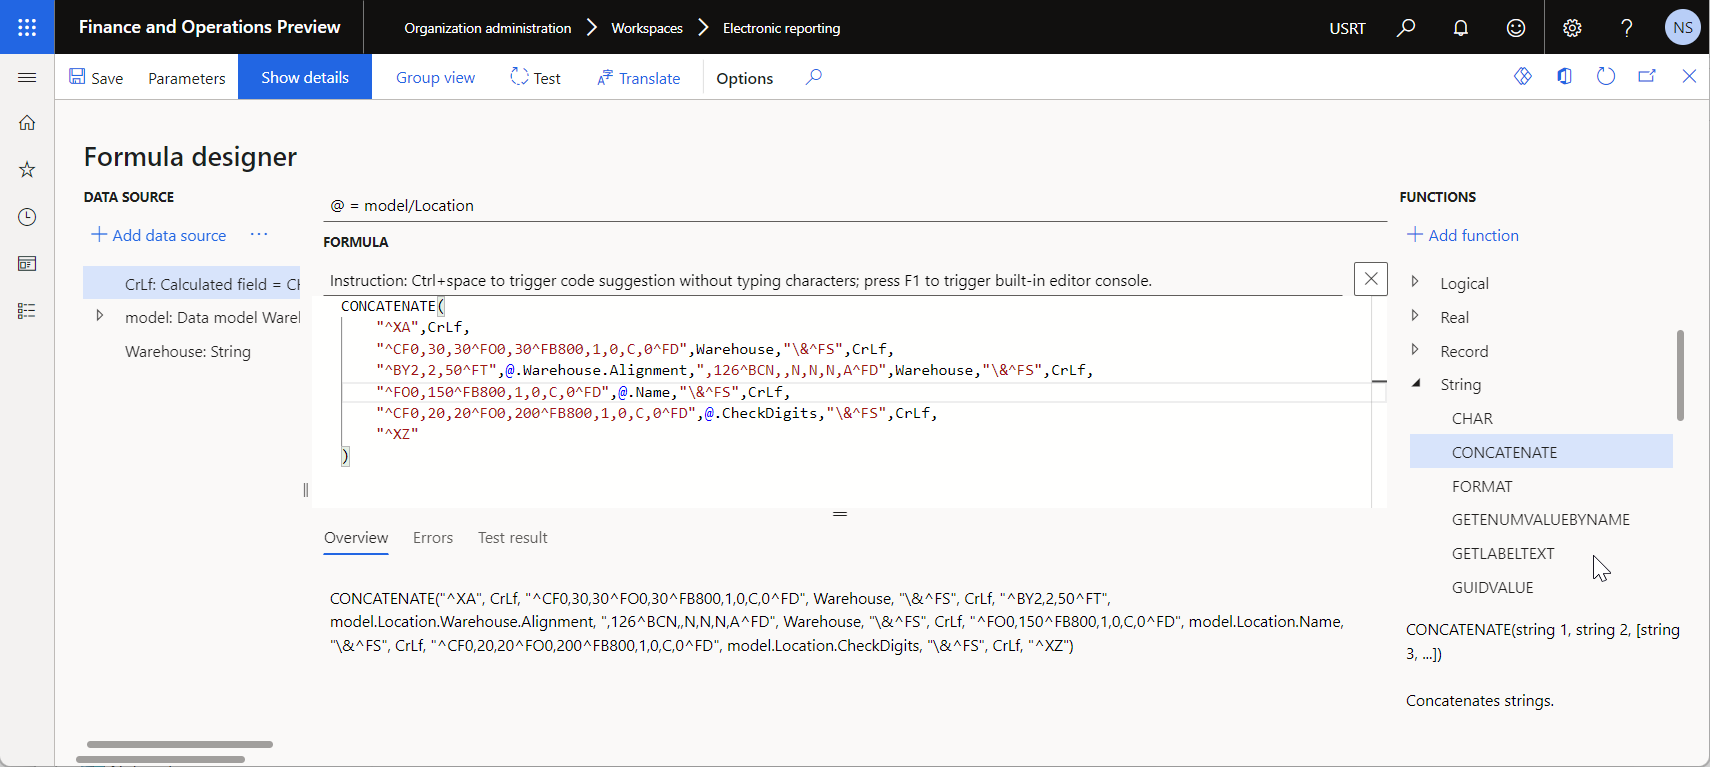
On the Formula designer page, in the Formula field, review the ER formula that is used to generate labels.
CONCATENATE(
"^XA",CrLf,
"^CF0,30,30^FO0,30^FB800,1,0,C,0^FD",Warehouse,"\&^FS",CrLf,
"^BY2,2,50^FT",@.Warehouse.Alignment,",126^BCN,,N,N,N,A^FD",Warehouse,"\&^FS",CrLf,
"^FO0,150^FB800,1,0,C,0^FD",@.Name,"\&^FS",CrLf,
"^CF0,20,20^FO0,200^FB800,1,0,C,0^FD",@.CheckDigits,"\&^FS",CrLf,
"^XZ")
Update the formula to add a location profile ID to generated labels.
CONCATENATE(
"^XA",CrLf,
"^CF0,30,30^FO0,30^FB800,1,0,C,0^FD",Warehouse,"\&^FS",CrLf,
"^BY2,2,50^FT",@.Warehouse.Alignment,",126^BCN,,N,N,N,A^FD",Warehouse,"\&^FS",CrLf,
"^FO0,150^FB800,1,0,C,0^FD",@.Name,"\&^FS",CrLf,
"^CF0,20,20^FO0,200^FB800,1,0,C,0^FD",@.CheckDigits,"\&^FS",CrLf,
"^CF0,40,40^FO0,240^FB800,1,0,C,0^FD",@.ProfileID,"\&^FS",CrLf,
"^XZ")
Select Save.
Select OK.
On the Action Pane, select Run.
In the Electronic report parameters dialog box, on the Records to include tab, select Filter.
On the Range tab, find the row where the Table field is set to Locations and the Field field is set to Location. In the Criteria field, enter Bay.
Select OK.
Select OK. A label is generated and shown on the preview page in the printer emulator application.
Encoding
Note
You must synchronize the encoding setting of the Common\File component of the editable ER format and the appropriate setting of the designed label. The value of the Encoding field of the Common\File component should not contradict a ZPL command that is used to control the label's encoding (for example, the ^CI command). ER doesn't validate that these settings are synchronized.
Additional resources
Feedback
Coming soon: Throughout 2024 we will be phasing out GitHub Issues as the feedback mechanism for content and replacing it with a new feedback system. For more information see: https://aka.ms/ContentUserFeedback.
Submit and view feedback for