Configure device data support in care management (preview)
Important
- This is a preview feature.
- Preview features aren't meant for production use and may have restricted functionality. These features are available before an official release so that customers can get early access and provide feedback.
In chronic care management, tracking a patient’s vitals over a long period of time is important to manage their conditions effectively. The dependence on routine in-person appointments and the inability to understand the patient’s health vitals regularly makes chronic care management resources intensive for hospitals, and inconvenient for patients.
Device data support in care management (preview) is a Microsoft Cloud for Healthcare capability that aims to make it easier for caregivers to access and track their patients’ vitals. By assigning appropriate health devices to a patient based on their chronic conditions, caregivers can access the patient’s vital data regularly and view the corresponding trends in the data. Based on this data, care managers can decide whether to request the patient to attend an appointment. It also enables clinical users to stay on top of their patients’ long-term health trends.
Intended use
Intended use: This capability strictly intends to support chronic care use cases so that clinical users can view information about a patient’s vitals and then interpret the data based on their own judgment.
Non-intended use: This capability isn't intended to support
- Critical care or acute care use cases.
- Alarms or alerts of any kind based on the captured data.
- Real-time display of captured data or its subsequent analysis.
Not a medical device: This capability is
- Not designed, intended, or made available as a medical device.
- Not designed or intended to be a substitute for professional medical advice, diagnosis, treatment, or judgment and shouldn't be used to replace or as a substitute for professional medical advice, diagnosis, treatment, or judgment.
Licensing and software prerequisites
Your organization needs the following licenses to be able to use this capability:
- Microsoft Cloud for Healthcare license
- Microsoft Power BI Pro license
Post-deployment configuration
You can install the device data support in care management (preview) solution using Microsoft Cloud Solution Center. The preview version of this capability comes packaged with the Device Management application. Healthcare organizations can use this application to add new health devices when required, either manually or by syncing with a device vendor, and maintain an inventory of these devices.
After the installation, your organization needs to configure the following apps and services to use this capability:
Azure services pipeline: To ingest the data from a health device into the application, you must deploy an Azure services pipeline comprising of an Azure Event Hubs service, Azure Health Data Services MedTech service, and a FHIR (Fast Healthcare Interoperability Resources) server in the user tenant. For more information on the deployment and configuration steps, go to Configure Azure services pipeline.
Patient observation chart: The patient observation chart is a Power BI template application that enables visualization of the vitals data captured from health devices. The main application’s post-deployment configuration automatically installs the patient observation chart. To embed it into the application, follow the instructions in Configure patient observation chart using Power BI.
Configure Azure services pipeline
This section provides a step-by-step guide to set up an Azure environment to ingest the device vitals to an Event Hubs service.
When you install the Device Management solution, you need to deploy the Azure Health Data Services MedTech pipeline in the user tenant. This pipeline ingests the data from a medical device or a sample data sender application to the event hub service. The MedTech service then pulls the data to transform it to FHIR observations and store it in the FHIR server.
As part of the deployment, you need to create and configure the following resources in the user tenant:
- FHIR server (if the user tenant doesn't already have it)
- Event Hubs namespace
- Azure Health Data Services workspace (if the user tenant doesn't already have it)
- MedTech service
- Azure Virtual Network
- Azure public IP address
- Azure Firewall
- Azure private DNS zone
- Private endpoint to the event hub service inside the virtual network
- Network interface card
The deployment and configuration includes the following steps:
- Review requirements
- Create resource group and virtual network
- Create Azure Health Data Services workspace
- Create the event hub service
- Configure MedTech service
- Set up network configuration
- Set up application registration
- Create a virtual machine for sample data application
Review requirements
Before proceeding with the deployment, you need to ensure you have the following requirements:
- An Azure account and subscription in the same tenant where you've deployed the Device Management solution. If you don't have a subscription, sign up for a free Azure account before you begin.
- Access within this Azure subscription with appropriate permissions to create resource groups and resources.
- Adherence to security guidelines outlined by Azure administrators and organization policy.
Create resource group and virtual network
Create an Azure resource group using the instructions in Create resource groups. Ensure that you select the Region value wisely. You should use the same region while configuring the rest of the resources in this article.
Create a virtual network within this resource group using the instructions in Quickstart: Create a virtual network using the Azure portal. You can skip the virtual machine creation steps in the quickstart.
Deploy a standard firewall for this virtual network using the instructions in Deploy the firewall.
Note
For all the following deployment and configuration sections, ensure that you always use the resource group and virtual network created in this step, unless explicitly mentioned otherwise.
Create Azure Health Data Services workspace
Deploy the Azure Health Data Services workspace using the instructions in Deploy Azure Health Data Services workspace using Azure portal.
Deploy a FHIR service within the same workspace using the instructions in Deploy a FHIR service within Azure Health Data Services.
Create the event hub service
Create the Event Hubs namespace using the instructions in Create an Event Hubs namespace.
Ensure that it uses a Standard or a higher tier. Don't use the Basic tier.
Create the event hub service within the same namespace using the instructions in Create an event hub. Ensure that you set the Message Retention value to at least 24 hours.
Configure MedTech service
Deploy and configure the MedTech service using the steps explained in the following articles:
- Quickstart: Deploy the MedTech service manually using the Azure portal
- Quickstart: Part 2: Configure the MedTech service for manual deployment using the Azure portal
The previous sections have already addressed the Prerequisites in the MedTech service deployment quickstart.
If the device data coming into the event hub service is in the format explained in Data format, use the following JSON code for the Configure the device mapping tab step. If not, you can also define your own device mappings. For more information on the device mappings, go to Overview of the MedTech service device mapping.
{
  "templateType": "CollectionContent",
  "template": [
    {
      "templateType": "JsonPathContent",
      "template": {
        "typeName": "Weight",
        "typeMatchExpression": "$..[?(@metrics.weight)]",
        "timestampExpression": "$.measuredAt",
        "deviceIdExpression": "$.metrics.imei",
        "patientIdExpression": "$.externId",
        "values": [
          {
            "valueName": "Weight",
            "valueExpression": "$.metrics.weight",
            "required": true
          }
        ]
      }
    },
    {
      "templateType": "JsonPathContent",
      "template": {
        "typeName": "Pulse Oxygen",
        "typeMatchExpression": "$..[?(@metrics.spo2 && @metrics.pulse)]",
        "timestampExpression": "$.measuredAt",
        "deviceIdExpression": "$.metrics.imei",
        "patientIdExpression": "$.externId",
        "values": [
          {
            "valueName": "Spo2",
            "valueExpression": "$.metrics.spo2",
            "required": true
          },
          {
            "valueName": "Pulse",
            "valueExpression": "$.metrics.pulse",
            "required": true
          }
        ]
      }
    },
    {
      "templateType": "JsonPathContent",
      "template": {
        "typeName": "Blood Pressure",
        "typeMatchExpression": "$..[?(@metrics.systolic && @metrics.diastolic)]",
        "timestampExpression": "$.measuredAt",
        "deviceIdExpression": "$.metrics.imei",
        "patientIdExpression": "$.externId",
        "values": [
          {
            "valueName": "Systolic",
            "required": true,
            "valueExpression": "$.metrics.systolic"
          },
          {
            "required": true,
            "valueName": "Diastolic",
            "valueExpression": "$.metrics.diastolic"
          },
          {
            "valueName": "Pulse",
            "valueExpression": "$.metrics.pulse",
            "required": true
          }
        ]
      }
    },
    {
      "templateType": "JsonPathContent",
      "template": {
        "typeName": "Temperature",
        "typeMatchExpression": "$..[?(@metrics.temp)]",
        "timestampExpression": "$.measuredAt",
        "deviceIdExpression": "$.metrics.imei",
        "patientIdExpression": "$.externId",
        "values": [
          {
            "valueName": "Temperature",
            "valueExpression": "$.metrics.temp",
            "required": true
          }
        ]
      }
    }
  ]
}
Similarly, if you're using the same data format, copy the following JSON code for the Configure the destination tab step.
Note
Under the Destination tab, specify the Resolution Type as Lookup.
{
  "templateType": "CollectionFhir",
  "template": [
    {
      "templateType": "CodeValueFhir",
      "template": {
        "typeName": "Weight",
        "value": {
          "valueName": "Weight",
          "valueType": "Quantity",
          "code": "[lb_av]",
          "unit": "lbs",
          "system": "http://unitsofmeasure.org"
        },
        "codes": [
          {
            "code": "29463-7",
            "display": "Body Weight",
            "system": "http://loinc.org"
          }
        ],
        "category": [
          {
            "codes": [
              {
                "system": "http://terminology.hl7.org/CodeSystem/observation-category",
                "code": "vital-signs",
                "display": "Vital Signs"
              }
            ],
            "text": "Vital Signs"
          }
        ]
      }
    },
    {
      "templateType": "CodeValueFhir",
      "template": {
        "typeName": "Pulse Oxygen",
        "value": {
          "valueName": "",
          "valueType": "Quantity"
        },
        "components": [
          {
            "codes": [
              {
                "code": "59408-5",
                "system": "http://loinc.org",
                "display": "Oxygen saturation in Arterial blood by Pulse oximetry"
              }
            ],
            "value": {
              "valueName": "Spo2",
              "valueType": "Quantity",
              "unit": "%",
              "system": "http://unitsofmeasure.org",
              "code": "%"
            }
          },
          {
            "codes": [
              {
                "display": "Heart Rate",
                "system": "http://loinc.org",
                "code": "8867-4"
              }
            ],
            "value": {
              "valueName": "Pulse",
              "valueType": "Quantity",
              "code": "beats/minute",
              "unit": "/min",
              "system": "http://unitsofmeasure.org"
            }
          }
        ],
        "codes": [
          {
            "code": "20564-1",
            "system": "https://loinc.org/",
            "display": "Oxygen saturation in Blood"
          }
        ],
        "category": [
          {
            "text": "Vital Signs",
            "codes": [
              {
                "system": "http://terminology.hl7.org/CodeSystem/observation-category",
                "code": "vital-signs",
                "display": "vital-signs"
              }
            ]
          }
        ]
      }
    },
    {
      "templateType": "CodeValueFhir",
      "template": {
        "typeName": "Blood Pressure",
        "periodInterval": "0",
        "components": [
          {
            "codes": [
              {
                "code": "8480-6",
                "display": "Systolic blood pressure",
                "system": "http://loinc.org"
              }
            ],
            "value": {
              "valueName": "Systolic",
              "valueType": "Quantity",
              "code": "mm[Hg]",
              "system": "http://unitsofmeasure.org",
              "unit": "mmHg"
            }
          },
          {
            "codes": [
              {
                "code": "8867-4",
                "display": "Diastolic blood pressure",
                "system": "http://loinc.org"
              }
            ],
            "value": {
              "valueName": "Diastolic",
              "valueType": "Quantity",
              "system": "http://unitsofmeasure.org",
              "code": "mm[Hg]",
              "unit": "mmHg"
            }
          },
          {
            "codes": [
              {
                "code": "8889-8",
                "system": "http://loinc.org",
                "display": "Heart Rate"
              }
            ],
            "value": {
              "valueName": "Pulse",
              "valueType": "Quantity",
              "code": "beats/minute",
              "system": "http://unitsofmeasure.org",
              "unit": "/min"
            }
          }
        ],
        "codes": [
          {
            "system": "http://loinc.org",
            "display": "Blood Pressure",
            "code": "55284-4"
          }
        ],
        "category": [
          {
            "text": "vitals",
            "codes": [
              {
                "code": "vital-signs",
                "display": "vital-signs",
                "system": "http://terminology.hl7.org/CodeSystem/observation-category"
              }
            ]
          }
        ]
      }
    },
    {
      "templateType": "CodeValueFhir",
      "template": {
        "typeName": "Temperature",
        "value": {
          "valueName": "Temperature",
          "valueType": "Quantity",
          "system": "http://unitsofmeasure.org",
          "code": "[degF]",
          "unit": "F"
        },
        "components": [],
        "codes": [
          {
            "code": "8310-5",
            "display": "Body temperature",
            "system": "http://loinc.org"
          }
        ],
        "category": [
          {
            "text": "Vital Signs",
            "codes": [
              {
                "code": "vital-signs",
                "system": "http://terminology.hl7.org/CodeSystem/observation-categor",
                "display": "vital-signs"
              }
            ]
          }
        ]
      }
    }
  ]
}
Set up network configuration
Using the instructions in Create a private DNS zone, create a private DNS zone with the name privatelink.servicebus.windows.net
Disable public access to the Event Hubs namespace using the following steps:
Go to the namespace resource that you created and select the Networking tab.
For the Public network access option, select Disabled, and save the updated settings.
Create a private endpoint for the Event Hubs namespace using the following steps:
Switch to the namespace's Private endpoint connections tab and select + Private endpoint.
Continue creating the endpoint with the default settings. On the Virtual Network and DNS tabs, select the virtual network and private DNS zone created in the previous sections.
After creating the endpoint, go back to the Private endpoint connections tab and verify whether the newly created private endpoint displays Succeeded for the provisioning state.
Configure the private DNS zone that you created using the following steps:
Select + Record set on the Overview tab and enter the following values:
Field Value Name Name of the Event Hubs namespace that you created IP address IP address of the private endpoint that you created You can ignore this step if the record set has been added automatically.
Select Virtual network links under Settings, select + Add, and select the virtual network that you created.
Set up application registration
Create and set up the app registration using the following steps:
On the Azure portal, search and select App registrations.
Select + New registration.
Enter a name for the app registration.
Under Supported account types, select the option Accounts in this organizational directory only (Default Directory only - Single tenant) and select Register.
Open the app registration.
Select Certificates & secrets, and select + New client secret on the Client secrets tab. Set the expiry value to six months and add the secret.
After you create the secret, make a note of the secret value.
Note
For security, the secret value is visible only during the creation process. If you miss noting down the secret value in this step, create a new secret.
Make a note of both the Application (Client) ID and the secret value of the registration. Use these values to configure the Data integration toolkit settings explained in the Additional configuration section.
Go to the FHIR service that you created in the Create Azure Health Data Services workspace step. Select Access control (IAM).
Select + Add, select the Add role assignment option, and select the FHIR Data Contributor role from the list.
Select Next.
On the Members tab, select + Select members to search and select the app registration that you previously created.
Review and add the role assignment.
Create a virtual machine for sample data application
This step shows you how to configure an Azure Virtual Machine to run a sample data sender application that can push data to the event hub service. The application mimics the data that health devices push.
Create a virtual machine with a Windows 11 OS image using the instructions in Create virtual machine.
To learn how to generate and push sample data, go to Generate sample data for device data support (preview).
Configure patient observation chart using Power BI
This section lists the prerequisites and steps for installing and configuring the patient observation chart.
Prerequisites
You must have a Microsoft Power BI Pro license to configure and publish reports.
Sign in to Power BI, select the gear icon, select Admin portal, select Tenant settings, and enable the setting for installing template apps not listed on AppSource.
You must have a FHIR Data Reader role on the FHIR server to read data from the server. For more information on the role assignment, go to Assign roles for the FHIR service.
Install and configure
Select the Patient observation chart template app from the post-deployment section.
Sign in to Power BI, and then select the Install button to proceed.
After you install the app, it will appear on your Power BI Apps page.
Select the app to open it.
Select Connect your data.
For the FHIRServerUrl field, enter the URL of the FHIR server you want to connect the report to.
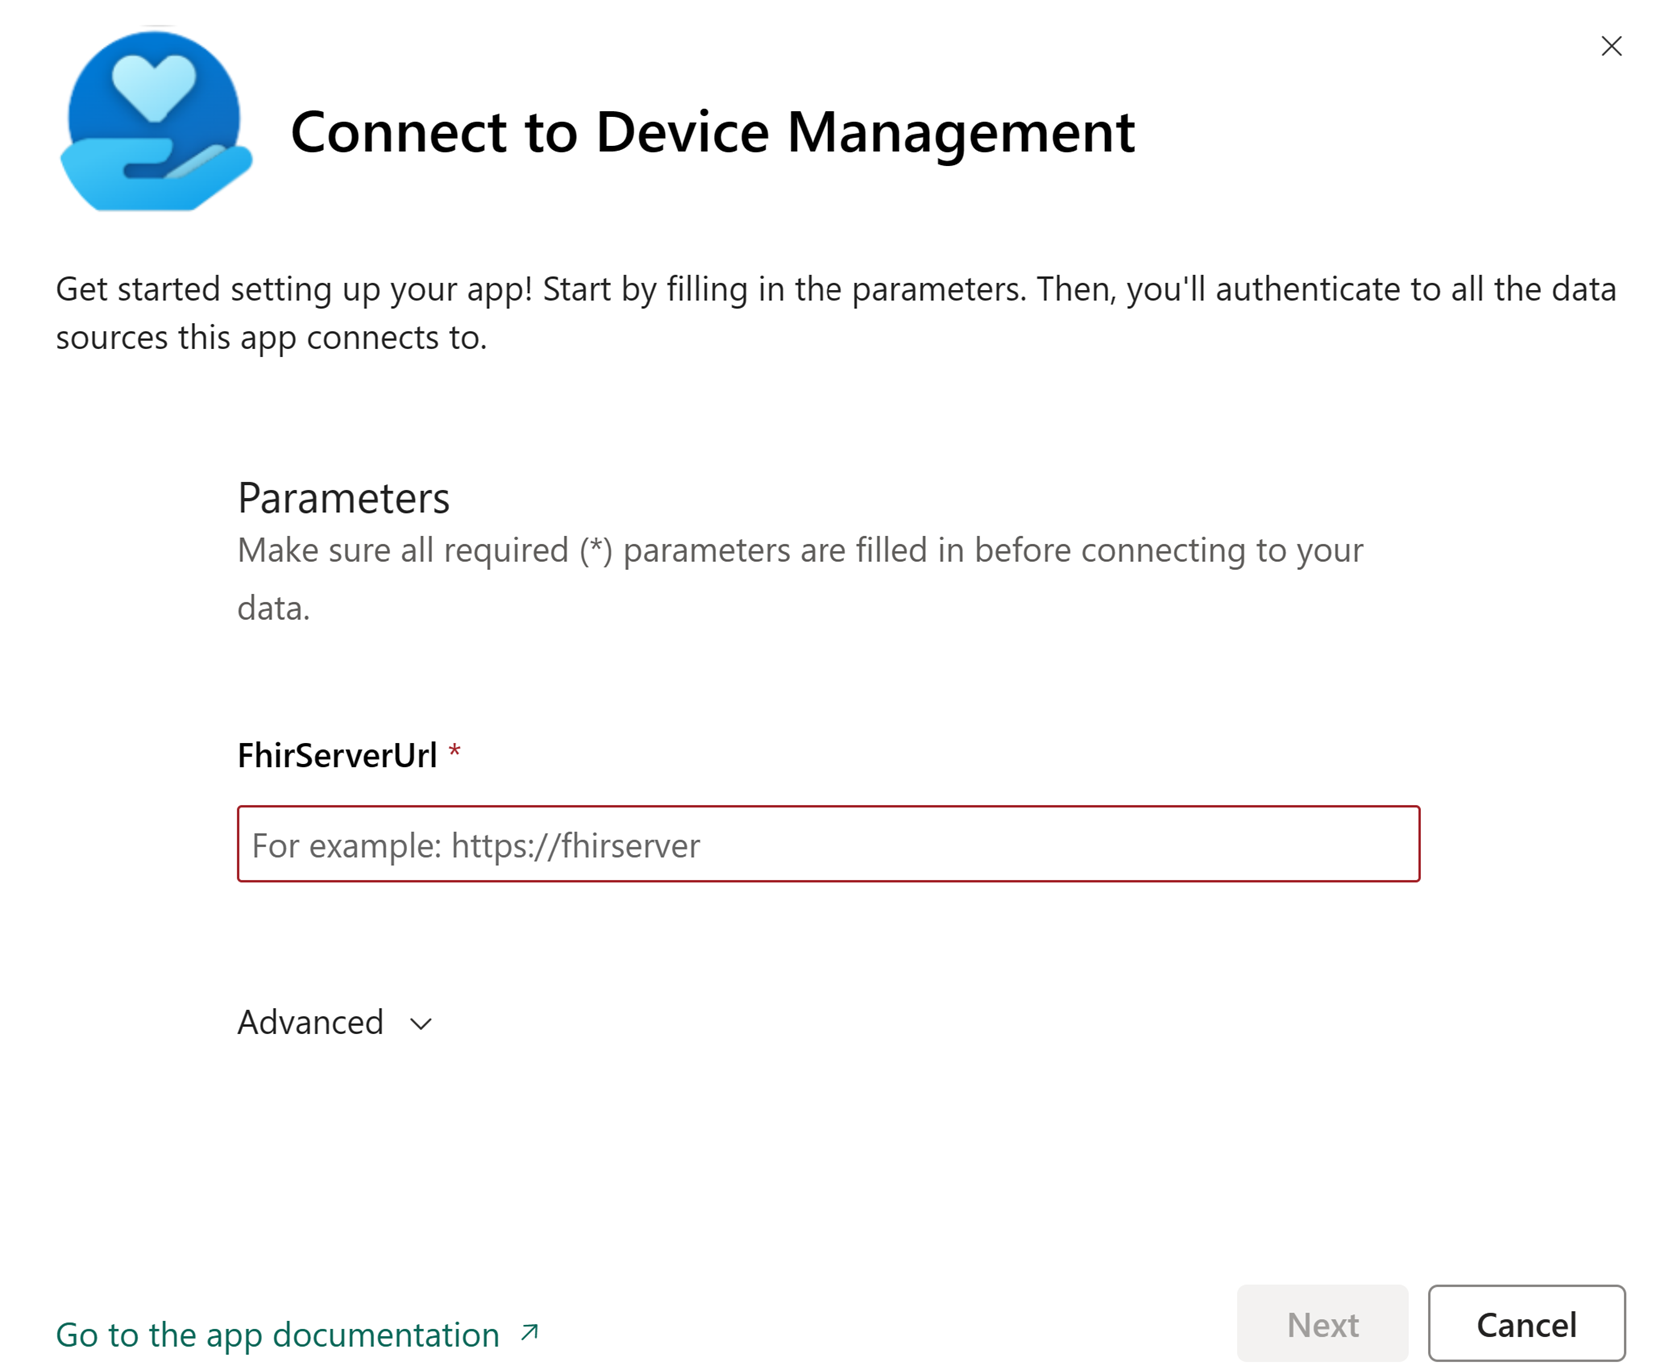
Connect your account:
- For Authentication method, select OAuth2.
- For Privacy level setting for this data source, select Organizational.
- Select Sign in and connect.
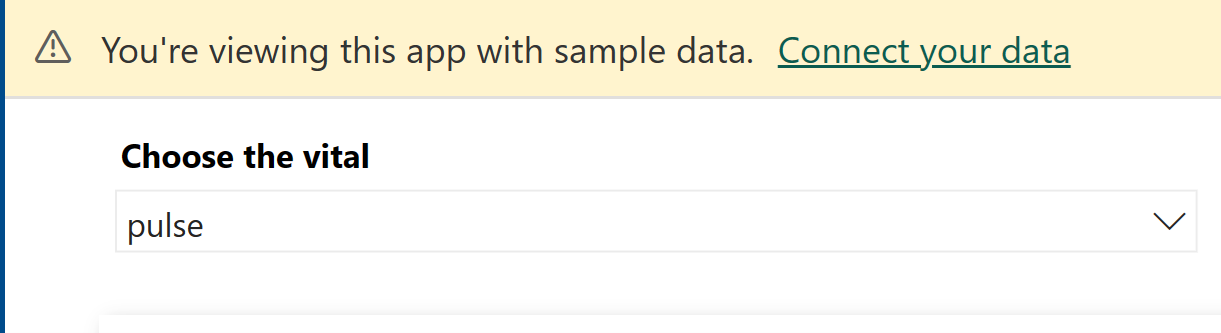
After the app refreshes the dataset, you'll see your patient vital information data reflected in the Power BI report.
Embed Power BI report
You can embed the Power BI reports on Dataverse forms using the Power BI Embed with contextual filtering feature. For more information on the Embed feature, go to Embed a report in a secure portal or website.
Use the following steps to embed your Power BI report in Dataverse:
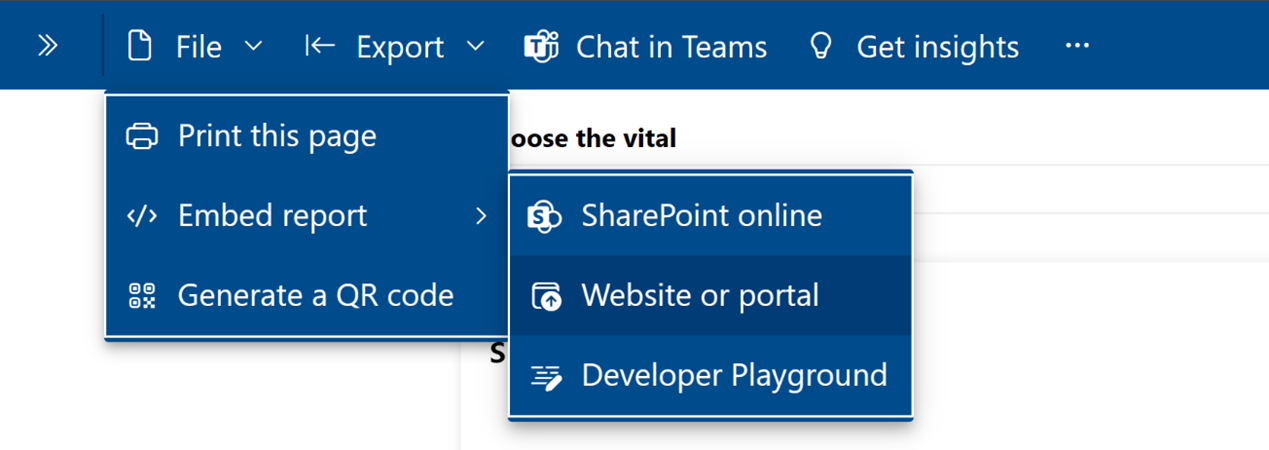
After the app installation is complete, go to the installed app and open the report.
On the File menu, select Embed report, and then select Website or portal.
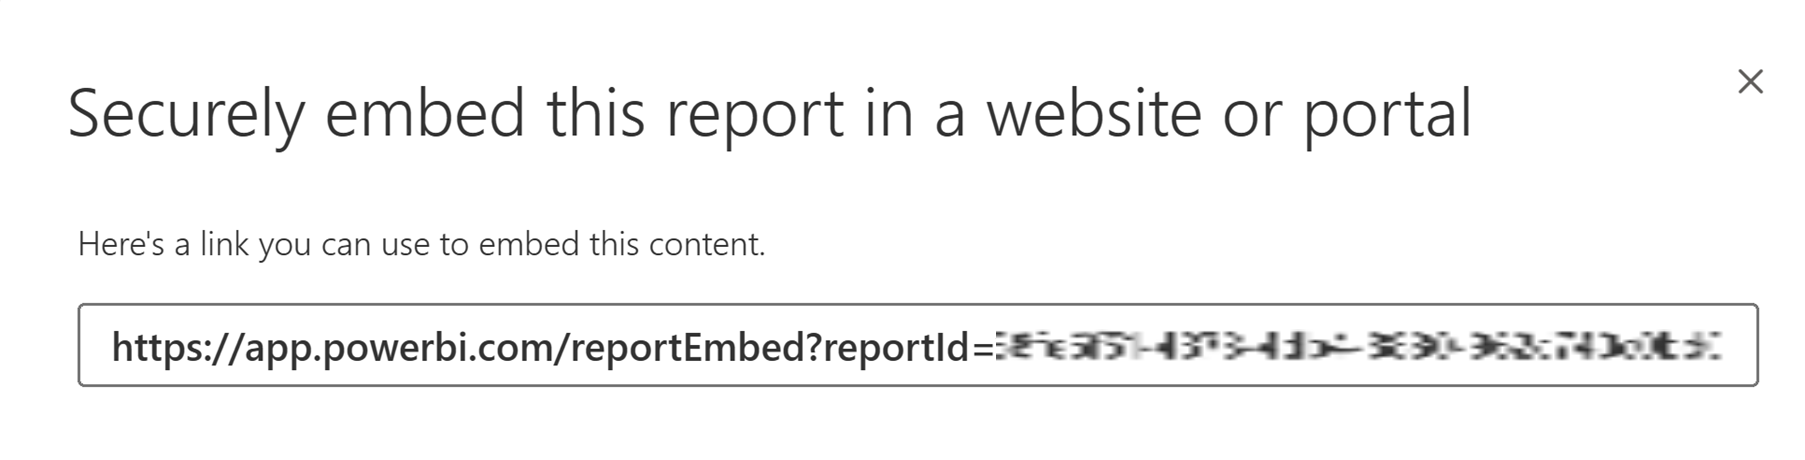
In the Secure embed code dialog, copy the URL value provided under Here's a link you can use to embed this content.
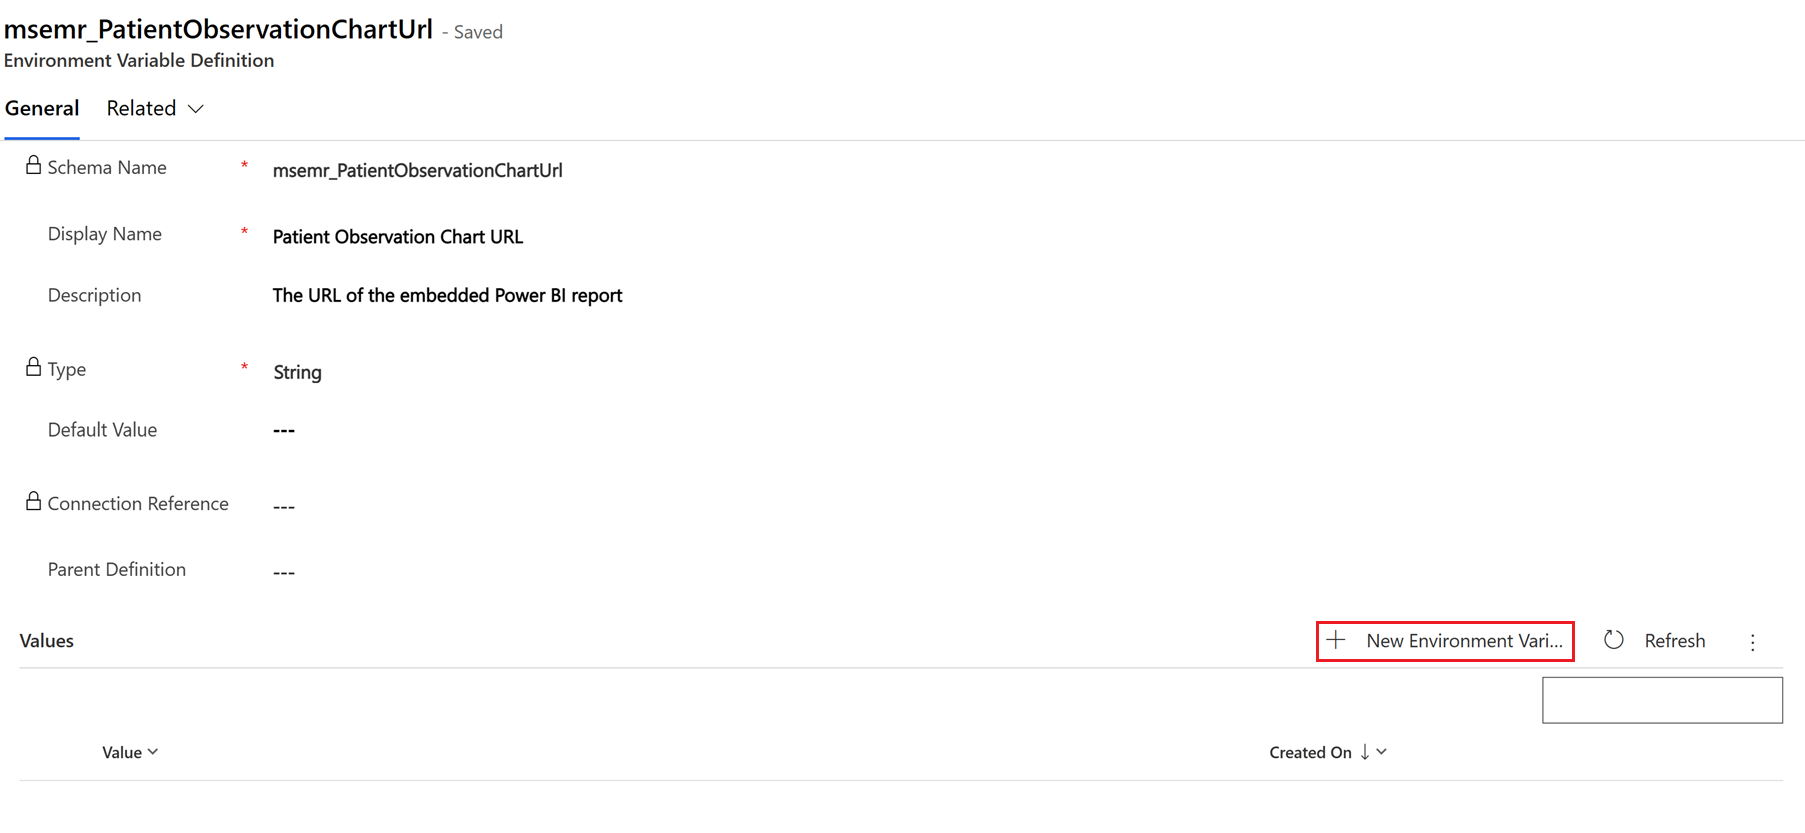
The next step would be to update the Patient Observation Chart URL environment variable in Dataverse.
In Dataverse, go to the advanced search experience and look for the environment variable definition using the filter "Schema name equals msemr_PatientObservationChartUrl".
Open the record and go to the values section.
Select + New Environment Variable to create a new environment variable value using the Power BI report URL copied in Step 3.

While configuring the Power BI reports, you might come across some commonly observed issues. For guidance on how to troubleshoot these issues, go to Troubleshoot Power BI reports.
Configure Power Automate flows
You must configure Power Automate flows to integrate your device management service(s) with the device data support in care management (preview) capability. For information on the configuration steps, go to Partner integration for device data support (preview).
Additional configuration
When using the capability in the care management app, ensure that you enable the in-app notifications. You can use the app designer to enable this setting. For more information, go to Enable the in-app notification feature.
In the Data Integration Toolkit application, enable the writeback process using the following steps:
Navigate to the Data Integration Toolkit integration settings area.
Select Dataverse Healthcare API and enable writeback.
If you're configuring a new FHIR server, use the information noted down during the Set up application registration step to configure the writeback settings and save the changes.
Go to Entity Maps.
Enable the maps and FHIR writeback for the following entities:
- Contact
- Contact medical identifier
- Device
- Device identifier
See also
What is Microsoft Cloud for Healthcare? Partner integration for device data support (preview) Generate sample data for device data support (preview) Troubleshoot device data support (preview) Use device data support (preview)