Note
Access to this page requires authorization. You can try signing in or changing directories.
Access to this page requires authorization. You can try changing directories.
Town Hall (Premium)
Premium Town Halls, Town Halls organized by users with a Teams Premium license, are Microsoft eCDN supported by default, regardless of the SDN provider configured in your tenant's Teams Admin Center (TAC). See below for how to enable Microsoft eCDN for non-Premium Town Halls and other live events.
For more information about licensing requirements, see the purchasing guidance.
Town Hall (Base) and other supported live events
Base Town Halls, Town Halls organized by users without a Teams Premium license, and other supported live events will utilize the eCDN provider configured in TAC, under Meetings > Live event settings > SDN provider. If no provider is configured, Town Halls and other supported live events will not be eCDN supported.
Setup
After you’ve purchased the appropriate licensing, enable the solution on your tenant by following these steps:
Open your Teams Admin Center and navigate to Live events settings.
Choose Microsoft eCDN from the Video distribution provider selection box.
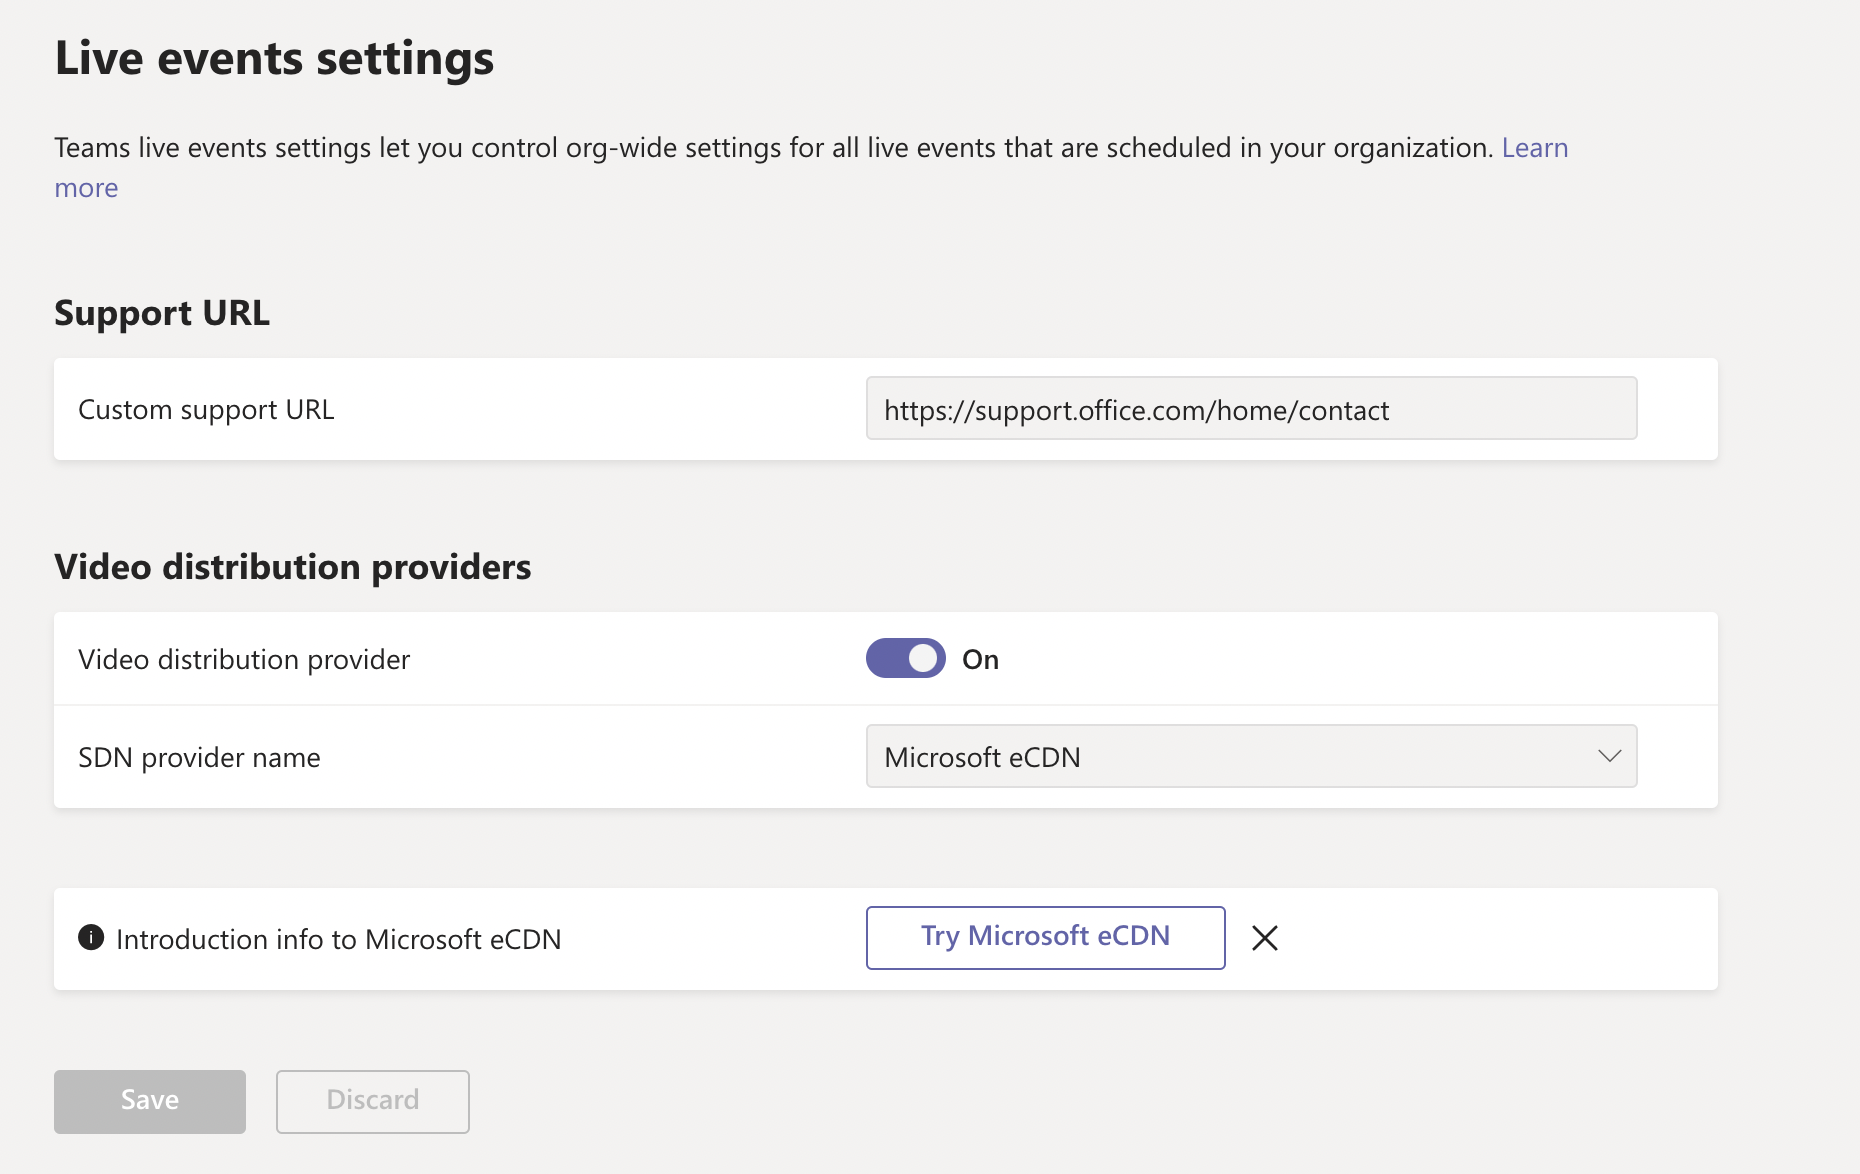
Leave the Custom Support URL as-is. It isn't mandatory.
Make sure to select Save.
Note
The system requires from 4 – 24 hours to provision Microsoft eCDN on your tenant.
Caution
Currently, pre-scheduled live events will not use Microsoft eCDN. To ensure your pre-scheduled events are Microsoft eCDN enabled, please re-create them post provisioning.
Validate setup
See our how to validate documentation.
Extended configuration
Administrators can define groups of peers and policies to restrict peering over specific networks, VPNs, across offices, etc.
You can incorporate your own subnet mapping by uploading a CSV file listing your subnets to Microsoft eCDN’s Subnet Mapping page. For guidance on how to prepare your subnet mappings CSV, refer to the subnet mapping documentation.
Analytics
Microsoft eCDN provides various analytics tools that are useful for the monitoring and troubleshooting of video- and network-related issues. These tools ideally complement the existing Teams user experience and usage statistics and provide one unified and holistic view of everything that is going on with the streaming end to end. Visit the Analytics Overview page view your analytics.

For more on Analytics, see the Overview Dashboard documentation.
Support
If you have any questions or need help, contact your Microsoft Customer Success Account Manager.