Note
Access to this page requires authorization. You can try signing in or changing directories.
Access to this page requires authorization. You can try changing directories.
Microsoft Entra ID allows you to create several types of users in your tenant, which provides greater flexibility in how you manage your organization's users.
This article explains how to create a new user, invite an external guest, and delete a user in your workforce tenant. It also includes information about creating users in an external tenant for Microsoft Entra External ID scenarios.
Note
For information about viewing or deleting personal data, please review Microsoft's guidance on the Windows data subject requests for the GDPR site. For general information about GDPR, see the GDPR section of the Microsoft Trust Center and the GDPR section of the Service Trust portal.
Types of users
Before you create or invite a new user, take some time to review the types of users, their authentication methods, and their access within your Microsoft Entra workforce tenant. For example, do you need to create an internal guest, an internal user, or an external guest? Does your new user need guest or member privileges?
Users in workforce tenants
A Microsoft Entra workforce tenant has the following user types:
- Internal member: These users are most likely full-time employees in your organization.
- Internal guest: These users have an account in your tenant, but have guest-level privileges. It's possible they were created within your tenant prior to the availability of B2B collaboration.
- External member: These users authenticate using an external account, but have member access to your tenant. These types of users are common in multitenant organizations.
- External guest: These users are true guests of your tenant who authenticate using an external method and who have guest-level privileges.
For more information about the differences between internal and external guests and members, see B2B collaboration properties.
Authentication methods vary based on the type of user you create. Internal guests and members have credentials in your Microsoft Entra tenant that can be managed by administrators. These users can also reset their own password. External members authenticate to their home Microsoft Entra tenant and your Microsoft Entra tenant authenticates the user through a federated sign-in with the external member's Microsoft Entra tenant. If external members forget their password, the administrator in their Microsoft Entra tenant can reset their password. External guests set up their own password using the link they receive in email when their account is created.
Reviewing the default user permissions may also help you determine the type of user you need to create. For more information, see Set default user permissions.
Users in external tenants
A Microsoft Entra tenant in an external configuration is used exclusively for Microsoft Entra External ID scenarios. An external tenant can include the following user types:
- Internal user: These users authenticate internally, and are typically admins with assigned Microsoft Entra roles in your external tenant.
- External user: These users are consumers and business customers of the apps registered in your external tenant. They have a local account with default user privileges and authenticate via a local account or via external identity providers. See how to create a new external user.
- External guest: These users sign in with their own external credentials and are typically admins with assigned Microsoft Entra roles in your external tenant.
For more information, see Default user permissions for external tenants.
Prerequisites
The required role of least privilege varies based on the type of user you're adding and if you need to assign Microsoft Entra roles at the same time. Whenever possible you should use the least privileged role.
| Task | Role |
|---|---|
| Create a new user | User Administrator |
| Invite an external guest | Guest Inviter |
| Assign Microsoft Entra roles | Privileged Role Administrator |
Create a new user
Follow these steps:
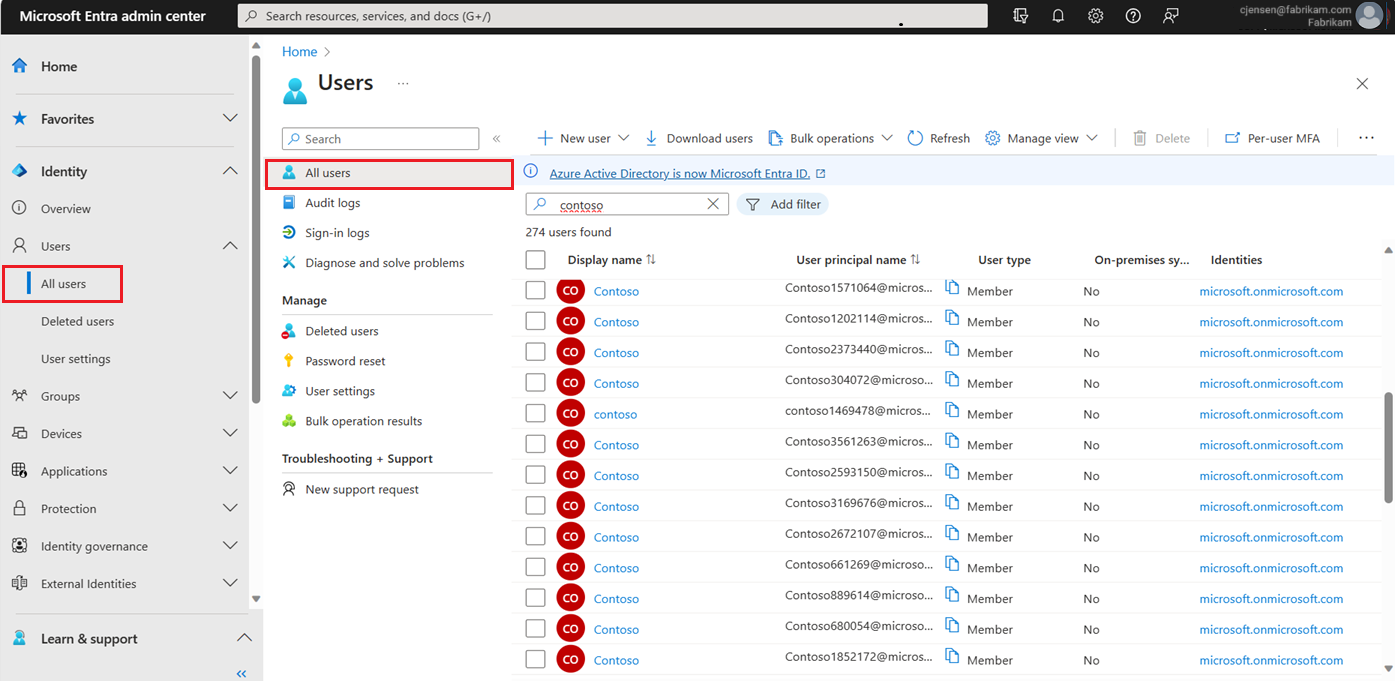
Sign in to the Microsoft Entra admin center as at least a User Administrator.
Browse to Entra ID > Users.
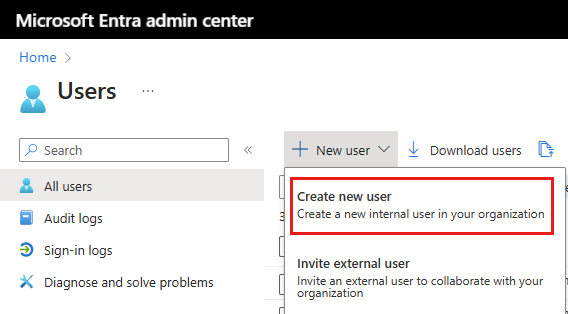
Select New user > Create new user.
Complete the remaining tabs in the New user page.
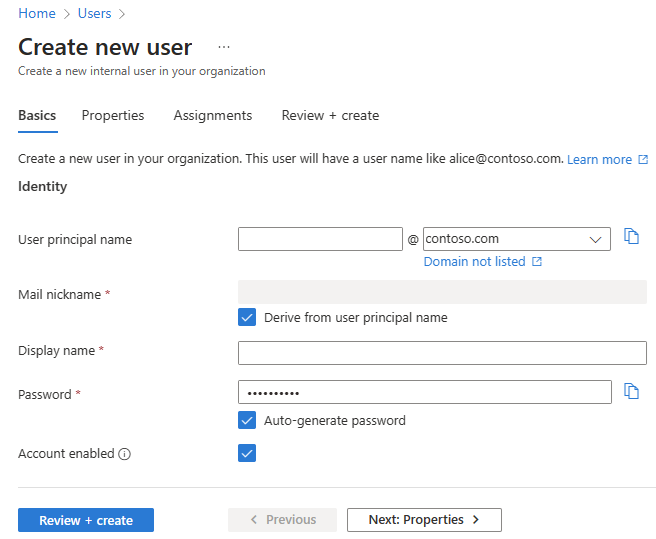
Basics
The Basics tab contains the core fields required to create a new user. Before you begin, review the guidance on user name properties.
- User principal name: Enter a unique username and select a domain from the menu after the @ symbol. Select Domain not listed if you need to create a new domain. For more information, see Add your custom domain name.
- Mail nickname: If you need to enter an email nickname that is different from the user principal name you entered, uncheck the Derive from user principal name option, then enter the mail nickname.
- Display name: Enter the user's name, such as Chris Green or Chris A. Green
- Password: Provide a password for the user to use during their initial sign-in. Uncheck the Auto-generate password option to enter a different password.
- Account enabled: This option is checked by default. Uncheck to prevent the new user from being able to sign-in. You can change this setting after the user is created. This setting was called Block sign in in the legacy create user process.
Either select the Review + create button to create the new user or Next: Properties to complete the next section.
Either select the Review + create button to create the new user or Next: Properties to complete the next section.
Properties
There are six categories of user properties you can provide. These properties can be added or updated after the user is created. To manage these details, go to Entra ID > Users and select a user to update.
- Identity: Enter the user's first and last name. Set the User type as either Member or Guest.
- Job information: Add any job-related information, such as the user's job title, department, or manager.
- Contact information: Add any relevant contact information for the user.
- Parental controls: For organizations like K-12 school districts, the user's age group may need to be provided. Minors are 12 and under, Not adult are 13-18 years old, and Adults are 18 and over. The combination of age group and consent provided by parent options determine the Legal age group classification. The Legal age group classification may limit the user's access and authority.
- Settings: Specify the user's global location.
Either select the Review + create button to create the new user or Next: Assignments to complete the next section.
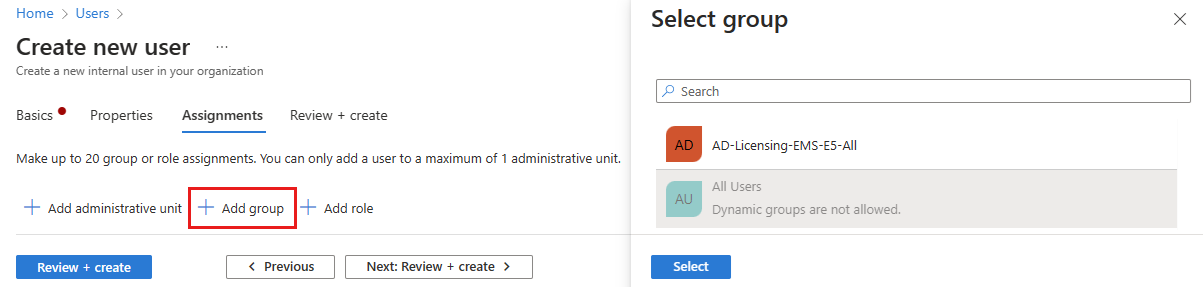
Assignments
You can assign the user to an administrative unit, group, or Microsoft Entra role when the account is created. You can assign the user to up to 20 groups or roles. You can only assign the user to one administrative unit. Assignments can be added after the user is created.
To assign a group to the new user:
- Select + Add group.
- From the menu that appears, choose up to 20 groups from the list and select the Select button.
- Select the Review + create button.
To assign a role to the new user:
- Select + Add role.
- From the menu that appears, choose up to 20 roles from the list and select the Select button.
- Select the Review + create button.
To add an administrative unit to the new user:
- Select + Add administrative unit.
- From the menu that appears, choose one administrative unit from the list and select the Select button.
- Select the Review + create button.
Review and create
The final tab captures several key details from the user creation process. Review the details and select the Create button if everything looks good.
Create a new external user
Important
These steps apply to Microsoft Entra External ID external tenants only.
Sign in to the Microsoft Entra admin center as at least a User Administrator.
Make sure you're signed in to your external tenant. Use the Settings icon
 in the top menu to switch to your external tenant from the Directories + subscriptions menu.
Browse to Entra ID > Users.
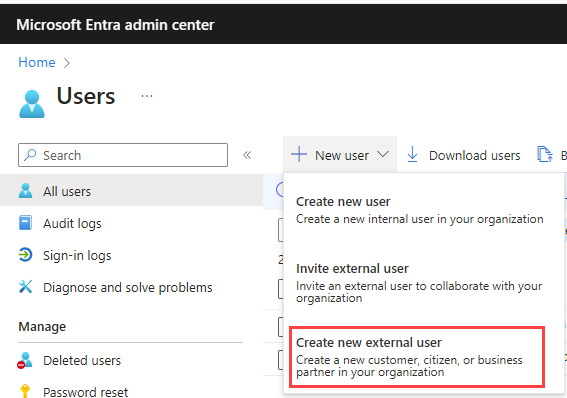
Select New user > Create new external user.
On the Create new user page, complete the Basics tab as described earlier in this article, but with these variations:
- Instead of a user principal name and mail nickname, specify the user's email for sign-in. Next to Identities, under Sign-in method, choose Email. Under Value, enter the user's email address.
- To add multiple emails for the user, select the Add button.
(Optional) Select Next: Properties. Complete the Properties tab as described earlier in this article, but note these variations:
- In the Identity section, the User type setting doesn't affect external users and can be left at the default Member setting.
- The Authorization info field is unavailable for external users.
- Under Job Information, the employee and manager-related information is unavailable for external users.
(Optional) Select Next: Assignments. Complete the Assignments tab as described earlier in this article, but note that the Add administrative unit and Add role options are unavailable for external users.
Select the Review + create button to create the new user.
Invite an external user
The overall process for inviting an external guest user is similar, except for a few details on the Basics tab and the email invitation process. You can't assign external users to administrative units.
Note
This feature applies to both workforce and external tenants, but is currently in preview for external tenants.
Sign in to the Microsoft Entra admin center as at least a User Administrator.
Browse to Entra ID > Users.
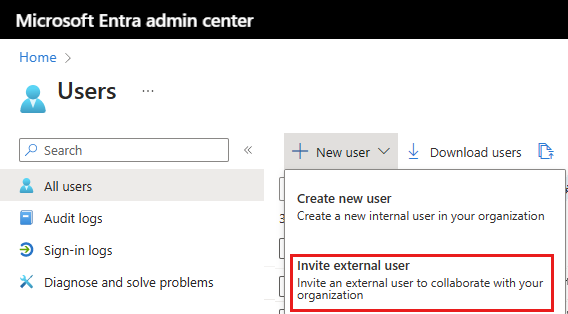
Select New user > Invite external user.
Complete the remaining tabs in the New user page (as shown below).
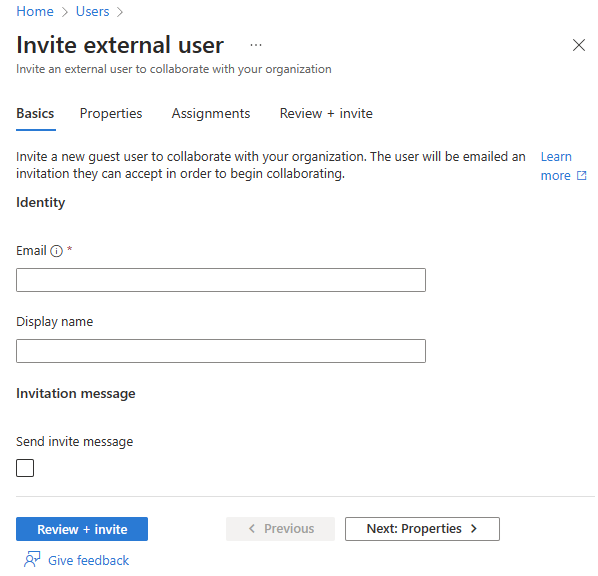
Basics for external users
In this section, you're inviting the guest to your tenant using their email address. If you need to create a guest user with a domain account, use the create new user process but change the User type to Guest.
- Email: Enter the email address for the guest user you're inviting.
- Display name: Provide the display name.
- Invitation message: Select the Send invite message checkbox to customize a brief message to the guest. Provide a Cc recipient, if necessary.
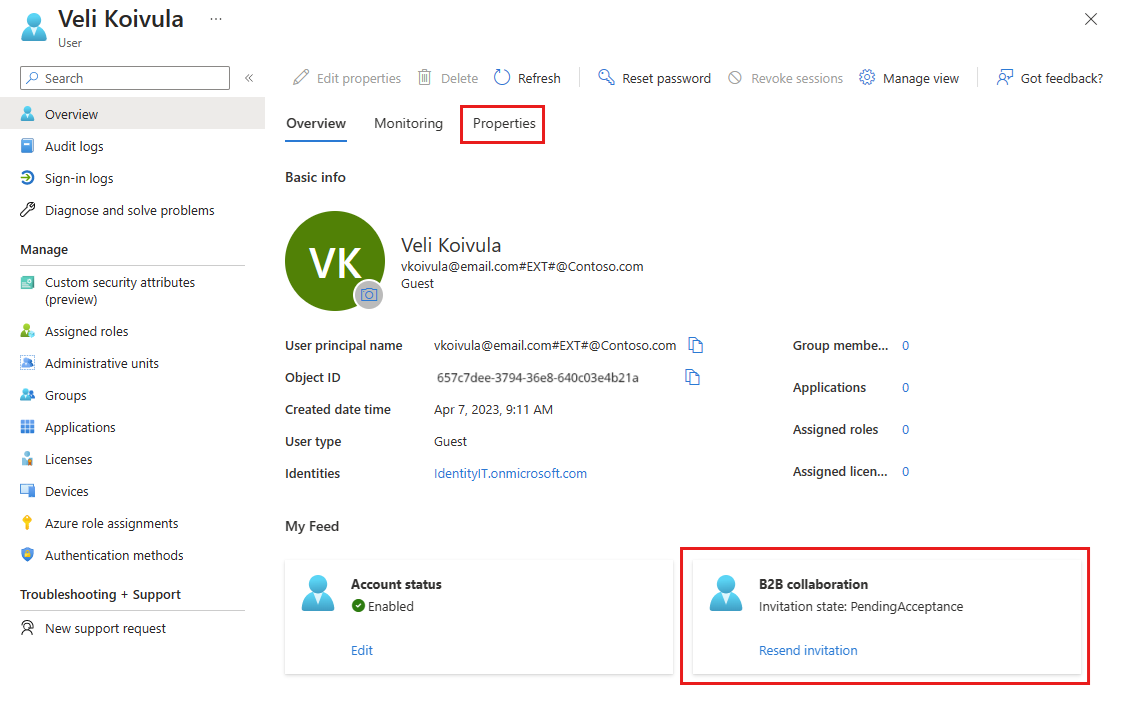
Guest user invitations
When you invite an external guest user by sending an email invitation, you can check the status of the invitation from the user's details.
- Browse to Entra ID > Users.
- Select the invited guest user.
- In the My Feed section, locate the B2B collaboration tile.
- If the invitation state is PendingAcceptance, select the Resend invitation link to send another email.
- You can also select the Properties for the user and view the Invitation state.
Add other users
There might be scenarios in which you want to manually create consumer accounts in your Azure Active Directory B2C (Azure AD B2C) directory. For more information about creating consumer accounts, see Create and delete consumer users in Azure AD B2C.
Important
Effective May 1, 2025, Azure Active Directory B2C (Azure AD B2C) is no longer available for new customers to purchase. To learn more, see Is Azure AD B2C still available to purchase? in our FAQ.
If you have an environment with both Microsoft Entra ID (cloud) and Windows Server Active Directory (on-premises), you can add new users by syncing the existing user account data. For more information about hybrid environments and users, see Integrate your on-premises directories with Microsoft Entra ID.
Delete a user
You can delete an existing user using the Microsoft Entra admin center.
You must have at least the User Administrator role assignment to delete users in your organization.
Those with the Privileged Authentication Administrator role can delete any users including other administrators.
User Administrators can delete any non-admin users, Helpdesk Administrators, and other User Administrators.
For more information, see Administrator role permissions in Microsoft Entra ID.
To delete a user, follow these steps:
- Sign in to the Microsoft Entra admin center as at least a User Administrator.
- Browse to Entra ID > Users.
- Search for and select the user you want to delete.
- Select Delete user.
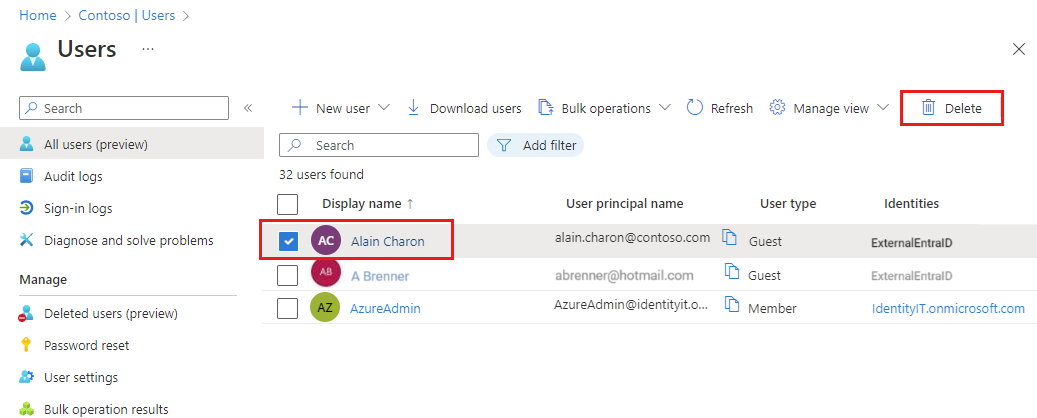
The user is deleted and no longer appears on the All users page. The user can be seen on the Deleted users page for the next 30 days and can be restored during that time. For more information about restoring a user, see Restore or remove a recently deleted user using Microsoft Entra ID.
When a user is deleted, any licenses consumed by the user are made available for other users.
Note
To update the identity, contact information, or job information for users whose source of authority is Windows Server Active Directory, you must use Windows Server Active Directory. After you complete the update, you must wait for the next synchronization cycle to complete before you'll see the changes.