Note
Access to this page requires authorization. You can try signing in or changing directories.
Access to this page requires authorization. You can try changing directories.
Important
Some or all of this functionality is available as part of a preview release. The content and the functionality are subject to change. Preview features aren't intended for production use and might have restricted functionality. These features are subject to supplemental terms of use, and are available before an official release so that customers can get early access and provide feedback.
Data exports let you extract sustainability data - such as activity records, emissions, water, and waste data - from Microsoft Sustainability Manager into a downloadable Microsoft Excel (.xlsx) file. Use exports to share data with auditors, feed downstream reporting tools, or archive a snapshot of records that were created within a specific date range.
When you create a data export, Sustainability Manager queues the request, runs it asynchronously in the backend service, and attaches the resulting file to the export job record so you can download it directly from the app.
Prerequisites
Before you export data, verify the following conditions:
Your administrator enables the Data exports (preview) feature for your environment.
You have a security role that includes read, create, and append privileges on the Sustainability data export job table. The out-of-the-box Sustainability all - full access role includes these privileges.
You know the sustainability data definition you want to export (for example, purchased electricity, stationary combustion, water quantity, waste quantity) and the date range that scopes the records.
Enable data exports
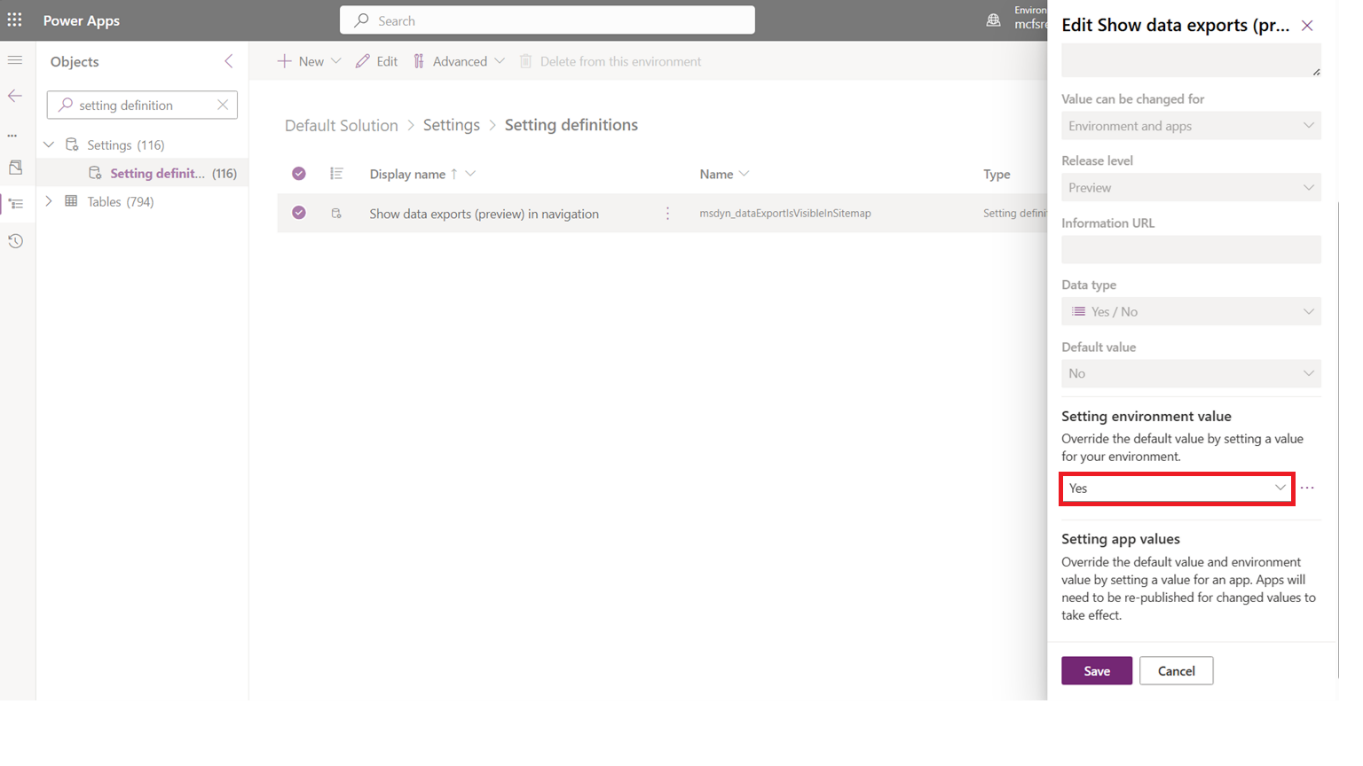
The data exports feature is off by default. An administrator enables it per environment by turning on the Show data exports (preview) in navigation environment setting (msdyn_dataExportIsVisibleInSitemap) from the Power Apps maker portal.
Go to the Power Apps maker portal and select the environment where Sustainability Manager is installed.
In the left navigation, select Solutions > Default Solution > Objects > Settings > Setting definition.
Locate the Show data exports (preview) in navigation setting (unique name msdyn_dataExportIsVisibleInSitemap).
Open the setting and set the value to Yes. This preview setting is turned off by default, so you must explicitly enable it for each environment.
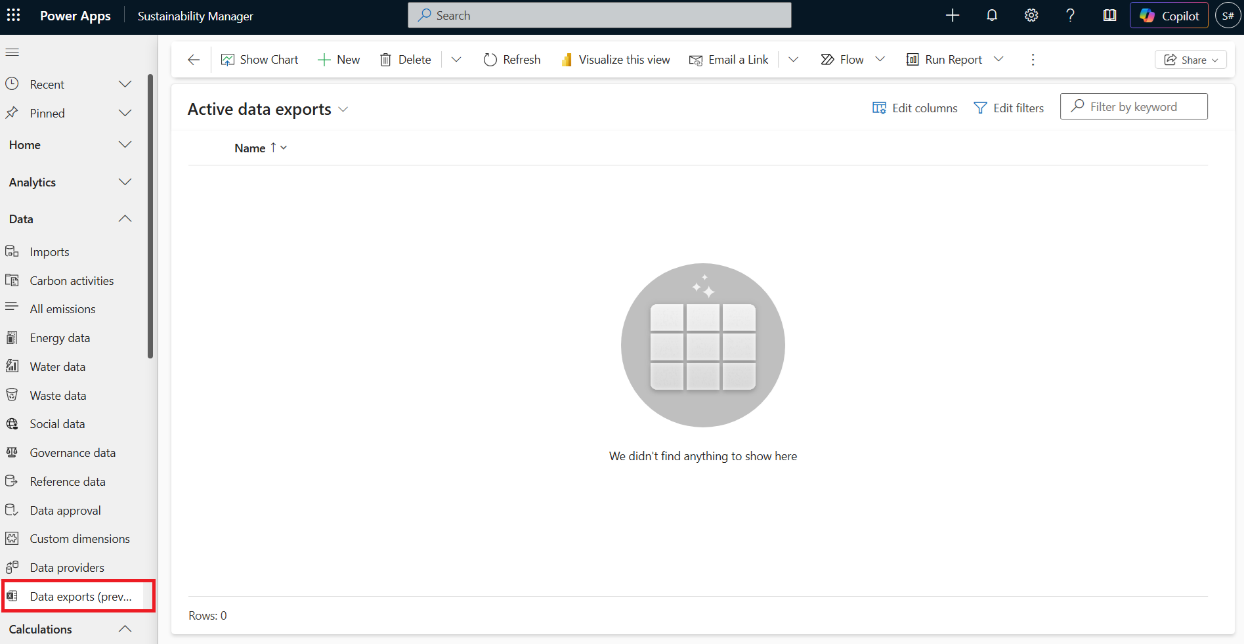
Save the change and refresh Sustainability Manager. A new Data exports (preview) entry appears in the left navigation under the Data pane.
Caution
Exports that contain 200,000 rows or more can generate files of 80 MB or larger. Repeated large exports can quickly increase Dataverse storage consumption and capacity costs.
To manage storage growth and optimize costs, consider configuring data retention or deletion policies before you enable data exports across your organization. For guidance, see Set a data retention policy for a table.
Create a data export record
Each export is represented by a Data export job record. When you create the record, you submit the request to the backend service.
In the left navigation pane of Sustainability Manager, select Data exports (preview).
On the command bar, select + New.
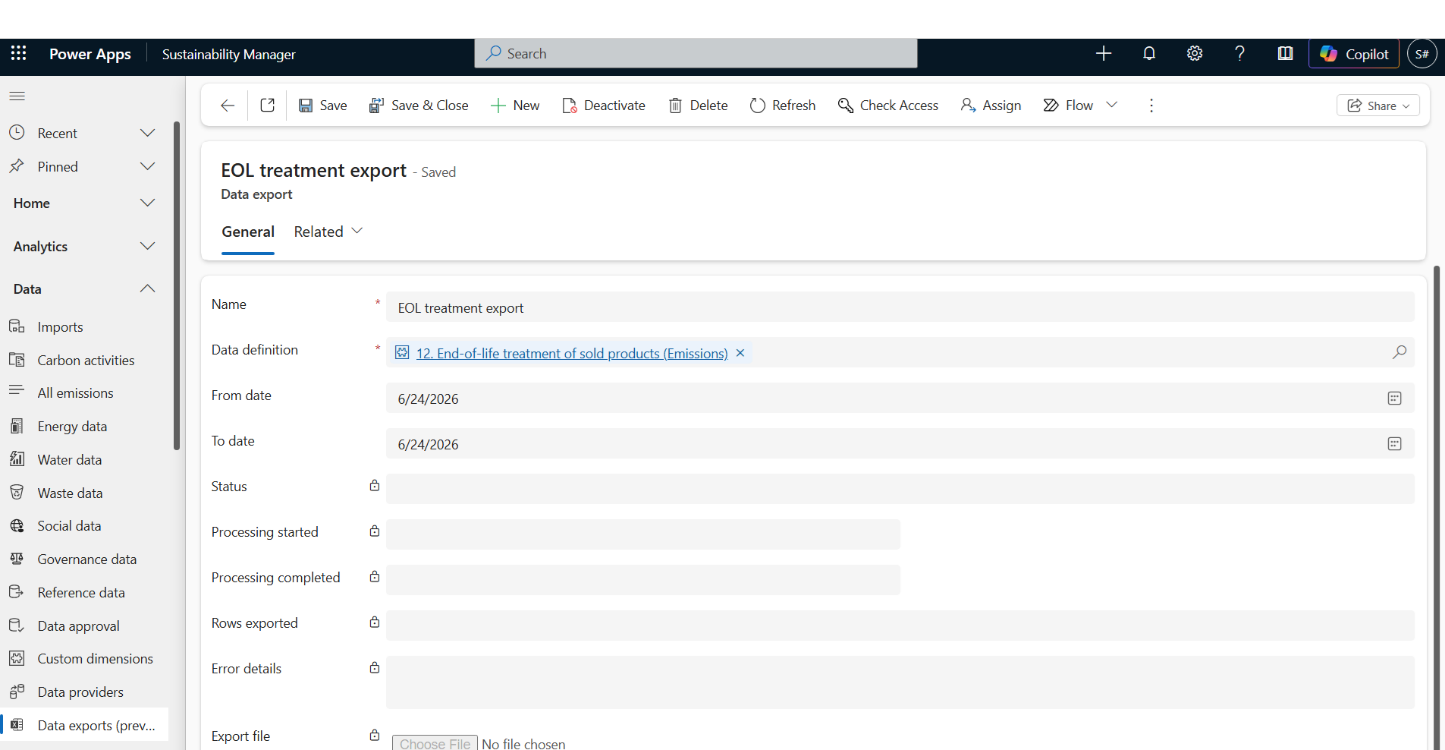
On the New Data export form, enter the following information:
Field Description Name A descriptive name for the export, such as End-of-life treatment export. Data definition The sustainability data definition that identifies which records to export. Select from the lookup. From date The start of the Created on date range. Records whose Created on timestamp is on or after this date are included. To date The end of the Created on date range. Records whose Created on timestamp is on or before this date are included. Select Save or Save & Close.
You don't need to keep the form open. The job continues to run in the backend, and you can return to the record later to check progress or download the file.
Important
The time it takes to complete an export depends on the size of the selected data definition and the number of records that fall within the specified Created on date range. Data definitions that contain large volumes of records take longer to export than smaller data definitions. Plan for a longer wait time when you export from a large data definition, and use a narrower Created on date range to reduce the volume when possible.
Monitor the export status
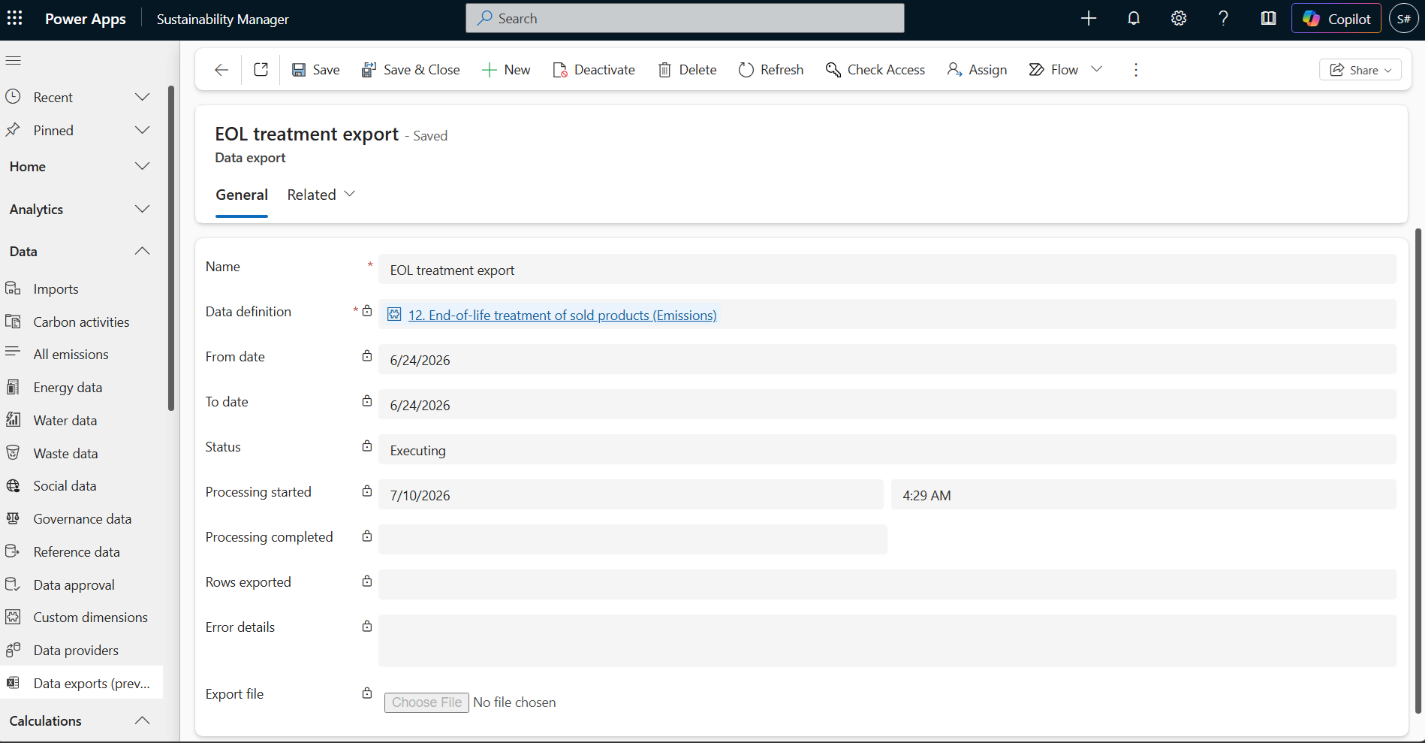
The Status field on the export job record shows the backend progress. The form displays the status and refreshes automatically as the state changes.
| Status | What it means |
|---|---|
| Executing | The request is accepted and the backend service is actively producing the export. The form shows the Job start time. |
| Succeeded | The export finishes successfully. The exported file is attached to this record. The form shows the Job end time and Row count. When the date range returns no rows, the job still succeeds with a Row count of 0 and an empty file. This is expected behavior, so check the Row count on the job record to confirm whether an export contains data before you share or audit it. |
| Failed | The export didn't finish successfully. Review the Error message field on the record to understand what went wrong, and create a new export job to retry. Typical causes: - Backend dispatch failed (transient network or service issue). - Selected data definition was unpublished, renamed, or deleted after submission. - Insufficient read access on tables in the selected data definition. - Export exceeded backend service time or size limits. - File attachment failed (for example, Dataverse file storage exhausted). |
When you save the record:
The status is set to Executing.
The Data definition, From date, and To date fields become read-only to preserve the request that you submitted.
A background plugin dispatches the request to the Sustainability service, which runs the export asynchronously.
Download the exported file
When the job reaches the Succeeded status:
Open the data export job record.
In the Export file section of the form, select the attached file to download the Excel file.
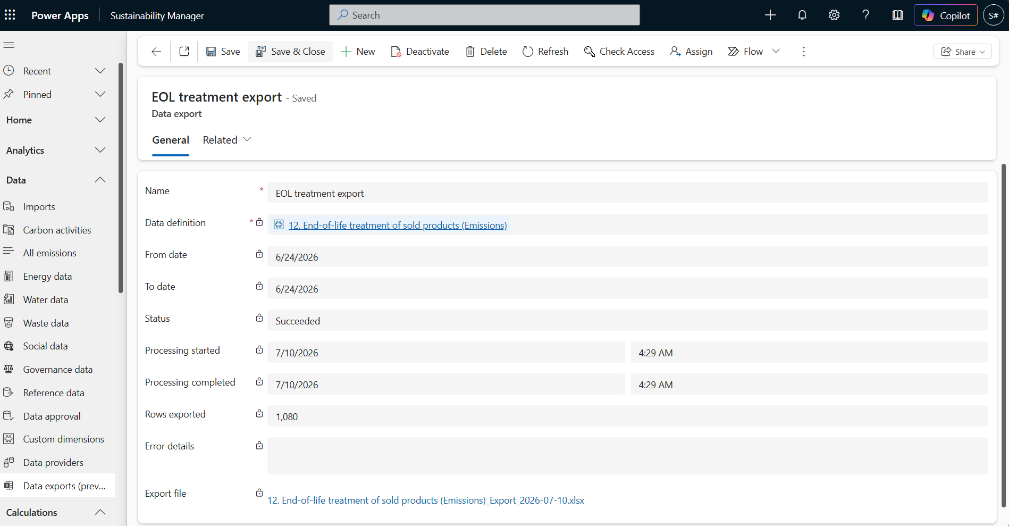
Review the Row count to confirm the number of records included, and the Job start time and Job end time to confirm the run window.
If the job status is Failed, no file is produced. Open the Error message field on the record to understand what went wrong, then create a new export job to retry.
Considerations and limitations
Keep the following in mind when you use data exports:
Preview feature: Data exports are in preview. Behavior, file layout, and status semantics might change before general availability.
Backend-owned processing: The Microsoft Sustainability service handles all validation, throttling, and status transitions. The client-side form and plugin don't perform validation beyond required fields.
Read-only after submission: After you save a job, you can't edit the data definition or the Created on date range. To change the scope, create a new job.
File retention: The exported file is stored as an attachment on the job record and follows the standard Dataverse file-attachment retention policy for your environment. For more information, see Set a data retention policy for a table.
One export job at a time: Only one data export job can run at a time. You can create a new export job only after the previously submitted job reaches a terminal state (Succeeded or Failed).