Quickstart guide for building copilots with generative AI
Important
Power Virtual Agents capabilities and features are now part of Microsoft Copilot Studio following significant investments in generative AI and enhanced integrations across Microsoft Copilot.
Some articles and screenshots may refer to Power Virtual Agents while we update documentation and training content.
It's even simpler to build a copilot using AI-powered capabilities in Microsoft Copilot Studio. Whether you're new to conversational AI or a seasoned developer, our intelligence platform is with you and your team every step of the way.
This quickstart helps you get started quickly to create a copilot with generative AI capabilities. For a summary of the available features, see the generative AI overview.
Prerequisites
An account for Copilot Studio. If you don't have an account, see the Microsoft Copilot Studio introduction website and select Try free.
Note
Personal Microsoft accounts aren't supported. Use a work account instead.
Supported browsers include Microsoft Edge, Chrome, and Firefox.
Use the current version of Copilot Studio.
Your copilot must be created in the US region. View the list of Supported languages.
Generative AI might be subject to usage limits or capacity throttling.
How copilot conversations work
Copilot Studio uses customized NLU model and AI capabilities to understand what a user types, then responds with the best copilot topic. A copilot topic is a portion of a conversational thread between a user and the copilot. Topics are linked together to form nodes. For more information, see Create and edit topics.
For example, you might create a copilot for your customers to ask common questions about your business. Your support overhead is reduced by deflecting support calls. In the copilot, you can create a topic about your store's opening hours and name the topic Store hours.
When a customer asks a question such as "When do you open?" or "What are your opening hours?", the copilot uses natural language understanding (NLU) to understand the intent behind the question. The copilot matches that intent to the best topic, the Store hours topic.
The copilot follows the conversation flow, which is a group of connected nodes, that you define in the Store hours topic. These questions use if/else arguments, or logic gates, to determine which store the customer wants. The final output of the topic shows the hours and contact information for that store's location.
However, you can't anticipate all the types of questions your customers ask. To help mitigate this, Copilot Studio incorporates powerful new AI-powered capabilities that use the latest advancements in NLU models. With your copilot linked to a public or Bing-indexed website, your copilot automatically generates responses. These responses are conversational, plain language, and don't depend on the copilot builder to create topics for every eventuality.
As well, when AI general knowledge is enabled, your copilot can access information not in its website or other knowledge sources.
Your copilot uses AI powered by the Azure OpenAI GPT model, also used in Bing, to create copilot topics from a simple description of your needs. Similarly, you can modify and update any topic in your copilot by describing the changes you want to make.
Ready to get started? The first step is to create your copilot.
Create a copilot with instant knowledge
For any user-sent message that can't be matched to an existing topic, your copilot can look for an answer on a fallback website or other knowledge source. The copilot turns the answer into a simple message that it sends to the user.
Go to the Microsoft Copilot Studio home page.
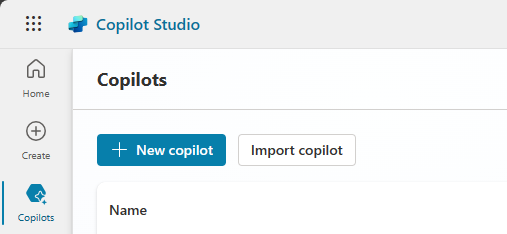
Create a copilot. There are many ways to create a copilot but, for this quickstart, you might open the Copilots page, select + New copilot, and then select Skip to configure.

s1. In the configuration page, enter a name for your copilot or accept the default, Copilot or Copilot n. Optionally add a description.
In the Knowledge section, select + Add knowledge and then Public websites.
In Add public websites, enter the URL of a public or Bing-indexed website. This website is where the copilot can search for answers if it can't find the right topic for a user question. Select Add to save the URL and Add again to exit the window.
Tip
Any URL with text works, for example
https://www.microsoft.com/en-us/store/.To add a URL or other knowledge sources after creating a website, go to the Knowledge page.

Select Create to finish creating your copilot.

Copilot Studio displays an overview of the copilot you created, with ideas for what to do next.
Notice the Knowledge section, which shows the website you added. It also includes the option Allow the AI to use its own general knowledge, enabled by default, which lets the copilot answer questions outside the specific knowledge sources.

Test your copilot for knowledge
Your copilot is now ready to answer questions based on its knowledge sources. Use the Test pane to try it out:
Select the Test button at the top right of the Copilot Studio page.
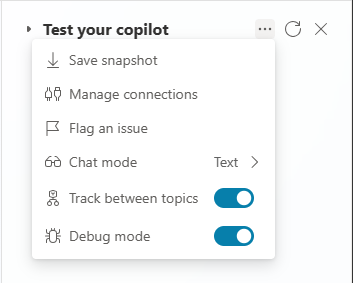
To view the underlying action of the copilot while it's answering your questions, select ... in the Test pane and choose Track between topics.
In the Ask a question prompt, ask the copilot a question related to the website. For example, type What is your return policy? or Do you give military discounts?
The copilot retrieves information from the website and returns a response. The response provides one or more links to where it found that information.
In the authoring canvas, you can see the conversation flow and the nodes that the copilot used to answer your question. In this case, the copilot used the Conversational boosting system topic to find the information and respond to your question.
Now ask a general question, for example Why is the sky blue? or even a nonsense question such as What color is the sky in your world? If Allow AI general Knowledge is enabled, the copilot can answer questions like these.
It might take a few minutes for the AI general knowledge to be available. If you don't get an answer immediately, try again.

For AI general knowledge answers, the copilot reminds users that the information might not be accurate.


If the copilot can't find an answer, it prompts you to rephrase the question. After two prompts, if it still can't determine your intent, it escalates to a live agent through the Escalate system topic.
You notice that even general knowledge has its limits. Although the copilot can answer many questions, it doesn't have access to live information such as news or weather reports. You add this capability using generative actions later in this quickstart.
For more information, see Generative answers and AI general knowledge. You can also find instructions for enabling generative AI in copilots you already created.
Note
After you test your copilot, select the reset icon at the top of the Test copilot pane to clear previous conversations. Resetting makes it easier to follow the flow of the current topic without getting confused by previous conversations.

You can return to the authoring canvas at any time to revise the conversation path. The Test copilot pane automatically refreshes when you select Save after editing your topics.
If error codes appear in the test pane, see Understand error codes.
Auto-create a new topic
You can create a new topic by describing what you want the topic to do. Copilot Studio uses your description to generate a topic with conversational responses and multiple types of nodes.
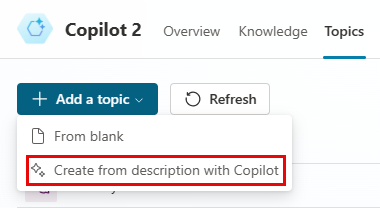
With your copilot open on the Topics page, select + Add a topic > Create from description with Copilot.
Note
If you don't see Create from description, you may need to enable it:
- On the top menu bar, select the Settings icon
 then General settings.
 - Turn on Build and iterate on your topics by describing what you want.
- On the top menu bar, select the Settings icon
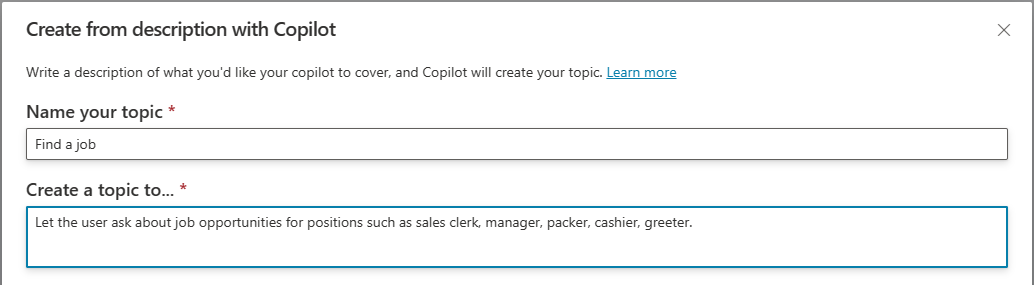
In the window that appears, enter a name in Name your topic.
In the Create a topic to... field, describe your topic in simple, plain English. See the examples to understand the structure of a description and select View more examples for more ideas.
Select Create and then Save.


Once your topic is created, you can test it. In the Test pane, ask a question that matches the intent of the topic you created. For example, if you created a topic about job opportunities, enter I'm looking for a job.
You can explore ways to extend and enhance your topic in Create and edit with Copilot.
Use generative actions
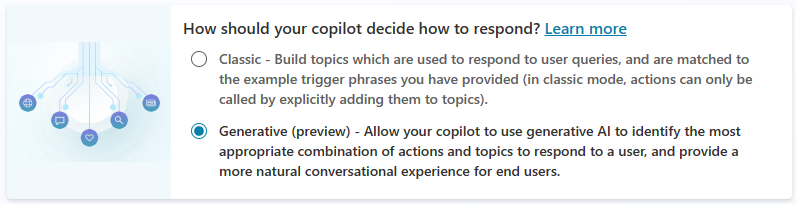
When generative actions are enabled, the copilot automatically chooses the topics and actions to a respond to the user. Instead of relying on trigger phrases for each topic, or calling actions manually from within a topic, the copilot can use its own logic to select the most appropriate actions at runtime.
Note
Generative actions is a preview feature. Preview features aren't meant for production use and may have restricted functionality. These features are available before an official release so that customers can get early access and provide feedback.
Enable generative actions: select the Settings button then Generative AI. Choose the Generative option. (The default is Classic.)
Select Save at the top of the page.
Create an action: go to the Actions page and select + Add action. Follow the instructions in Use actions to add a weather website.
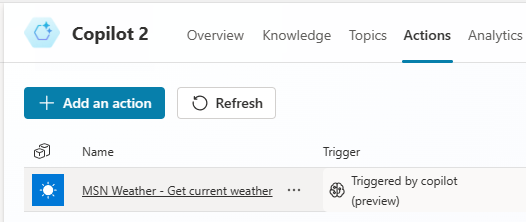


When you add this action and enable generative actions, the copilot has access to live information, as well as specific topics, specific knowledge sources, and AI general knowledge.
To see the action of the copilot as it answers your questions, select the Conversation map icon  in the Test pane and turn it On. In the conversation map, select the Tracking between topics icon
 ![]() and turn it On.
and turn it On.

For example, ask the copilot What's the weather in Montreal in fahrenheit? The copilot uses the action you created to find the answer.

Add features to further develop your copilot
You can enhance your copilot to make it unique and enjoyable. Try adding images and video clips, adaptive cards, entities, and variable expressions.
For more information, see Key concepts - Enhanced authoring or continue your copilot-building journey by exploring the rest of the Microsoft Copilot Studio documentation.
Feedback
Coming soon: Throughout 2024 we will be phasing out GitHub Issues as the feedback mechanism for content and replacing it with a new feedback system. For more information see: https://aka.ms/ContentUserFeedback.
Submit and view feedback for