Note
Access to this page requires authorization. You can try signing in or changing directories.
Access to this page requires authorization. You can try changing directories.
When you clone the Microsoft Copilot Studio agent to your local machine, you can edit its components by using Microsoft Visual Studio Code's text editing features. The Copilot Studio extension provides IntelliSense, validation, and YAML language support to make editing efficient and error-free.
Agent file structure
Understanding the file structure is key to efficient editing.
my-agent/
├── actions # Connectors
│ ├── DevOpsAction.mcs.yml
│ └── GetItems.mcs.yml
├── knowledge/files # Knowledge sources
│ ├── source1.yaml
│ └── source2.yaml
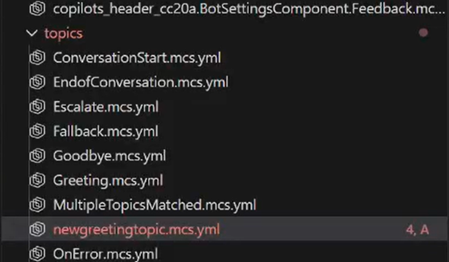
├── topics/ # Conversation topics
│ ├── greeting.mcs.yaml
│ ├── help.mcs.yaml
│ └── escalate.mcs.yaml
├── workflows/ # Agent tools and actions
│ └── GetDevOpsItems
│ ├── metadata.yaml
│ └── workflow.json
│ └── GetMeetings
│ ├── metadata.yaml
│ └── workflow.json
├── trigger/ # Event triggers
│ └── welcometrigger.mcs.yaml
├── agent.mcs.yaml # Main agent definition
├── icon.png # Icon used for the agent, visible in test panel and in supported channels
├── settings.mcs.yml # Configuration settings for the agent
└── connectioreferences.mcs.yml # Connection References used by Connectors and other actions
Edit the main agent configuration
IntelliSense features
As you type, suggestions are displayed and invalid values are highlighted. These suggestions change depending on the level of node you're at.
- Use
Ctrl+Spaceto get suggestions based on the level of node. - Use
Ctrl+Fto search for variable names and other information across your entire agent to update quickly
View problems
You can view problems with files in the Problems pane in Visual Studio Code. Also, when you open a file, you can see a red underline identifying problems.
Problems pane
Use
Ctrl+Shift+Mto open the Problems pane (or go to View > Problems).View all errors and warnings.
Select any problem to jump to the location.
Working with changes
When a change is made and saved, it shows up in a different color in Visual Studio so that you can easily identify it.
Edit agent components
Topics
Topics define conversation flows and dialogs. They're a type of AdaptiveDialog.
You can use GitHub Copilot or other agents to help build new components, or, if you want, write your own topics.
Topic file structure
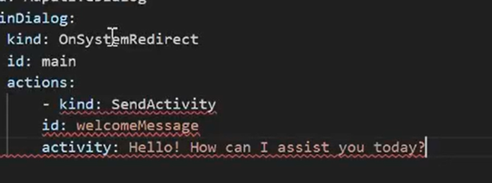
Here's an example of a simple greeting topic:
# This is the name of the topic that will appear in the 'topics' list in Copilot Studio
kind: AdaptiveDialog
beginDialog:
  kind: OnConversationStart
  id: main
  actions:
    - kind: SendActivity
      id: sendMessage_M0LuhV
      activity:
        text:
          - Hello, I'm {System.Bot.Name}. How can I help?
        speak:
          - Hello and thank you for calling {System.Bot.Name}.
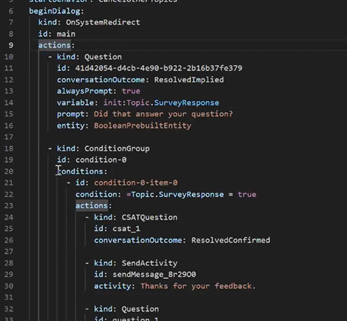
Advanced topic features
You can use other components in topics such as:
-
- kind: Question id: question_1 alwaysPrompt: true variable: init:Topic.Continue prompt: Can I help with anything else? entity: BooleanPrebuiltEntity -
  actions:
    - kind: Question
      id: 41d42054-d4cb-4e90-b922-2b16b37fe379
      conversationOutcome: ResolvedImplied
      alwaysPrompt: true
      variable: init:Topic.SurveyResponse
      prompt: Did that answer your question?
      entity: BooleanPrebuiltEntity
Conditions using Power Fx:
            - kind: ConditionGroup
              id: condition-1
              conditions:
                - id: condition-1-item-0
                  condition: =Topic.Continue = true
                  actions:
                    - kind: SendActivity
                      id: sendMessage_4eOE6h
                      activity: Go ahead. I'm listening.
Other nodes, for example, HTTP nodes
Adaptive Cards
Tools
Tools define actions your agent can perform. You can see them in the Tools area of the Copilot Studio Agent UI.
Tools can include:
- Prompts
- Workflows (Power Automate flows)
- CUA tools
- Custom connectors
- REST APIs
- MCP Connectors
Tools appear within the extension under an agent's /actions folder but might also appear in other folders with extra metadata. For example, Workflows and Triggers have their own folders and JSON.
Edit triggers
Triggers define when topics or actions activate. You can set them as schedules, events, or conditional types. Triggers typically reference a workflow.
kind: ExternalTriggerConfiguration
externalTriggerSource:
  kind: WorkflowExternalTrigger
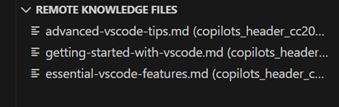
Manage remote knowledge files
If you upload documents using the upload feature in Copilot Studio, these documents are available to download by clicking on the name in the Remote Knowledge Files window. The documents aren't downloaded automatically and must be selected for download in the window. You see a notification when the download is successful.
If you want to upload new files, you can put them in the knowledge/files folder in the agent definition. When you apply those changes, they're uploaded via the agent contents upload feature.
Best practices
Naming conventions
Files:
- Use kebab-case:
create-ticket.tool.yaml - Be descriptive:
product-pricing-faq.yamlnotfaq.yaml - Use the type suffix:
.topic.yaml,.tool.yaml,.trigger.yaml
IDs and variables:
- Use camelCase:
userOrderNumber,productDetails - Be descriptive:
checkPaymentStatusnotcheck1 - Avoid abbreviations:
customerEmailnotcustEmail
Comments
To explain complex logic, add comments:
nodes:
  # Check if user is within business hours and eligible for live support
  # Business hours: 9 AM - 5 PM EST, Monday-Friday
  # Eligibility: Premium tier customers only
  - id: check-live-support-availability
    type: condition
Next steps
Now that you understand editing: