Note
Access to this page requires authorization. You can try signing in or changing directories.
Access to this page requires authorization. You can try changing directories.
In this article, you learn the basics of how to create a model-driven app that can be shared and distributed to other environments.
Prerequisites
Verify the availability of the following prerequisites before you start to create a model-driven app:
- A Power Platform environment used for app development.
- An environment maker, system administrator, or system customizer security role.
For more information, go to the following articles:
Create an app
On the Power Apps Home page, select Solutions from the left navigation pane. If the item isn’t in the side panel pane, select …More and then select the item you want.
Open an unmanaged solution or create a new solution.
Note
Unmanaged solutions are displayed when the Unmanaged filter is selected in the Solutions area.
Although the Default Solution is an unmanaged solution, it is in most circumstances not recommended to create or edit customizations in the default solution.
Select New > App > Model-driven app.
On the New model-driven app dialog box, enter a Name and optionally, a Description, and then select Create.
On the command bar, select Add page > Dataverse table.
From the list of tables, select Account, select Contact, and then select Add.
On the Pages left pane, under Navigation the layout for the app is displayed.
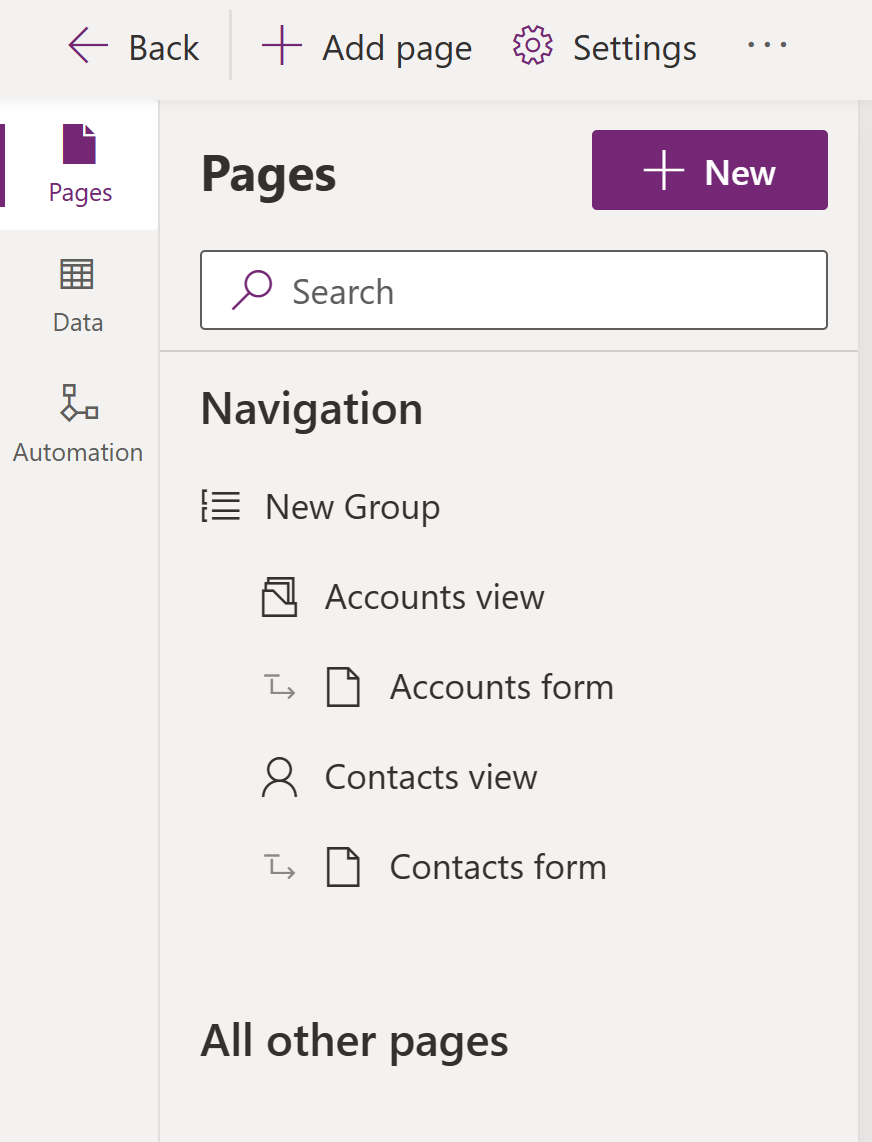
Notice the preview pane displays your app. When you select a component, such as the Accounts form, it affects what's displayed in the preview and property panes. If your environment includes data that you have access to view, that also appears in the preview.

To save and publish the app, select Save and Publish.
To see how the app runs in a full browser window, on the command bar, select Play.
Create an app description with Copilot
If your app is in a managed environment, you can use AI to help create a description for your app.
Important
- To use this capability your app must be in a managed environment.
- This capability is powered by Azure OpenAI Service.
- This capability is in process of rolling out, and might not be available in your region yet.
- This capability might be subject to usage limits or capacity throttling.
- To understand capabilities and limitations of AI-powered and Copilot features in Power Apps, go to Responsible AI FAQs for Power Apps
When you save and publish your app, on the Publish dialog box select Create descriptions using AI to replace your current description or, if your app doesn't have a description, Copilot generates one for you.
You can also generate an app description in app designer by going to, Settings > General tab. Under Description select, Create descriptions using AI.
For information that describes the AI impact of Power Apps generate app descriptions with Copilot feature, go to FAQ for generate app descriptions with Copilot.
Enable or disable AI-generated app descriptions
The app AI-generated descriptions are managed by a setting in the Power Platform admin center.
- Go to Environments in the Power Platform admin center.
- Select an environment, and then select Edit managed environments.
- Under the section titled Enable AI-generated app descriptions, select or clear AI-generated app descriptions
- Select Save.
Clear the browser cache and close any active Power Apps (make.powerapps.com) browser windows. The feature is now be enabled or disabled.