Note
Access to this page requires authorization. You can try signing in or changing directories.
Access to this page requires authorization. You can try changing directories.
Power Query offers a series of ways to gain access to files that are hosted on either SharePoint or Microsoft OneDrive for work or school.
Browse files
Note
Currently, you can only browse for OneDrive for work or school files of the authenticated user inside of Power Query Online for PowerApps.
Warning
This feature requires your browser to allow third party cookies. If your browser blocks third party cookies, the Browse dialog appears but is blank with no option to close the dialog.
Power Query provides a Browse OneDrive button next to the File path or URL text box when you create a dataflow in PowerApps using any of these connectors:
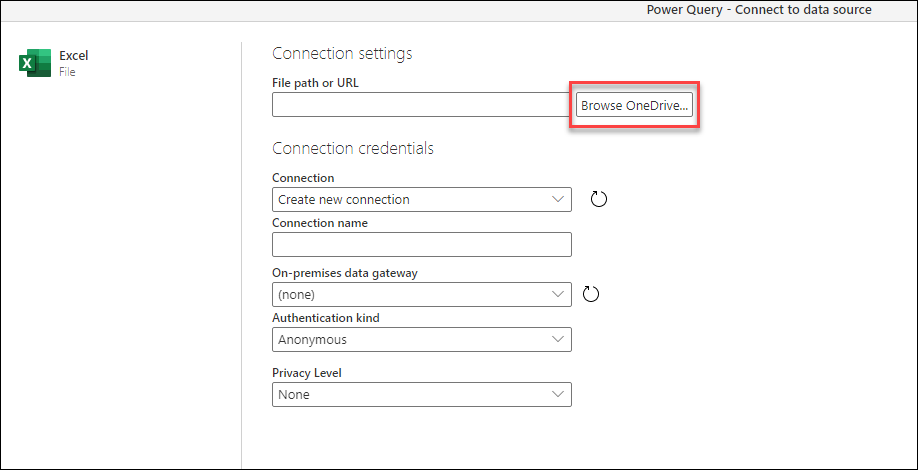
When you select this button, you're prompted to go through the authentication process. After you complete this process, a new window appears with all the authenticated user files inside OneDrive for work or school.
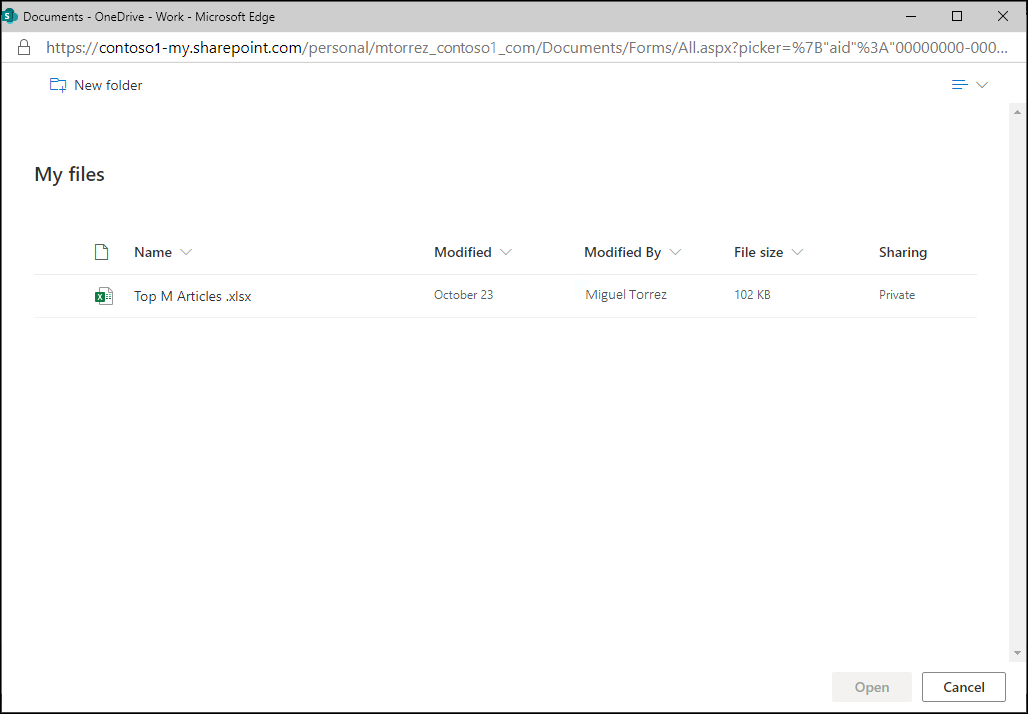
You can select the file of your choice, and then select the Open button. After selecting Open, you're taken back to the initial connection settings page where the File path or URL text box now holds the exact URL to the file you selected from OneDrive for work or school.
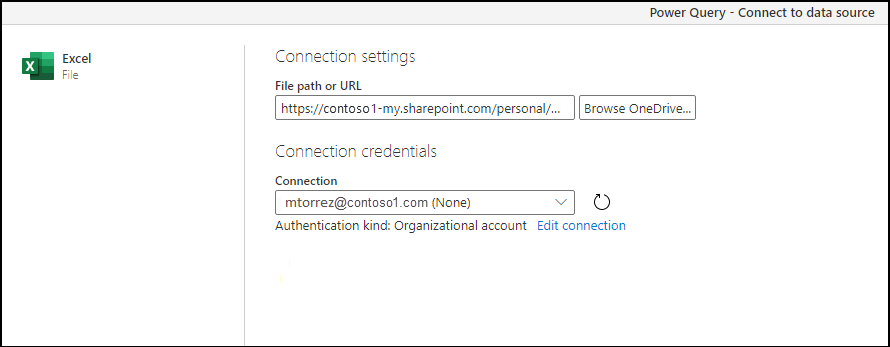
You can select the Next button at the bottom-right corner of the window to continue the process and get your data.
From the Web connector using a file URL
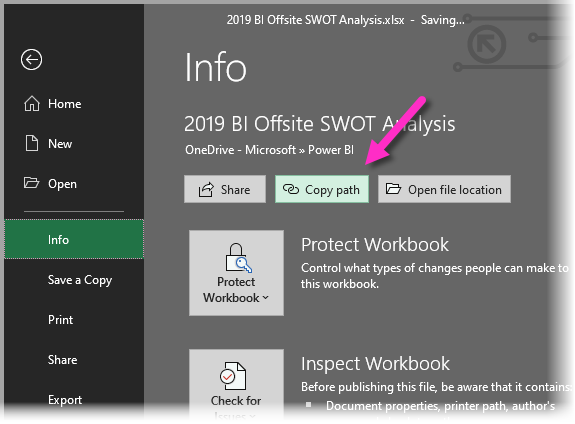
Navigate to your OneDrive for work or school location using a browser. Right-click the file you want to use, and select Open in Excel.
Note
Your browser interface might not look exactly like the following image. There are many ways to select Open in Excel for files in your OneDrive for work or school browser interface. You can use any option that allows you to open the file in Excel.

In Excel, select File > Info, and then select the Copy path button.
To use the link you just copied in Power Query, take the following steps:
Select Get Data > Web.

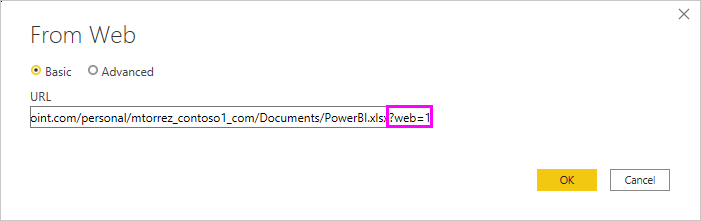
In the From Web dialog box, select the Basic option and paste the link in URL.
Remove the ?web=1 string at the end of the link so that Power Query can properly navigate to your file, and then select OK.
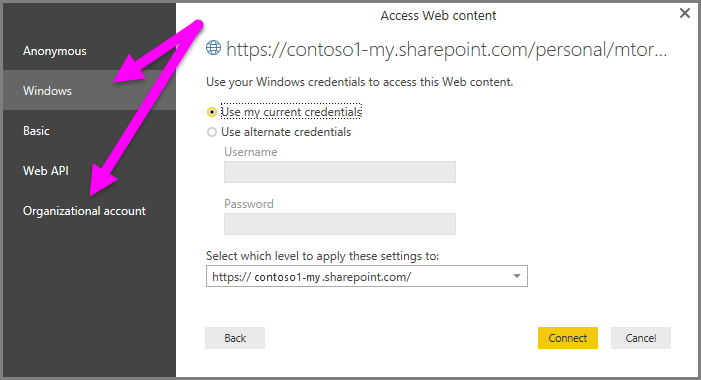
If Power Query prompts you for credentials, choose either Windows (for on-premises SharePoint sites) or Organizational Account (for Microsoft 365 or OneDrive for work or school sites). The select Connect.
Caution
When you work with files hosted on OneDrive for home, the file that you want to connect to needs to be publicly available. When setting the authentication method for this connection, select the Anonymous option.
When the Navigator dialog box appears, you can select from the list of tables, sheets, and ranges found in the Excel workbook. From there, you can use the OneDrive for work or school file just like any other Excel file. You can create reports and use it in data sets like you would with any other data source.
Note
To use a OneDrive for work or school file as a data source in the Power BI service, with Service Refresh enabled for that file, make sure you select OAuth2 as the Authentication method when configuring your refresh settings. Otherwise, you might encounter an error (such as, Failed to update data source credentials) when you attempt to connect or to refresh. Selecting OAuth2 as the authentication method remedies that credentials error.
SharePoint folder connector
You can read a detailed step-by-step guide on how to connect to the files hosted on your SharePoint site in the SharePoint folder article.
After successfully establishing the connection, you'll be prompted with a table preview that shows the files in your SharePoint site. Select the Transform data button at the bottom right of the window.

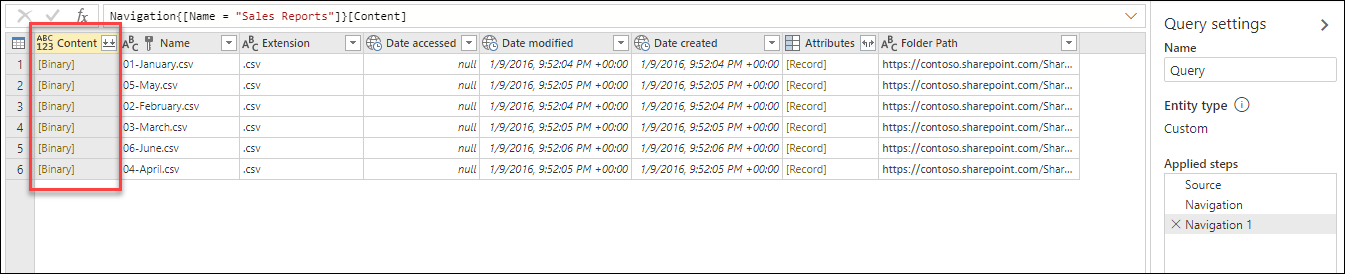
Selecting the Transform Data button takes you to a view of the data called the File system view. Each of the rows in this table represents a file that was found in your SharePoint site.

The table has a column named Content that contains your file in a binary format. The values in the Content column have a different color than the rest of the values in the other columns of the table, which indicates that they're selectable.
When you select a Binary value in the Content column, Power Query automatically adds a series of steps in your query to navigate to the file and interprets its contents where possible.
For example, from the table shown in the previous image, you can select the second row where the Name field has a value of 02-February.csv. Power Query automatically creates a series of steps to navigate and interprets the contents of the file as a CSV file.

Note
You can interact with the table by applying filters, sortings, and other transforms before navigating to the file of your choice. Once you finish these transforms, select the Binary value you want to view.
OneDrive for work or school experience
The SharePoint folder connector and its experience also work for files hosted on OneDrive for work or school. However, the URL that you need to use is different from the one you would use for a SharePoint site. To locate your unique URL, go to your OneDrive for work or school portal and copy the URL from your browser. This URL might look similar to the following example:
https://contoso-my.sharepoint.com/personal/user123_contoso_com/_layouts/15/onedrive.aspx
You don't need the full URL, but only the first few parts. The URL you need to use in Power Query has the following format:
https://<unique_tenant_name>.sharepoint.com/personal/<user_identifier>
For example:
https://contoso-my.sharepoint/personal/user123_contoso_com
SharePoint.Contents function
While the SharePoint folder connector offers you an experience where you can see all the files available in your SharePoint or OneDrive for work or school site at once, you can also opt for a different experience. In this experience, you can navigate through your SharePoint or OneDrive for work or school folders and reach the folder or files that you're interested in.
This experience is provided through the SharePoint.Contents function. To use this function, take the following steps:
Create a Blank Query.
Change the code in the formula bar to be
SharePoint.Contents("url")whereurlis the same format used for the SharePoint folder connector. For example:SharePoint.Contents("https://contoso.sharepoint.com/marketing/data")Note
By default, this function tries to use SharePoint API Version 14 to connect. If you aren't certain of the API version being used by your SharePoint site, you might want to try using the following example code:
SharePoint.Contents("https://contoso.sharepoint.com/marketing/data", [ApiVersion="Auto"]).Power Query requests that you add an authentication method for your connection. Use the same authentication method that you'd use for the SharePoint files connector.
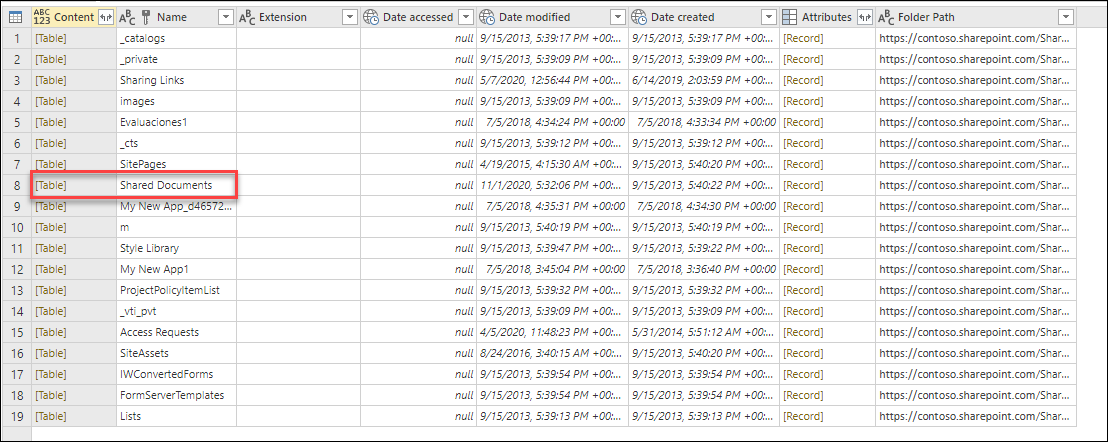
Navigate through the different documents to the specific folder or files that you're interested in.
For example, imagine a SharePoint site with a Shared Documents folder. You can select the Table value in the Content column for that folder and navigate directly to that folder.
Inside this Shared Documents folder, there's a folder where the company stores all the sales reports. This folder is named Sales Reports. You can select the Table value on the Content column for that row.
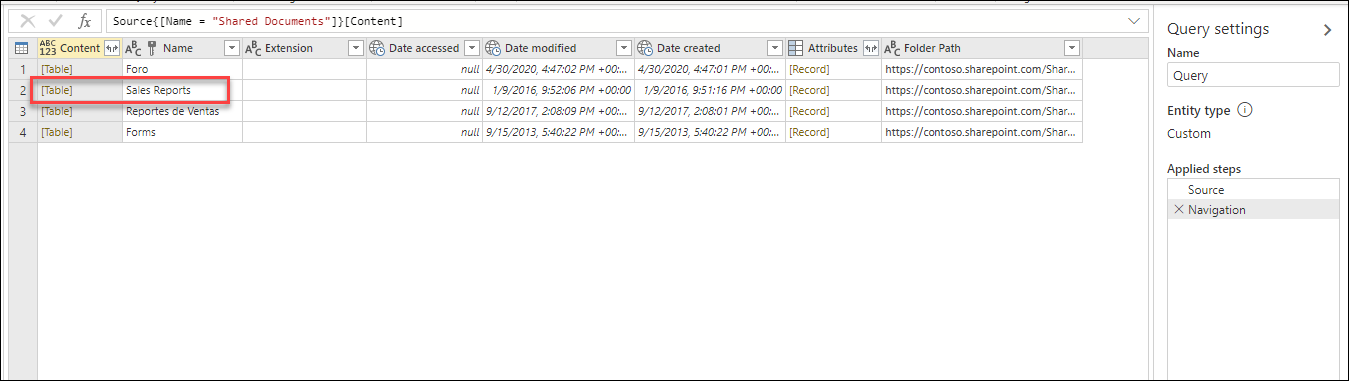
With all the files inside the Sales Reports folder, you could select the Combine files button (see Combine files overview) to combine the data from all the files in this folder to a single table. Or you could navigate directly to a single file of your choice by selecting the Binary value from the Content column.


Note
The experience provided by the SharePoint.Contents function is optimal for SharePoint and OneDrive for work or school environments with a large number of files.