Complete, abandon, or revert pull requests
TFS 2017 | TFS 2015 | TFS 2013
Visual Studio 2019 | Visual Studio 2017 | Visual Studio 2015
Once all required reviewers approve your pull request (PR) and the PR meets all branch policy requirements, you can merge your changes into the target branch and complete the PR. Or if you decide not to proceed with the changes in the PR, you can abandon the PR.
To address reviewers' changes, and respond to and resolve review comments, see Address comments.
Prerequisites
To complete a PR, you must be a member of the Contributors security group for the Azure DevOps project, or have the corresponding permissions.
To view or review PRs, you must be a member of the Azure DevOps project with Basic access or higher. If you aren't a project member, get added.
To contribute to a PR, you must be a member of the Readers security group for the Azure DevOps project or have the corresponding permissions.
To learn more about permissions and access, see Default Git repository and branch permissions and About access levels.
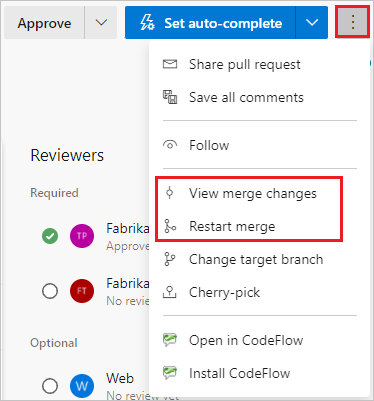
Check merge changes
When you complete a PR, Git adds a new merge commit to the end of the main branch. This merge commit links the earlier histories of the main branch and the PR source branch. To see the preview merge commit and check for merge conflicts, select the More options menu at upper right on a PR Overview page, and then select View merge changes.
If you changed the target branch after creating the PR, select Restart merge to create a new preview merge commit and update the merge change diff view.
Review branch policies
Teams can set branch policies that require PRs in protected branches to meet specific criteria before the PRs can merge. You can see the branch policies in effect for your PR, whether they're required for merge, and whether the PR is passing or failing.
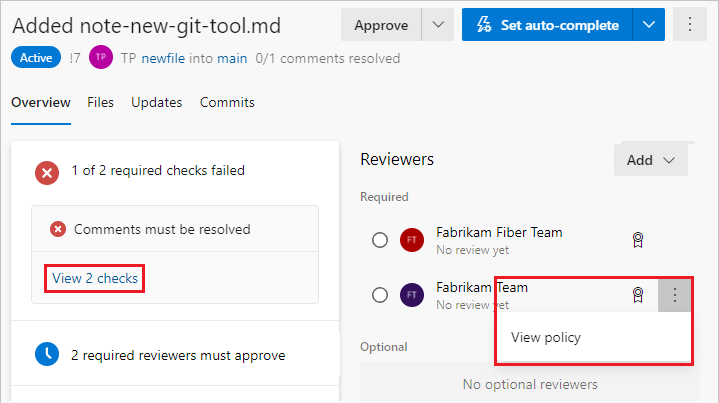
The PR Overview tab summarizes branch policies that are passing or failing for the PR. The overview lists only failed policies, but you can see all the policy checks by selecting View <n> checks.
On the PR Overview page, branch policy requirements have an ![]() icon. Select More options next to the requirement and then select View policy to go to the branch's Branch Policies page in Project Settings.
icon. Select More options next to the requirement and then select View policy to go to the branch's Branch Policies page in Project Settings.
Complete a pull request
After you resolve any merge conflicts, and the PR meets all branch policies and has all required approvals, you can complete the PR.
Select Complete in the upper right of the PR view to complete your PR after the reviewers approve of the changes.
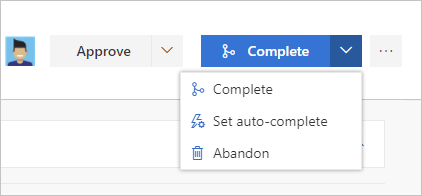
- Complete: Complete the PR now and merge the changes to the target branch.
- Set auto-complete: If you have branch policies, you can choose Set auto-complete to configure the PR to close once it meets all branch policies.
- Abandon: Close the PR without merging the changes.
In Complete pull request, enter the message for the merge commit and update the PR description.
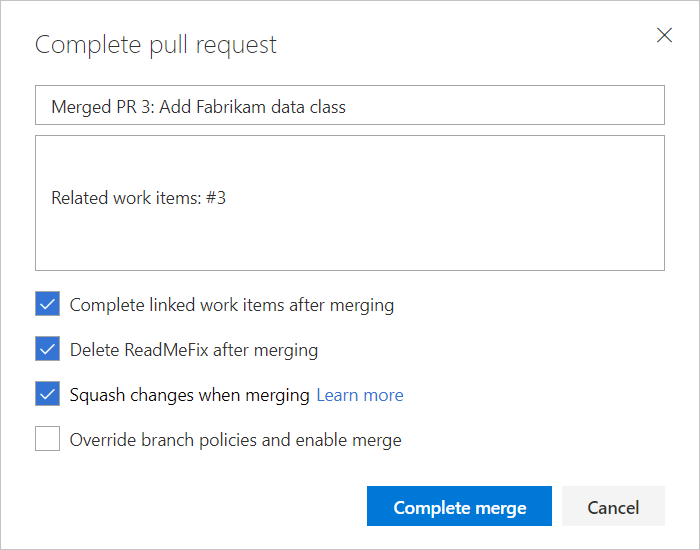
Select any of the following post-completion options:
- Complete linked work items after merging to complete any linked work items.
- Delete
<branch name>after merging to delete the source branch from the PR. - Squash changes when merging to squash merge your PR.
- Override branch policies and enable merge to force a branch to merge even if it doesn't satisfy all branch policies. This option is only available if you have Exempt from policy enforcement permissions.
Select Complete merge.
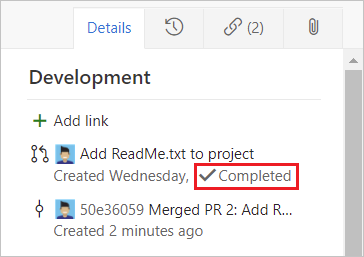
Linked work items are also updated showing the PR completion.
Multiple merge base issue
In some cases, a PR has more than one true merge base, and this situation can cause security issues. If the files in the PR have different versions between the merge bases, a multiple merge base warning happens. For more information and remediation, see Multiple merge bases.
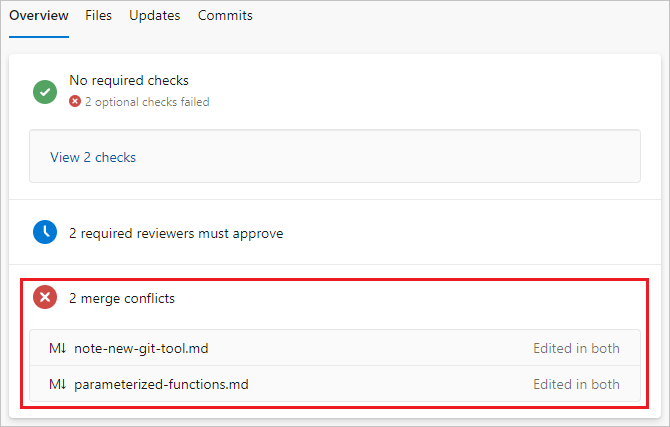
Resolve merge conflicts
File changes in your branch can conflict with changes in another branch. When it isn't clear how to merge changes, Git shows the files that conflict on the PR's Overview page. You must resolve any merge conflicts between the PR branch and the target branch before you can merge a PR or set the PR to autocomplete. For instructions on resolving merge conflicts, see Resolve merge conflicts.
Set a pull request to autocomplete
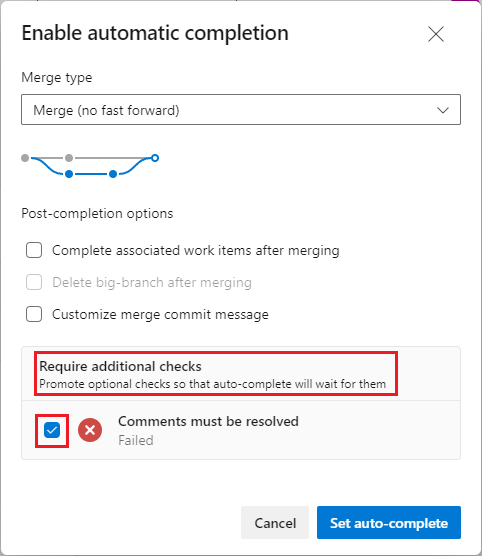
Select Set auto-complete from the Complete dropdown list to complete and merge the PR changes as soon as conditions satisfy all branch policies. When the PR is completed, you receive an email notification. If a conflict or error prevents PR completion, email notifies you of the issue.
Note
The Set auto-complete option is available in Azure Repos and TFS 2017 and higher when you have branch policies. If you don't see Set auto-complete, you don't have any branch policies. For more information, see Branch policies.
By default, a PR that's set to autocomplete waits only on required policies. In the Enable automatic completion panel, you can choose to wait on optional policies as well.
Starting with TFS 2018 Update 2, the PR Overview page displays the list of outstanding policy criteria the PR is waiting for. If you set a policy to be required in the Enable automatic completion panel, you can set it back to optional on the Overview page.
Select Cancel auto-complete to turn off autocomplete.
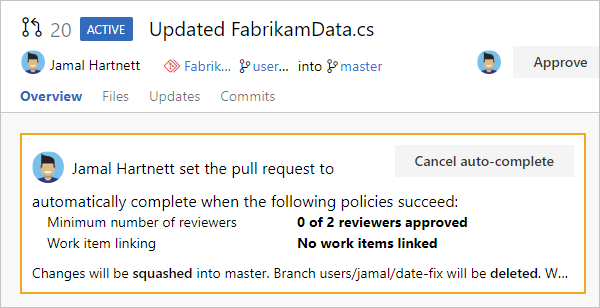
A PR set to autocomplete displays an Auto-complete badge on the Pull requests page.
![]()
Abandon or reactivate a pull request
To abandon your changes and your PR without merging, select Abandon from the dropdown list on the Complete button. You can still view the abandoned PR, and it stays linked to work items.
To reactivate an abandoned PR at any time, open the PR from the Abandoned tab in the Pull Request view, and select Reactivate at upper right.
Revert a completed pull request
To undo the changes from a PR, follow these steps. For more information, see Undo changes.
Open the completed PR and select Revert. This action creates a new branch with changes that undo the PR in an existing target branch in your repo.
In the Revert pull request pane:
- Under Target branch, select the branch where you want to undo the PR changes.
- Under Topic branch name required, change the revert PR branch name if you want.
- Select Revert.
On the New pull request screen, select Create.
Merge the new PR to complete the revert.
Note
The branch created during this revert has a single commit that reverts all the file changes from the original PR. The branch doesn't contain a reverted commit for each of the commits in the original PR.