Note
Access to this page requires authorization. You can try signing in or changing directories.
Access to this page requires authorization. You can try changing directories.
In this tutorial, you implement a Chiller device that sends the following telemetry to the Remote Monitoring solution accelerator:
- Temperature
- Pressure
- Humidity
For simplicity, the code generates sample telemetry values for the Chiller. You could extend the sample by connecting real sensors to your device and sending real telemetry.
The sample device also:
- Sends metadata to the solution to describe its capabilities.
- Responds to actions triggered from the Devices page in the solution.
- Responds to configuration changes send from the Devices page in the solution.
To complete this tutorial, you need an active Azure account. If you don't have an account, you can create a free trial account in just a couple of minutes. For details, see Azure Free Trial.
Before you start
Before you write any code for your device, deploy your Remote Monitoring solution accelerator and add a new real device to the solution.
Deploy your Remote Monitoring solution accelerator
The Chiller device you create in this tutorial sends data to an instance of the Remote Monitoring solution accelerator. If you haven't already provisioned the Remote Monitoring solution accelerator in your Azure account, see Deploy the Remote Monitoring solution accelerator
When the deployment process for the Remote Monitoring solution finishes, click Launch to open the solution dashboard in your browser.

Add your device to the Remote Monitoring solution
Note
If you have already added a device in your solution, you can skip this step. However, the next step requires your device connection string. You can retrieve a device's connection string from the Azure portal or using the az iot CLI tool.
For a device to connect to the solution accelerator, it must identify itself to IoT Hub using valid credentials. You have the opportunity to save the device connection string that contains these credentials when you add the device to the solution. You include the device connection string in your client application later in this tutorial.
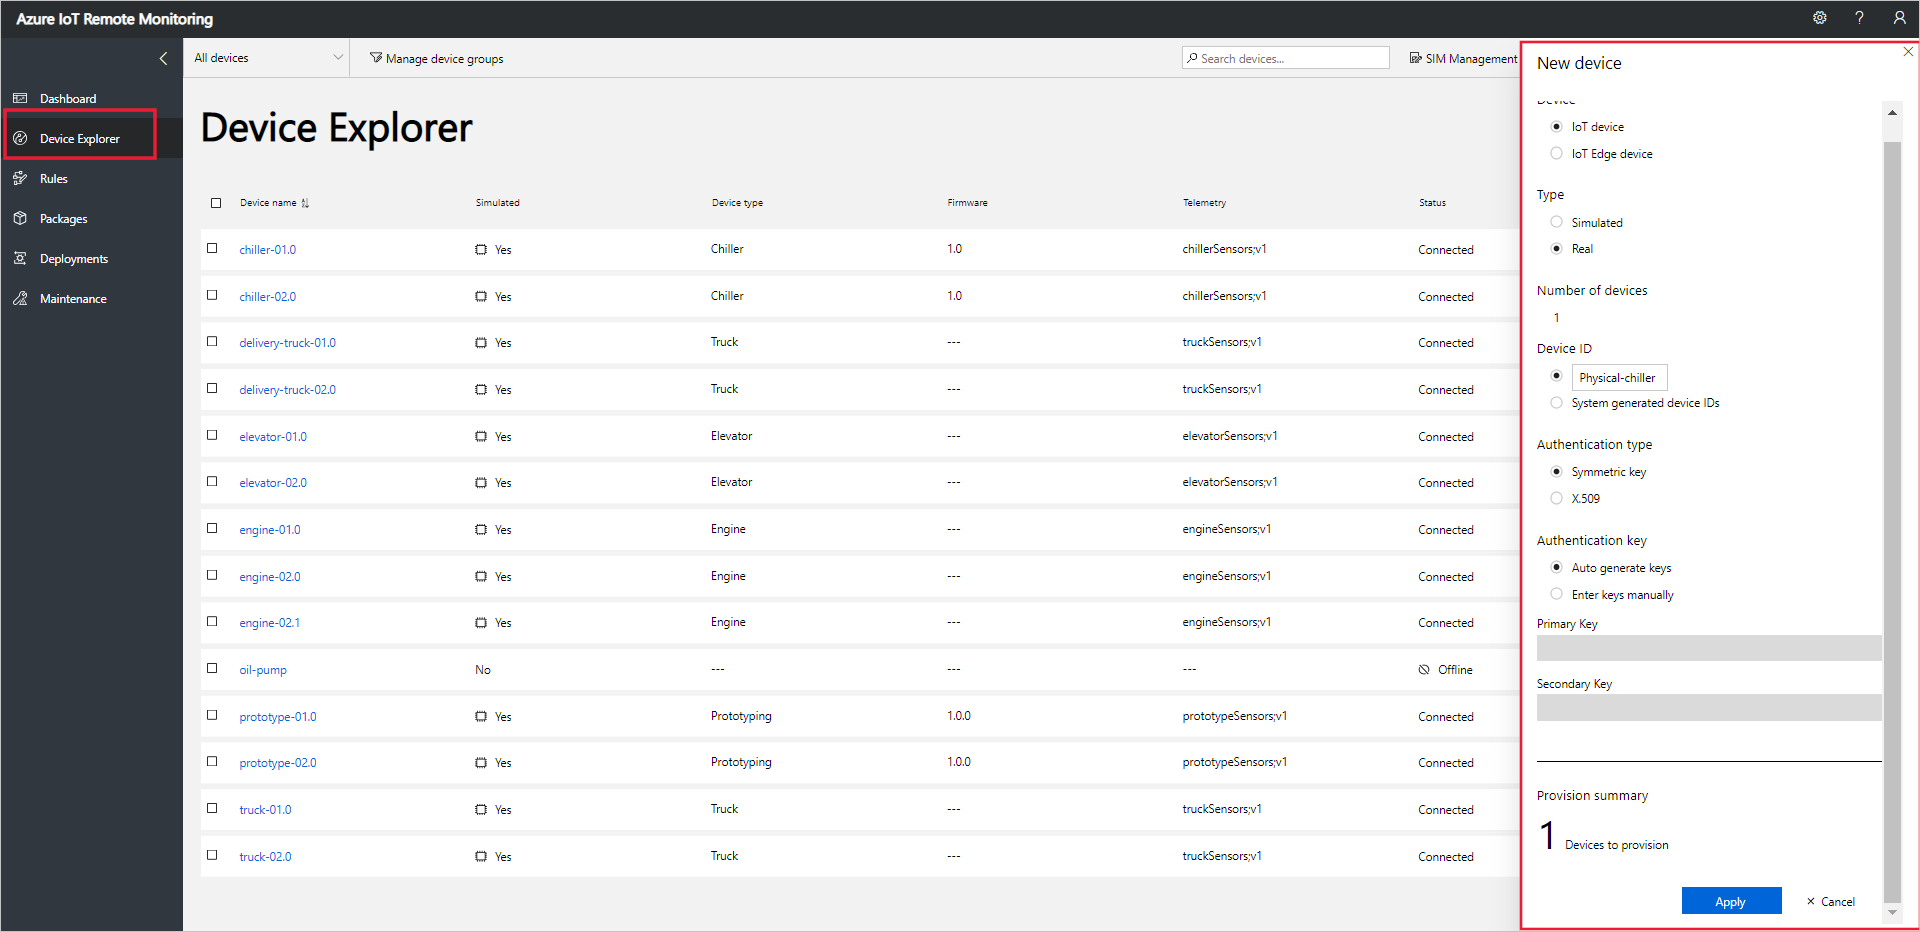
To add a device to your Remote Monitoring solution, complete the following steps on the Device Explorer page in the solution:
Choose + New device, and then choose Real as the Device type:
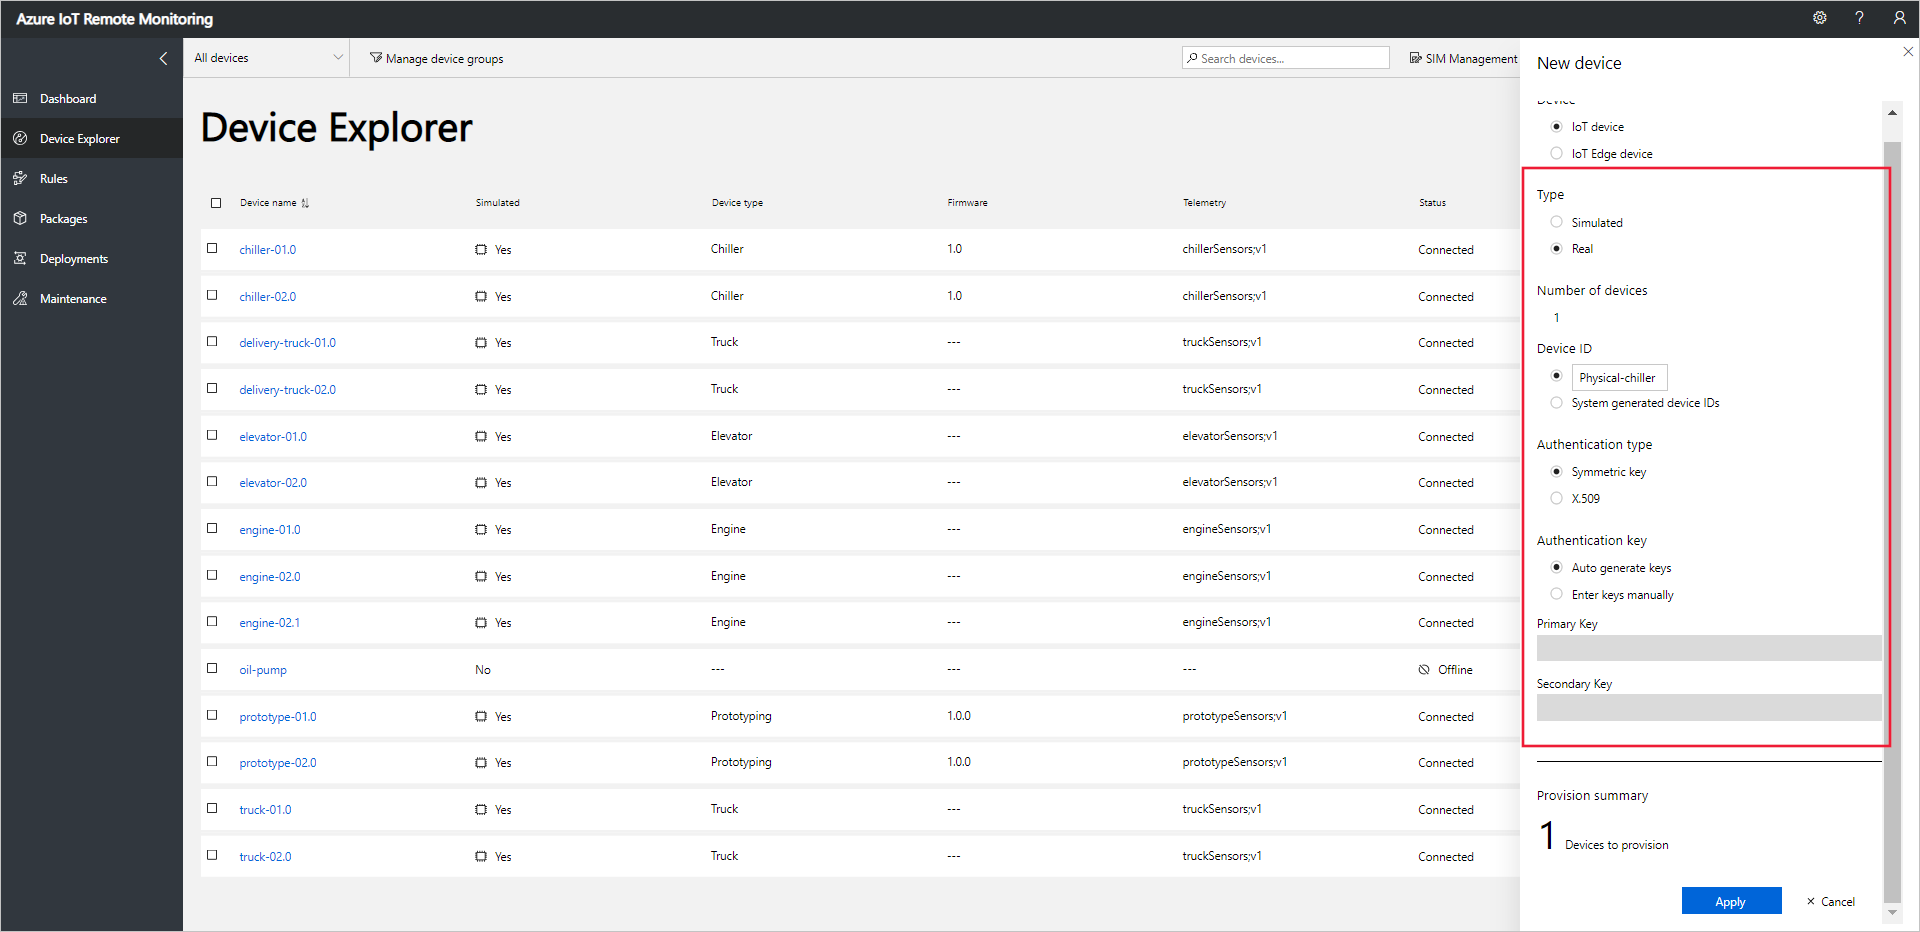
Enter Physical-chiller as the Device ID. Choose the Symmetric Key and Auto generate keys options:
Choose Apply. Then make a note of the Device ID, Primary Key, and Connection string primary key values:

You've now added a real device to the Remote Monitoring solution accelerator and noted its device connection string. In the following sections, you implement the client application that uses the device connection string to connect to your solution.
The client application implements the built-in Chiller device model. A solution accelerator device model specifies the following about a device:
- The properties the device reports to the solution. For example, a Chiller device reports information about its firmware and location.
- The types of telemetry the device sends to the solution. For example, a Chiller device sends temperature, humidity, and pressure values.
- The methods you can schedule from the solution to run on the device. For example, a Chiller device must implement Reboot, FirmwareUpdate, EmergencyValveRelease, and IncreasePressure methods.
This tutorial shows you how to connect a real device to the Remote Monitoring solution accelerator.
As with most embedded applications that run on constrained devices, the client code for the device application is written in C. In this tutorial, you build the application on a machine running Ubuntu (Linux).
If you prefer to simulate a device, see Create and test a new simulated device.
Prerequisites
To complete the steps in this how-to guide, you need a device running Ubuntu version 15.04 or later. Before proceeding, set up your Linux development environment.
View the code
The sample code used in this guide is available in the Azure IoT C SDKs GitHub repository.
Download the source code and prepare the project
To prepare the project, clone or download the Azure IoT C SDKs repository from GitHub.
The sample is located in the samples/solutions/remote_monitoring_client folder.
Open the remote_monitoring.c file in the samples/solutions/remote_monitoring_client folder in a text editor.
Code walkthrough
This section describes some of the key parts of the sample code and explains how they relate to the Remote Monitoring solution accelerator.
The following snippet shows how the reported properties that describe the capabilities of the device are defined. These properties include:
- The location of the device to enable the solution accelerator to add the device to the map.
- The current firmware version.
- The list of methods the device supports.
- The schema of the telemetry messages sent by the device.
typedef struct MESSAGESCHEMA_TAG
{
    char* name;
    char* format;
    char* fields;
} MessageSchema;

typedef struct TELEMETRYSCHEMA_TAG
{
    MessageSchema messageSchema;
} TelemetrySchema;

typedef struct TELEMETRYPROPERTIES_TAG
{
    TelemetrySchema temperatureSchema;
    TelemetrySchema humiditySchema;
    TelemetrySchema pressureSchema;
} TelemetryProperties;

typedef struct CHILLER_TAG
{
    // Reported properties
    char* protocol;
    char* supportedMethods;
    char* type;
    char* firmware;
    FIRMWARE_UPDATE_STATUS firmwareUpdateStatus;
    char* location;
    double latitude;
    double longitude;
    TelemetryProperties telemetry;

    // Manage firmware update process
    char* new_firmware_version;
    char* new_firmware_URI;
} Chiller;
The sample includes a serializeToJson function that serializes this data structure using the Parson library.
The sample includes several callback functions that print information to the console as the client interacts with the solution accelerator:
- connection_status_callback
- send_confirm_callback
- reported_state_callback
- device_method_callback
The following snippet shows the device_method_callback function. This function determines the action to take when a method call is received from the solution accelerator. The function receives a reference to the Chiller data structure in the userContextCallback parameter. The value of userContextCallback is set when the callback function is configured in the main function:
static int device_method_callback(const char* method_name, const unsigned char* payload, size_t size, unsigned char** response, size_t* response_size, void* userContextCallback)
{
    Chiller *chiller = (Chiller *)userContextCallback;

    int result;

    (void)printf("Direct method name:    %s\r\n", method_name);

    (void)printf("Direct method payload: %.*s\r\n", (int)size, (const char*)payload);

    if (strcmp("Reboot", method_name) == 0)
    {
        MESSAGERESPONSE(201, "{ \"Response\": \"Rebooting\" }")
    }
    else if (strcmp("EmergencyValveRelease", method_name) == 0)
    {
        MESSAGERESPONSE(201, "{ \"Response\": \"Releasing emergency valve\" }")
    }
    else if (strcmp("IncreasePressure", method_name) == 0)
    {
        MESSAGERESPONSE(201, "{ \"Response\": \"Increasing pressure\" }")
    }
    else if (strcmp("FirmwareUpdate", method_name) == 0)
    {
        if (chiller->firmwareUpdateStatus != IDLE)
        {
            (void)printf("Attempt to invoke firmware update out of order\r\n");
            MESSAGERESPONSE(400, "{ \"Response\": \"Attempting to initiate a firmware update out of order\" }")
        }
        else
        {
            getFirmwareUpdateValues(chiller, payload);

            if (chiller->new_firmware_version != NULL && chiller->new_firmware_URI != NULL)
            {
                // Create a thread for the long-running firmware update process.
                THREAD_HANDLE thread_apply;
                THREADAPI_RESULT t_result = ThreadAPI_Create(&thread_apply, do_firmware_update, chiller);
                if (t_result == THREADAPI_OK)
                {
                    (void)printf("Starting firmware update thread\r\n");
                    MESSAGERESPONSE(201, "{ \"Response\": \"Starting firmware update thread\" }")
                }
                else
                {
                    (void)printf("Failed to start firmware update thread\r\n");
                    MESSAGERESPONSE(500, "{ \"Response\": \"Failed to start firmware update thread\" }")
                }
            }
            else
            {
                (void)printf("Invalid method payload\r\n");
                MESSAGERESPONSE(400, "{ \"Response\": \"Invalid payload\" }")
            }
        }
    }
    else
    {
        // All other entries are ignored.
        (void)printf("Method not recognized\r\n");
        MESSAGERESPONSE(400, "{ \"Response\": \"Method not recognized\" }")
    }

    return result;
}
When the solution accelerator calls the firmware update method, the sample deserializes the JSON payload and starts a background thread to complete the update process. The following snippet shows the do_firmware_update that runs on the thread:
/*
 This is a thread allocated to process a long-running device method call.
 It uses device twin reported properties to communicate status values
 to the Remote Monitoring solution accelerator.
*/
static int do_firmware_update(void *param)
{
    Chiller *chiller = (Chiller *)param;
    printf("Running simulated firmware update: URI: %s, Version: %s\r\n", chiller->new_firmware_URI, chiller->new_firmware_version);

    printf("Simulating download phase...\r\n");
    chiller->firmwareUpdateStatus = DOWNLOADING;
    sendChillerReportedProperties(chiller);

    ThreadAPI_Sleep(5000);

    printf("Simulating apply phase...\r\n");
    chiller->firmwareUpdateStatus = APPLYING;
    sendChillerReportedProperties(chiller);

    ThreadAPI_Sleep(5000);

    printf("Simulating reboot phase...\r\n");
    chiller->firmwareUpdateStatus = REBOOTING;
    sendChillerReportedProperties(chiller);

    ThreadAPI_Sleep(5000);

    size_t size = strlen(chiller->new_firmware_version) + 1;
    (void)memcpy(chiller->firmware, chiller->new_firmware_version, size);

    chiller->firmwareUpdateStatus = IDLE;
    sendChillerReportedProperties(chiller);

    return 0;
}
The following snippet shows how the client sends a telemetry message to the solution accelerator. The message properties include the message schema to help the solution accelerator display the telemetry on the dashboard:
static void send_message(IOTHUB_DEVICE_CLIENT_HANDLE handle, char* message, char* schema)
{
    IOTHUB_MESSAGE_HANDLE message_handle = IoTHubMessage_CreateFromString(message);
    if (message_handle != NULL)
    {
        // Set system properties
        (void)IoTHubMessage_SetMessageId(message_handle, "MSG_ID");
        (void)IoTHubMessage_SetCorrelationId(message_handle, "CORE_ID");
        (void)IoTHubMessage_SetContentTypeSystemProperty(message_handle, "application%2fjson");
        (void)IoTHubMessage_SetContentEncodingSystemProperty(message_handle, "utf-8");

        // Set application properties
        MAP_HANDLE propMap = IoTHubMessage_Properties(message_handle);
        (void)Map_AddOrUpdate(propMap, "$$MessageSchema", schema);
        (void)Map_AddOrUpdate(propMap, "$$ContentType", "JSON");

        time_t now = time(0);
        struct tm* timeinfo;
#ifdef _MSC_VER
#pragma warning(push)
#pragma warning(disable: 4996) /* Suppress warning about possible unsafe function in Visual Studio */
#endif
        timeinfo = gmtime(&now);
#ifdef _MSC_VER
#pragma warning(pop)
#endif
        char timebuff[50];
        strftime(timebuff, 50, "%Y-%m-%dT%H:%M:%SZ", timeinfo);
        (void)Map_AddOrUpdate(propMap, "$$CreationTimeUtc", timebuff);

        IoTHubDeviceClient_SendEventAsync(handle, message_handle, send_confirm_callback, NULL);

        IoTHubMessage_Destroy(message_handle);
    }
}
The main function in the sample:
- Initializes and shuts down the SDK subsystem.
- Initializes the Chiller data structure.
- Sends the reported properties to the solution accelerator.
- Configures the device method callback function.
- Sends simulated telemetry values to the solution accelerator.
int main(void)
{
    srand((unsigned int)time(NULL));
    double minTemperature = 50.0;
    double minPressure = 55.0;
    double minHumidity = 30.0;
    double temperature = 0;
    double pressure = 0;
    double humidity = 0;

    (void)printf("This sample simulates a Chiller device connected to the Remote Monitoring solution accelerator\r\n\r\n");

    // Used to initialize sdk subsystem
    (void)IoTHub_Init();

    (void)printf("Creating IoTHub handle\r\n");
    // Create the iothub handle here
    device_handle = IoTHubDeviceClient_CreateFromConnectionString(connectionString, MQTT_Protocol);
    if (device_handle == NULL)
    {
        (void)printf("Failure creating IotHub device. Hint: Check your connection string.\r\n");
    }
    else
    {
        // Setting connection status callback to get indication of connection to iothub
        (void)IoTHubDeviceClient_SetConnectionStatusCallback(device_handle, connection_status_callback, NULL);

        Chiller chiller;
        memset(&chiller, 0, sizeof(Chiller));
        chiller.protocol = "MQTT";
        chiller.supportedMethods = "Reboot,FirmwareUpdate,EmergencyValveRelease,IncreasePressure";
        chiller.type = "Chiller";
        size_t size = strlen(initialFirmwareVersion) + 1;
        chiller.firmware = malloc(size);
        if (chiller.firmware == NULL)
        {
            (void)printf("Chiller Firmware failed to allocate memory.\r\n");
        }
        else
        {
            memcpy(chiller.firmware, initialFirmwareVersion, size);
            chiller.firmwareUpdateStatus = IDLE;
            chiller.location = "Building 44";
            chiller.latitude = 47.638928;
            chiller.longitude = -122.13476;
            chiller.telemetry.temperatureSchema.messageSchema.name = "chiller-temperature;v1";
            chiller.telemetry.temperatureSchema.messageSchema.format = "JSON";
            chiller.telemetry.temperatureSchema.messageSchema.fields = "{\"temperature\":\"Double\",\"temperature_unit\":\"Text\"}";
            chiller.telemetry.humiditySchema.messageSchema.name = "chiller-humidity;v1";
            chiller.telemetry.humiditySchema.messageSchema.format = "JSON";
            chiller.telemetry.humiditySchema.messageSchema.fields = "{\"humidity\":\"Double\",\"humidity_unit\":\"Text\"}";
            chiller.telemetry.pressureSchema.messageSchema.name = "chiller-pressure;v1";
            chiller.telemetry.pressureSchema.messageSchema.format = "JSON";
            chiller.telemetry.pressureSchema.messageSchema.fields = "{\"pressure\":\"Double\",\"pressure_unit\":\"Text\"}";

            sendChillerReportedProperties(&chiller);

            (void)IoTHubDeviceClient_SetDeviceMethodCallback(device_handle, device_method_callback, &chiller);

            while (1)
            {
                temperature = minTemperature + ((double)(rand() % 10) + 5);
                pressure = minPressure + ((double)(rand() % 10) + 5);
                humidity = minHumidity + ((double)(rand() % 20) + 5);

                if (chiller.firmwareUpdateStatus == IDLE)
                {
                    (void)printf("Sending sensor value Temperature = %f %s,\r\n", temperature, "F");
                    (void)sprintf_s(msgText, sizeof(msgText), "{\"temperature\":%.2f,\"temperature_unit\":\"F\"}", temperature);
                    send_message(device_handle, msgText, chiller.telemetry.temperatureSchema.messageSchema.name);


                    (void)printf("Sending sensor value Pressure = %f %s,\r\n", pressure, "psig");
                    (void)sprintf_s(msgText, sizeof(msgText), "{\"pressure\":%.2f,\"pressure_unit\":\"psig\"}", pressure);
                    send_message(device_handle, msgText, chiller.telemetry.pressureSchema.messageSchema.name);


                    (void)printf("Sending sensor value Humidity = %f %s,\r\n", humidity, "%");
                    (void)sprintf_s(msgText, sizeof(msgText), "{\"humidity\":%.2f,\"humidity_unit\":\"%%\"}", humidity);
                    send_message(device_handle, msgText, chiller.telemetry.humiditySchema.messageSchema.name);
                }

                ThreadAPI_Sleep(5000);
            }

            (void)printf("\r\nShutting down\r\n");

            // Clean up the iothub sdk handle and free resources
            IoTHubDeviceClient_Destroy(device_handle);
            free(chiller.firmware);
            free(chiller.new_firmware_URI);
            free(chiller.new_firmware_version);
        }
    }
    // Shutdown the sdk subsystem
    IoTHub_Deinit();

    return 0;
}
Build and run the application
The following steps describe how to use CMake to build the client application. The remote monitoring client application is built as part of the build process for the SDK.
Edit the remote_monitoring.c file to replace
<connectionstring>with the device connection string you noted at the start of this how-to guide when you added a device to the solution accelerator.Navigate to root of your cloned copy of the Azure IoT C SDKs repository repository and run the following commands to build the client application:
mkdir cmake
cd cmake
cmake ../
make
Run the client application and send telemetry to IoT Hub:
./samples/solutions/remote_monitoring_client/remote_monitoring_clientThe console displays messages as:
- The application sends sample telemetry to the solution accelerator.
- Responds to methods invoked from the solution dashboard.
View device telemetry
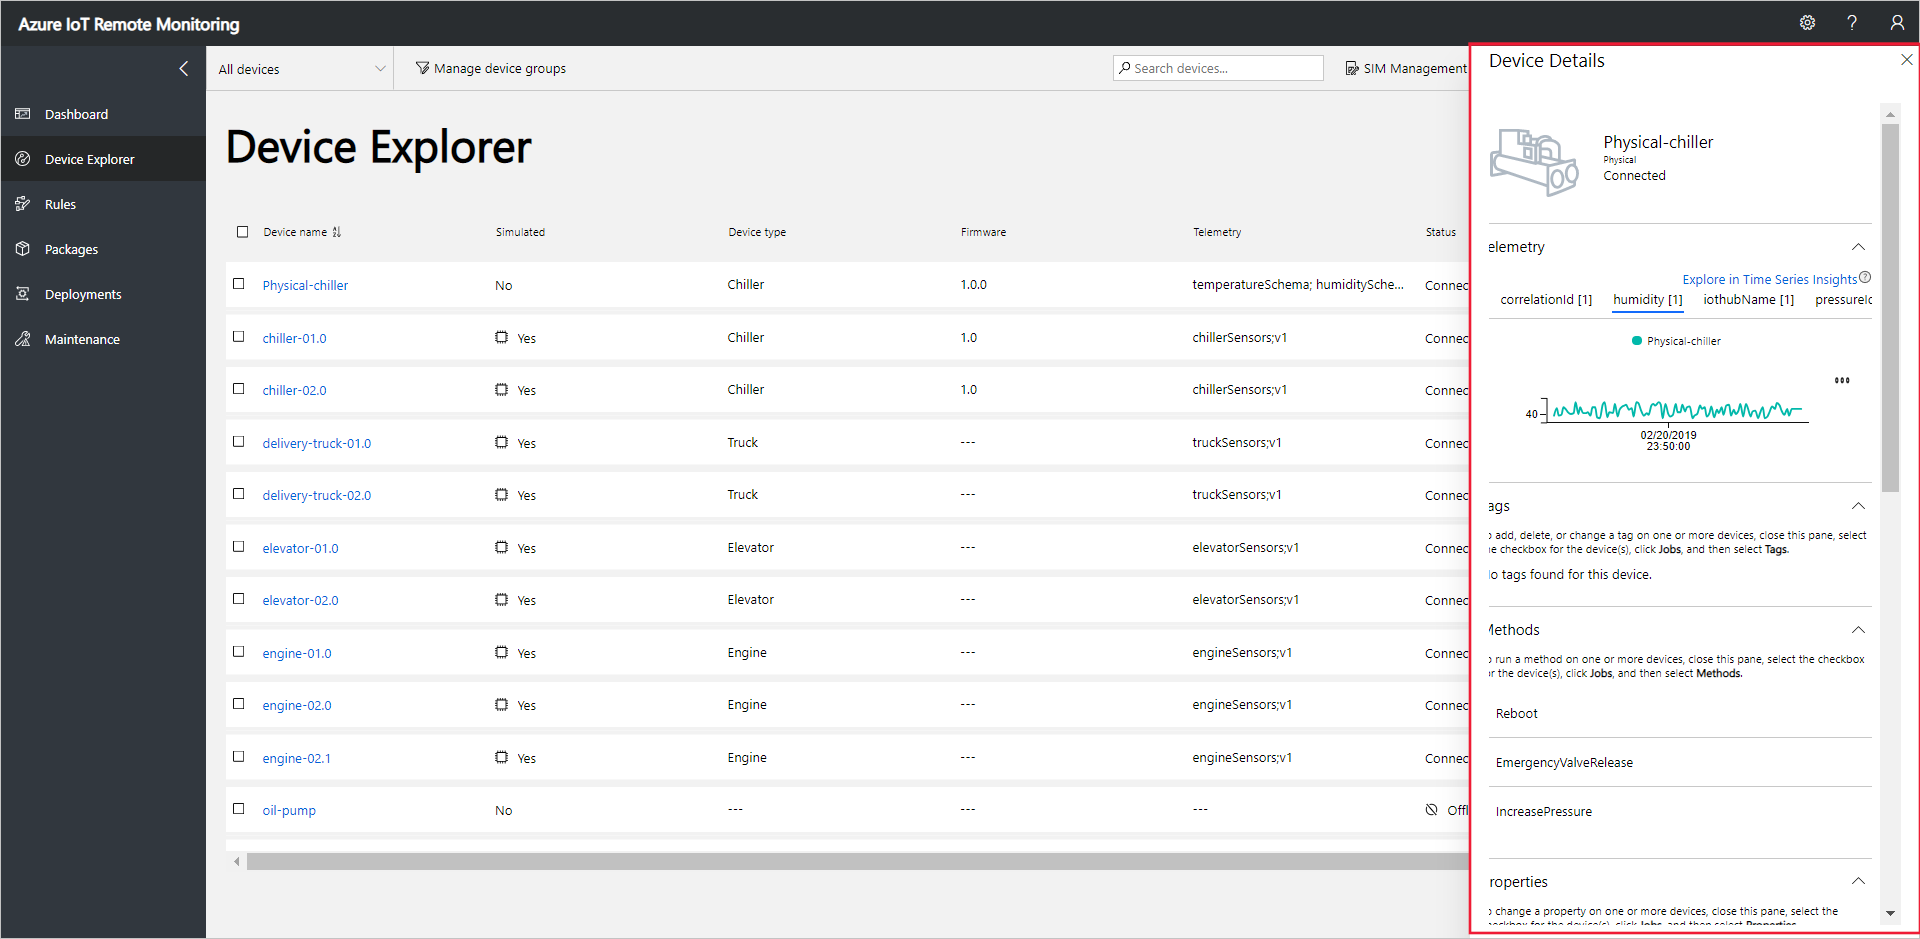
You can view the telemetry sent from your device on the Device Explorer page in the solution.
Select the device you provisioned in the list of devices on the Device Explorer page. A panel displays information about your device including a plot of the device telemetry:
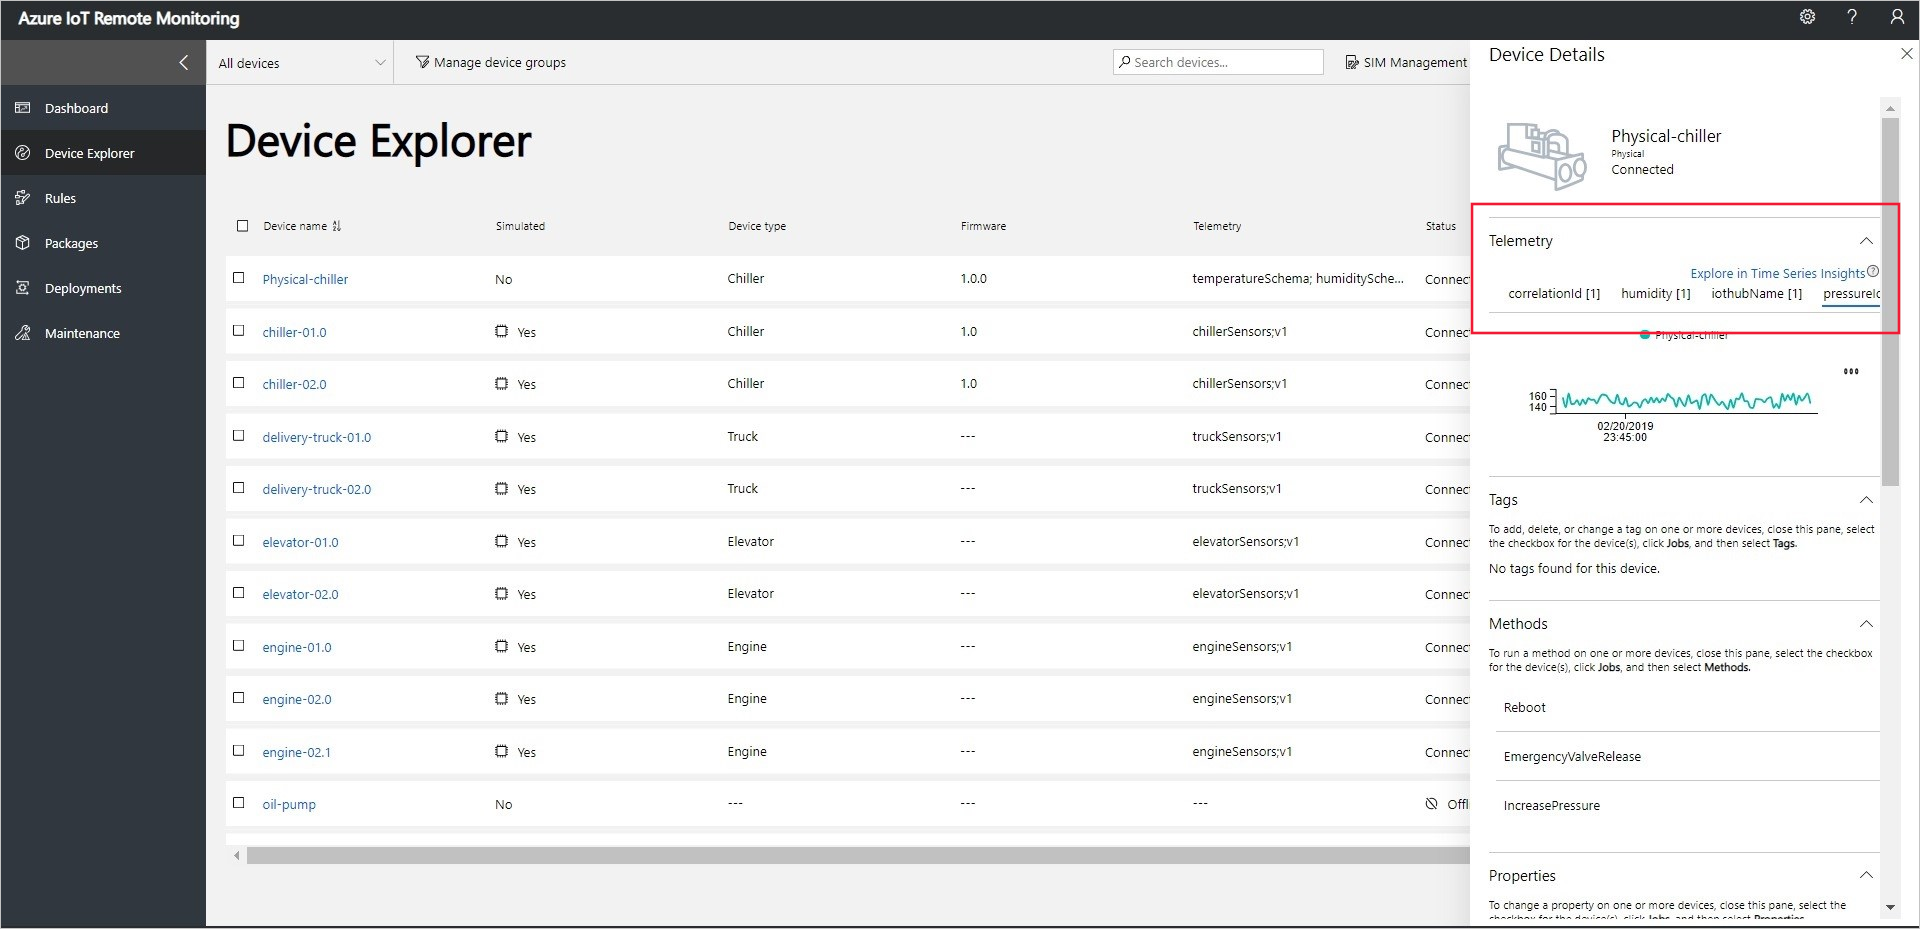
Choose Pressure to change the telemetry display:
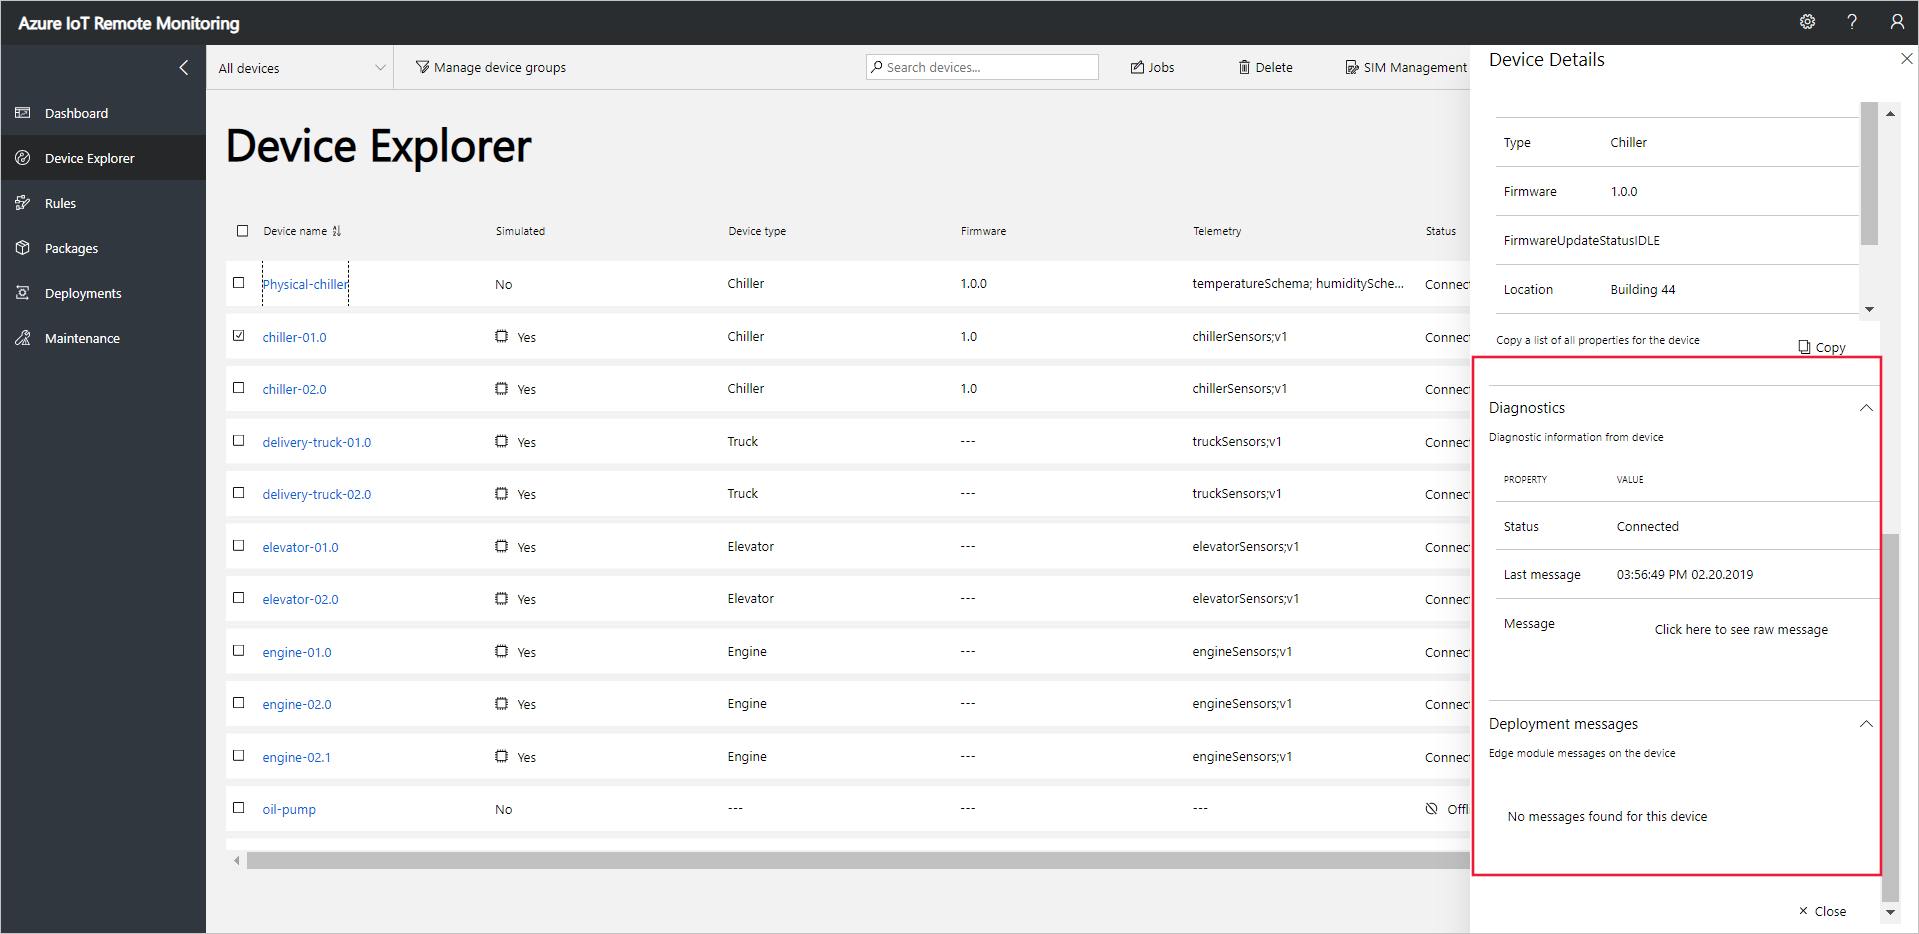
To view diagnostic information about your device, scroll down to Diagnostics:
Act on your device
To invoke methods on your devices, use the Device Explorer page in the Remote Monitoring solution. For example, in the Remote Monitoring solution Chiller devices implement a Reboot method.
Choose Devices to navigate to the Device Explorer page in the solution.
Select the device you provisioned in the list of devices on the Device Explorer page:
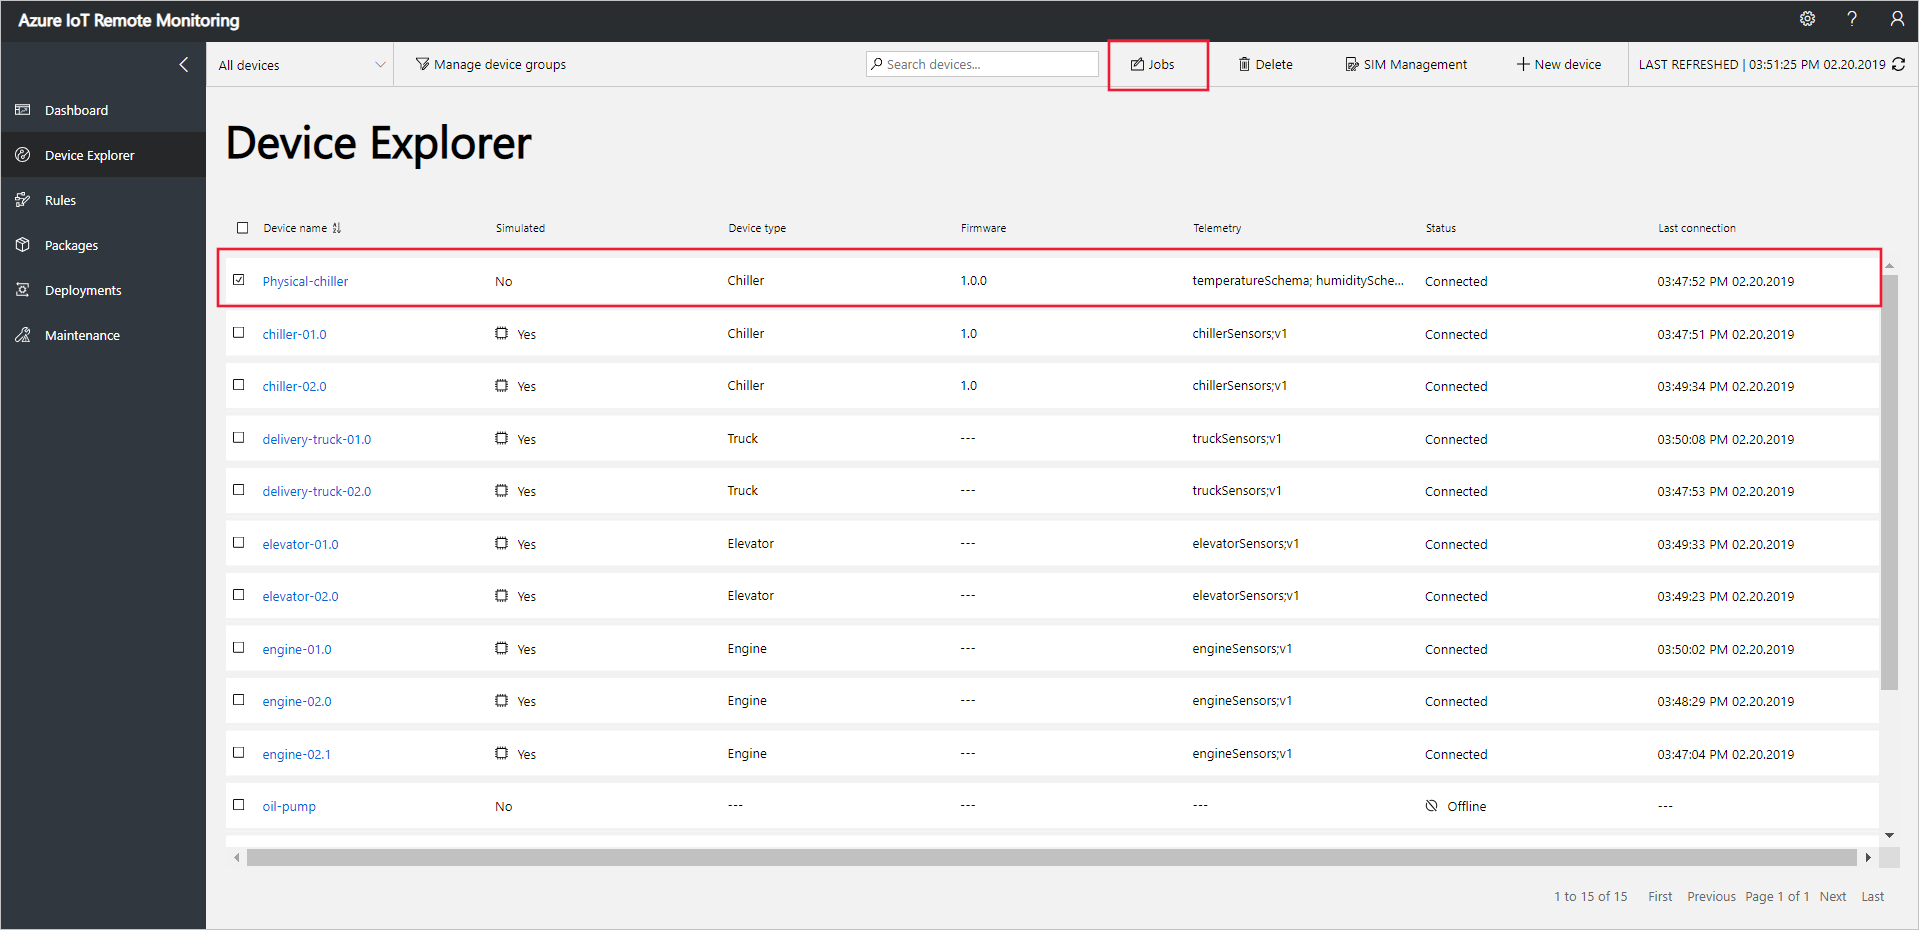
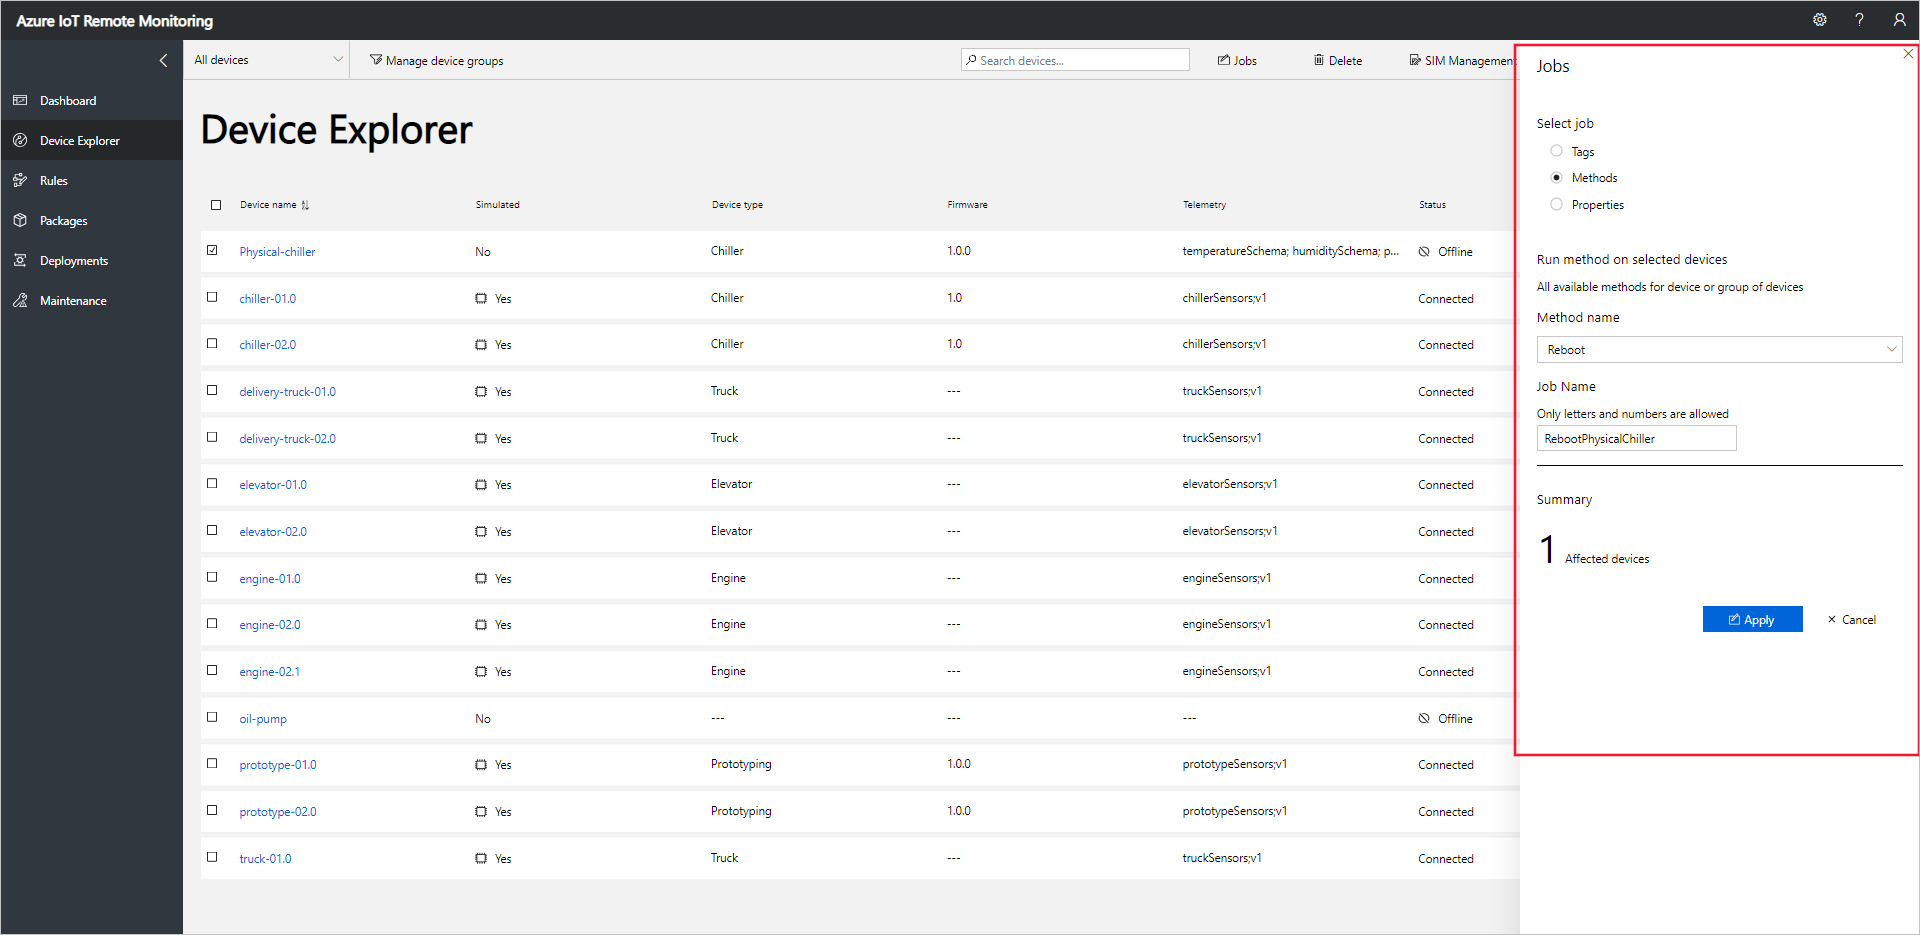
To display a list of the methods you can call on your device, choose Jobs, then Methods. To schedule a job to run on multiple devices, you can select multiple devices in the list. The Jobs panel shows the types of method common to all the devices you selected.
Choose Reboot, set the job name to RebootPhysicalChiller and then choose Apply:
A sequence of messages displays in the console running your device code while the simulated device handles the method.
Note
To track the status of the job in the solution, choose View Job Status.
Next steps
The article Customize the Remote Monitoring solution accelerator describes some ways to customize the solution accelerator.