Note
Access to this page requires authorization. You can try signing in or changing directories.
Access to this page requires authorization. You can try changing directories.
In this tutorial, you implement a Chiller device that sends the following telemetry to the Remote Monitoring solution accelerator:
- Temperature
- Pressure
- Humidity
For simplicity, the code generates sample telemetry values for the Chiller. You could extend the sample by connecting real sensors to your device and sending real telemetry.
The sample device also:
- Sends metadata to the solution to describe its capabilities.
- Responds to actions triggered from the Devices page in the solution.
- Responds to configuration changes send from the Devices page in the solution.
To complete this tutorial, you need an active Azure account. If you don't have an account, you can create a free trial account in just a couple of minutes. For details, see Azure Free Trial.
Before you start
Before you write any code for your device, deploy your Remote Monitoring solution accelerator and add a new real device to the solution.
Deploy your Remote Monitoring solution accelerator
The Chiller device you create in this tutorial sends data to an instance of the Remote Monitoring solution accelerator. If you haven't already provisioned the Remote Monitoring solution accelerator in your Azure account, see Deploy the Remote Monitoring solution accelerator
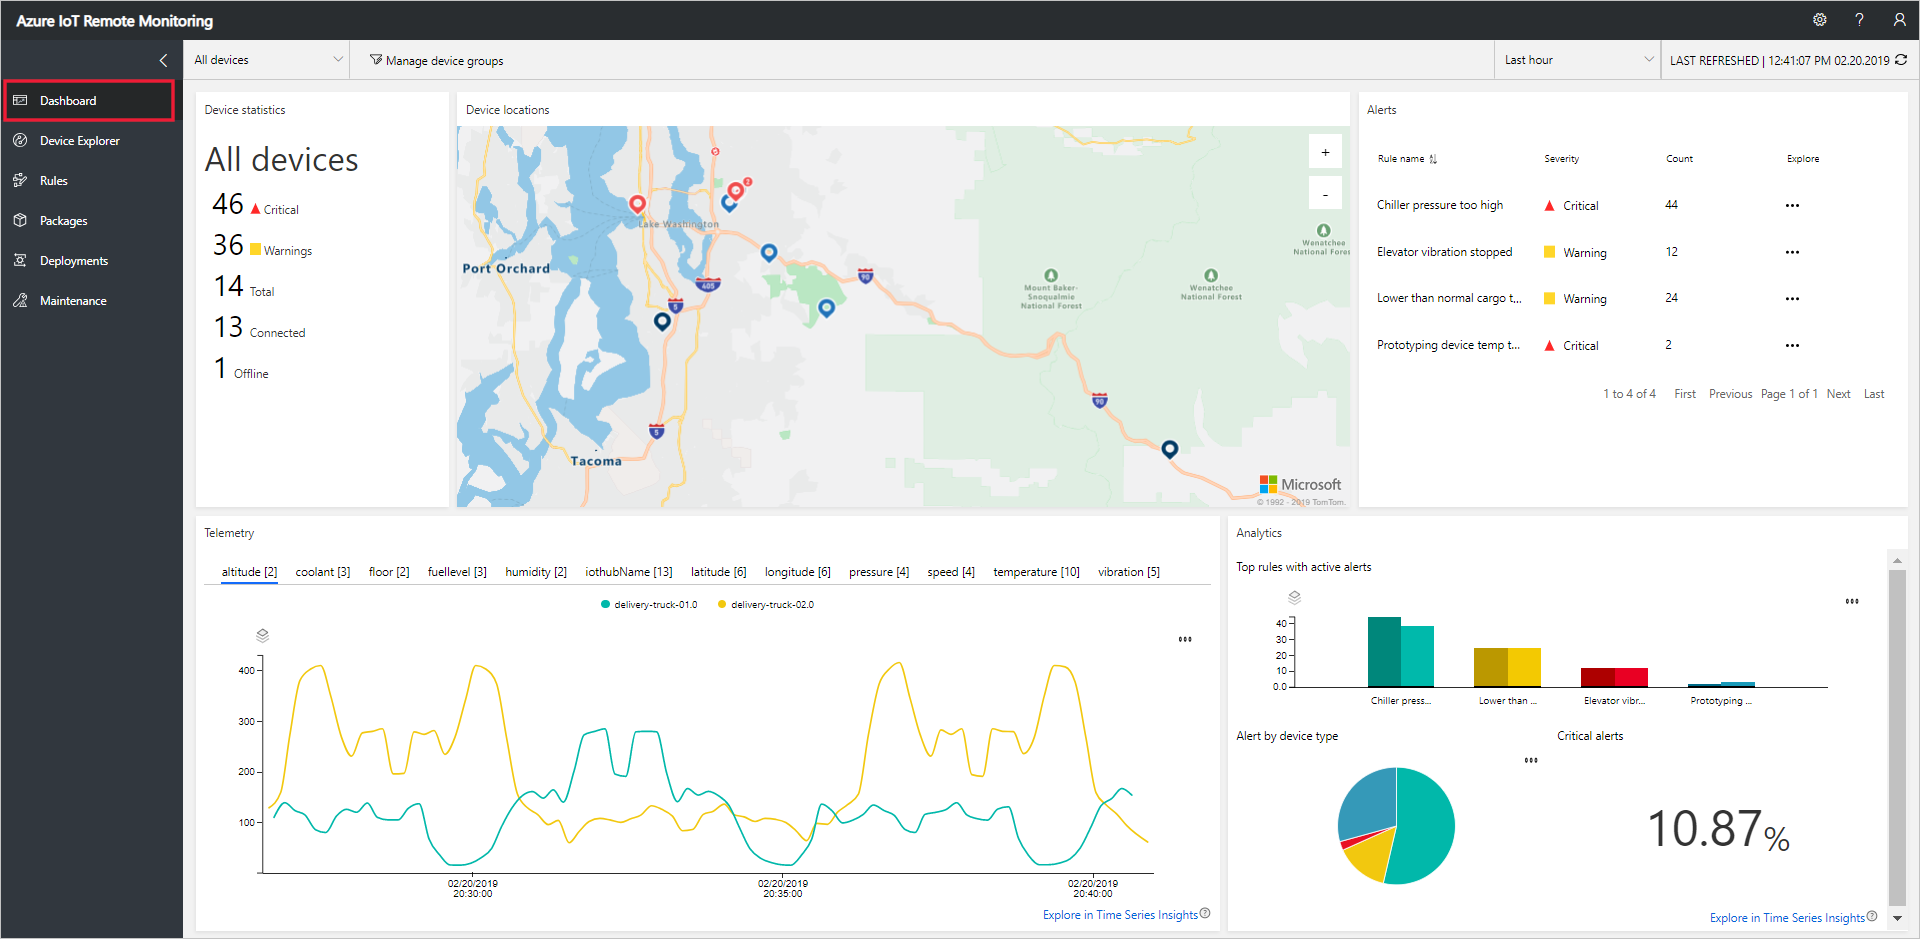
When the deployment process for the Remote Monitoring solution finishes, click Launch to open the solution dashboard in your browser.
Add your device to the Remote Monitoring solution
Note
If you have already added a device in your solution, you can skip this step. However, the next step requires your device connection string. You can retrieve a device's connection string from the Azure portal or using the az iot CLI tool.
For a device to connect to the solution accelerator, it must identify itself to IoT Hub using valid credentials. You have the opportunity to save the device connection string that contains these credentials when you add the device to the solution. You include the device connection string in your client application later in this tutorial.
To add a device to your Remote Monitoring solution, complete the following steps on the Device Explorer page in the solution:
Choose + New device, and then choose Real as the Device type:
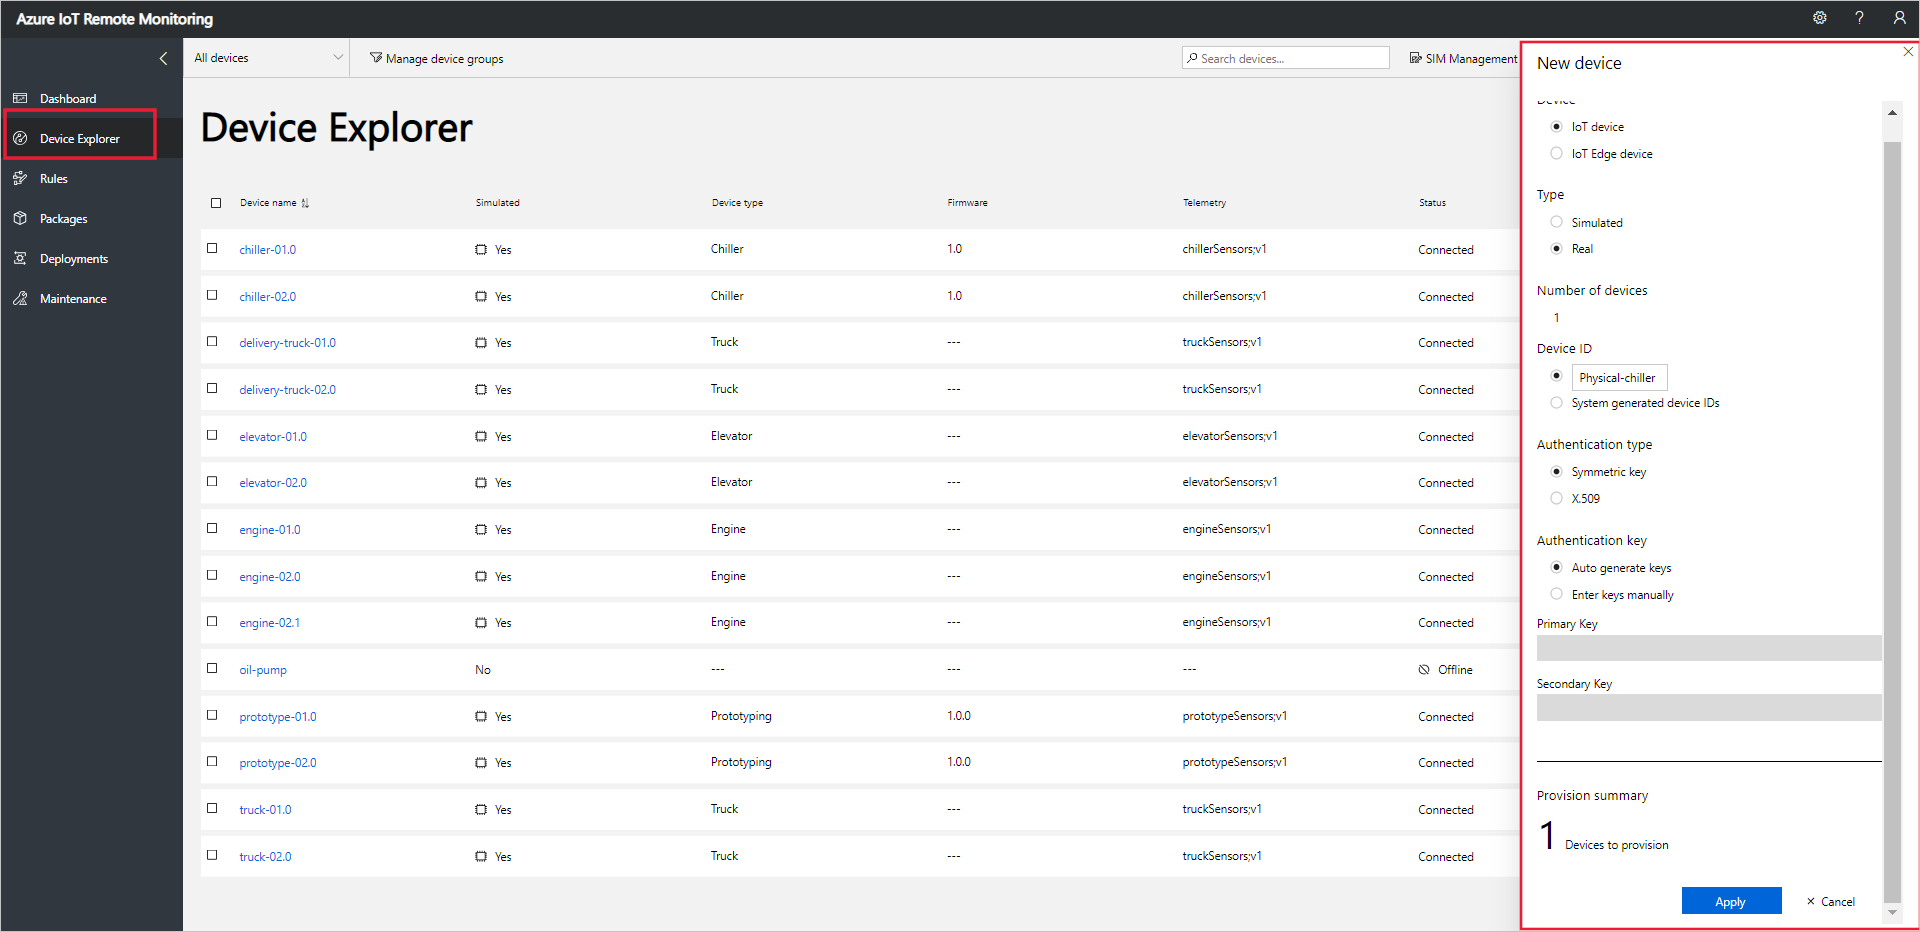
Enter Physical-chiller as the Device ID. Choose the Symmetric Key and Auto generate keys options:
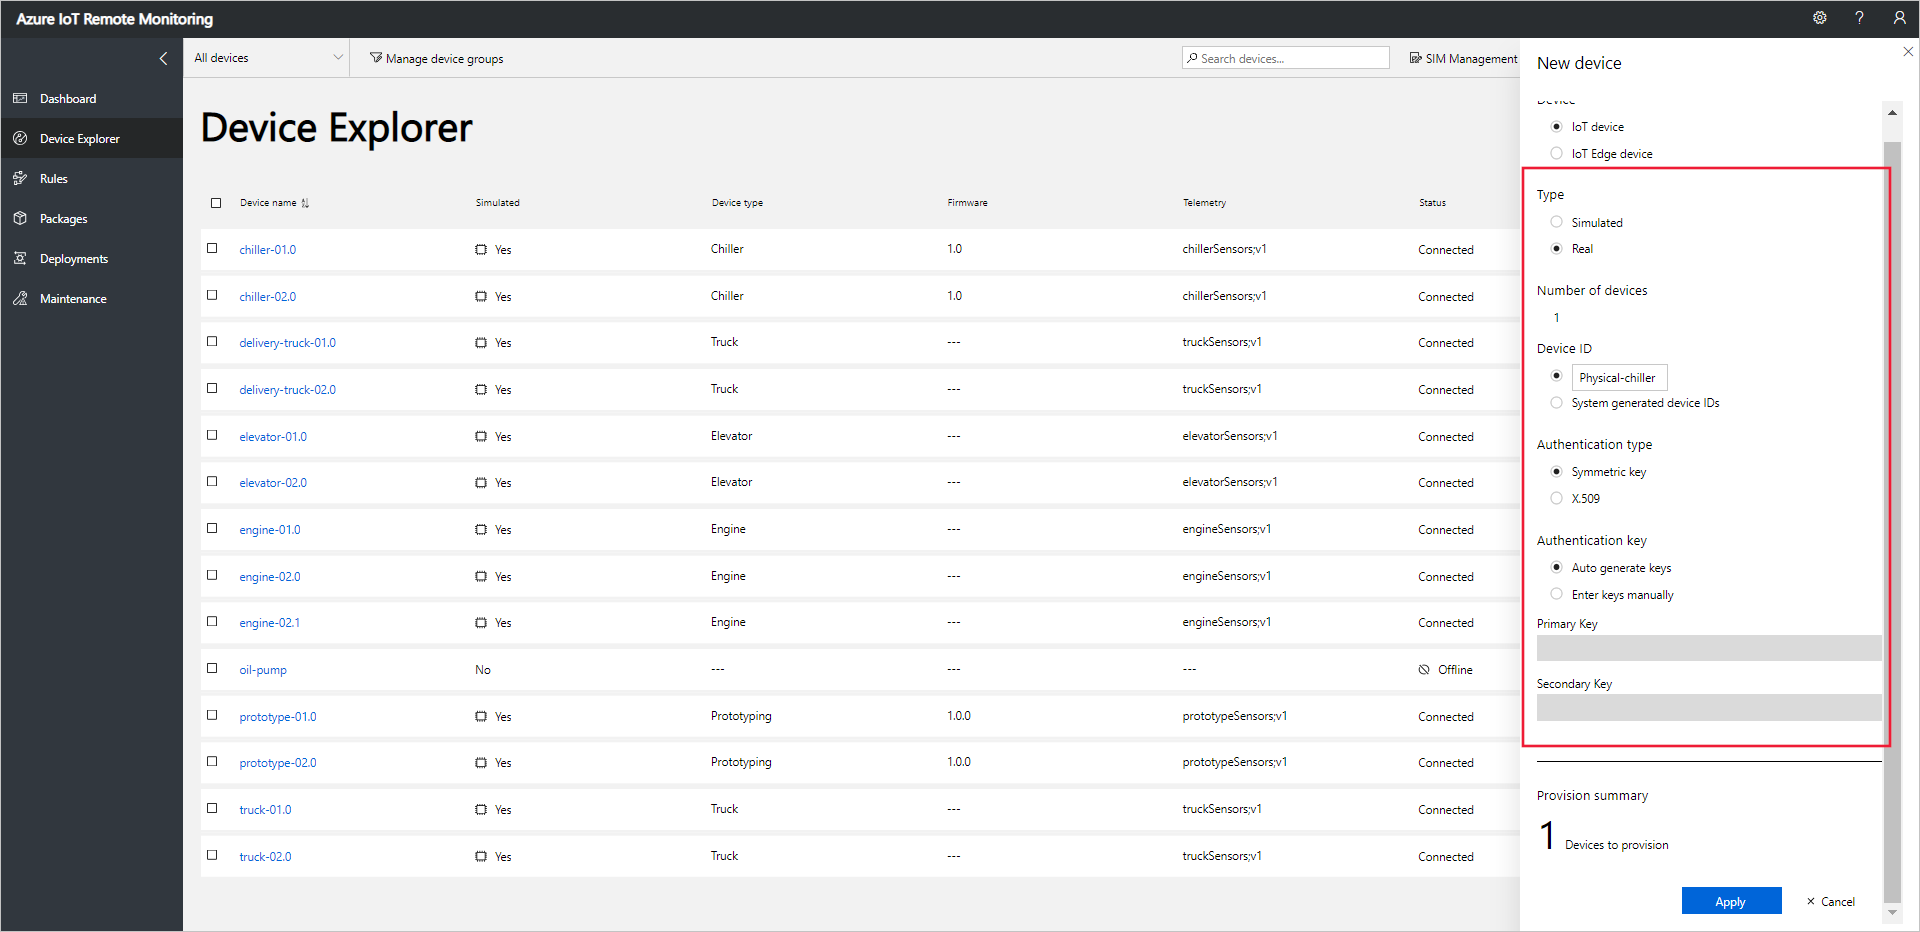
Choose Apply. Then make a note of the Device ID, Primary Key, and Connection string primary key values:
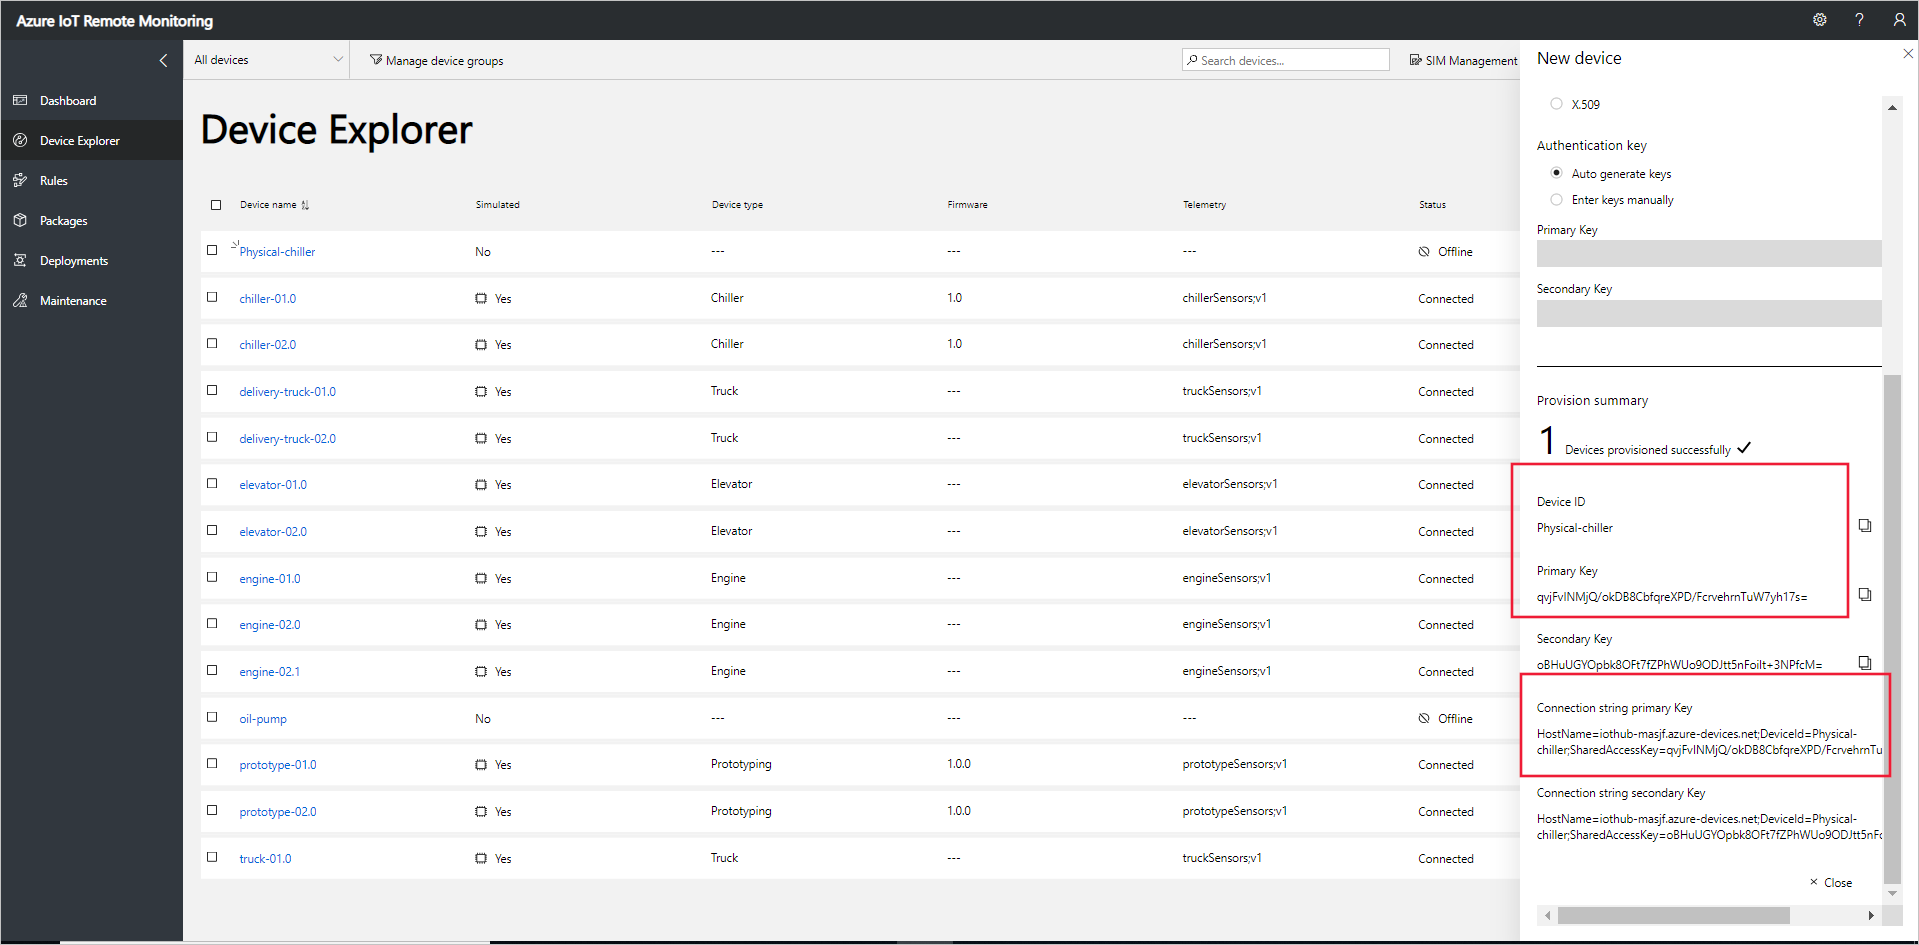
You've now added a real device to the Remote Monitoring solution accelerator and noted its device connection string. In the following sections, you implement the client application that uses the device connection string to connect to your solution.
The client application implements the built-in Chiller device model. A solution accelerator device model specifies the following about a device:
- The properties the device reports to the solution. For example, a Chiller device reports information about its firmware and location.
- The types of telemetry the device sends to the solution. For example, a Chiller device sends temperature, humidity, and pressure values.
- The methods you can schedule from the solution to run on the device. For example, a Chiller device must implement Reboot, FirmwareUpdate, EmergencyValveRelease, and IncreasePressure methods.
This tutorial shows you how to connect a real device to the Remote Monitoring solution accelerator. In this tutorial, you use Node.js, which is a good option for environments with minimal resource constraints.
If you prefer to simulate a device, see Create and test a new simulated device.
Required hardware
A desktop computer to enable you to connect remotely to the command line on the Raspberry Pi.
Microsoft IoT Starter Kit for Raspberry Pi 3 or equivalent components. This tutorial uses the following items from the kit:
- Raspberry Pi 3
- MicroSD Card (with NOOBS)
- A USB Mini cable
- An Ethernet cable
Required desktop software
You need SSH client on your desktop machine to enable you to remotely access the command line on the Raspberry Pi.
- Windows does not include an SSH client. We recommend using PuTTY.
- Most Linux distributions and Mac OS include the command-line SSH utility. For more information, see SSH Using Linux or Mac OS.
Required Raspberry Pi software
If you haven't done so already, install Node.js version 4.0.0 or later on your Raspberry Pi. The following steps show you how to install Node.js v6 on your Raspberry Pi:
Connect to your Raspberry Pi using
ssh. For more information, see SSH (Secure Shell) on the Raspberry Pi website.Use the following command to update your Raspberry Pi:
sudo apt-get updateUse the following commands to remove any existing installation of Node.js from your Raspberry Pi:
sudo apt-get remove nodered -y
sudo apt-get remove nodejs nodejs-legacy -y
sudo apt-get remove npm  -y
Use the following command to download and install Node.js v6 on your Raspberry Pi:
curl -sL https://deb.nodesource.com/setup_6.x | sudo bash -
sudo apt-get install nodejs npm
Use the following command to verify you have installed Node.js v6.11.4 successfully:
node --version
Create a Node.js solution
Complete the following steps using the ssh connection to your Raspberry Pi:
Create a folder called
remotemonitoringin your home folder on the Raspberry Pi. Navigate to this folder in your command line:cd ~ mkdir remotemonitoring cd remotemonitoringTo download and install the packages you need to complete the sample app, run the following commands:
npm install async azure-iot-device azure-iot-device-mqttIn the
remotemonitoringfolder, create a file called remote_monitoring.js. Open this file in a text editor. On the Raspberry Pi, you can use thenanoorvitext editors.In the remote_monitoring.js file, add the following
requirestatements:var Protocol = require('azure-iot-device-mqtt').Mqtt; var Client = require('azure-iot-device').Client; var Message = require('azure-iot-device').Message; var async = require('async');Add the following variable declarations after the
requirestatements. Replace the placeholder value{device connection string}with value you noted for the device you provisioned in the Remote Monitoring solution:var connectionString = '{device connection string}';To define some base telemetry data, add the following variables:
var temperature = 50;
var temperatureUnit = 'F';
var humidity = 50;
var humidityUnit = '%';
var pressure = 55;
var pressureUnit = 'psig';
To define some property values, add the following variables:
var schema = "real-chiller;v1";
var deviceType = "RealChiller";
var deviceFirmware = "1.0.0";
var deviceFirmwareUpdateStatus = "";
var deviceLocation = "Building 44";
var deviceLatitude = 47.638928;
var deviceLongitude = -122.13476;
var deviceOnline = true;
Add the following variable to define the reported properties to send to the solution. These properties include metadata to display in the Web UI:
var reportedProperties = {
  "SupportedMethods": "Reboot,FirmwareUpdate,EmergencyValveRelease,IncreasePressure",
  "Telemetry": {
    [schema]: ""
  },
  "Type": deviceType,
  "Firmware": deviceFirmware,
  "FirmwareUpdateStatus": deviceFirmwareUpdateStatus,
  "Location": deviceLocation,
  "Latitude": deviceLatitude,
  "Longitude": deviceLongitude,
  "Online": deviceOnline
}
To print operation results, add the following helper function:
function printErrorFor(op) {
    return function printError(err) {
        if (err) console.log(op + ' error: ' + err.toString());
    };
}
Add the following helper function to use to randomize the telemetry values:
function generateRandomIncrement() {
    return ((Math.random() * 2) - 1);
}
Add the following generic function to handle direct method calls from the solution. The function displays information about the direct method that was invoked, but in this sample does not modify the device in any way. The solution uses direct methods to act on devices:
function onDirectMethod(request, response) {
  // Implement logic asynchronously here.
  console.log('Simulated ' + request.methodName);

  // Complete the response
  response.send(200, request.methodName + ' was called on the device', function (err) {
    if (err) console.error('Error sending method response :\n' + err.toString());
    else console.log('200 Response to method \'' + request.methodName + '\' sent successfully.');
  });
}
Add the following function to handle the FirmwareUpdate direct method calls from the solution. The function verifies the parameters passed in the direct method payload and then asynchronously runs a firmware update simulation:
function onFirmwareUpdate(request, response) {
  // Get the requested firmware version from the JSON request body
  var firmwareVersion = request.payload.Firmware;
  var firmwareUri = request.payload.FirmwareUri;

  // Ensure we got a firmware values
  if (!firmwareVersion || !firmwareUri) {
    response.send(400, 'Missing firmware value', function(err) {
      if (err) console.error('Error sending method response :\n' + err.toString());
      else console.log('400 Response to method \'' + request.methodName + '\' sent successfully.');
    });
  } else {
    // Respond the cloud app for the device method
    response.send(200, 'Firmware update started.', function(err) {
      if (err) console.error('Error sending method response :\n' + err.toString());
      else {
        console.log('200 Response to method \'' + request.methodName + '\' sent successfully.');

        // Run the simulated firmware update flow
        runFirmwareUpdateFlow(firmwareVersion, firmwareUri);
      }
    });
  }
}
Add the following function to simulate a long-running firmware update flow that reports progress back to the solution:
// Simulated firmwareUpdate flow
function runFirmwareUpdateFlow(firmwareVersion, firmwareUri) {
  console.log('Simulating firmware update flow...');
  console.log('> Firmware version passed: ' + firmwareVersion);
  console.log('> Firmware URI passed: ' + firmwareUri);
  async.waterfall([
    function (callback) {
      console.log("Image downloading from " + firmwareUri);
      var patch = {
        FirmwareUpdateStatus: 'Downloading image..'
      };
      reportUpdateThroughTwin(patch, callback);
      sleep(10000, callback);
    },
    function (callback) {
      console.log("Downloaded, applying firmware " + firmwareVersion);
      deviceOnline = false;
      var patch = {
        FirmwareUpdateStatus: 'Applying firmware..',
        Online: false
      };
      reportUpdateThroughTwin(patch, callback);
      sleep(8000, callback);
    },
    function (callback) {
      console.log("Rebooting");
      var patch = {
        FirmwareUpdateStatus: 'Rebooting..'
      };
      reportUpdateThroughTwin(patch, callback);
      sleep(10000, callback);
    },
    function (callback) {
      console.log("Firmware updated to " + firmwareVersion);
      deviceOnline = true;
      var patch = {
        FirmwareUpdateStatus: 'Firmware updated',
        Online: true,
        Firmware: firmwareVersion
      };
      reportUpdateThroughTwin(patch, callback);
      callback(null);
    }
  ], function(err) {
    if (err) {
      console.error('Error in simulated firmware update flow: ' + err.message);
    } else {
      console.log("Completed simulated firmware update flow");
    }
  });

  // Helper function to update the twin reported properties.
  function reportUpdateThroughTwin(patch, callback) {
    console.log("Sending...");
    console.log(JSON.stringify(patch, null, 2));
    client.getTwin(function(err, twin) {
      if (!err) {
        twin.properties.reported.update(patch, function(err) {
          if (err) callback(err);
        });
      } else {
        if (err) callback(err);
      }
    });
  }

  function sleep(milliseconds, callback) {
    console.log("Simulate a delay (milleseconds): " + milliseconds);
    setTimeout(function () {
      callback(null);
    }, milliseconds);
  }
}
Add the following code to send telemetry data to the solution. The client app adds properties to the message to identify the message schema:
function sendTelemetry(data, schema) {
  if (deviceOnline) {
    var d = new Date();
    var payload = JSON.stringify(data);
    var message = new Message(payload);
    message.properties.add('iothub-creation-time-utc', d.toISOString());
    message.properties.add('iothub-message-schema', schema);

    console.log('Sending device message data:\n' + payload);
    client.sendEvent(message, printErrorFor('send event'));
  } else {
    console.log('Offline, not sending telemetry');
  }
}
Add the following code to create a client instance:
var client = Client.fromConnectionString(connectionString, Protocol);Add the following code to:
Open the connection.
Set up a handler for desired properties.
Send reported properties.
Register handlers for the direct methods. The sample uses a separate handler for the firmware update direct method.
Start sending telemetry.
client.open(function (err) {
if (err) {
  printErrorFor('open')(err);
} else {
  // Create device Twin
  client.getTwin(function (err, twin) {
    if (err) {
      console.error('Could not get device twin');
    } else {
      console.log('Device twin created');

      twin.on('properties.desired', function (delta) {
        // Handle desired properties set by solution
        console.log('Received new desired properties:');
        console.log(JSON.stringify(delta));
      });

      // Send reported properties
      twin.properties.reported.update(reportedProperties, function (err) {
        if (err) throw err;
        console.log('Twin state reported');
      });

      // Register handlers for all the method names we are interested in.
      // Consider separate handlers for each method.
      client.onDeviceMethod('Reboot', onDirectMethod);
      client.onDeviceMethod('FirmwareUpdate', onFirmwareUpdate);
      client.onDeviceMethod('EmergencyValveRelease', onDirectMethod);
      client.onDeviceMethod('IncreasePressure', onDirectMethod);
    }
  });

  // Start sending telemetry
  var sendDeviceTelemetry = setInterval(function () {
    temperature += generateRandomIncrement();
    pressure += generateRandomIncrement();
    humidity += generateRandomIncrement();
    var data = {
      'temperature': temperature,
      'temperature_unit': temperatureUnit,
      'humidity': humidity,
      'humidity_unit': humidityUnit,
      'pressure': pressure,
      'pressure_unit': pressureUnit
    };
    sendTelemetry(data, schema)
  }, 5000);

  client.on('error', function (err) {
    printErrorFor('client')(err);
    if (sendTemperatureInterval) clearInterval(sendTemperatureInterval);
    if (sendHumidityInterval) clearInterval(sendHumidityInterval);
    if (sendPressureInterval) clearInterval(sendPressureInterval);
    client.close(printErrorFor('client.close'));
  });
}
});
Save the changes to the remote_monitoring.js file.
To launch the sample application, run the following command at your command prompt on the Raspberry Pi:
node remote_monitoring.js
View device telemetry
You can view the telemetry sent from your device on the Device Explorer page in the solution.
Select the device you provisioned in the list of devices on the Device Explorer page. A panel displays information about your device including a plot of the device telemetry:
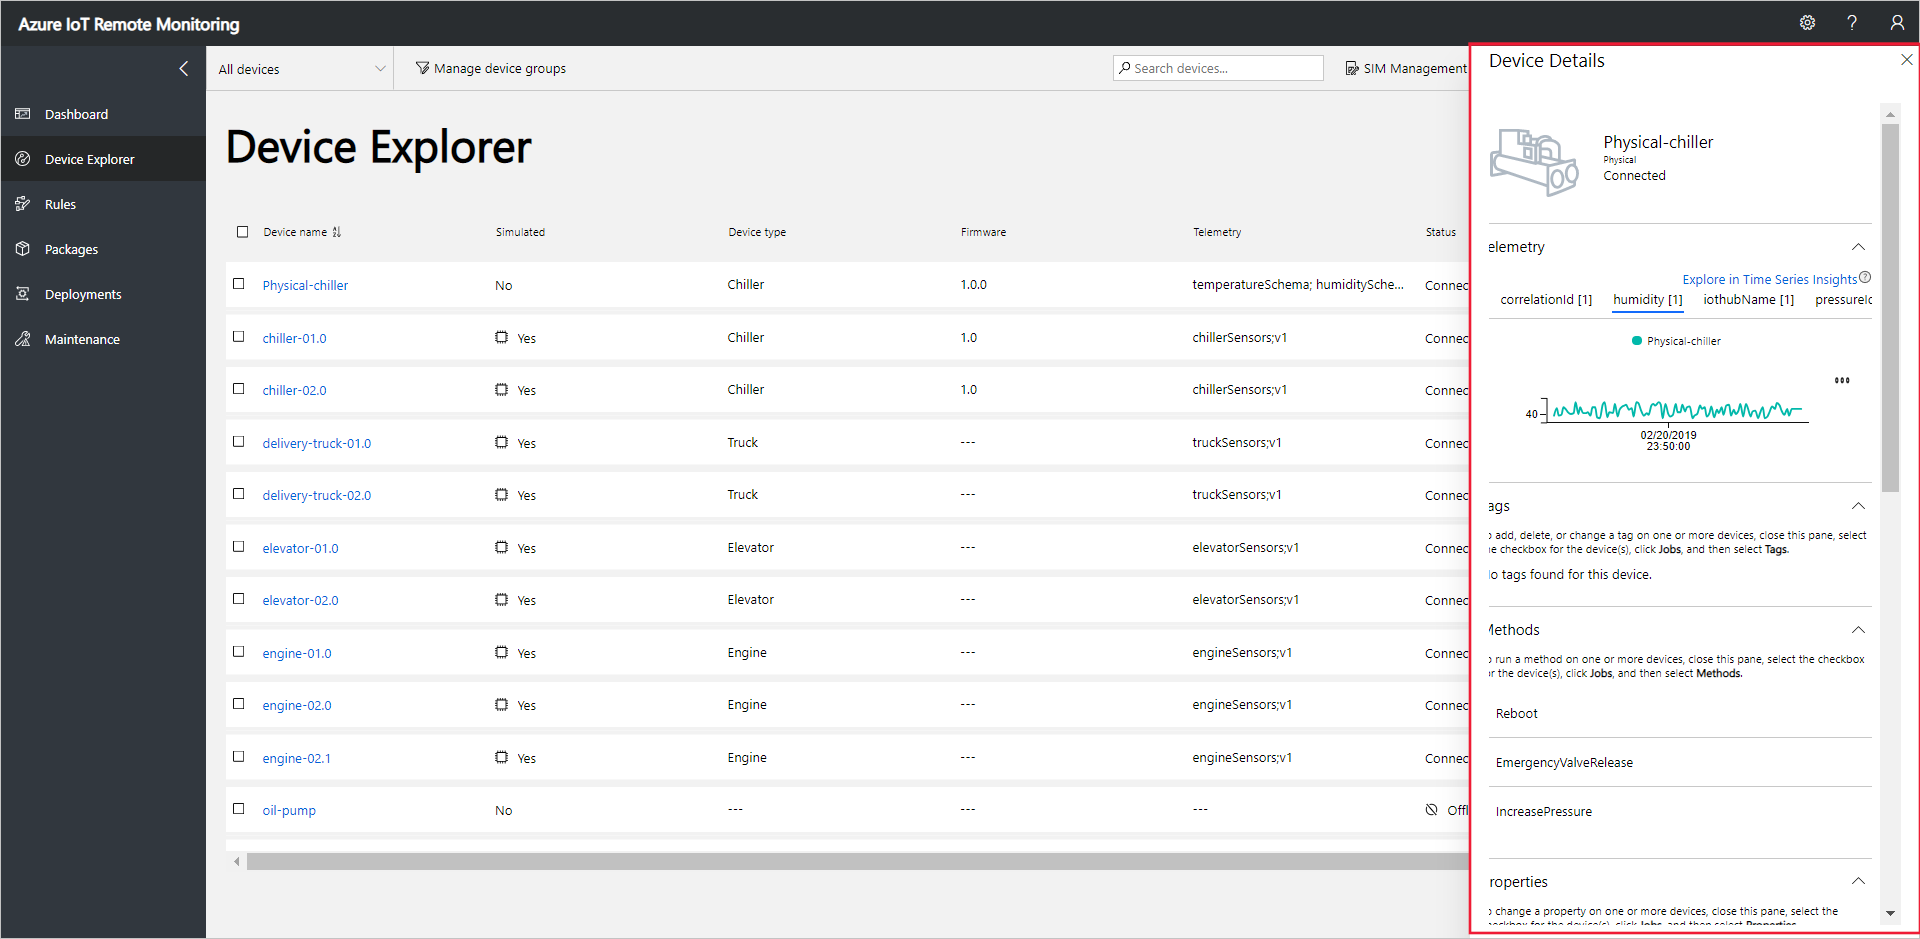
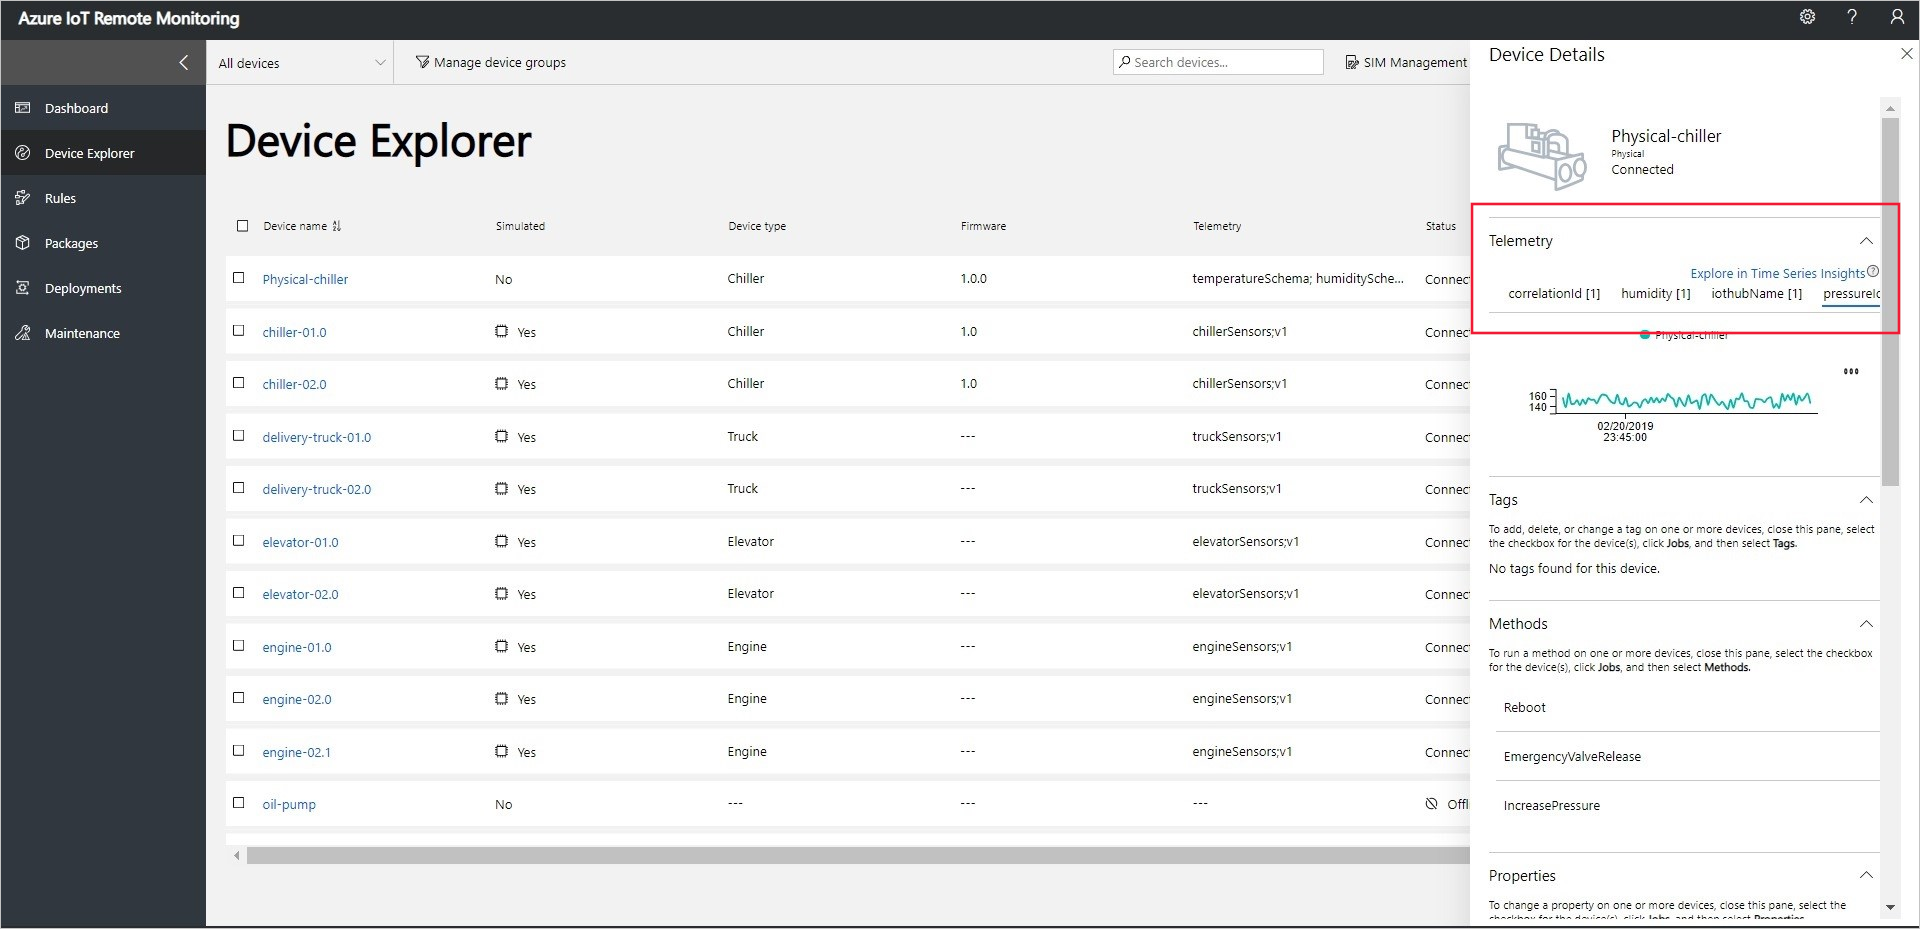
Choose Pressure to change the telemetry display:
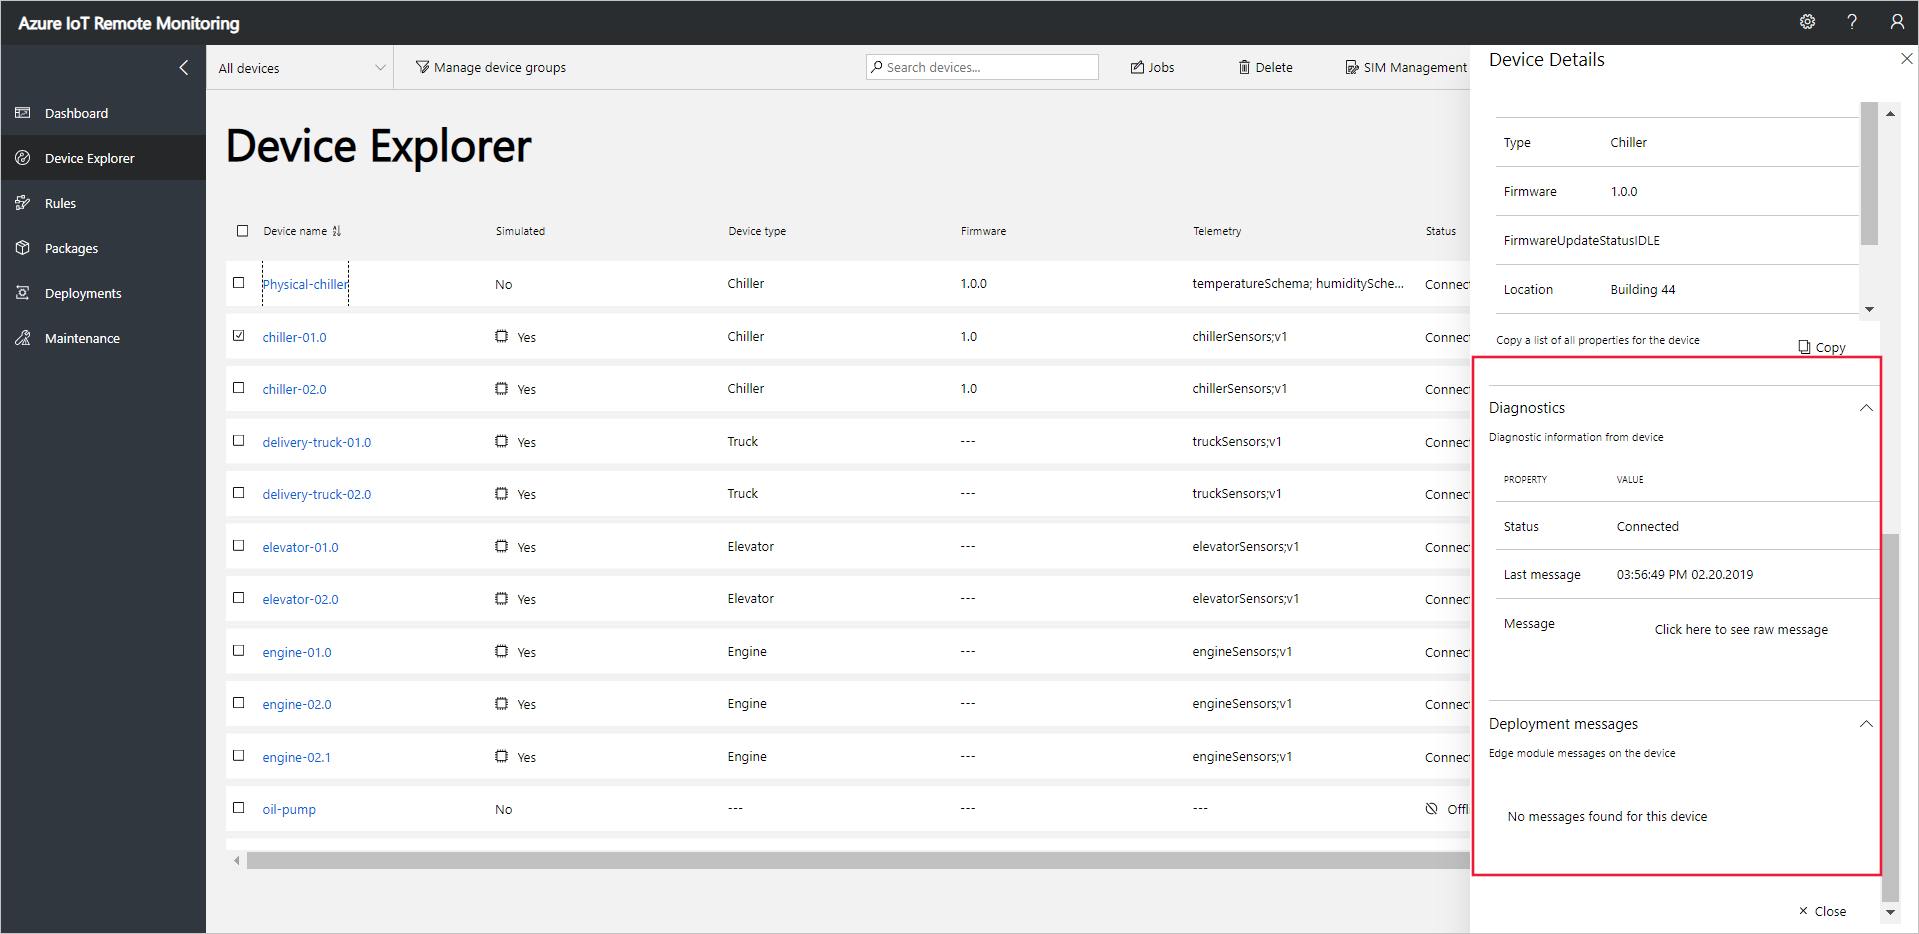
To view diagnostic information about your device, scroll down to Diagnostics:
Act on your device
To invoke methods on your devices, use the Device Explorer page in the Remote Monitoring solution. For example, in the Remote Monitoring solution Chiller devices implement a Reboot method.
Choose Devices to navigate to the Device Explorer page in the solution.
Select the device you provisioned in the list of devices on the Device Explorer page:
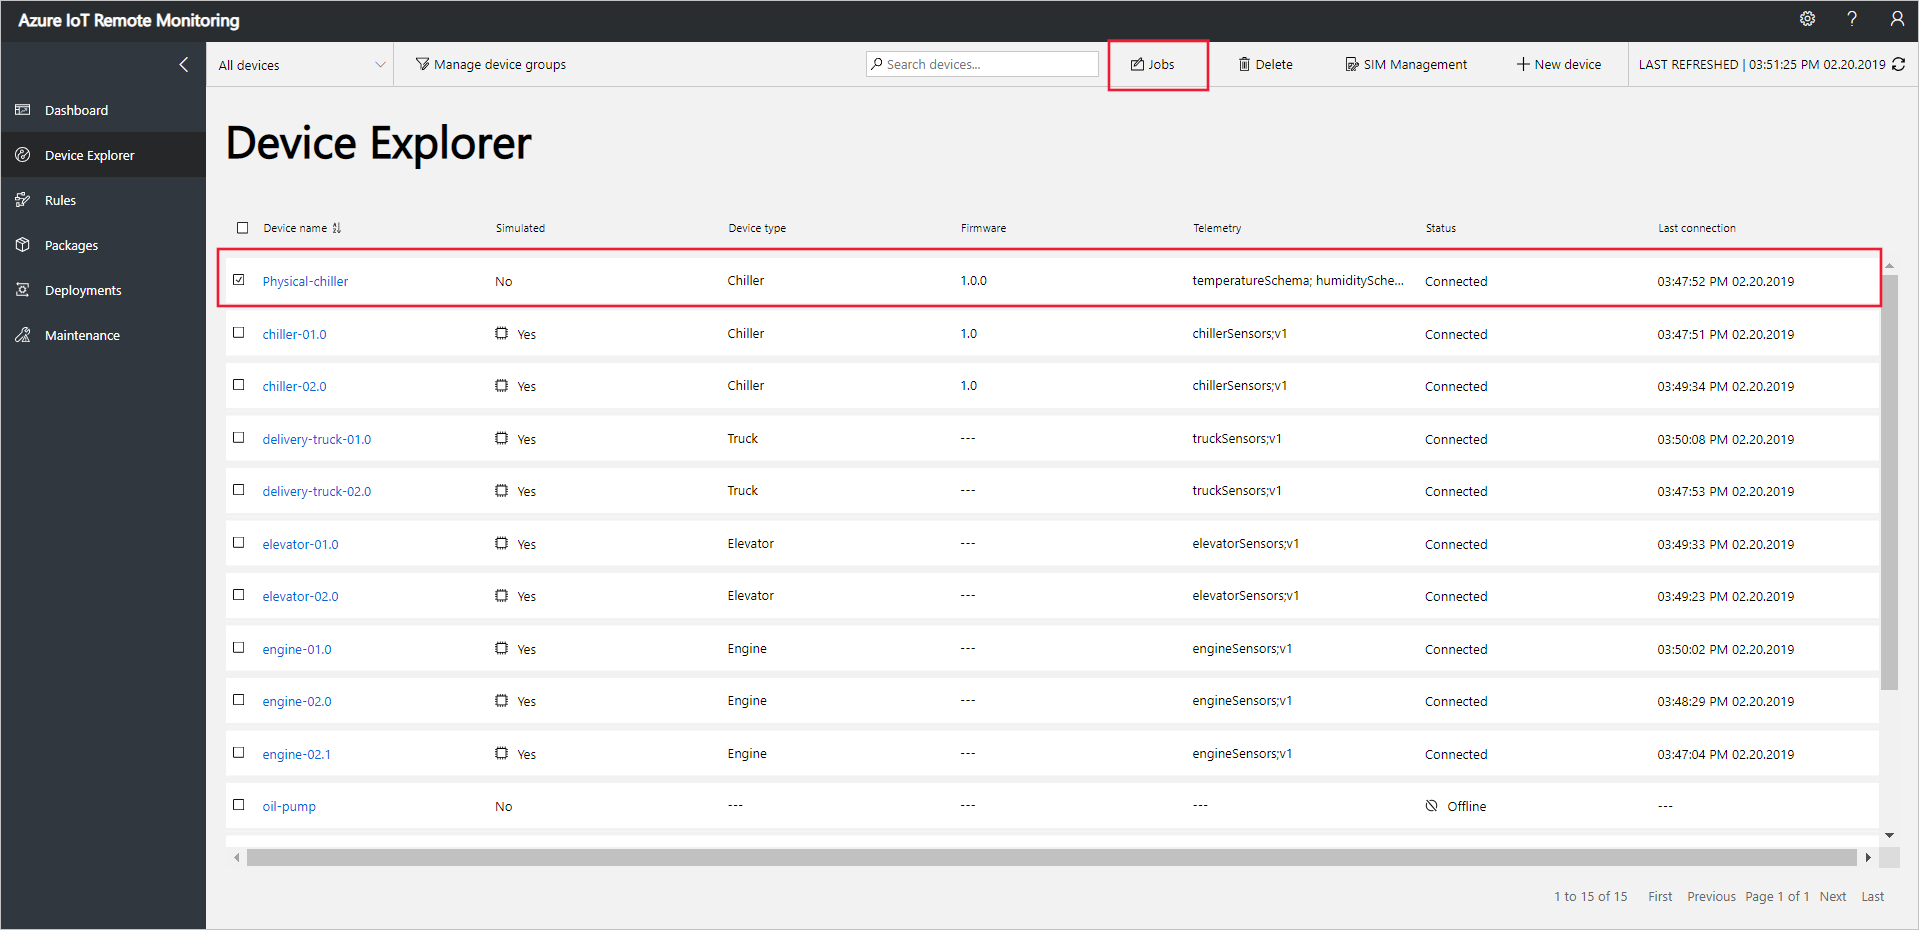
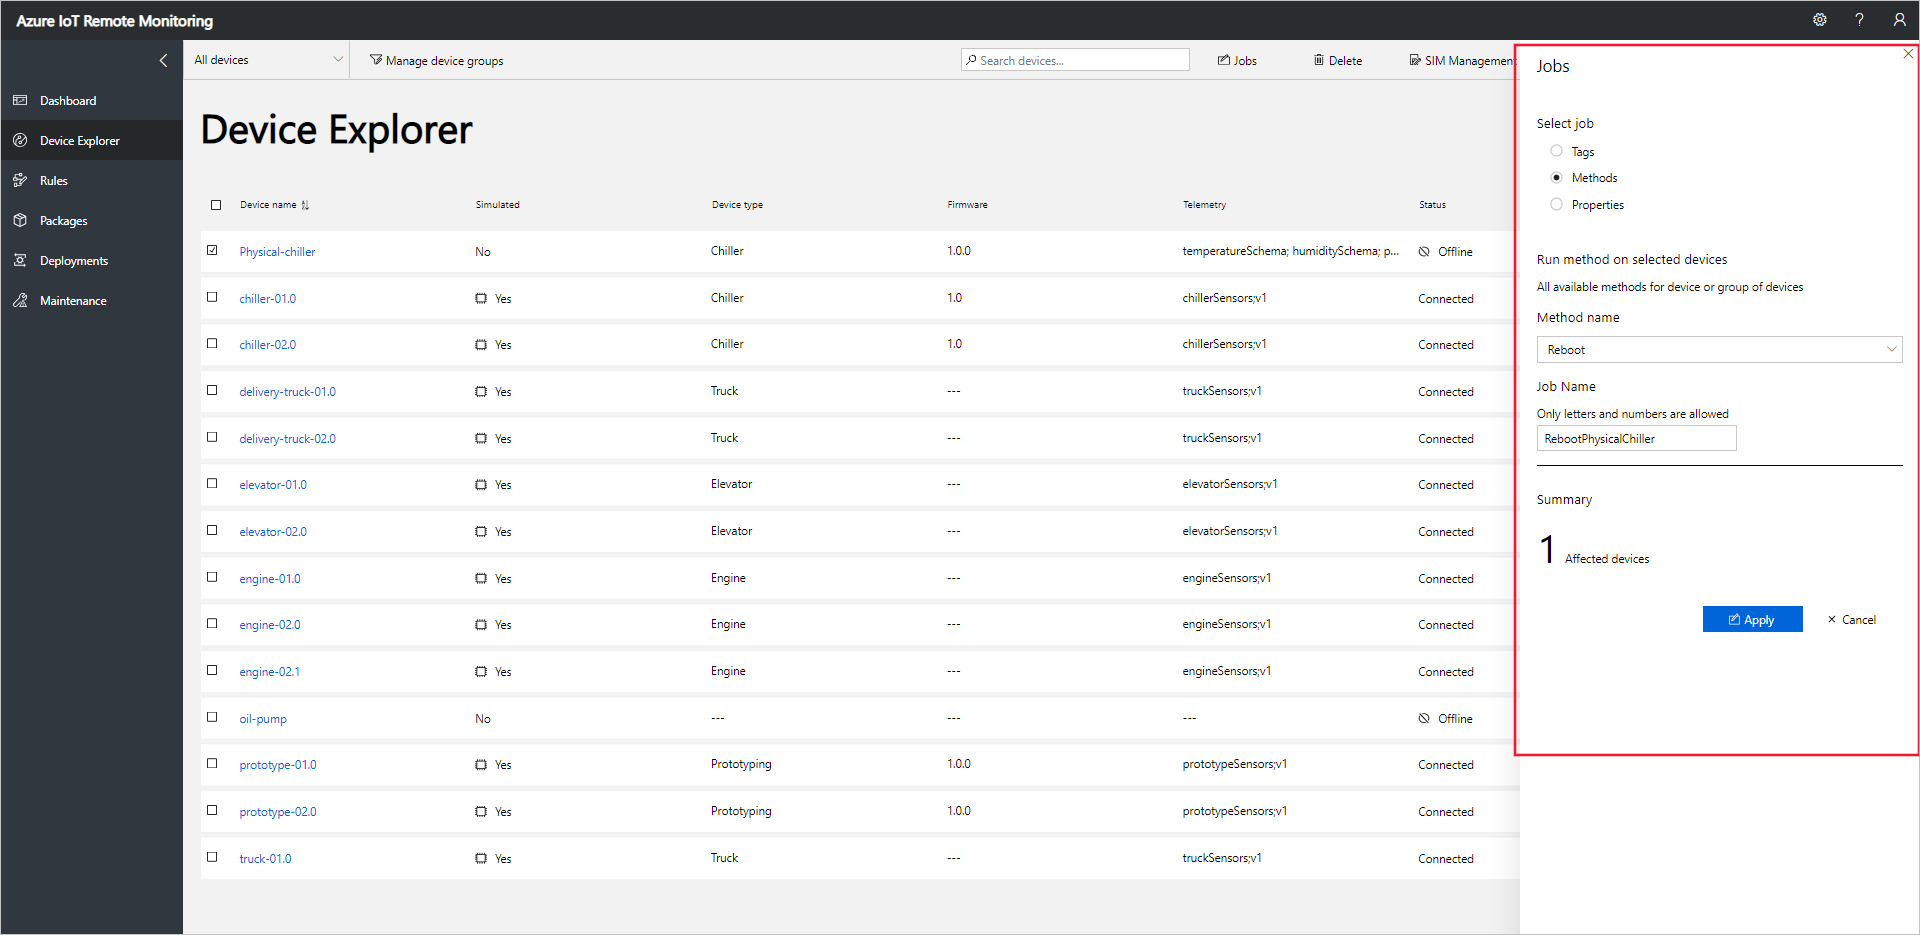
To display a list of the methods you can call on your device, choose Jobs, then Methods. To schedule a job to run on multiple devices, you can select multiple devices in the list. The Jobs panel shows the types of method common to all the devices you selected.
Choose Reboot, set the job name to RebootPhysicalChiller and then choose Apply:
A sequence of messages displays in the console running your device code while the simulated device handles the method.
Note
To track the status of the job in the solution, choose View Job Status.
Next steps
The article Customize the Remote Monitoring solution accelerator describes some ways to customize the solution accelerator.