Catatan
Akses ke halaman ini memerlukan otorisasi. Anda dapat mencoba masuk atau mengubah direktori.
Akses ke halaman ini memerlukan otorisasi. Anda dapat mencoba mengubah direktori.
Berlaku untuk:✅ Fabric Rekayasa Data dan Sains Data
Pelajari cara mengirimkan pekerjaan batch Spark menggunakan Livy API untuk Fabric Data Engineering. Livy API saat ini tidak mendukung Azure Service Principal (SPN).
Prasyarat
Klien remote seperti Visual Studio Code dengan Jupyter Notebook, PySpark, dan Pustaka Autentikasi Microsoft (MSAL) untuk Python.
Token aplikasi Microsoft Entra diperlukan untuk mengakses Fabric Rest API. Mendaftarkan sebuah aplikasi dengan platform identitas Microsoft.
Sebagian data di lakehouse Anda, contoh ini menggunakan
Komisi Taksi & Limousine NYC green_tripdata_2022_08 sebuah file parquet yang dimuat ke lakehouse.
Livy API mendefinisikan titik akhir terpadu untuk operasi. Ganti placeholder {Entra_TenantID}, {Entra_ClientID}, {Fabric_WorkspaceID}, dan {Fabric_LakehouseID} dengan nilai yang tepat saat Anda mengikuti contoh dalam artikel ini.
Mengonfigurasi Visual Studio Code untuk Batch API Livy Anda
Pilih Pengaturan Lakehouse di Lakehouse Fabric Anda.

Navigasikan ke bagian titik akhir Livy.
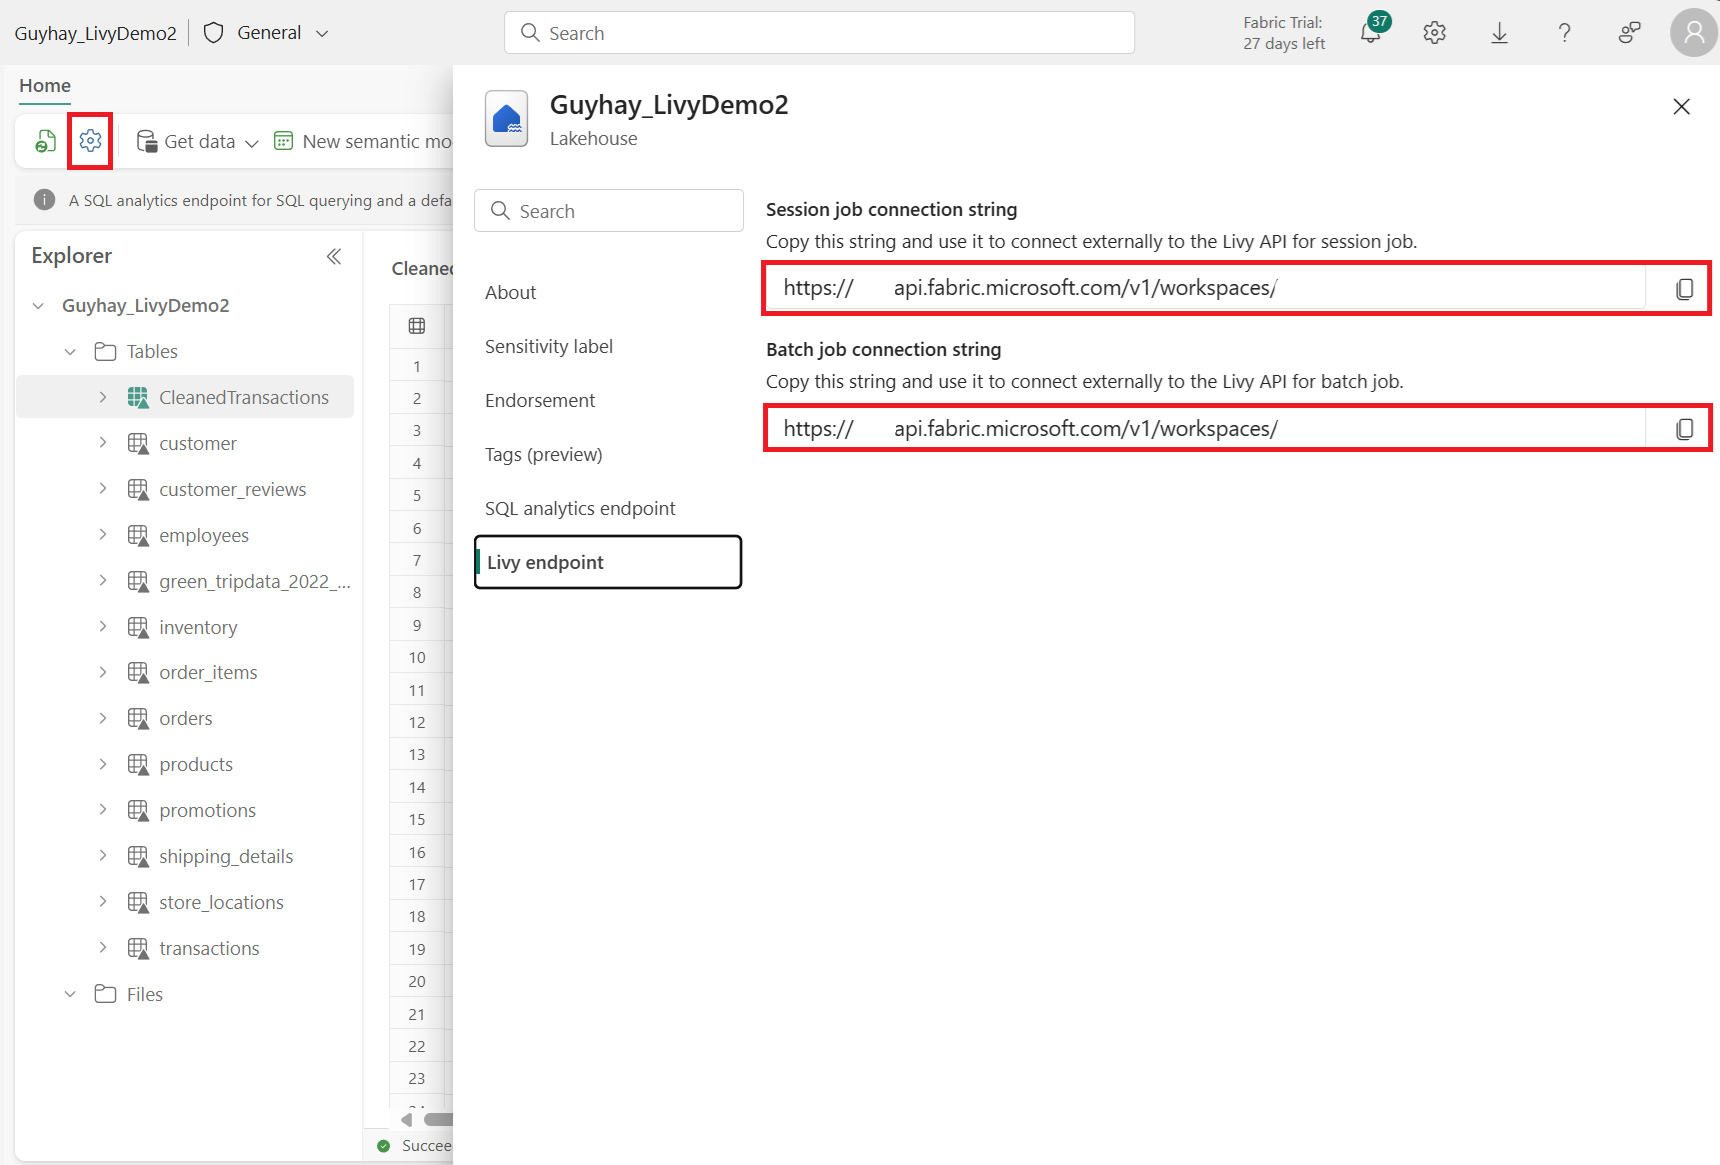
Salin string koneksi Batch job (kotak merah kedua dalam gambar) ke kode Anda.
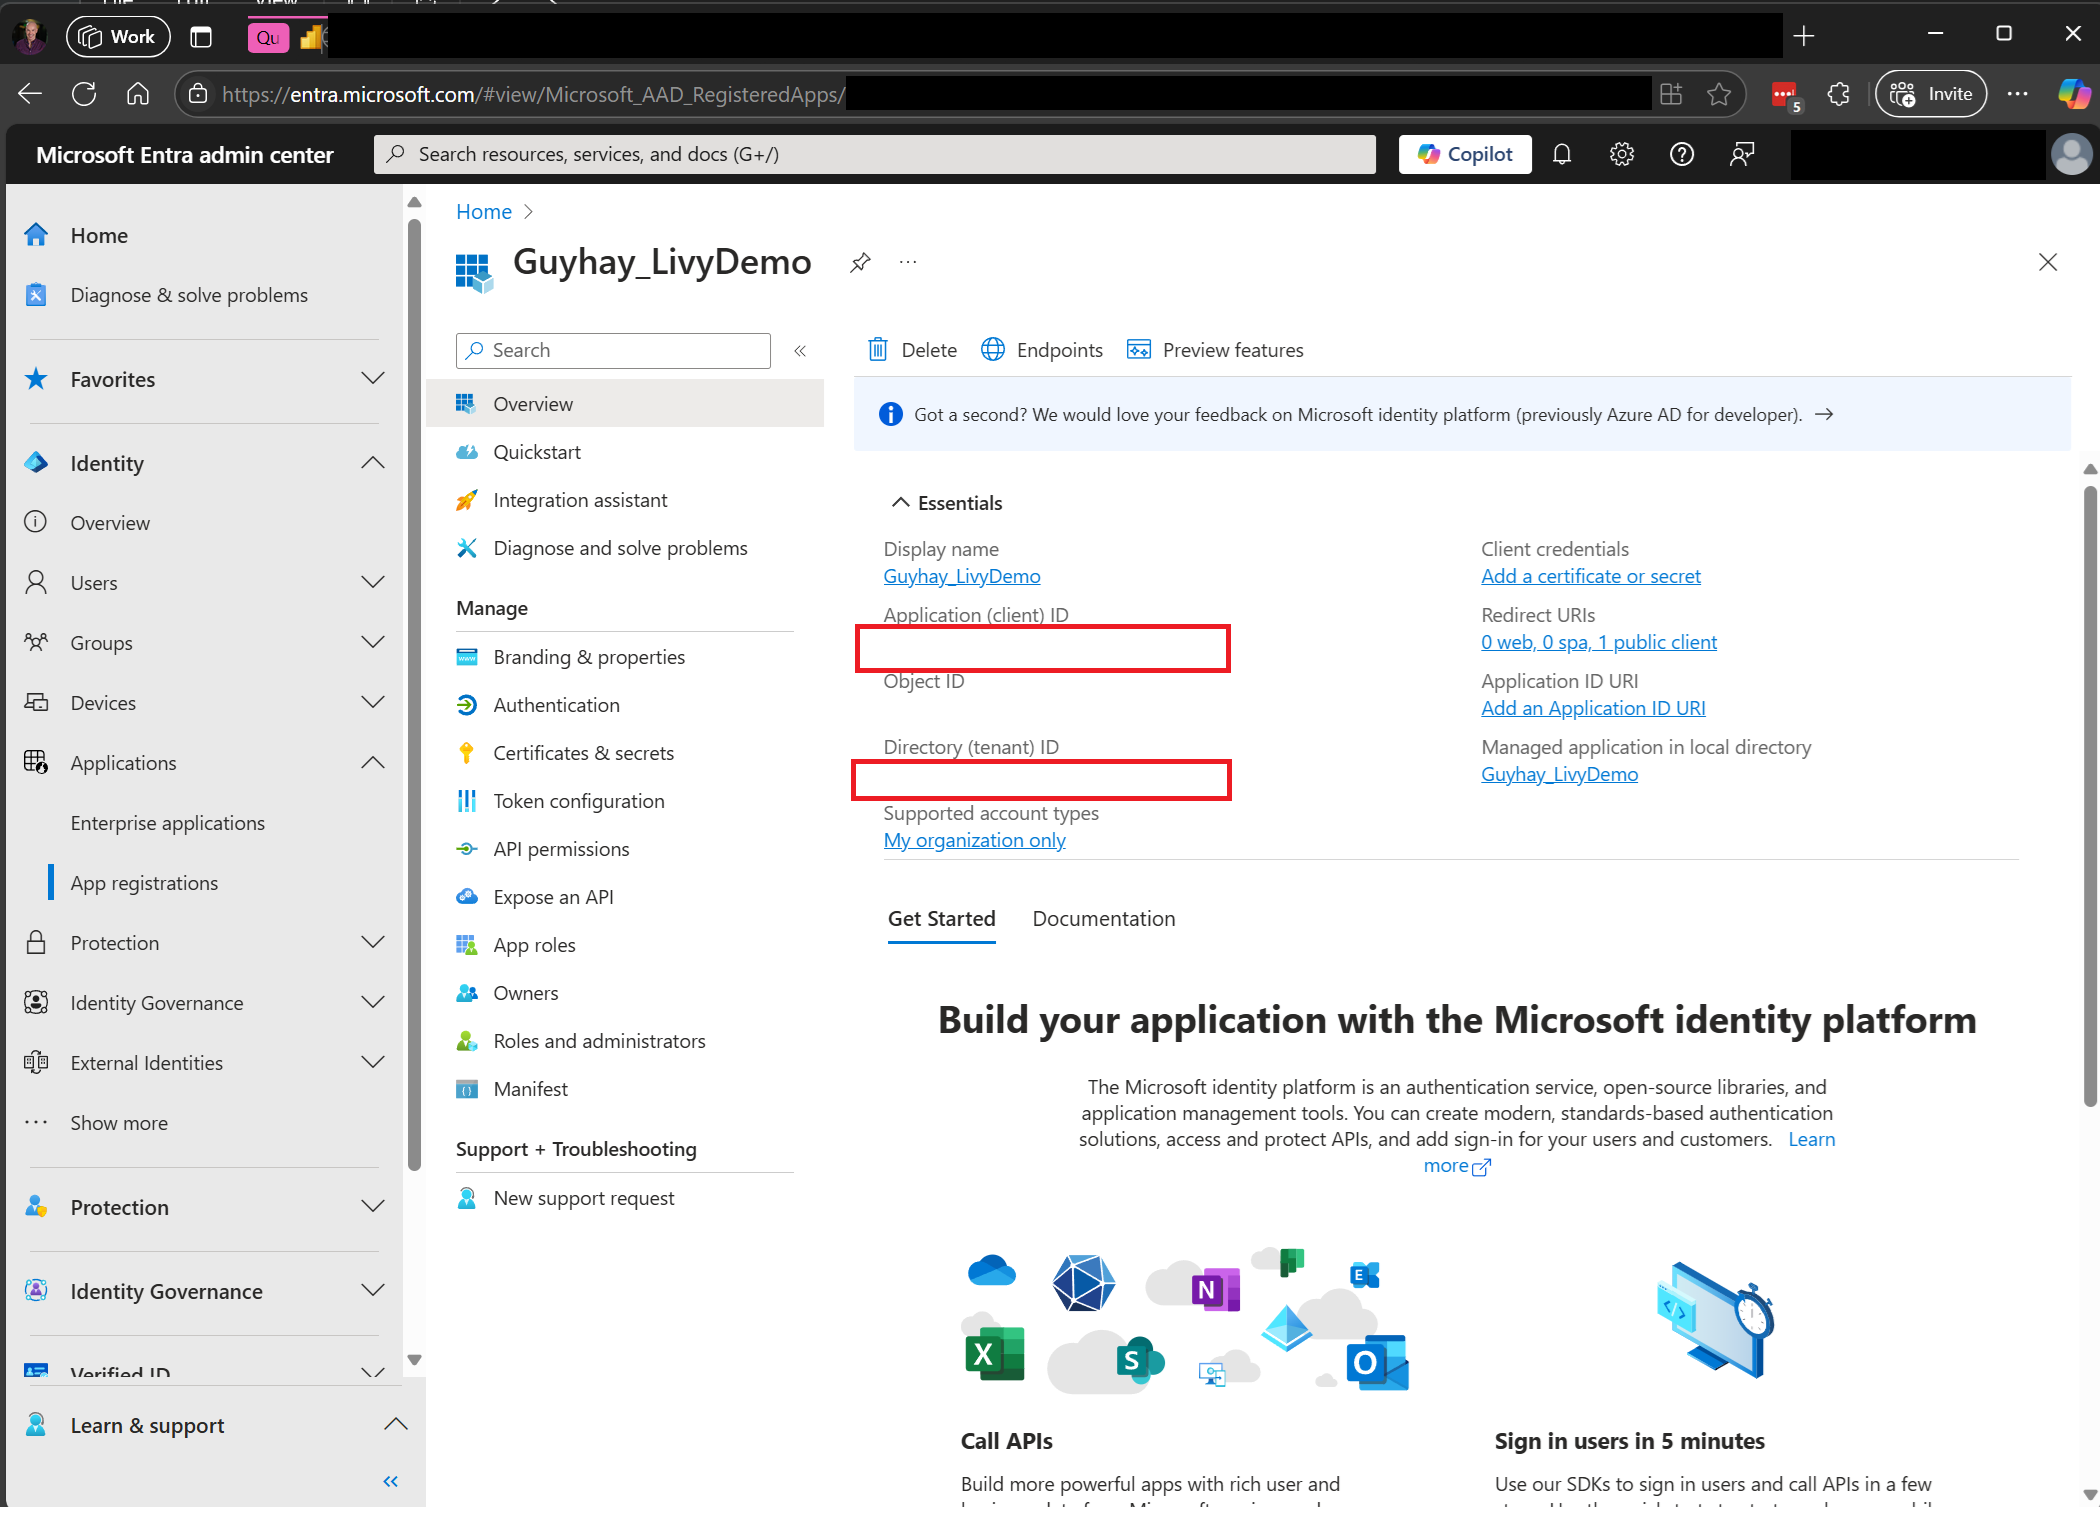
Navigasi ke pusat admin Microsoft Entra dan salin ID Aplikasi (klien) dan ID Direktori (penyewa) ke kode Anda.
Buat kode Spark Batch dan unggah ke Lakehouse Anda
Buat buku catatan
.ipynbdi Visual Studio Code dan sisipkan kode berikutimport sys import os from pyspark.sql import SparkSession from pyspark.conf import SparkConf from pyspark.sql.functions import col if __name__ == "__main__": #Spark session builder spark_session = (SparkSession .builder .appName("batch_demo") .getOrCreate()) spark_context = spark_session.sparkContext spark_context.setLogLevel("DEBUG") tableName = spark_context.getConf().get("spark.targetTable") if tableName is not None: print("tableName: " + str(tableName)) else: print("tableName is None") df_valid_totalPrice = spark_session.sql("SELECT * FROM green_tripdata_2022 where total_amount > 0") df_valid_totalPrice_plus_year = df_valid_totalPrice.withColumn("transaction_year", col("lpep_pickup_datetime").substr(1, 4)) deltaTablePath = f"Tables/{tableName}CleanedTransactions" df_valid_totalPrice_plus_year.write.mode('overwrite').format('delta').save(deltaTablePath)Simpan file Python secara lokal. Payload kode Python ini berisi dua pernyataan Spark yang bekerja pada data di lakehouse dan perlu diunggah ke lakehouse Anda. Anda membutuhkan jalur ABFS (Azure Blob File System) dari payload untuk direferensikan dalam pekerjaan batch Livy API Anda di Visual Studio Code dan nama tabel lakehouse Anda dalam
SELECTpernyataan SQL.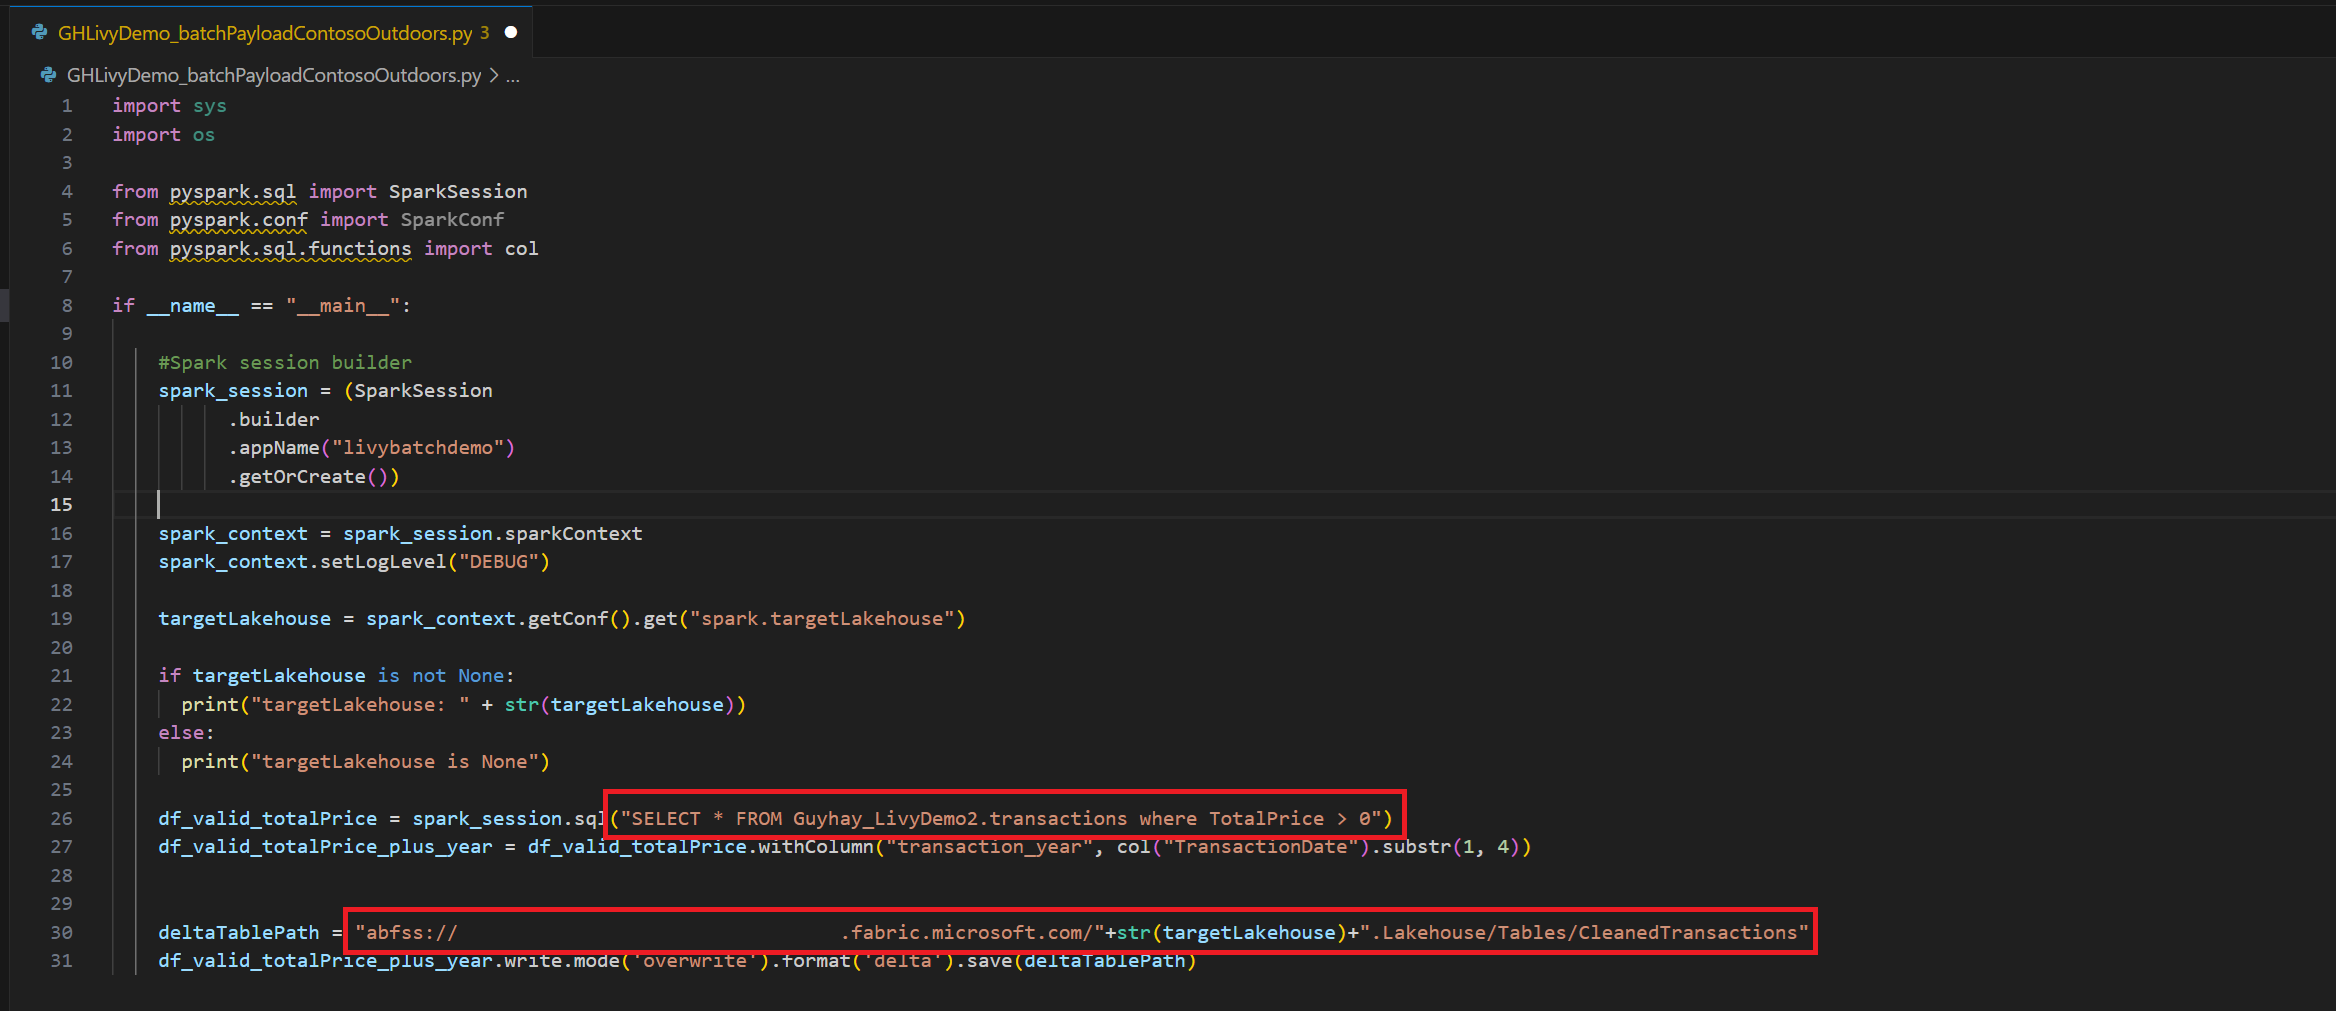
Unggah payload Python ke bagian file Lakehouse Anda. Di penjelajah Lakehouse, pilih File. Lalu pilih >Dapatkan data>Unggah file. Pilih file melalui pemilih file.
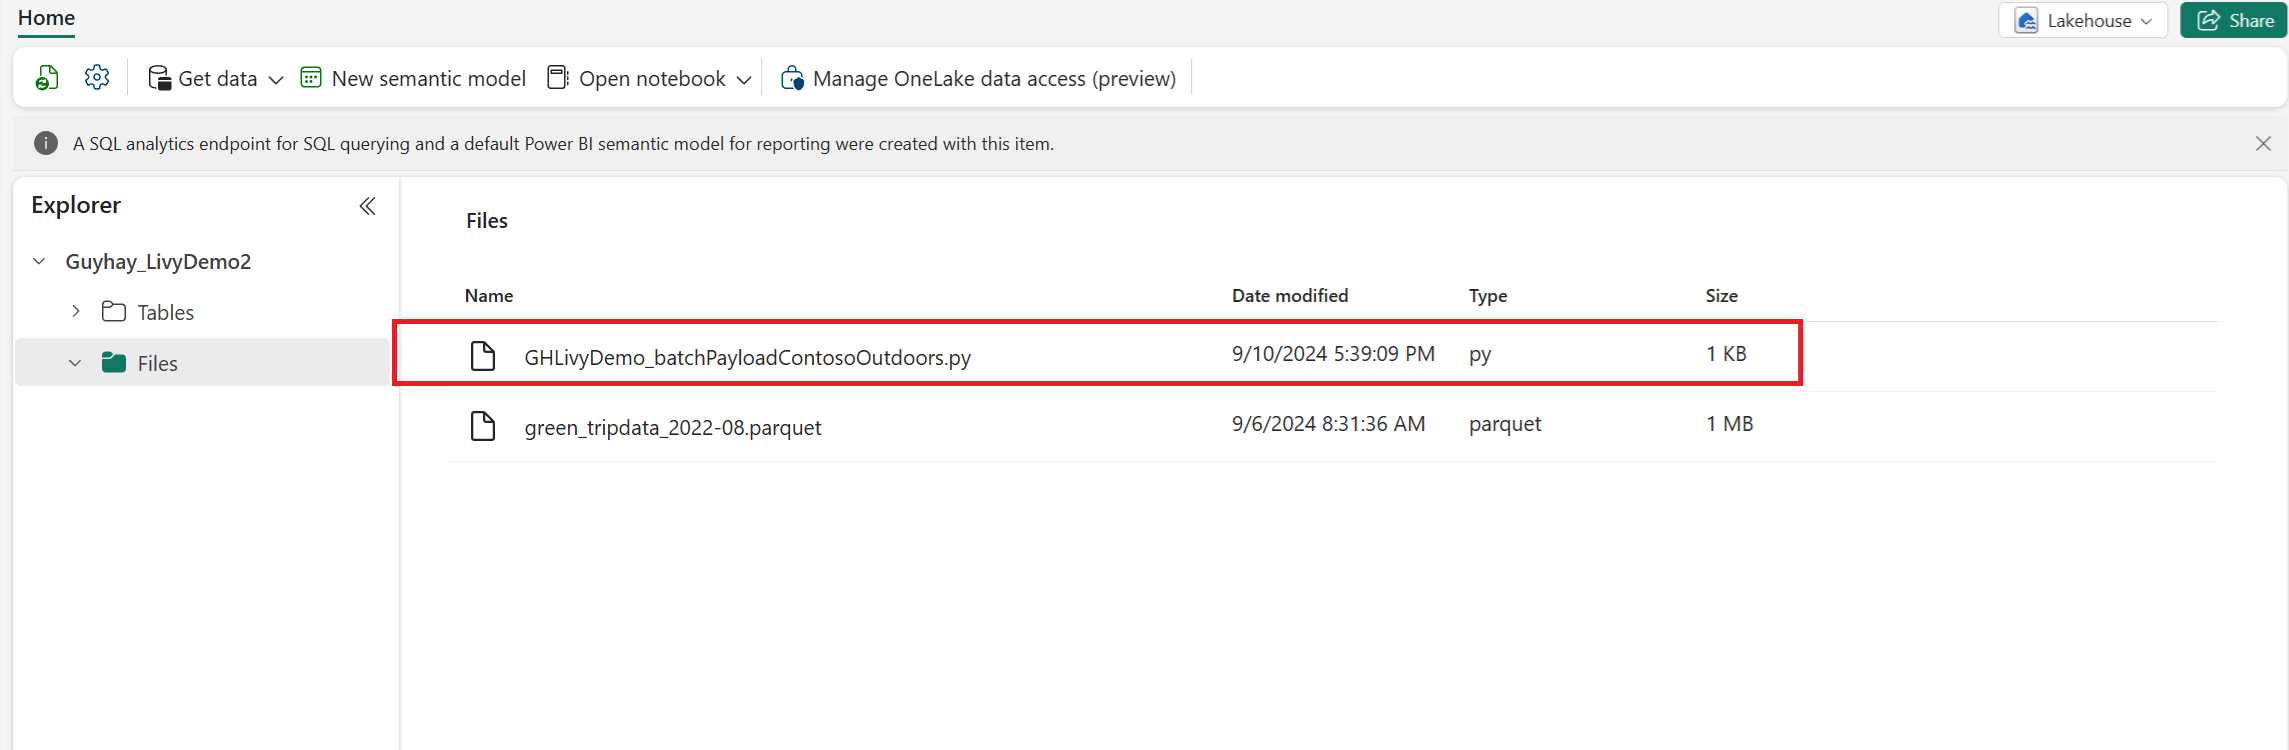
Setelah file berada di bagian Files di lakehouse Anda, pilih tiga titik (elips) di sebelah kanan nama file payload Anda dan pilih Properties.
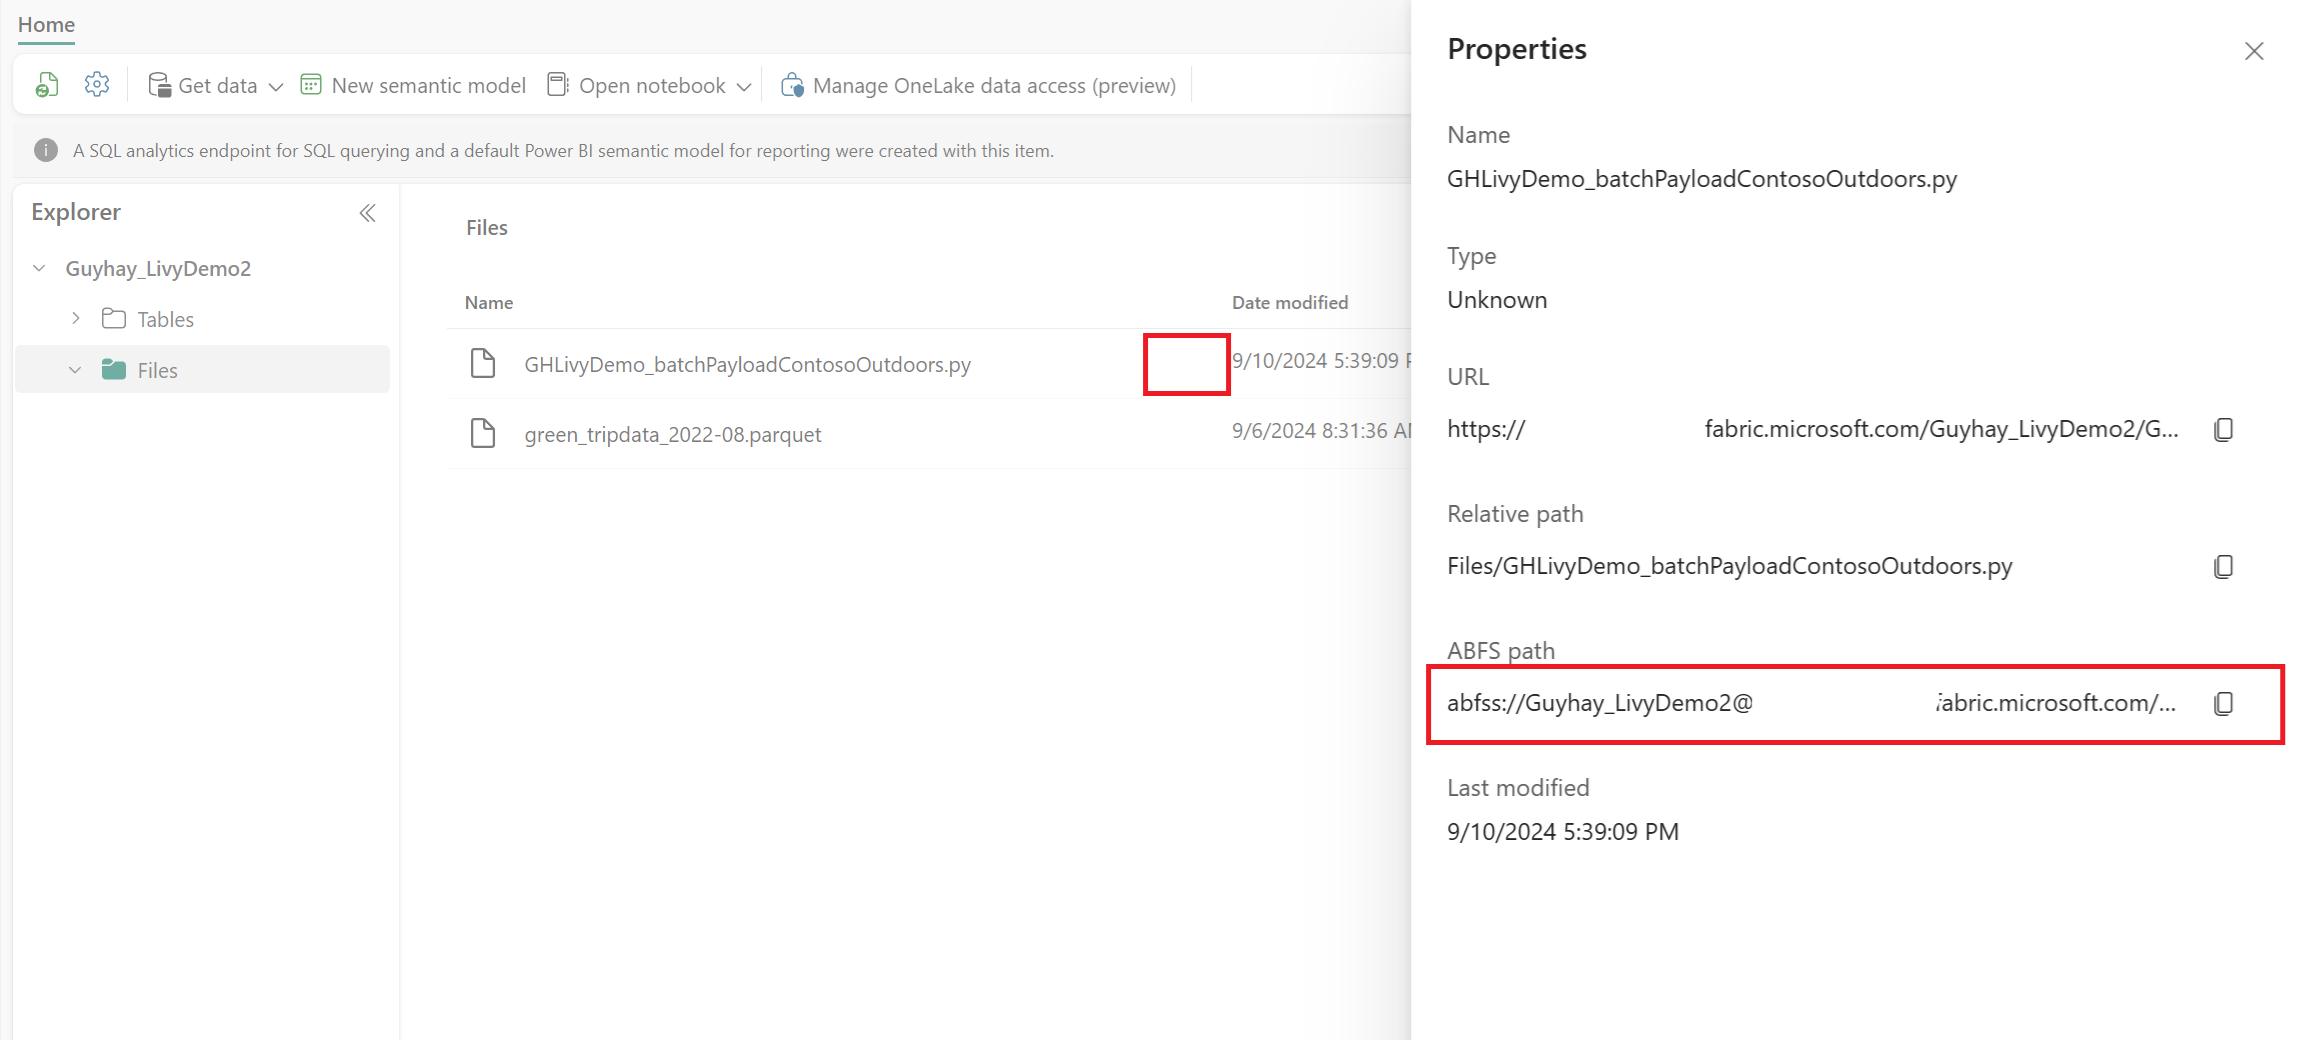
Salin jalur ABFS ini ke sel notebook Anda pada langkah 1.
Mengautentikasi sesi batch Livy API Spark menggunakan token pengguna Microsoft Entra atau token SPN Microsoft Entra
Mengautentikasi sesi batch Livy API Spark menggunakan token SPN Microsoft Entra
Buat buku catatan
.ipynbdi Visual Studio Code dan sisipkan kode berikut.import sys from msal import ConfidentialClientApplication # Configuration - Replace with your actual values tenant_id = "Entra_TenantID" # Microsoft Entra tenant ID client_id = "Entra_ClientID" # Service Principal Application ID # Certificate paths - Update these paths to your certificate files certificate_path = "PATH_TO_YOUR_CERTIFICATE.pem" # Public certificate file private_key_path = "PATH_TO_YOUR_PRIVATE_KEY.pem" # Private key file certificate_thumbprint = "YOUR_CERTIFICATE_THUMBPRINT" # Certificate thumbprint # OAuth settings audience = "https://analysis.windows.net/powerbi/api/.default" authority = f"https://login.windows.net/{tenant_id}" def get_access_token(client_id, audience, authority, certificate_path, private_key_path, certificate_thumbprint=None): """ Get an app-only access token for a Service Principal using OAuth 2.0 client credentials flow. This function uses certificate-based authentication which is more secure than client secrets. Args: client_id (str): The Service Principal's client ID audience (str): The audience for the token (resource scope) authority (str): The OAuth authority URL certificate_path (str): Path to the certificate file (.pem format) private_key_path (str): Path to the private key file (.pem format) certificate_thumbprint (str): Certificate thumbprint (optional but recommended) Returns: str: The access token for API authentication Raises: Exception: If token acquisition fails """ try: # Read the certificate from PEM file with open(certificate_path, "r", encoding="utf-8") as f: certificate_pem = f.read() # Read the private key from PEM file with open(private_key_path, "r", encoding="utf-8") as f: private_key_pem = f.read() # Create the confidential client application app = ConfidentialClientApplication( client_id=client_id, authority=authority, client_credential={ "private_key": private_key_pem, "thumbprint": certificate_thumbprint, "certificate": certificate_pem } ) # Acquire token using client credentials flow token_response = app.acquire_token_for_client(scopes=[audience]) if "access_token" in token_response: print("Successfully acquired access token") return token_response["access_token"] else: raise Exception(f"Failed to retrieve token: {token_response.get('error_description', 'Unknown error')}") except FileNotFoundError as e: print(f"Certificate file not found: {e}") sys.exit(1) except Exception as e: print(f"Error retrieving token: {e}", file=sys.stderr) sys.exit(1) # Get the access token token = get_access_token(client_id, audience, authority, certificate_path, private_key_path, certificate_thumbprint)Jalankan sel buku catatan, Anda akan melihat token Microsoft Entra dikembalikan.

Mengautentikasi sesi Livy API Spark menggunakan token pengguna Microsoft Entra
Buat buku catatan
.ipynbdi Visual Studio Code dan sisipkan kode berikut.from msal import PublicClientApplication import requests import time # Configuration - Replace with your actual values tenant_id = "Entra_TenantID" # Microsoft Entra tenant ID client_id = "Entra_ClientID" # Application ID (can be the same as above or different) # Required scopes for Livy API access scopes = [ "https://api.fabric.microsoft.com/Lakehouse.Execute.All", # Required — execute operations in lakehouses "https://api.fabric.microsoft.com/Lakehouse.Read.All", # Required — read lakehouse metadata "https://api.fabric.microsoft.com/Code.AccessFabric.All", # Required — general Fabric API access from Spark Runtime "https://api.fabric.microsoft.com/Code.AccessStorage.All", # Required — access OneLake and Azure storage from Spark Runtime ] # Optional scopes — add these only if your Spark jobs need access to the corresponding services: # "https://api.fabric.microsoft.com/Code.AccessAzureKeyvault.All" # Optional — access Azure Key Vault from Spark Runtime # "https://api.fabric.microsoft.com/Code.AccessAzureDataLake.All" # Optional — access Azure Data Lake Storage Gen1 from Spark Runtime # "https://api.fabric.microsoft.com/Code.AccessAzureDataExplorer.All" # Optional — access Azure Data Explorer from Spark Runtime # "https://api.fabric.microsoft.com/Code.AccessSQL.All" # Optional — access Azure SQL audience tokens from Spark Runtime def get_access_token(tenant_id, client_id, scopes): """ Get an access token using interactive authentication. This method will open a browser window for user authentication. Args: tenant_id (str): The Azure Active Directory tenant ID client_id (str): The application client ID scopes (list): List of required permission scopes Returns: str: The access token, or None if authentication fails """ app = PublicClientApplication( client_id, authority=f"https://login.microsoftonline.com/{tenant_id}" ) print("Opening browser for interactive authentication...") token_response = app.acquire_token_interactive(scopes=scopes) if "access_token" in token_response: print("Successfully authenticated") return token_response["access_token"] else: print(f"Authentication failed: {token_response.get('error_description', 'Unknown error')}") return None # Uncomment the lines below to use interactive authentication token = get_access_token(tenant_id, client_id, scopes) print("Access token acquired via interactive login")Jalankan sel buku catatan, popup akan muncul di browser Anda yang memungkinkan Anda memilih identitas untuk masuk.
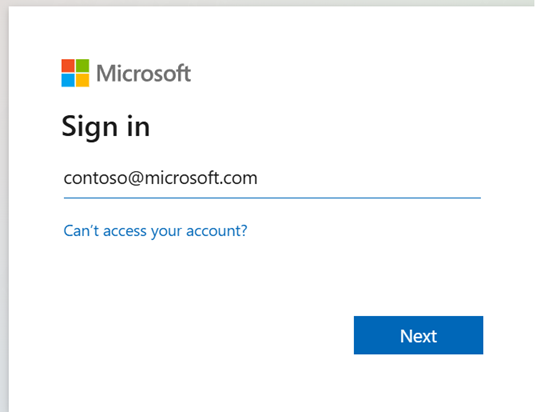
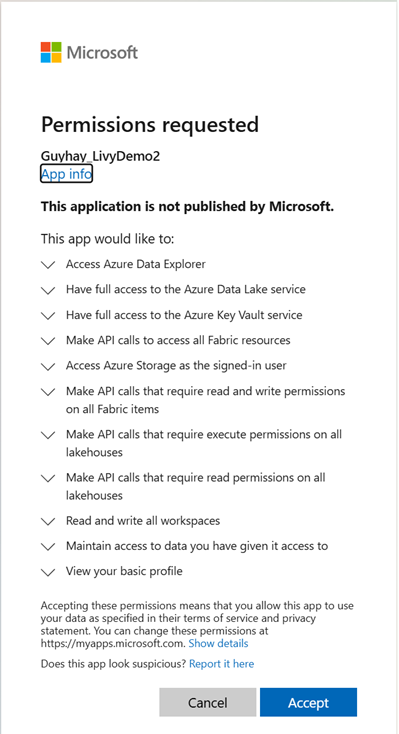
Setelah memilih identitas untuk masuk, Anda perlu menyetujui izin API pendaftaran aplikasi Microsoft Entra.
Tutup jendela browser setelah menyelesaikan autentikasi.

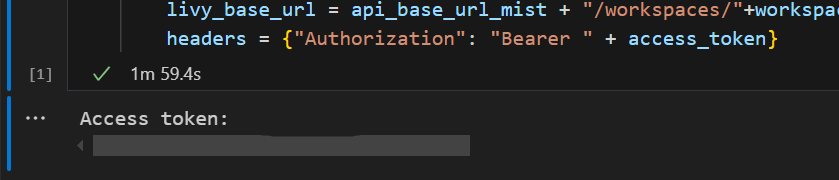
Dalam Visual Studio Code, Anda akan melihat token Microsoft Entra dikembalikan.
Memahami cakupan untuk "Code.*" pada Livy API
Saat tugas Spark Anda berjalan melalui Livy API, Code.* cakupan mengontrol layanan eksternal apa yang dapat diakses oleh Spark Runtime atas nama pengguna yang diautentikasi. Dua diperlukan; sisanya bersifat opsional tergantung pada beban kerja Anda.
Cakupan Kode yang Diperlukan.*
| Ruang lingkup | Deskripsi |
|---|---|
Code.AccessFabric.All |
Memungkinkan mendapatkan token akses ke Fabric. Diperlukan untuk semua operasi Livy API. |
Code.AccessStorage.All |
Memungkinkan mendapatkan token akses ke OneLake dan penyimpanan Azure. Diperlukan untuk membaca dan menulis data di lakehouse. |
Cakupan Kode Opsional.*
Tambahkan cakupan ini hanya jika pekerjaan Spark Anda perlu mengakses layanan Azure yang sesuai saat runtime.
| Ruang lingkup | Deskripsi | Kapan digunakan |
|---|---|---|
Code.AccessAzureKeyvault.All |
Memungkinkan mendapatkan token akses ke Azure Key Vault. | Kode Spark Anda mengambil rahasia, kunci, atau sertifikat dari Azure Key Vault. |
Code.AccessAzureDataLake.All |
Memungkinkan mendapatkan token akses ke Azure Data Lake Storage Gen1. | Kode Spark Anda membaca dari atau menulis ke akun Azure Data Lake Storage Gen1. |
Code.AccessAzureDataExplorer.All |
Memungkinkan mendapatkan token akses ke Azure Data Explorer (Kusto). | Kode Spark Anda mengkueri atau menyerap data ke/dari kluster Azure Data Explorer. |
Code.AccessSQL.All |
Memungkinkan mendapatkan token akses ke Azure SQL. | Kode Spark Anda perlu tersambung ke database Azure SQL. |
Nota
Cakupan Lakehouse.Execute.All dan Lakehouse.Read.All juga diperlukan, namun tidak termasuk dalam keluarga Code.*. Mereka memberikan izin untuk menjalankan operasi serta membaca metadata dari Fabric Lakehouse masing-masing.
Kirim Livy Batch dan memantau tugas batch.
Tambahkan sel buku catatan lain dan sisipkan kode ini.
# submit payload to existing batch session

import requests
import time
import json

api_base_url = "https://api.fabric.microsoft.com/v1"  # Base URL for Fabric APIs

# Fabric Resource IDs - Replace with your workspace and lakehouse IDs
workspace_id = "Fabric_WorkspaceID"
lakehouse_id = "Fabric_LakehouseID"

# Construct the Livy Batch API URL
# URL pattern: {base_url}/workspaces/{workspace_id}/lakehouses/{lakehouse_id}/livyApi/versions/{api_version}/batches
livy_base_url = f"{api_base_url}/workspaces/{workspace_id}/lakehouses/{lakehouse_id}/livyApi/versions/2023-12-01/batches"

# Set up authentication headers
headers = {"Authorization": f"Bearer {token}"}

print(f"Livy Batch API URL: {livy_base_url}")

new_table_name = "TABLE_NAME"  # Name for the new table

# Configure the batch job
print("Configuring batch job parameters...")

# Batch job configuration - Modify these values for your use case
payload_data = {
    # Job name - will appear in the Fabric UI
    "name": f"livy_batch_demo_{new_table_name}",

    # Path to your Python file in the lakehouse
    "file": "<ABFSS_PATH_TO_YOUR_PYTHON_FILE>",  # Replace with your Python file path

    # Optional: Spark configuration parameters
    "conf": {
        "spark.targetTable": new_table_name,  # Custom configuration for your application
    },
}

print("Batch Job Configuration:")
print(json.dumps(payload_data, indent=2))

try:
    # Submit the batch job
    print("\nSubmitting batch job...")
    post_batch = requests.post(livy_base_url, headers=headers, json=payload_data)

    if post_batch.status_code == 202:
        batch_info = post_batch.json()
        print("Livy batch job submitted successfully!")
        print(f"Batch Job Info: {json.dumps(batch_info, indent=2)}")

        # Extract batch ID for monitoring
        batch_id = batch_info['id']
        livy_batch_get_url = f"{livy_base_url}/{batch_id}"

        print(f"\nBatch Job ID: {batch_id}")
        print(f"Monitoring URL: {livy_batch_get_url}")

    else:
        print(f"Failed to submit batch job. Status code: {post_batch.status_code}")
        print(f"Response: {post_batch.text}")

except requests.exceptions.RequestException as e:
    print(f"Network error occurred: {e}")
except json.JSONDecodeError as e:
    print(f"JSON decode error: {e}")
    print(f"Response text: {post_batch.text}")
except Exception as e:
    print(f"Unexpected error: {e}")
Jalankan sel buku catatan, Anda akan melihat beberapa baris yang dicetak ketika tugas Livy Batch dibuat dan dijalankan.

Untuk melihat perubahan, kembali ke rumah danau Anda.
Integrasi dengan lingkungan Fabric
Secara bawaan, sesi Livy API ini berjalan dengan kumpulan starter bawaan untuk ruang kerja. Sebagai alternatif, Anda dapat menggunakan Fabric Environments Create, konfigurasi, dan menggunakan lingkungan di Fabric untuk menyesuaikan pool Spark yang digunakan sesi API Livy untuk pekerjaan Spark ini. Untuk menggunakan lingkungan Fabric Anda, perbarui sel buku catatan sebelumnya dengan perubahan satu baris ini.
payload_data = {
    "name":"livybatchdemo_with"+ newlakehouseName,
    "file":"abfss://YourABFSPathToYourPayload.py",
    "conf": {
        "spark.targetLakehouse": "Fabric_LakehouseID",
        "spark.fabric.environmentDetails" : "{\"id\" : \""EnvironmentID"\"}"  # remove this line to use starter pools instead of an environment, replace "EnvironmentID" with your environment ID
        }
    }
Menampilkan pekerjaan Anda di hub Pemantauan
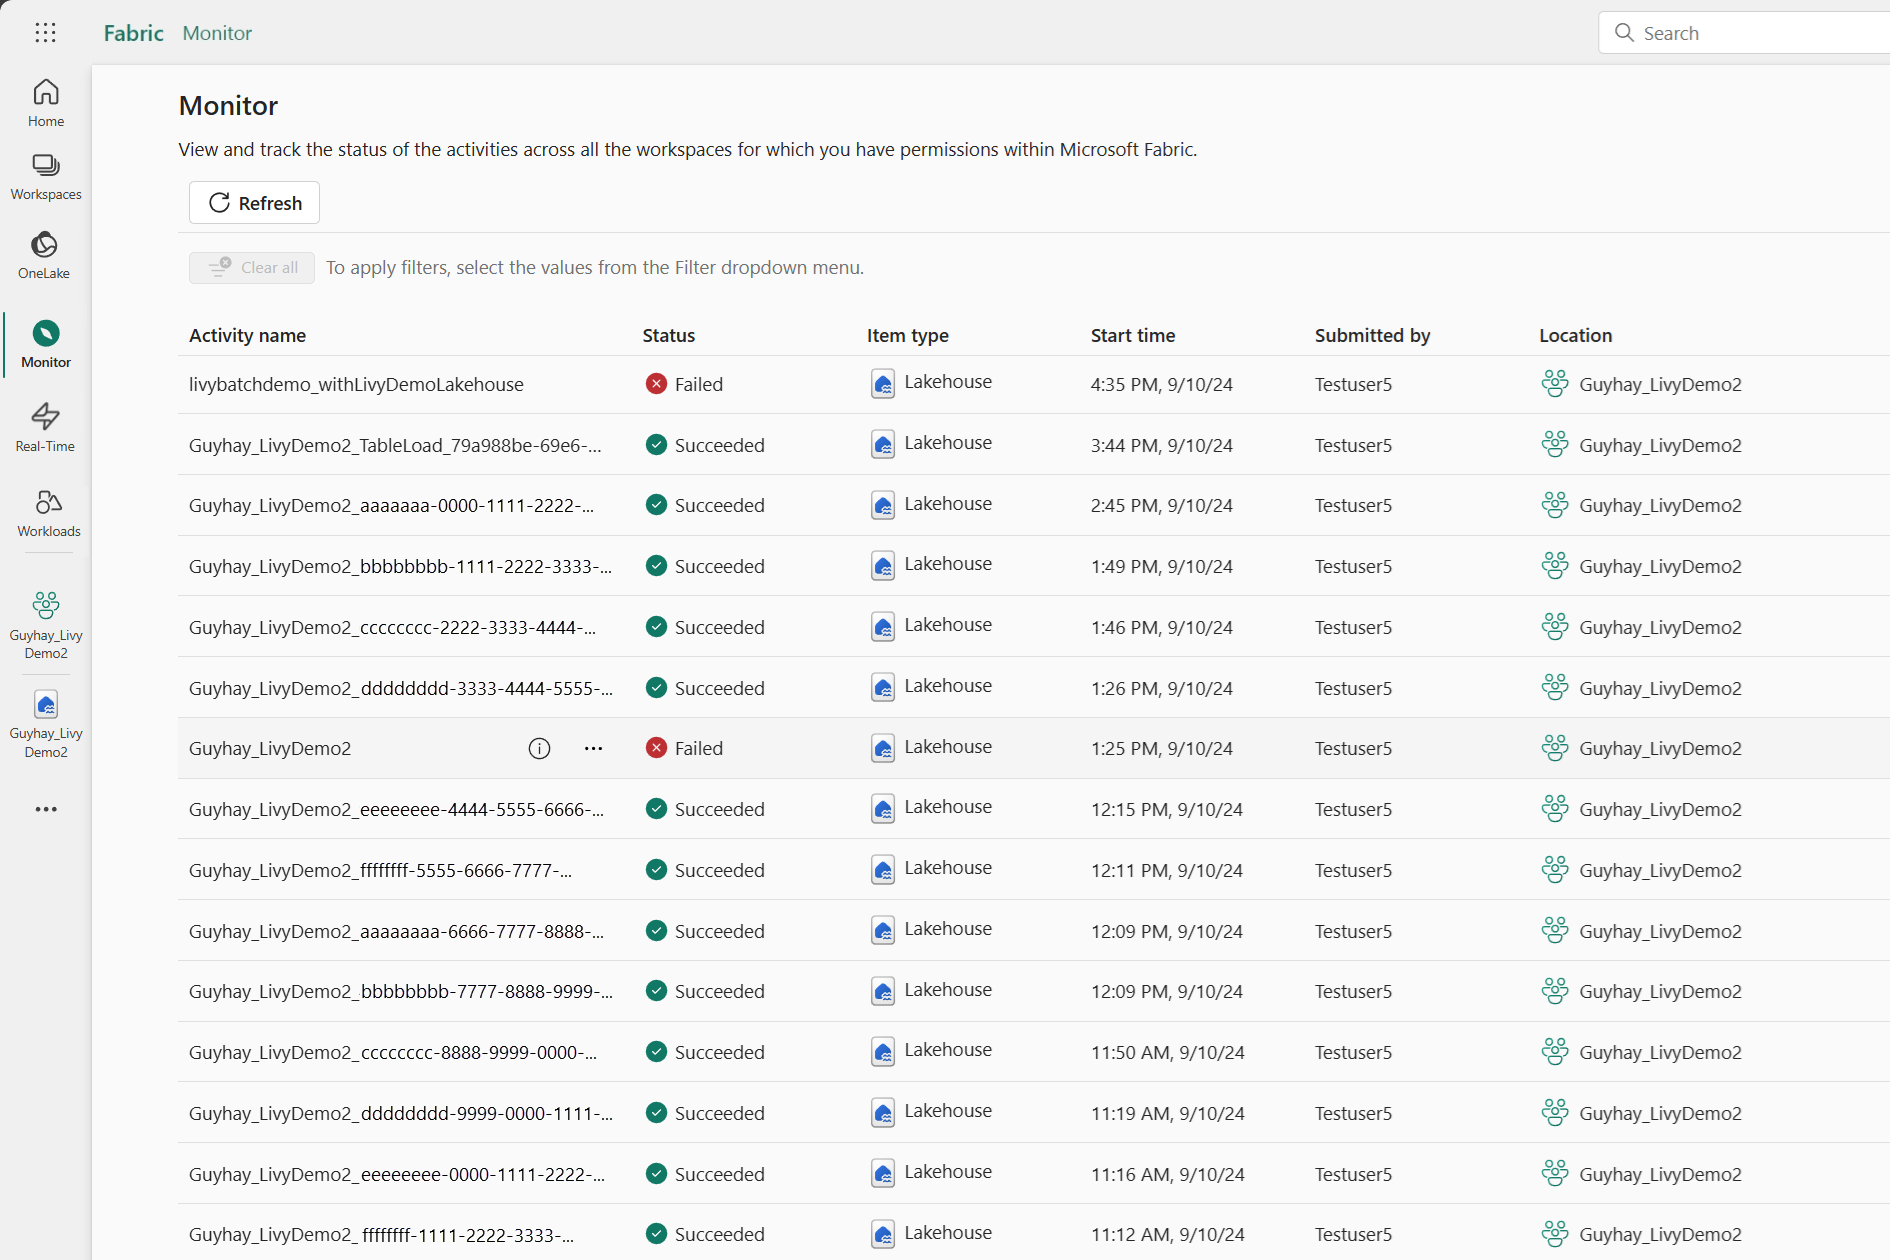
Anda dapat mengakses hub Pemantauan untuk melihat berbagai aktivitas Apache Spark dengan memilih Pantau di tautan navigasi sisi kiri.
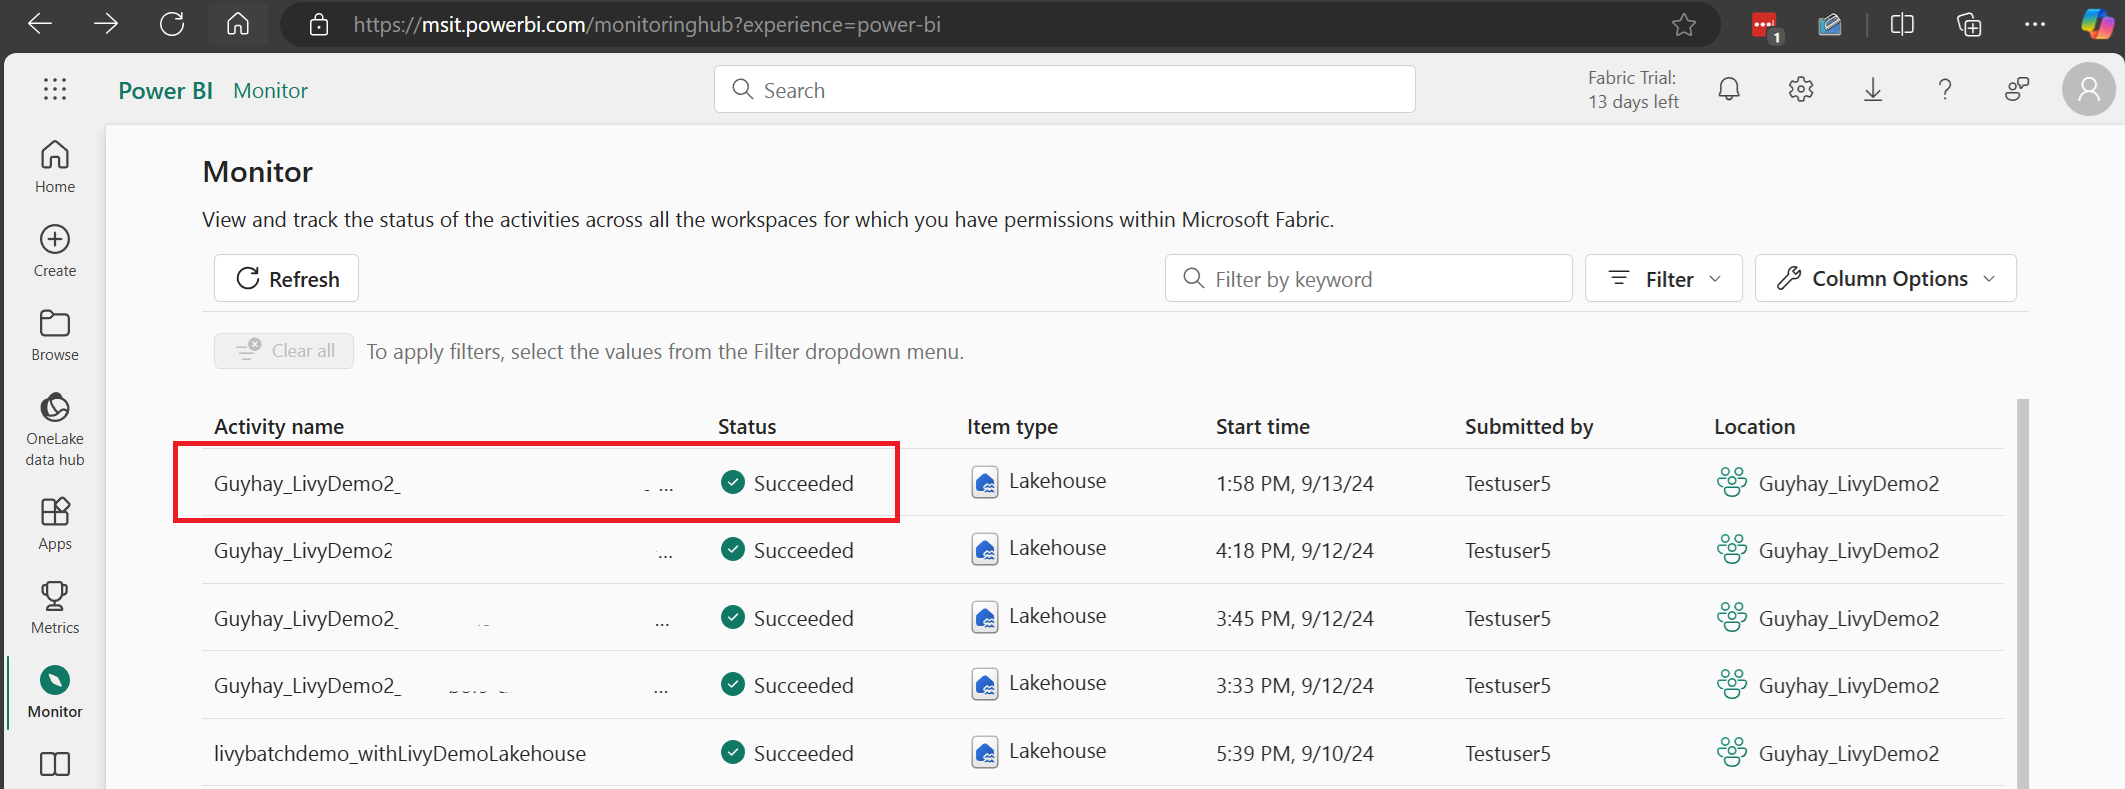
Saat tugas batch selesai, Anda dapat melihat status sesi dengan menavigasi ke Monitor.
Pilih dan buka nama aktivitas terbaru.
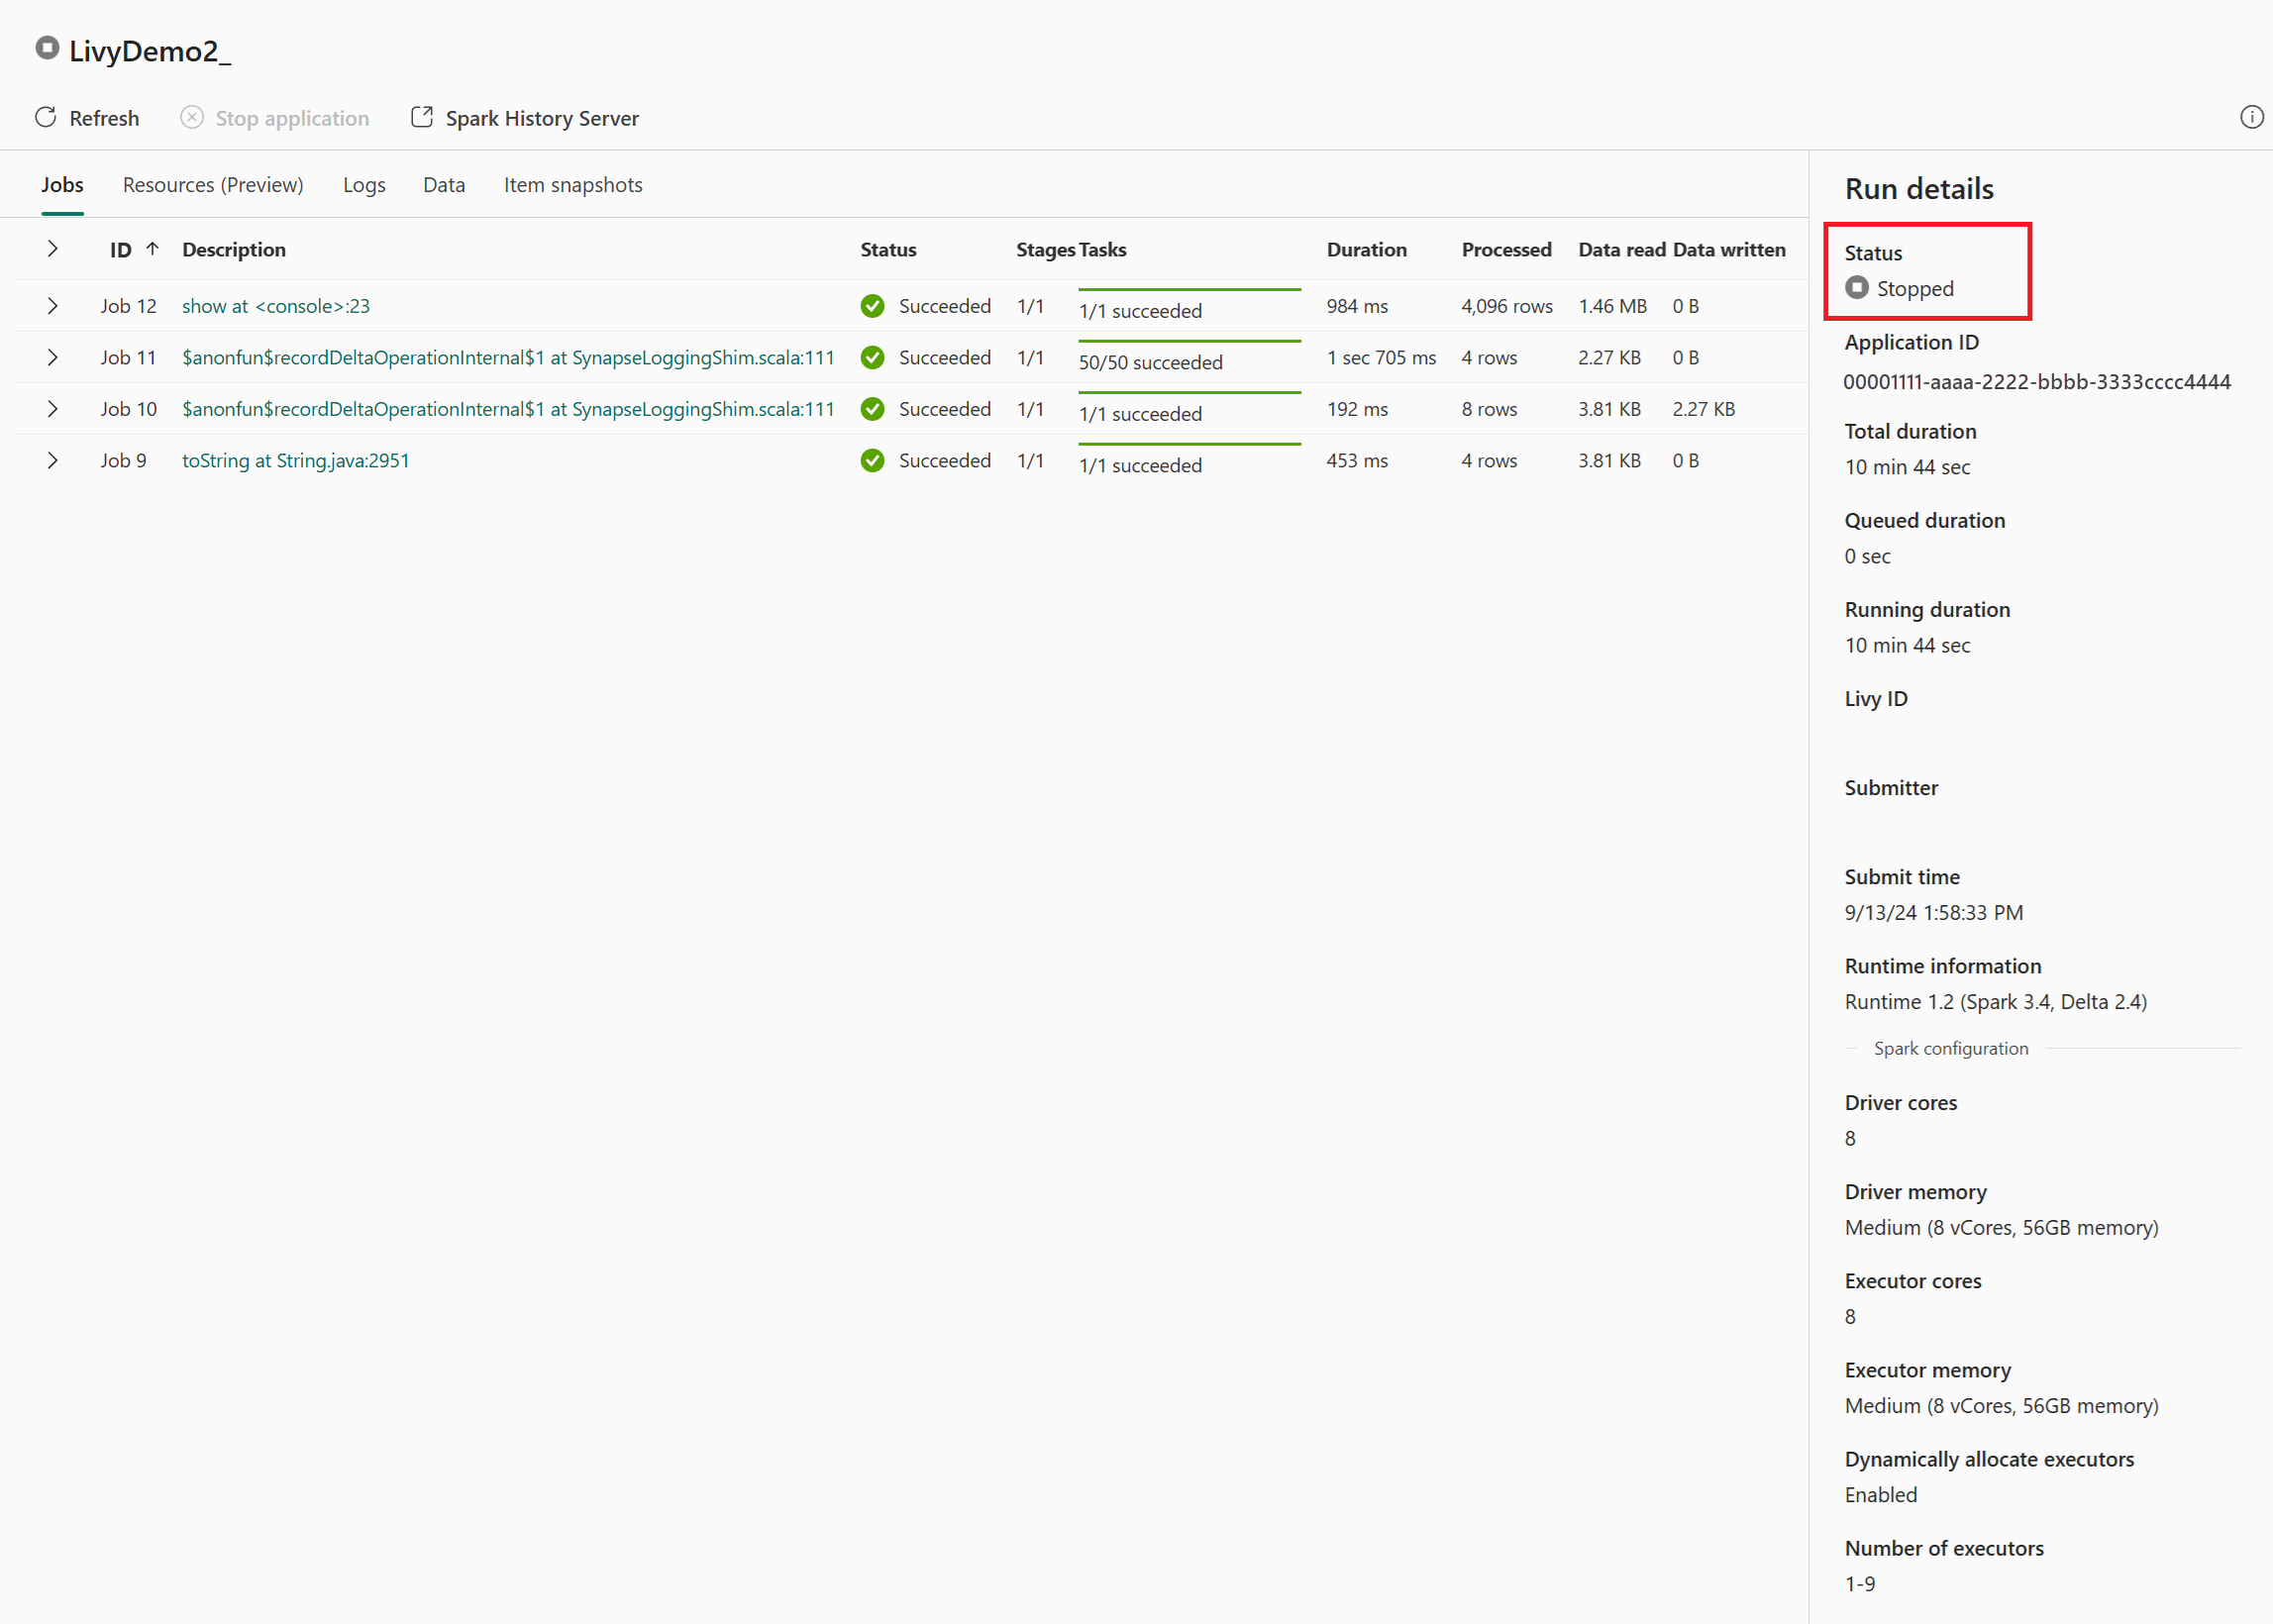
Dalam kasus sesi Livy API ini, Anda dapat melihat pengiriman batch sebelumnya, detail eksekusi, versi Spark, dan konfigurasi. Perhatikan status "dihentikan" di kanan atas.
Untuk merekap seluruh proses, Anda memerlukan klien jarak jauh seperti Visual Studio Code, token aplikasi Microsoft Entra, URL titik akhir Livy API, autentikasi terhadap Lakehouse Anda, payload Spark di Lakehouse Anda, dan akhirnya sesi Livy API batch.