Connect to SharePoint from a canvas app
![]()
Connect to a SharePoint site to generate an app automatically from a list, or create a connection before you add data to an existing app or build an app from scratch.
Depending on where your data resides, you can take either or both of these approaches:
- Show data from a list in a SharePoint Online site or an on-premises site.
- Show images and play video or audio files in a library (SharePoint Online only).
Generate an app
If you want to manage data in a list, Power Apps can generate a three-screen app for you automatically. Users can browse the list on the first screen, show details of an item in the second screen, and create or update items in the third screen.
Note
If your list contains a Choice, Lookup, or Person or group column, see Show data in a gallery later in this topic.
Create a connection
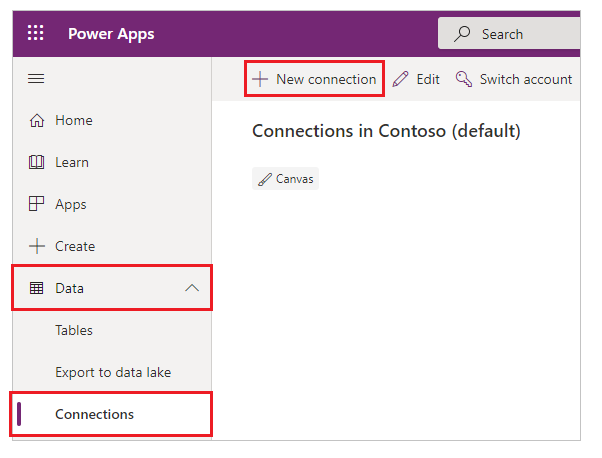
Sign in to Power Apps, select Data > Connections in the left navigation bar, and then select New connection near the upper-left corner.
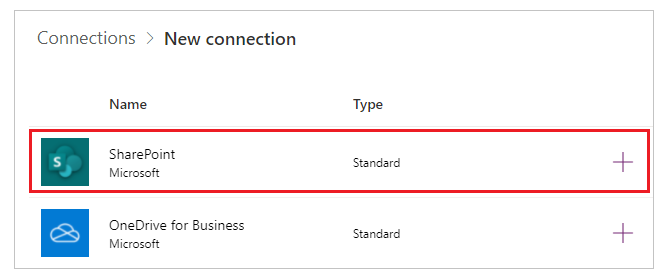
Select SharePoint.
Perform either of these sets of steps:
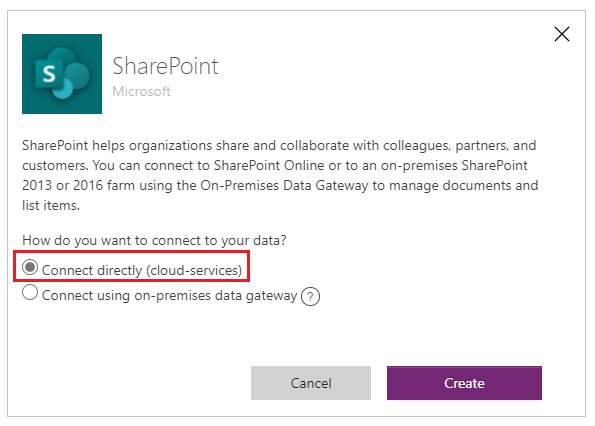
To connect to SharePoint Online, select Connect directly (cloud services), select Create, and then provide credentials (if prompted).
The connection is created, and you can add data to an existing app or build an app from scratch.
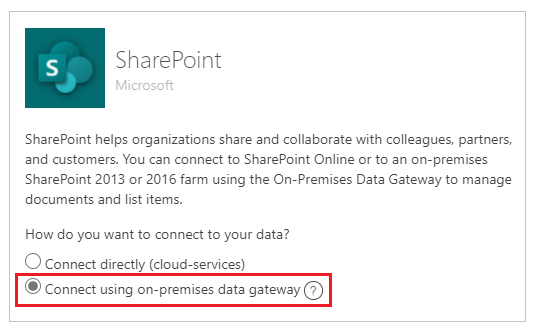
To connect to an on-premises site, select Connect using on-premises data gateway.
Specify Windows as the authentication type, and then specify your credentials. (If your credentials include a domain name, specify it as domain\alias.)
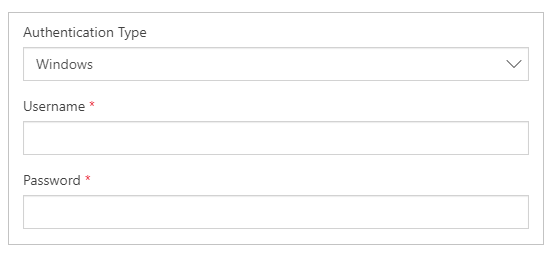
Under Choose a gateway, select the gateway that you want to use, and then select Create.
Note
If you don't have an on-premises data gateway installed, install one, and then select the icon to refresh the list of gateways.

The connection is created, and you can add data to an existing app or build an app from scratch.
Add data to an existing app
In Power Apps Studio, open the app that you want to update, select Data on the left-pane.
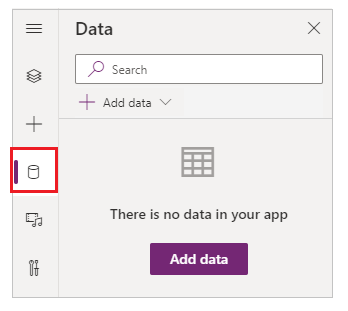
Select Add data > Connectors > SharePoint.
Under Connect to a SharePoint site, select an entry in the Recent sites list (or type or paste the URL for the site that you want to use), and then select Connect.
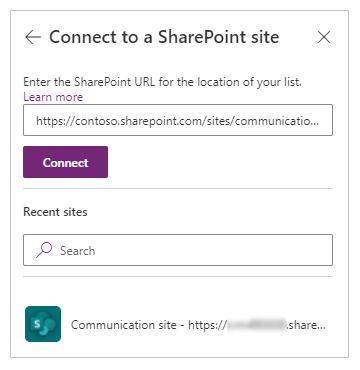
Under Choose a list, select the check box for one or more lists that you want to use, and then select Connect:
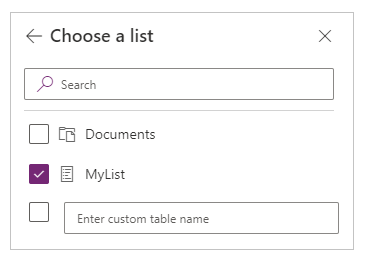
Not all types of lists appear by default. Power Apps supports lists, not template-based lists. If the name of the list that you want to use doesn't appear, scroll to the bottom, and then type the name of the list in the box that contains Enter custom table name.
 The data source or sources are added to your app.
Build your own app from scratch
Apply the concepts in Create an app from scratch to SharePoint instead of Excel.
Show list columns in a gallery
If your list contains any of these types of columns, show that data in a Gallery control by using the formula bar to set the Text property of one or more Label controls in that gallery:
For a Choice or Lookup column, specify ThisItem.ColumnName.Value to show data in that column.
For example, specify ThisItem.Location.Value if you have a Choice column named Location, and specify ThisItem.PostalCode.Value if you have a Lookup column named PostalCode.
For a Person or Group column, specify ThisItem.ColumnName.DisplayName to show the display name of the user or the group.
For example, specify ThisItem.Manager.DisplayName to show display names from a Person or Group column named Manager.
You can also show different information about users, such as email addresses or job titles. To display a complete list of options, specify ThisItem.ColumnName. (including the trailing period).
Note
For a CreatedBy column, specify ThisItem.Author.DisplayName to show the display names of users who created items in the list. For a ModifiedBy column, specify ThisItem.Editor.DisplayName to show the display names of users who changed items in the list.
For a Managed Metadata column, specify ThisItem.ColumnName.Label to show data in that column.
For example, specify ThisItem.Languages.Label if you have a Managed Metadata column named Languages.
Show data from a library
If you have several images in a SharePoint library, you can add a Drop down control to your app so that users can specify which image to show. You can also apply the same principles to other controls, such as Gallery controls, and other types of data, such as videos.
If you haven't already, create a connection, and then add data to an existing app.
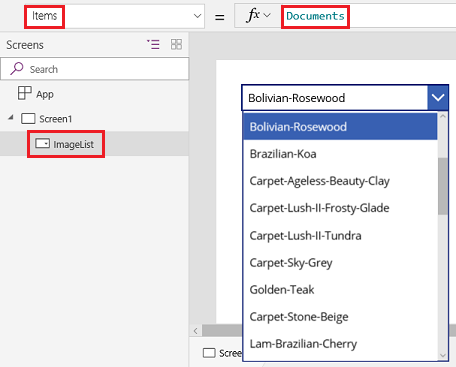
Add a Drop down control, and name it ImageList.
Set the Items property of ImageList to Documents.
On the Properties tab of the right-hand pane, open the Value list, and then select Name.
The file names of the images in your library appear in ImageList.
Add an Image control, and set its Image property to this expression:
ImageList.Selected.'Link to item'Press F5, and then select a different value in ImageList.
The image that you specified appears.

You can download a sample app that demonstrates a more complex approach to showing data from a SharePoint library.
- After you download the app, open Power Apps Studio, select Open in the left navigation bar, and then select Browse.
- In the Open dialog box, find and open the file that you downloaded, and then add a SharePoint library as a data source by following the first two procedures in this topic.
Note
By default, this app shows delegation warnings, but you can ignore them if your library contains fewer than 500 items.
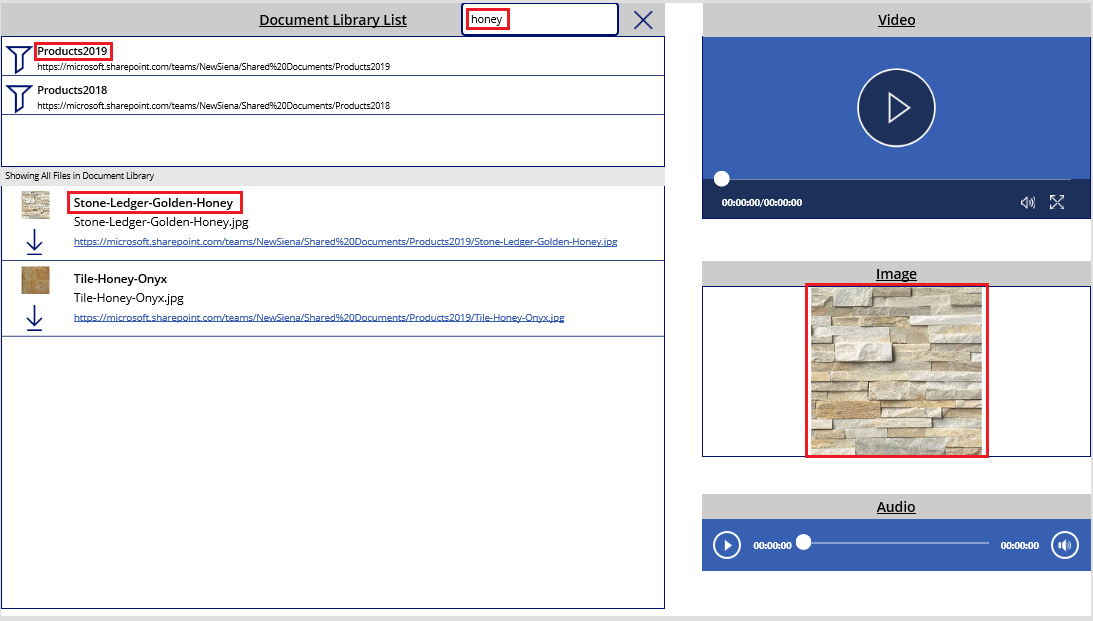
In this one-screen app, the list in the lower-left corner shows all files in your library.
- You can search for a file by typing or pasting one or more characters in the search box near the top.
- If your library contains folders, you can filter the list of files by selecting a filter icon in the list of folders just under the title bar.
When you find the file that you want, select it to show it in the Video, Image, or Audio control along the right-hand side.
Known issues
Sharing a Canvas apps using SharePoint connector Power Apps won't show canvas apps connecting to SharePoint that are only shared with Everyone, unless you're the creator of the app OR you're explicitly shared the app with (as a user, or as a co-owner) through a group membership, or directly through the user assignment. To play such apps, use the direct link to the app.
Lists
Power Apps can read column names that contain spaces, but the spaces are replaced with the hexadecimal escape code "_x0020_". For example, "Column Name" in SharePoint will appear as "Column_x0020_Name" in Power Apps when displayed in the data layout or used in a formula.
Not all types of columns are supported, and not all types of columns support all types of cards.
| Column type | Support | Default cards |
|---|---|---|
| Single line of text | Yes | View text |
| Multiple lines of text | Yes | View text |
| Choice | Yes | View lookup Edit lookup View multiselect (SharePoint Online only) Edit multiselect (SharePoint Online only) |
| Number | Yes | View percentage View rating View text |
| Currency | Yes | View percentage View rating View text |
| Date and Time | Yes | View text |
| Lookup | Yes | View lookup Edit lookup View multiselect Edit multiselect |
| Boolean (Yes/No) | Yes | View text View toggle |
| Person or Group | Yes | View lookup Edit lookup View multiselect Edit multiselect |
| Hyperlink | Yes | View URL View text |
| Picture | Yes (read-only) | View image View text |
| Attachment | Yes (read-only) | View Attachments |
| Calculated | Yes (read-only) | |
| Image | No | |
| Task Outcome | No | |
| External data | No | |
| Managed Metadata | Yes (read-only) | |
| Rating | No |
Libraries
- You can't upload files from Power Apps to a library.
- You can't show PDF files from a library in a PDF Viewer control.
- Power Apps Mobile doesn't support the Download function.
- If your users will run the app in Power Apps Mobile or the Windows 10 app, use the Launch function to display library content in a gallery.
SharePoint document library images render intermittently
Lists with links to images stored in SharePoint document libraries may fail to render inside Power Apps with authentication errors.
Power Apps connections to SharePoint are made to an explicitly identified list, and not to a SharePoint site in general. Power Apps will try to resolve an external link to an external source. Rendering such images succeeds if there's no authentication required, or if the user has previously authenticated to the referenced SharePoint site. However, it's common that the Power Apps users on mobile devices may not have previously authenticated to the referenced SharePoint site for images. Using links to refer to images from SharePoint document libraries in this scenario may not succeed. This behavior applies even if a separate connection exists for the document library inside the app.
As a solution for such scenarios, store images on a CORS-enabled source such as Azure Storage, or a CDN service such as Azure CDN that allows anonymous access.
Next steps
- Learn how to show data from a data source.
- Learn how to view details and create or update records.
- See other types of data sources to which you can connect.