Nota
L'accesso a questa pagina richiede l'autorizzazione. È possibile provare ad accedere o modificare le directory.
L'accesso a questa pagina richiede l'autorizzazione. È possibile provare a modificare le directory.
Questo articolo fa parte di una serie di esercitazioni su come inserire e distribuire un'app Web Python in App Azure Container. Container Apps consente di distribuire app in contenitori senza la necessità di gestire un'infrastruttura complessa.
In questa esercitazione, imparerai a:
- Configurare la distribuzione continua per un'app contenitore usando un flusso di lavoro GitHub Actions.
- Apportare una modifica a una copia del repository di esempio per attivare il flusso di lavoro di GitHub Actions.
- Risolvere i problemi che possono verificarsi con la configurazione della distribuzione continua.
- Rimuovere le risorse non necessarie al termine della serie di esercitazioni.
La distribuzione continua è correlata alla pratica DevOps dell'integrazione continua e del recapito continuo (CI/CD), che è l'automazione del flusso di lavoro di sviluppo delle app.
Il diagramma seguente illustra le attività in questa esercitazione.

Prerequisiti
Per configurare la distribuzione continua, è necessario:
Le risorse (e la loro configurazione) che hai creato nella precedente esercitazione, che includono un'istanza di Registro Azure Container e un'app contenitore in App contenitore di Azure.
Un account GitHub in cui hai fatto un fork del codice di esempio (Django o Flask) al quale puoi connetterti da App contenitore di Azure. (Se hai scaricato il codice di esempio invece di creare un fork, assicurati di fare push del tuo repository locale sul tuo account GitHub.)
Facoltativamente, Git è installato nell'ambiente di sviluppo per apportare modifiche al codice ed eseguire il push nel repository in GitHub. In alternativa, è possibile apportare le modifiche direttamente in GitHub.
Configurare la distribuzione continua per un contenitore
Nell'esercitazione precedente, hai creato e configurato un'applicazione contenitore in App contenitore di Azure. Parte della configurazione consisteva nel recuperare un'immagine Docker da un'istanza di Registro Azure Container. L'immagine del contenitore viene estratta dal Registro di sistema quando si crea un contenitore revisione, ad esempio quando si configura per la prima volta l'app contenitore.
In questa sezione viene configurata la distribuzione continua usando un flusso di lavoro di GitHub Actions. Con la distribuzione continua, viene creata una nuova immagine Docker e una nuova revisione del contenitore in base a un trigger. L'attivazione in questa esercitazione è qualsiasi modifica al branch main del tuo repository, ad esempio tramite una pull request. Quando il flusso di lavoro viene attivato, crea una nuova immagine Docker, la inserisce nell'istanza di Registro Azure Container e aggiorna l'app contenitore a una nuova revisione usando la nuova immagine.
È possibile eseguire comandi interfaccia della riga di comando di Azure in Azure Cloud Shell o in una workstation in cui è installato interfaccia della riga di comando di Azure.
Se si eseguono comandi in una shell Git Bash in un computer Windows, immettere il comando seguente prima di procedere:
export MSYS_NO_PATHCONV=1
Crea un service principal usando il comando az ad sp create-for-rbac:
az ad sp create-for-rbac \
--name <app-name> \
--role Contributor \
--scopes "/subscriptions/<subscription-ID>/resourceGroups/<resource-group-name>"
Nel comando :
-
<app-name> è un nome visualizzato facoltativo per l'entità servizio. Se si omette l'opzione
--name, viene generato un GUID come nome visualizzato. -
<subscription-ID> è il GUID che identifica in modo univoco la sottoscrizione in Azure. Se non si conosce l'ID della sottoscrizione, eseguire il comando az account show e copiarlo dalla proprietà
idnell'output. -
<resource-group-name> è il nome di un gruppo di risorse che contiene il contenitore App contenitore di Azure. Il controllo degli accessi in base al ruolo è a livello di gruppo di risorse. Se sono stati seguiti i passaggi dell'esercitazione precedente, il nome del gruppo di risorse è
pythoncontainer-rg.
Salvare l'output di questo comando per il passaggio successivo. In particolare, salvare l'ID client (proprietà
appId), il segreto client ( proprietàpassword) e l'ID tenant ( proprietàtenant).-
<app-name> è un nome visualizzato facoltativo per l'entità servizio. Se si omette l'opzione
Configurare GitHub Actions usando il comando az containerapp github-action add:
az containerapp github-action add \
--resource-group <resource-group-name> \
--name python-container-app \
--repo-url <https://github.com/userid/repo> \
--branch main \
--registry-url <registry-name>.azurecr.io \
--service-principal-client-id <client-id> \
--service-principal-tenant-id <tenant-id> \
--service-principal-client-secret <client-secret> \
--login-with-github
Nel comando :
-
<resource-group-name> è il nome del gruppo di risorse. In questa esercitazione si tratta di
pythoncontainer-rg. -
<https://github.com/userid/repo> è l'URL del tuo repository GitHub. In questa esercitazione, è
https://github.com/userid/msdocs-python-django-azure-container-appsohttps://github.com/userid/msdocs-python-flask-azure-container-apps. In questi URLuseridè l'ID utente di GitHub. - <registry-name> è l'istanza di Registro Azure Container esistente creata nell'esercitazione precedente o una istanza che è possibile usare.
-
<client-id> è il valore della proprietà del
appIdcomando precedenteaz ad sp create-for-rbac. L'ID è un GUID del formato00000000-0000-0000-0000-00000000. -
<tenant-id> è il valore della
tenantproprietà del comando precedenteaz ad sp create-for-rbac. L'ID è anche un GUID simile all'ID del client. -
<client-secret> è il valore della
passwordproprietà del comando precedenteaz ad sp create-for-rbac.
-
<resource-group-name> è il nome del gruppo di risorse. In questa esercitazione si tratta di


Nella configurazione della distribuzione continua, un'entità servizio consente a GitHub Actions di accedere alle risorse di Azure e modificarle. I ruoli assegnati all'entità servizio limitano l'accesso alle risorse. All'entità servizio è assegnato il ruolo predefinito Collaboratore per il gruppo di risorse che contiene l'app contenitore.
Se si seguono i passaggi per il portale, l'entità servizio viene creata automaticamente. Se segui i passaggi per interfaccia della riga di comando di Azure, crei esplicitamente il service principal prima di configurare la distribuzione continua.
Ridistribuire l'app Web con GitHub Actions
In questa sezione viene apportata una modifica alla copia tramite fork del repository di esempio. Successivamente, è possibile verificare che la modifica venga distribuita automaticamente nel sito Web.
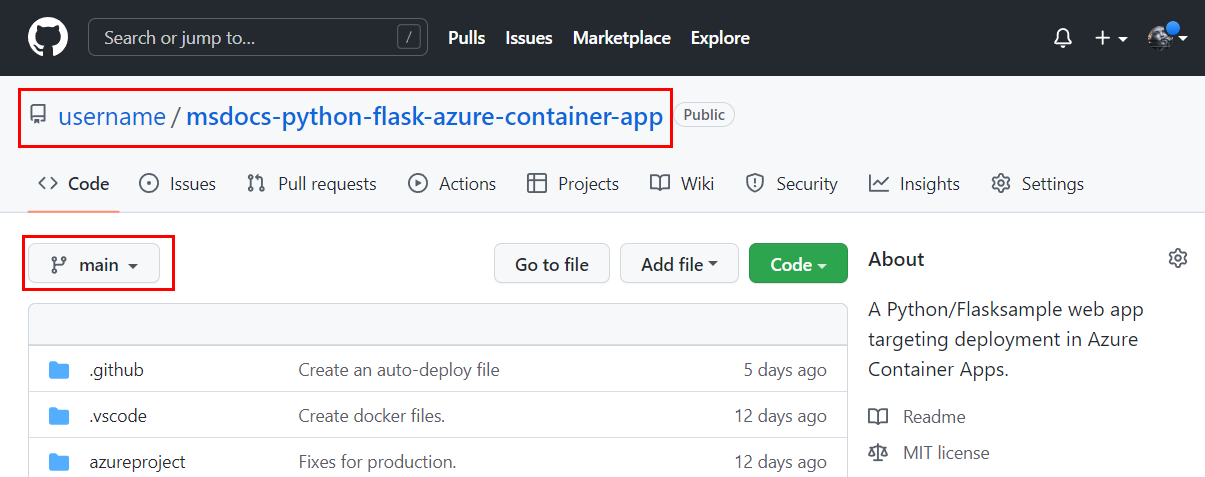
Se non l'hai già fatto, esegui il fork del repository di esempio (Django o Flask). È possibile apportare la modifica del codice direttamente in GitHub o nell'ambiente di sviluppo da una riga di comando con Git.
Vai al tuo fork del repository di esempio e parti dal branch main.
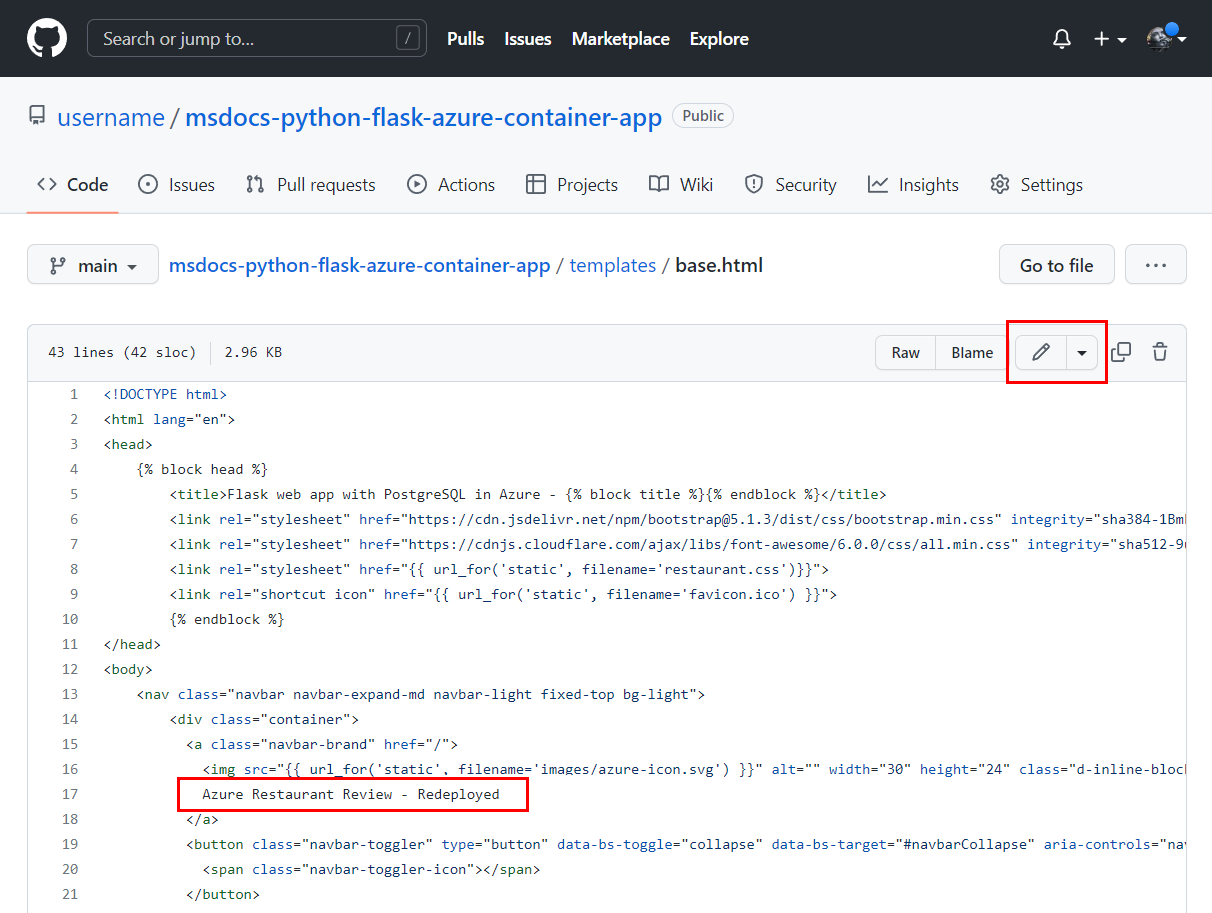
Apportare una modifica:
- Passare al file /templates/base.html. Per Django, il percorso è restaurant_review/templates/restaurant_review/base.html.)
- Seleziona Modifica e modifica la frase
Azure Restaurant ReviewinAzure Restaurant Review - Redeployed.
Nella parte inferiore della pagina che si sta modificando, assicurarsi che l'opzione Esegui commit direttamente nel ramo principale sia selezionata. Quindi selezionare il pulsante Conferma modifiche.
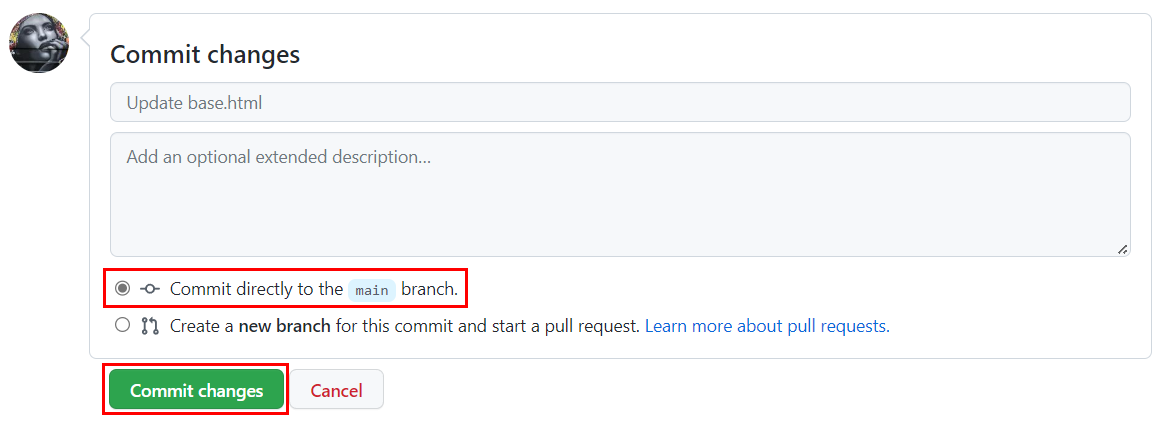


Il commit avvia il flusso di lavoro GitHub Actions.
Nota
Questa esercitazione illustra come apportare una modifica direttamente nel ramo principale. Nei flussi di lavoro software tipici, si apporta una modifica in un ramo diverso da main e quindi si crea una pull request per unire la modifica nel main. Le pull request avviano anche il flusso di lavoro.
Comprendere GitHub Actions
Visualizzazione della cronologia del flusso di lavoro
Se è necessario visualizzare la cronologia del flusso di lavoro, utilizzare una delle procedure seguenti.
In GitHub passare al fork del repository di esempio e aprire la scheda Azioni.

Segreti del flusso di lavoro
Il file di workflow .github/workflows/<workflow-name>.yml che aggiungi al repository include segnaposto per le credenziali necessarie ai processi di compilazione e di aggiornamento di Container App del workflow. Archiviare le informazioni sulle credenziali crittografate nell'area Impostazioni del repository, in Segreti di sicurezza>e variabili>Azioni.

Se le informazioni sulle credenziali cambiano, aggiornarla qui. Ad esempio, se le password Registro Azure Container vengono rigenerate, aggiornare il REGISTRY_PASSWORD valore. Per altre informazioni, vedere Encrypted secrets nella documentazione di GitHub.
App autorizzate OAuth
Quando si configura la distribuzione continua, si designa App contenitore di Azure come app OAuth autorizzata per l'account GitHub. Container Apps utilizza l'accesso autorizzato per creare un file YAML di GitHub Actions in .github/workflows/<nome-flusso-di-lavoro>.yml. È possibile visualizzare le app autorizzate e revocare le autorizzazioni nell'account in Integrations>Applications.

Troubleshoot
Si verificano errori durante la configurazione di un principale di servizio tramite la CLI di Azure
Questa sezione può aiutarti a risolvere gli errori che possono verificarsi durante la configurazione di un'entità servizio tramite il comando interfaccia della riga di comando di Azure az ad sp create-for-rbac.
Se ricevi un errore contenente "InvalidSchema: non sono stati trovati adattatori di connessione":
Verifica quale shell stai usando. Se si utilizza una shell Bash, impostare la variabile
MSYS_NO_PATHCONVcomeexport MSYS_NO_PATHCONV=1.Per ulteriori informazioni, vedere il problema di GitHub Impossibile creare un'entità principale del servizio con interfaccia della riga di comando di Azure dalla shell Git Bash.
Se viene visualizzato un errore che contiene "Più applicazioni hanno lo stesso nome visualizzato":
- Il nome è già in uso per il service principal. Scegli un altro nome oppure elimina l'argomento
--name. Un GUID viene generato automaticamente come nome visualizzato.
Flusso di lavoro di GitHub Actions non riuscito
Per controllare lo stato di un flusso di lavoro, passare alla scheda Azioni del repository:
- Se è presente un flusso di lavoro non riuscito, aprire il file del flusso di lavoro. Verranno visualizzati due processi: compilazione e distribuzione. Per un'operazione non riuscita, verificare l'output delle attività dell'operazione per individuare eventuali problemi.
- Se viene visualizzato un messaggio di errore contenente il timeout dell'handshake TLS, eseguire manualmente il flusso di lavoro. Nel repository, nella scheda Azioni selezionare Attiva distribuzione automatica per verificare se il timeout è un problema temporaneo.
- Se si configura la distribuzione continua per l'app contenitore come illustrato in questa esercitazione, il file del flusso di lavoro (.github/workflows/<nome del flusso di lavoro>.yml) viene creato automaticamente. Non è necessario modificare questo file per questa esercitazione. Se lo hai fatto, annulla le modifiche e prova il flusso di lavoro.
Il sito web non mostra le modifiche che hai unito nel ramo principale
In GitHub:
- Verificare che il flusso di lavoro di GitHub Actions sia stato eseguito e che sia stata verificata la modifica nel ramo che attiva il flusso di lavoro.
Nel portale di Azure:
Controllare l'istanza di Registro Azure Container per verificare se è stata creata una nuova immagine Docker con un timestamp dopo la modifica al ramo.
Controllare i log dell'app contenitore per verificare se si verifica un errore di programmazione:
- Vai all'app contenitore, quindi vai a Gestione revisioni><contenitore attivo>>Dettagli revisione>Log della console.
- Scegli l'ordine delle colonne da visualizzare: Time Generated, Stream_se Log_s.
- Ordinare i log in base ai più recenti e cercare i messaggi di Python
e nella colonna Stream_s del flusso . L'output di Python printè distdoutmessaggi.
Nella CLI di Azure:
- Usare il comando az containerapp logs show .
Vuoi interrompere la distribuzione continua
Interrompere la distribuzione continua significa scollegare l'app contenitore dal repo.
Nel portale di Azure:
- Passare all'app contenitore. Nel menu del servizio selezionare Distribuzione continua e quindi disconnetti.
Nella CLI di Azure:
- Usare il comando az containerapp github-action remove .
Dopo la disconnessione:
- Il file .github/workflows/<nome del flusso di lavoro>.yml viene rimosso dal tuo repository.
- Le chiavi segrete non vengono rimosse dal repository.
- App contenitore di Azure rimangono un'app OAuth autorizzata per il tuo account GitHub.
- In Azure il contenitore viene lasciato con l'ultimo contenitore distribuito. È possibile riconnettere l'app contenitore con l'istanza di Registro Azure Container, in modo che le nuove revisioni del contenitore rilevino l'immagine più recente.
- In Azure, i service principal che hai creato e usato per la distribuzione continua non vengono eliminati.
Rimuovere le risorse
Se hai finito con la serie di esercitazioni e non vuoi sostenere costi aggiuntivi, rimuovi le risorse usate.
La rimozione di un gruppo di risorse rimuove tutte le risorse nel gruppo ed è il modo più rapido per rimuovere le risorse. Per un esempio di come rimuovere i gruppi di risorse, vedi Pulizia dell'esercitazione sulla containerizzazione.
Contenuto correlato
Se prevedi di partire da questa esercitazione, prendi in considerazione i seguenti passi successivi: