マップ スタイルを設定する (Android SDK)
この記事では、Azure Maps Android SDK を使用してマップ スタイルを設定する 2 つの方法を示します。 Azure Maps は、6 つの異なるマップ スタイルから選択できます。 サポートされているマップ スタイルの詳細については、「Azure Maps でのサポートされているマップ スタイル」を参照してください。
Note
Azure Maps Android SDK の廃止
Android 用 Azure Maps Native SDK は非推奨となり、2025 年 3 月 31 日に廃止されます。 サービスの中断を回避するには、2025 年 3 月 31 日までに Azure Maps Web SDK に移行します。 詳細については、「Azure Maps Android SDK 移行ガイド」を参照してください。
前提条件
必ずクイック スタート: Android アプリ作成 の手順を完了してください。
レイアウトでのマップ スタイルの設定
マップ スタイルは、マップ コントロールの追加時に、アクティビティ クラスのレイアウト ファイルで設定できます。 次のコードは、中央の場所、ズーム レベル、およびマップ スタイルを設定します。
<com.azure.android.maps.control.MapControl
android:id="@+id/mapcontrol"
android:layout_width="match_parent"
android:layout_height="match_parent"
app:azure_maps_centerLat="47.602806"
app:azure_maps_centerLng="-122.329330"
app:azure_maps_zoom="12"
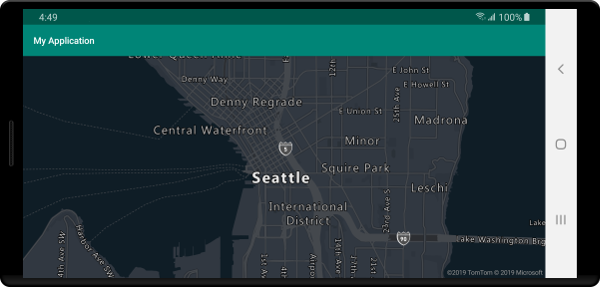
app:azure_maps_style="grayscale_dark"
/>
次のスクリーンショットは、上記のコードで、グレースケールの濃色スタイルを使用した道路地図を示しています。
コードでマップ スタイルを設定する
マップ スタイルは、マップの setStyle メソッドを使用して、プログラムによってコード内で設定できます。 次のコードでは、マップ setCamera メソッドを使用して中心位置とズーム レベルを設定し、マップ スタイルを SATELLITE_ROAD_LABELS に設定しています。
mapControl.onReady(map -> {
//Set the camera of the map.
map.setCamera(center(Point.fromLngLat(-122.33, 47.64)), zoom(14));
//Set the style of the map.
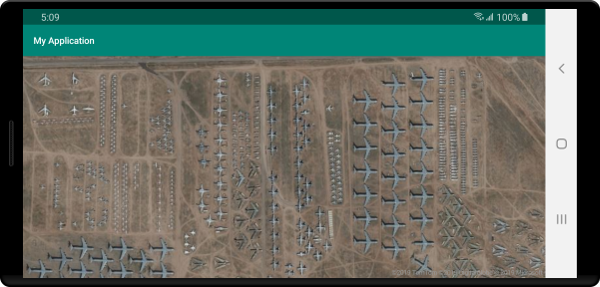
map.setStyle(style(MapStyle.SATELLITE_ROAD_LABELS));
});
mapControl!!.onReady { map: AzureMap ->
    //Set the camera of the map.
    map.setCamera(center(Point.fromLngLat(-122.33, 47.64)), zoom(14))

    //Set the style of the map.
    map.setStyle(style(MapStyle.SATELLITE_ROAD_LABELS))
}
次のスクリーンショットは、上記のコードで、衛星からの道路ラベル スタイルを使用したマップを示しています。
マップ カメラの設定
マップ カメラは、マップ ビューポートに表示される世界の部分を制御します。 カメラは、コード内でプログラムを使用してレイアウト内に配置できます。 コードで設定する場合は、マップの位置を設定する主な方法として、中心とズームを使用する方法と境界ボックスを渡す方法の 2 つがあります。 次のコードは、center と zoom を使用する場合に、省略可能なすべてのカメラ オプションを設定する方法を示しています。
//Set the camera of the map using center and zoom.
map.setCamera(
    center(Point.fromLngLat(-122.33, 47.64)),

    //The zoom level. Typically a value between 0 and 22.
    zoom(14),

    //The amount of tilt in degrees the map where 0 is looking straight down.
    pitch(45),

    //Direction the top of the map is pointing in degrees. 0 = North, 90 = East, 180 = South, 270 = West
    bearing(90),

    //The minimum zoom level the map will zoom-out to when animating from one location to another on the map.
    minZoom(10),

    //The maximum zoom level the map will zoom-in to when animating from one location to another on the map.
    maxZoom(14)
);
//Set the camera of the map using center and zoom.
map.setCamera(
    center(Point.fromLngLat(-122.33, 47.64)),

    //The zoom level. Typically a value between 0 and 22.
    zoom(14),

    //The amount of tilt in degrees the map where 0 is looking straight down.
    pitch(45),

    //Direction the top of the map is pointing in degrees. 0 = North, 90 = East, 180 = South, 270 = West
    bearing(90),

    //The minimum zoom level the map will zoom-out to when animating from one location to another on the map.
    minZoom(10),

    //The maximum zoom level the map will zoom-in to when animating from one location to another on the map.
    maxZoom(14)
)
多くの場合、一連のデータに対してマップにフォーカスすることをお勧めします。 MapMath.fromData メソッドを使用して特徴から境界ボックスを計算でき、その境界ボックスをマップ カメラの bounds オプションに渡すことができます。 境界ボックスに基づいてマップ ビューを設定するときには、バブルまたは記号としてレンダリングされているポイントのピクセル サイズに相当する padding 値を指定すると多くの場合役に立ちます。 次のコードは、境界ボックスを使用してカメラの位置を設定するときに、省略可能なすべてのカメラ オプションを設定する方法を示しています。
//Set the camera of the map using a bounding box.
map.setCamera(
    //The area to focus the map on.
    bounds(BoundingBox.fromLngLats(
        //West
        -122.4594,

        //South
        47.4333,

        //East
        -122.21866,

        //North
        47.75758
    )),

    //Amount of pixel buffer around the bounding box to provide extra space around the bounding box.
    padding(20),

    //The maximum zoom level the map will zoom-in to when animating from one location to another on the map.
    maxZoom(14)
);
//Set the camera of the map using a bounding box.
map.setCamera(
    //The area to focus the map on.
    bounds(BoundingBox.fromLngLats(
        //West
        -122.4594,

        //South
        47.4333,

        //East
        -122.21866,

        //North
        47.75758
    )),

    //Amount of pixel buffer around the bounding box to provide extra space around the bounding box.
    padding(20),

    //The maximum zoom level the map will zoom-in to when animating from one location to another on the map.
    maxZoom(14)
)
境界ボックスの縦横比はマップの縦横比とは異なる場合があります。そのため、マップには、多くの場合、境界ボックス領域全体が表示されますが、垂直方向または水平方向の一方のみが狭いことがよくあります。
マップ ビューをアニメーション化する
マップのカメラ オプションを設定するときに、アニメーション オプションを使用して、現在のマップ ビューと次のマップ ビューの間の切り替えも作成できます。 これらのオプションでは、カメラの移動に必要なアニメーションの種類と継続時間を指定します。
| オプション | 説明 |
|---|---|
animationDuration(Integer durationMs) |
カメラがビュー間でアニメーション化する時間をミリ秒単位 (ms) で指定します。 |
animationType(AnimationType animationType) |
実行するアニメーションの切り替えの種類を指定します。 - JUMP - 即時に変更します。- EASE - カメラの設定を段階的に変更します。- FLY - 円弧のようなフライトを作成するように、カメラの設定を段階的に変更します。 |
このコードは、3 秒間の FLY アニメーションを使用してマップ ビューをアニメーション化する方法を示しています:
map.setCamera(
    center(Point.fromLngLat(-122.33, 47.6)),
    zoom(12),
    animationType(AnimationType.FLY),
    animationDuration(3000)
);
map.setCamera(
    center(Point.fromLngLat(-122.33, 47.6)),
    zoom(12.0),
    AnimationOptions.animationType(AnimationType.FLY),
    AnimationOptions.animationDuration(3000)
)
上記のコードは、ニューヨークからシアトルにマップ ビューのアニメーション化を示します:

次のステップ
マップに追加できる他のコード サンプルについては、次の記事をご覧ください。