適用対象: Azure Data Factory
 Azure Synapse Analytics
ヒント
Data Factory in Microsoft Fabric は、よりシンプルなアーキテクチャ、組み込みの AI、および新機能を備えた次世代のAzure Data Factoryです。 データ統合を初めて使用する場合は、Fabric Data Factory から始めます。 既存の ADF ワークロードをFabricにアップグレードして、データ サイエンス、リアルタイム分析、レポートの新機能にアクセスできます。
このクイック スタートでは、.NET SDK を使用してAzure Data Factoryを作成する方法について説明します。 このデータ ファクトリで作成するパイプラインは、Azure BLOB ストレージ内のあるフォルダーから別のフォルダーへデータをコピーします。 Azure Data Factoryを使用してデータを変換する方法については、「Sparkを使用してデータを変換するチュートリアル」を参照してください。
前提条件
Azure サブスクリプション
Azure サブスクリプションがない場合は、開始する前に free アカウントを作成します。
Azure のロール
Data Factory インスタンスを作成するには、Azureへのサインインに使用するユーザー アカウントは、contributor ロールまたは owner ロール、またはAzure サブスクリプションの administrator のメンバーである必要があります。 サブスクリプションで自分のアクセス許可を表示するには、Azure ポータルに移動し、右上隅にあるユーザー名を選択して、"..." アイコンをクリックし、自分のアクセス許可を選択します。 複数のサブスクリプションにアクセスできる場合は、適切なサブスクリプションを選択します。
データセット、リンクされたサービス、パイプライン、トリガー、および統合ランタイムを含む Data Factory の子リソースを作成および管理するには、次の要件が適用されます。
- Azure ポータルで子リソースを作成および管理するには、リソース グループ レベル以上の Data Factory 共同作成者 ロールに属している必要があります。
- PowerShell または SDK を使用して子リソースを作成および管理する場合は、リソース レベル以上での共同作成者ロールで十分です。
ロールにユーザーを追加する方法に関するサンプル手順については、ロールの追加に関する記事を参照してください。
詳細については、次の記事を参照してください。
Azure Storage アカウント
このクイック スタートでは、汎用Azure Storage アカウント (具体的には BLOB ストレージ) を source と destination データ ストアの両方として使用します。 汎用Azure Storage アカウントがない場合は、「ストレージ アカウントの作成を参照して作成します。
ストレージ アカウント名を取得する
このクイック スタートには、Azure Storage アカウントの名前が必要です。 以下の手順に従って、ご利用のストレージ アカウントの名前を取得してください。
- Web ブラウザーで、Azure ポータルに移動し、Azureのユーザー名とパスワードを使用してサインインします。
- Azure ポータル メニューから All services を選択し、Storage>Storage accounts を選択します。 また、任意のページから検索して、 [ストレージ アカウント] を選択することもできます。
- [ストレージ アカウント] ページで、ご利用のストレージ アカウントを (必要に応じて) フィルターで抽出し、該当するストレージ アカウントを選択します。
また、任意のページから検索して、 [ストレージ アカウント] を選択することもできます。
BLOB コンテナーを作成する
このセクションでは、Azure Blob Storage に adftutorial という名前の BLOB コンテナーを作成します。
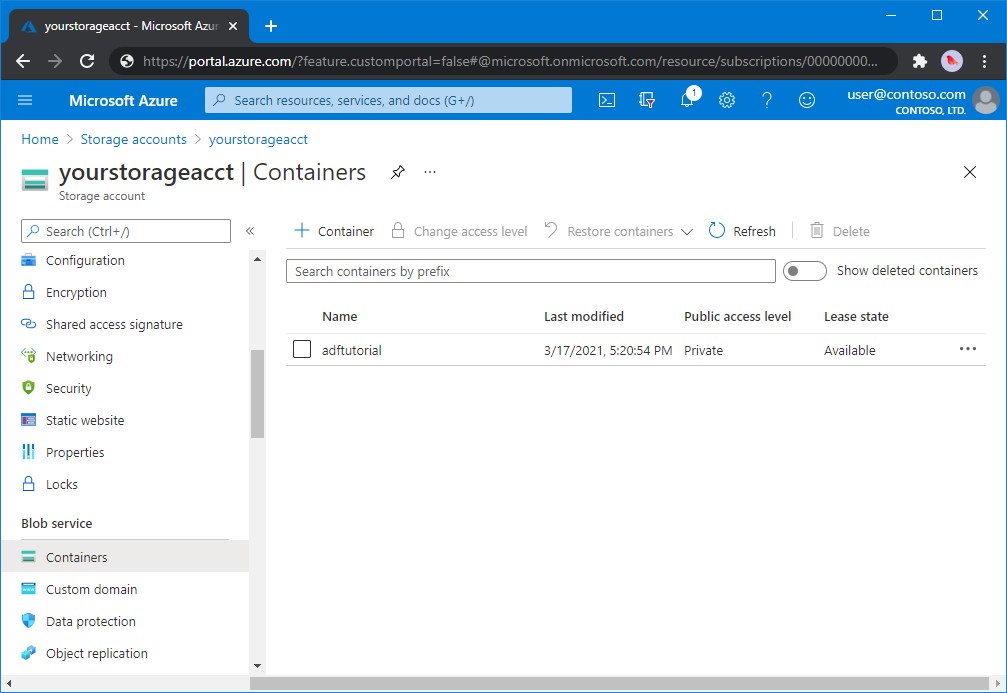
ストレージ アカウント ページで、 [概要]>[コンテナー] を選択します。
<アカウント名> - [コンテナー] ページのツールバーで、コンテナー を選択します。
[新しいコンテナー] ダイアログ ボックスで、名前に「adftutorial」と入力し、 [OK] を選択します。 <アカウント名> - [コンテナー] ページが更新され、コンテナーの一覧に adftutorial が含まれるようになります。
BLOB コンテナーの入力フォルダーとファイルを追加する
このセクションでは、作成したコンテナーに input という名前のフォルダーを作成し、入力フォルダーにサンプル ファイルをアップロードします。 開始する前に、メモ帳などのテキスト エディターを開き、次の内容を含む emp.txt という名前のファイルを作成します。
John, Doe
Jane, Doe
C:\ADFv2QuickStartPSH フォルダーにファイルを保存します (フォルダーがまだ存在しない場合は、作成します)。次に、Azure ポータルに戻り、次の手順に従います。
中断した <アカウント名> - [コンテナー] ページで、コンテナーの更新された一覧から adftutorial を選択します。
- ウィンドウを閉じた場合、または別のページに移動した場合は、もう一度 Azure ポータルにサインインします。
- Azure ポータル メニューから All services を選択し、Storage>Storage accounts を選択します。 また、任意のページから検索して、 [ストレージ アカウント] を選択することもできます。
- ストレージ アカウントを選択してから、 [コンテナー]>[adftutorial] を選択します。
adftutorial コンテナー ページのツールバーで、 [アップロード] を選択します。
[BLOB のアップロード] ページで、 [ファイル] ボックスを選択し、emp.txt ファイルを参照して選択します。
[詳細設定] の見出しを展開します。 次のようにページが表示されます。
![[詳細設定] リンクの選択](includes/media/data-factory-quickstart-prerequisites/upload-blob-advanced.png)
[アップロード先のフォルダー] ボックスに「input」と入力します。
[アップロード] ボタンを選択します。 一覧に emp.txt ファイルとアップロードの状態が表示されます。
[閉じる] アイコン (X) を選択して、 [BLOB のアップロード] ページを閉じます。
adftutorial コンテナーのページを開いたままにしておきます。 このクイックスタートの最後に、出力を検証するため、それを使います。
Visual Studio
この記事のチュートリアルでは、Visual Studio 2019 を使用します。 Visual Studio 2013、2015、または 2017 の手順は若干異なります。
Microsoft Entra IDでアプリケーションを作成する
-
Microsoft Entra アプリケーションの作成で、このチュートリアルで作成する.NET アプリケーションを表すアプリケーションを作成します。 サインオン URL については、この記事に示されているようにダミーの URL (
https://contoso.org/exampleapp) を指定できます。 - 「サインインするための値を取得する」で、アプリケーション ID とテナント ID を取得し、それらの値をメモしておいてください。このチュートリアルで後ほど使用します。
- 「証明書とシークレット」で、認証キーを取得し、その値をメモしておいてください。このチュートリアルで後ほど使用します。
- 「アプリケーションをロールに割り当てる」で、アプリケーションがサブスクリプションにデータ ファクトリを作成できるように、サブスクリプション レベルでアプリケーションを共同作成者ロールに割り当てます。
Visual Studio プロジェクトを作成する
次に、Visual Studioで C# .NET コンソール アプリケーションを作成します。
- Visual Studio を起動します。
- [スタート] ウィンドウで、新しいプロジェクトの作成>Console App (.NET Framework) を選択します。 .NETバージョン 4.5.2 以降が必要です。
- Project name に「ADFv2QuickStart」と入力します。
- [作成] を選択してプロジェクトを作成します。
NuGet パッケージのインストール
Tools>NuGet Package Manager>Package Manager Console を選択します。
Package Manager コンソール ウィンドウで、次のコマンドを実行してパッケージをインストールします。 詳細については、Azure.ResourceManager.DataFactory NuGet パッケージを参照してください。
Install-Package Azure.ResourceManager.DataFactory -IncludePrerelease
Install-Package Azure.Identity
Data Factory の作成
Program.csを開き、次のステートメントを含め、名前空間への参照を追加します。
using Azure;
using Azure.Core;
using Azure.Core.Expressions.DataFactory;
using Azure.Identity;
using Azure.ResourceManager;
using Azure.ResourceManager.DataFactory;
using Azure.ResourceManager.DataFactory.Models;
using Azure.ResourceManager.Resources;
using System;
using System.Collections.Generic;
変数を設定する次のコードを Main メソッドに追加します。 プレースホルダーを実際の値に置き換えてください。 Data Factory が現在使用できるAzureリージョンの一覧については、次のページで目的のリージョンを選択し、Analytics を展開して、Data Factory: Products available by region> を探します。 データ ファクトリで使用されるデータ ストア (Azure Storage、Azure SQL Databaseなど) とコンピューティング (HDInsight など) は、他のリージョンに存在できます。
// Set variables
string tenantID = "<your tenant ID>";
string applicationId = "<your application ID>";
string authenticationKey = "<your authentication key for the application>";
string subscriptionId = "<your subscription ID where the data factory resides>";
string resourceGroup = "<your resource group where the data factory resides>";
string region = "<the location of your resource group>";
string dataFactoryName =
    "<specify the name of data factory to create. It must be globally unique.>";
string storageAccountName = "<your storage account name to copy data>";
string storageKey = "<your storage account key>";
// specify the container and input folder from which all files
// need to be copied to the output folder.
string inputBlobContainer = "<blob container to copy data from, e.g. containername>";
string inputBlobPath = "<path to existing blob(s) to copy data from, e.g. inputdir/file>";
//specify the contains and output folder where the files are copied
string outputBlobContainer = "<blob container to copy data from, e.g. containername>";
string outputBlobPath = "<the blob path to copy data to, e.g. outputdir/file>";

// name of the Azure Storage linked service, blob dataset, and the pipeline
string storageLinkedServiceName = "AzureStorageLinkedService";
string blobDatasetName = "BlobDataset";
string pipelineName = "Adfv2QuickStartPipeline";
データ ファクトリを作成する次のコードを Main メソッドに追加します。
ArmClient armClient = new ArmClient(
    new ClientSecretCredential(tenantID, applicationId, authenticationKey, new TokenCredentialOptions
    {
        AuthorityHost = AzureAuthorityHosts.AzurePublicCloud
    }),
    subscriptionId,
    new ArmClientOptions { Environment = ArmEnvironment.AzurePublicCloud }
);

ResourceIdentifier resourceIdentifier = SubscriptionResource.CreateResourceIdentifier(subscriptionId);
SubscriptionResource subscriptionResource = armClient.GetSubscriptionResource(resourceIdentifier);

Console.WriteLine("Get an existing resource group " + resourceGroupName + "...");
var resourceGroupOperation = subscriptionResource.GetResourceGroups().Get(resourceGroupName);
ResourceGroupResource resourceGroupResource = resourceGroupOperation.Value;

Console.WriteLine("Create a data factory " + dataFactoryName + "...");
DataFactoryData dataFactoryData = new DataFactoryData(AzureLocation.EastUS2);
var dataFactoryOperation = resourceGroupResource.GetDataFactories().CreateOrUpdate(WaitUntil.Completed, dataFactoryName, dataFactoryData);
Console.WriteLine(dataFactoryOperation.WaitForCompletionResponse().Content);

// Get the data factory resource
DataFactoryResource dataFactoryResource = dataFactoryOperation.Value;
リンクされたサービスを作成する
次のコードを Main メソッドに追加して、Azure Storageリンクされたサービスを作成します。
データ ストアおよびコンピューティング サービスをデータ ファクトリにリンクするには、リンクされたサービスをデータ ファクトリに作成します。 このクイック スタートでは、コピー ソースとシンク ストアの両方に対してリンクされたサービスAzure Blob Storage 1 つだけ作成する必要があります。サンプルでは "AzureBlobStorageLinkedService" という名前です。
// Create an Azure Storage linked service
Console.WriteLine("Create a linked service " + storageLinkedServiceName + "...");
AzureBlobStorageLinkedService azureBlobStorage = new AzureBlobStorageLinkedService()
{
    ConnectionString = azureBlobStorageConnectionString
};

DataFactoryLinkedServiceData linkedServiceData = new DataFactoryLinkedServiceData(azureBlobStorage);

var linkedServiceOperation = dataFactoryResource.GetDataFactoryLinkedServices().CreateOrUpdate(WaitUntil.Completed, storageLinkedServiceName, linkedServiceData);
Console.WriteLine(linkedServiceOperation.WaitForCompletionResponse().Content);
データセットを作成する
次のコードを Main メソッドに追加して、区切りテキスト データセットを作成します。
ソースからシンクにコピーするデータを表すデータセットを定義します。 この例では、この区切りテキスト データセットは、前の手順で作成したリンクされたサービスAzure Blob Storage参照します。 データセットは 2 つのパラメーターを受け取り、その値はデータセットを使うアクティビティで設定されます。 パラメーターは、データが存在する/格納される場所を指す "コンテナー" と "folderPath" を構築するために使われます。
// Create an Azure Blob dataset
DataFactoryLinkedServiceReference linkedServiceReference = new DataFactoryLinkedServiceReference(DataFactoryLinkedServiceReferenceType.LinkedServiceReference, storageLinkedServiceName);
DelimitedTextDataset delimitedTextDataset = new DelimitedTextDataset(linkedServiceReference)
{
    DataLocation = new AzureBlobStorageLocation
    {
        Container = DataFactoryElement<string>.FromExpression("@dataset().container"),
        FileName = DataFactoryElement<string>.FromExpression("@dataset().path")
    },
    Parameters =
    {
        new KeyValuePair<string, EntityParameterSpecification>("container",new EntityParameterSpecification(EntityParameterType.String)),
        new KeyValuePair<string, EntityParameterSpecification>("path",new EntityParameterSpecification(EntityParameterType.String))
    },
    FirstRowAsHeader = false,
    QuoteChar = "\"",
    EscapeChar = "\\",
    ColumnDelimiter = ","
};

DataFactoryDatasetData datasetData = new DataFactoryDatasetData(delimitedTextDataset);

var datasetOperation = dataFactoryResource.GetDataFactoryDatasets().CreateOrUpdate(WaitUntil.Completed, blobDatasetName, datasetData);
Console.WriteLine(datasetOperation.WaitForCompletionResponse().Content);
パイプラインを作成する
コピー アクティビティが含まれているパイプラインを作成する次のコードを Main メソッドに追加します。
この例では、このパイプラインには 1 つのアクティビティが含まれており、4 つのパラメーター (入力 BLOB コンテナーとパス、出力 BLOB コンテナーとパス) を受け取ります。 これらのパラメーターの値は、パイプラインがトリガー/実行されたときに設定されます。 コピー アクティビティは、入力と出力として、前の手順で作成された同じ BLOB データセットを参照します。 データセットを入力データセットとして使う場合、入力コンテナーとパスを指定します。 また、データセットが出力データセットとして使われる場合は、出力コンテナーとパスを指定します。
// Create a pipeline with a copy activity
Console.WriteLine("Creating pipeline " + pipelineName + "...");
DataFactoryPipelineData pipelineData = new DataFactoryPipelineData()
{
    Parameters =
    {
        new KeyValuePair<string, EntityParameterSpecification>("inputContainer",new EntityParameterSpecification(EntityParameterType.String)),
        new KeyValuePair<string, EntityParameterSpecification>("inputPath",new EntityParameterSpecification(EntityParameterType.String)),
        new KeyValuePair<string, EntityParameterSpecification>("outputContainer",new EntityParameterSpecification(EntityParameterType.String)),
        new KeyValuePair<string, EntityParameterSpecification>("outputPath",new EntityParameterSpecification(EntityParameterType.String))
    },
    Activities =
    {
        new CopyActivity("CopyFromBlobToBlob",new DataFactoryBlobSource(),new DataFactoryBlobSink())
        {
            Inputs =
            {
                new DatasetReference(DatasetReferenceType.DatasetReference,blobDatasetName)
                {
                    Parameters =
                    {
                        new KeyValuePair<string, BinaryData>("container", BinaryData.FromString("\"@pipeline().parameters.inputContainer\"")),
                        new KeyValuePair<string, BinaryData>("path", BinaryData.FromString("\"@pipeline().parameters.inputPath\""))
                    }
                }
            },
            Outputs =
            {
                new DatasetReference(DatasetReferenceType.DatasetReference,blobDatasetName)
                {
                    Parameters =
                    {
                        new KeyValuePair<string, BinaryData>("container", BinaryData.FromString("\"@pipeline().parameters.outputContainer\"")),
                        new KeyValuePair<string, BinaryData>("path", BinaryData.FromString("\"@pipeline().parameters.outputPath\""))
                    }
                }
            }
        }
    }
};

var pipelineOperation = dataFactoryResource.GetDataFactoryPipelines().CreateOrUpdate(WaitUntil.Completed, pipelineName, pipelineData);
Console.WriteLine(pipelineOperation.WaitForCompletionResponse().Content);
パイプライン実行を設定する
パイプラインの実行をトリガーする次のコードを Main メソッドに追加します。
また、このコードは、パイプラインで指定された inputContainer、inputPath、outputContainer、outputPath パラメーターの値を、ソースおよびシンクの BLOB パスの実際の値に設定します。
// Create a pipeline run
Console.WriteLine("Creating pipeline run...");
Dictionary<string, BinaryData> parameters = new Dictionary<string, BinaryData>()
{
    { "inputContainer",BinaryData.FromObjectAsJson(inputBlobContainer) },
    { "inputPath",BinaryData.FromObjectAsJson(inputBlobPath) },
    { "outputContainer",BinaryData.FromObjectAsJson(outputBlobContainer) },
    { "outputPath",BinaryData.FromObjectAsJson(outputBlobPath) }
};

var pipelineResource = dataFactoryResource.GetDataFactoryPipeline(pipelineName);
var runResponse = pipelineResource.Value.CreateRun(parameters);
Console.WriteLine("Pipeline run ID: " + runResponse.Value.RunId);
パイプラインの実行を監視する
データのコピーが完了するまで状態を継続的にチェックするために、次のコードを Main メソッドに追加します。
// Monitor the pipeline run
Console.WriteLine("Checking pipeline run status...");
DataFactoryPipelineRunInfo pipelineRun;
while (true)
{
    pipelineRun = dataFactoryResource.GetPipelineRun(runResponse.Value.RunId.ToString());
    Console.WriteLine("Status: " + pipelineRun.Status);
    if (pipelineRun.Status == "InProgress" || pipelineRun.Status == "Queued")
        System.Threading.Thread.Sleep(15000);
    else
        break;
}
コピー アクティビティの実行の詳細 (たとえば、読み取りおよび書き込みされたデータのサイズ) を取得する次のコードを Main メソッドに追加します。
// Check the copy activity run details
Console.WriteLine("Checking copy activity run details...");

var queryResponse = dataFactoryResource.GetActivityRun(pipelineRun.RunId.ToString(),
    new RunFilterContent(DateTime.UtcNow.AddMinutes(-10), DateTime.UtcNow.AddMinutes(10)));

var enumerator = queryResponse.GetEnumerator();
enumerator.MoveNext();

if (pipelineRun.Status == "Succeeded")
    Console.WriteLine(enumerator.Current.Output);
else
    Console.WriteLine(enumerator.Current.Error);
Console.WriteLine("\nPress any key to exit...");
Console.ReadKey();
コードの実行
アプリケーションをビルドして起動し、パイプラインの実行を確認します。
コンソールに、データ ファクトリ、リンクされたサービス、データセット、パイプライン、およびパイプラインの実行の作成の進捗状況が表示されます。 その後、パイプラインの実行状態が確認されます。 コピー アクティビティの実行の詳細と、読み取りおよび書き込みデータのサイズが表示されるまで待ちます。 次に、Azure Storage Explorer などのツールを使用して、変数で指定したとおりに BLOB が "inputBlobPath" から "outputBlobPath" にコピーされていることを確認します。
サンプル出力
Create a data factory quickstart-adf...
{
  "name": "quickstart-adf",
  "type": "Microsoft.DataFactory/factories",
  "properties": {
    "provisioningState": "Succeeded",
    "version": "2018-06-01"
  },
  "location": "eastus2"
}
Create a linked service AzureBlobStorage...
{
  "name": "AzureBlobStorage",
  "type": "Microsoft.DataFactory/factories/linkedservices",
  "properties": {
    "type": "AzureBlobStorage",
    "typeProperties": {
      "connectionString": "DefaultEndpointsProtocol=https;AccountName=<storageAccountName>;",
      "encryptedCredential": "<encryptedCredential>"
    }
  }
}
Creating dataset BlobDelimitedDataset...
{
  "name": "BlobDelimitedDataset",
  "type": "Microsoft.DataFactory/factories/datasets",
  "properties": {
    "type": "DelimitedText",
    "linkedServiceName": {
      "type": "LinkedServiceReference",
      "referenceName": "AzureBlobStorage"
    },
    "parameters": {
      "container": {
        "type": "String"
      },
      "path": {
        "type": "String"
      }
    },
    "typeProperties": {
      "location": {
        "container": {
          "type": "Expression",
          "value": "@dataset().container"
        },
        "type": "AzureBlobStorageLocation",
        "fileName": {
          "type": "Expression",
          "value": "@dataset().path"
        }
      },
      "columnDelimiter": ",",
      "quoteChar": "\"",
      "escapeChar": "\\",
      "firstRowAsHeader": false
    }
  }
}
Creating pipeline Adfv2QuickStartPipeline...
{
  "properties": {
    "activities": [
      {
        "inputs": [
          {
            "type": "DatasetReference",
            "referenceName": "BlobDelimitedDataset",
            "parameters": {
              "container": "@pipeline().parameters.inputContainer",
              "path": "@pipeline().parameters.inputPath"
            }
          }
        ],
        "outputs": [
          {
            "type": "DatasetReference",
            "referenceName": "BlobDelimitedDataset",
            "parameters": {
              "container": "@pipeline().parameters.outputContainer",
              "path": "@pipeline().parameters.outputPath"
            }
          }
        ],
        "name": "CopyFromBlobToBlob",
        "type": "Copy",
        "typeProperties": {
          "source": {
            "type": "BlobSource"
          },
          "sink": {
            "type": "BlobSink"
          }
        }
      }
    ],
    "parameters": {
      "inputContainer": {
        "type": "String"
      },
      "inputPath": {
        "type": "String"
      },
      "outputContainer": {
        "type": "String"
      },
      "outputPath": {
        "type": "String"
      }
    }
  }
}
Creating pipeline run...
Pipeline run ID: 3aa26ffc-5bee-4db9-8bac-ccbc2d7b51c1
Checking pipeline run status...
Status: InProgress
Status: Succeeded
Checking copy activity run details...
{
  "dataRead": 1048,
  "dataWritten": 1048,
  "filesRead": 1,
  "filesWritten": 1,
  "sourcePeakConnections": 1,
  "sinkPeakConnections": 1,
  "copyDuration": 8,
  "throughput": 1.048,
  "errors": [],
  "effectiveIntegrationRuntime": "AutoResolveIntegrationRuntime (East US 2)",
  "usedDataIntegrationUnits": 4,
  "billingReference": {
    "activityType": "DataMovement",
    "billableDuration": [
      {
        "meterType": "AzureIR",
        "duration": 0.06666666666666667,
        "unit": "DIUHours"
      }
    ],
    "totalBillableDuration": [
      {
        "meterType": "AzureIR",
        "duration": 0.06666666666666667,
        "unit": "DIUHours"
      }
    ]
  },
  "usedParallelCopies": 1,
  "executionDetails": [
    {
      "source": {
        "type": "AzureBlobStorage"
      },
      "sink": {
        "type": "AzureBlobStorage"
      },
      "status": "Succeeded",
      "start": "2023-12-15T10:25:33.9991558Z",
      "duration": 8,
      "usedDataIntegrationUnits": 4,
      "usedParallelCopies": 1,
      "profile": {
        "queue": {
          "status": "Completed",
          "duration": 5
        },
        "transfer": {
          "status": "Completed",
          "duration": 1,
          "details": {
            "listingSource": {
              "type": "AzureBlobStorage",
              "workingDuration": 0
            },
            "readingFromSource": {
              "type": "AzureBlobStorage",
              "workingDuration": 0
            },
            "writingToSink": {
              "type": "AzureBlobStorage",
              "workingDuration": 0
            }
          }
        }
      },
      "detailedDurations": {
        "queuingDuration": 5,
        "transferDuration": 1
      }
    }
  ],
  "dataConsistencyVerification": {
    "VerificationResult": "NotVerified"
  }
}

Press any key to exit...
出力を検証する
このパイプラインは、adftutorial BLOB コンテナーに対して output フォルダーを自動的に作成します。 そのうえで、input フォルダーから output フォルダーに emp.txt ファイルをコピーします。
- Azure ポータルの adftutorial コンテナー ページで、前に停止した「入力フォルダーとファイルを BLOB コンテナーに追加する」セクションから、更新ボタン Refresh を選択して出力フォルダーを確認します。
- フォルダー一覧で、 [output] を選択します。
- emp.txt が output フォルダーにコピーされていることを確認します。
リソースをクリーンアップする
プログラムによってデータ ファクトリを削除するには、次のコード行をプログラムに追加します。
Console.WriteLine("Deleting the data factory");
dataFactoryResource.Delete(WaitUntil.Completed);
次のステップ
このサンプルのパイプラインは、Azure BLOB ストレージ内のある場所から別の場所にデータをコピーします。 より多くのシナリオで Data Factory を使用する方法については、チュートリアルを参照してください。