통화 관리
Azure Communication Services SDKS를 사용하여 통화를 관리하는 방법을 알아봅니다. 전화를 걸고, 참가자와 속성을 관리하는 방법을 알아봅니다.
필수 조건
- 활성 구독이 있는 Azure 계정. 체험 계정을 만듭니다.
- 배포된 Communication Services 리소스. Communication Services 리소스 만들기
- 호출 클라이언트를 사용하도록 설정하는
User Access Token입니다.User Access Token를 가져오는 방법에 대한 자세한 정보 - 선택 사항: 애플리케이션에 통화 추가 시작에 대한 빠른 시작을 완료합니다.
지원
다음 표는 Azure Communication Services의 소규모 회의실 지원을 정의합니다.
ID 및 호출 형식
다음 표에서는 특정 호출 유형 및 ID에 대한 기능을 지원합니다.
| Identities | Teams 모임 | 방 | 1:1 통화 | 그룹 통화 | 1:1 Teams Interop 통화 | 그룹 Teams Interop 통화 |
|---|---|---|---|---|---|---|
| Communication Services 사용자 | ✔️ | ✔️ | ✔️ | ✔️ | ✔️ | ✔️ |
| Microsoft 365 사용자 | ✔️ | ✔️ | ✔️ |
작업
다음 표에서는 개별 ID 유형과 관련된 호출 SDK의 개별 API에 대한 지원을 보여 줍니다.
| 작업 | Communication Services 사용자 | Microsoft 365 사용자 |
|---|---|---|
| Communication Services 사용자에 대한 호출 시작 | ✔️ | |
| Microsoft 365 사용자에 대한 통화 시작 | ✔️ | ✔️ |
| 전화 번호로 통화 시작 | ✔️ | ✔️ |
| 채팅방 참가 | ✔️ | |
| Teams 모임 참가 | ✔️ | ✔️ |
| groupId를 기반으로 통화 참가 | ✔️ | |
| 수신 전화 수락 또는 거부 | ✔️ | ✔️ |
| 통화 보류 및 다시 시작 | ✔️ | ✔️ |
| 참가자 가져오기 | ✔️ | ✔️ |
| Communication Services 사용자 추가 | ✔️ | |
| Communication Services 사용자 제거 | ✔️ | ✔️ |
| Microsoft 365 사용자 추가 또는 제거 | ✔️ | ✔️ |
| 전화 번호 추가 또는 제거 | ✔️ | ✔️ |
| 원격 참가자 음소거 또는 음소거 해제 | ✔️[1] | ✔️[1] |
| 끊기 | ✔️ | ✔️ |
| 모든 사용자에 대한 통화 종료 | ✔️[2] | ✔️ |
[1] API는 그룹 통화, 회의실 및 Teams 모임에서만 지원됩니다. [2] API는 회의실에서 지원되지 않습니다.
SDK
다음 표에서는 개별 Azure Communication Services SDK의 기능에 대한 지원을 보여 줍니다.
| 상태 지원 | 웹 | 웹 UI | iOS | iOS UI | Android | Android UI | Windows |
|---|---|---|---|---|---|---|---|
| 지원됨 | ✔️ | ✔️ | ✔️ | ✔️ | ✔️ | ✔️ | ✔️ |
SDK 설치
npm install 명령을 사용하여 다음과 같은 JavaScript용 Azure Communication Services Common 및 통화 SDK를 설치합니다.
npm install @azure/communication-common --save
npm install @azure/communication-calling --save
필수 개체 초기화
대부분의 호출 작업에는 CallClient 인스턴스가 필요합니다. 새 CallClient 인스턴스를 만들 때 Logger 인스턴스와 같은 사용자 지정 옵션을 사용하여 이 새 인스턴스를 구성할 수 있습니다.
CallClient 인스턴스를 사용하면 createCallAgent를 호출하여 CallAgent 인스턴스를 만들 수 있습니다. 이 메서드는 CallAgent 인스턴스 개체를 비동기적으로 반환됩니다.
createCallAgent 메서드는 CommunicationTokenCredential을 인수로 사용합니다.
사용자 액세스 토큰이 허용됩니다.
CallClient 인스턴스에서 getDeviceManager 메서드를 사용하여 deviceManager에 액세스할 수 있습니다.
const { CallClient } = require('@azure/communication-calling');
const { AzureCommunicationTokenCredential} = require('@azure/communication-common');
const { AzureLogger, setLogLevel } = require("@azure/logger");

// Set the logger's log level
setLogLevel('verbose');

// Redirect log output to console, file, buffer, REST API, or whatever location you want
AzureLogger.log = (...args) => {
    console.log(...args); // Redirect log output to console
};

const userToken = '<USER_TOKEN>';
callClient = new CallClient(options);
const tokenCredential = new AzureCommunicationTokenCredential(userToken);
const callAgent = await callClient.createCallAgent(tokenCredential, {displayName: 'optional Azure Communication Services user name'});
const deviceManager = await callClient.getDeviceManager()
Microsoft 인프라에 대한 SDK 연결을 가장 잘 관리하는 방법
Call Agent 인스턴스는 통화를 관리하는 데 도움이 됩니다(통화 참여 또는 시작). 작동하려면 통화 SDK가 Microsoft 인프라에 연결하여 수신 전화에 대한 알림을 가져오고 기타 호출 세부 정보를 조정해야 합니다. 사용자의 Call Agent에는 두 가지 상태가 있을 수 있습니다.
연결됨 - Call Agent connectionStatue 값이 Connected이면 클라이언트 SDK가 연결되어 있고 Microsoft 인프라로부터 알림을 받을 수 있음을 의미합니다.
연결 끊김 - Disconnected의 Call Agent connectionStatue 값은 SDK가 제대로 연결되지 못하게 하는 문제가 있음을 나타냅니다.
Call Agent를 다시 만들어야 합니다.
-
invalidToken: 토큰이 만료되었거나 유효하지 않은 경우Call Agent인스턴스가 이 오류와 함께 연결 끊기됩니다. -
connectionIssue: Microsoft 인프라에 연결하는 클라이언트에 문제가 있는 경우 여러 번 다시 시도한 후Call Agent에서connectionIssue오류를 노출합니다.
connectionState 속성의 현재 값을 검사하여 로컬 Call Agent가 Microsoft 인프라에 연결되어 있는지 확인할 수 있습니다. 활성 통화 중에 connectionStateChanged 이벤트를 수신 대기하여 Call Agent가 연결됨에서 연결 끊김 상태로 변경되는지 확인할 수 있습니다.
const connectionState = callAgentInstance.connectionState;
console.log(connectionState); // it may return either of 'Connected' | 'Disconnected'

const connectionStateCallback = (args) => {
    console.log(args); // it will return an object with oldState and newState, each of having a value of either of 'Connected' | 'Disconnected'
    // it will also return reason, either of 'invalidToken' | 'connectionIssue'
}
callAgentInstance.on('connectionStateChanged', connectionStateCallback);
전화 걸기
통화를 만들고 시작하려면 callAgent에서 API 중 하나를 사용하여 Communication Services ID SDK를 통해 만든 사용자를 제공합니다.
통화 만들기와 시작은 동기적입니다.
call 인스턴스를 사용하여 통화 이벤트를 구독할 수 있습니다.
사용자 또는 PSTN에게 1:n 전화 걸기
다른 Communication Services 사용자에게 전화를 걸려면 callAgent에서 startCall 메서드를 사용하고, Communication Services 관리 라이브러리를 사용하여 만든 수신자의 CommunicationUserIdentifier를 전달합니다.
사용자에 대한 1:1 통화의 경우 다음 코드를 사용합니다.
const userCallee = { communicationUserId: '<ACS_USER_ID>' }
const oneToOneCall = callAgent.startCall([userCallee]);
PSTN(공중 교환 전화망)으로 전화를 걸려면 callAgent에서 startCall 메서드를 사용하여 수신자의 PhoneNumberIdentifier를 전달합니다. PSTN 호출을 허용하도록 Communication Services 리소스를 구성해야 합니다.
PSTN 번호로 전화를 거는 경우 대체 발신자 ID를 지정합니다. 대체 발신자 ID는 PSTN 통화의 발신자를 식별하는 전화 번호(E.164 표준 기반)입니다. 통화 수신자가 수신 통화에 대해 확인하는 전화번호입니다.
참고 항목
PSTN 통화 제공에 대한 세부 정보를 확인하세요. 미리 보기 프로그램에 액세스하려면 얼리어답터 프로그램을 신청하세요.
PSTN 번호에 대한 1:1 통화의 경우 다음 코드를 사용합니다.
const pstnCallee = { phoneNumber: '<ACS_USER_ID>' }
const alternateCallerId = {phoneNumber: '<ALTERNATE_CALLER_ID>'};
const oneToOneCall = callAgent.startCall([pstnCallee], { alternateCallerId });
사용자 및 PSTN 번호에 대한 1:n 통화의 경우 다음 코드를 사용합니다.
const userCallee = { communicationUserId: '<ACS_USER_ID>' }
const pstnCallee = { phoneNumber: '<PHONE_NUMBER>'};
const alternateCallerId = {phoneNumber: '<ALTERNATE_CALLER_ID>'};
const groupCall = callAgent.startCall([userCallee, pstnCallee], { alternateCallerId });
회의실 통화에 참가
room 통화에 참가하려면 roomId 속성을 room 식별자로 사용하여 컨텍스트 개체를 인스턴스화할 수 있습니다. 통화에 참가하려면 join 메서드를 사용하고 컨텍스트 인스턴스를 전달합니다.
const context = { roomId: '<RoomId>' }
const call = callAgent.join(context);
room은 애플리케이션 개발자가 통화에 참가할 수 있는 사용자, 모임 시기, 협업 방법을 보다 잘 제어할 수 있도록 합니다.
rooms에 대해 자세히 알아보려면 개념 설명서를 읽거나 빠른 시작 가이드를 따르세요.
그룹 통화에 참가하기
참고 항목
groupId 매개 변수는 시스템 메타데이터로 간주되며 Microsoft가 시스템을 실행하는 데 필요한 작업에 사용할 수 있습니다.
groupId 값에 개인 데이터를 포함하지 마세요. Microsoft는 이 매개 변수를 개인 데이터로 간주하지 않으며 해당 내용이 Microsoft 직원에게 표시되거나 장기적으로 저장될 수 있습니다.
groupId 매개 변수는 데이터를 GUID 형식으로 지정해야 합니다. 시스템에서 개인 데이터로 간주되지 않는 임의로 생성된 GUID를 사용하는 것이 좋습니다.
새 그룹 통화를 시작하거나 진행 중인 그룹 통화에 참가하려면 join 메서드를 사용하고 groupId 속성을 통해 개체를 전달합니다.
groupId 값은 GUID여야 합니다.
const context = { groupId: '<GUID>'};
const call = callAgent.join(context);
수신 전화 받기
callAgent 인스턴스는 로그인된 ID가 전화를 받을 때 incomingCall 이벤트를 내보냅니다. 이 이벤트를 수신 대기하려면 다음 옵션 중 하나를 사용하여 구독합니다.
const incomingCallHandler = async (args: { incomingCall: IncomingCall }) => {
    const incomingCall = args.incomingCall;

    // Get incoming call ID
    var incomingCallId = incomingCall.id

    // Get information about this Call. This API is provided as a preview for developers
    // and may change based on feedback that we receive. Do not use this API in a production environment.
    // To use this api please use 'beta' release of Azure Communication Services Calling Web SDK
    var callInfo = incomingCall.info;

    // Get information about caller
    var callerInfo = incomingCall.callerInfo

    // Accept the call
    var call = await incomingCall.accept();

    // Reject the call
    incomingCall.reject();

    // Subscribe to callEnded event and get the call end reason
     incomingCall.on('callEnded', args => {
        console.log(args.callEndReason);
    });

    // callEndReason is also a property of IncomingCall
    var callEndReason = incomingCall.callEndReason;
};
callAgentInstance.on('incomingCall', incomingCallHandler);
incomingCall 이벤트에는 허용 또는 거부할 수 있는 incomingCall 인스턴스가 포함됩니다.
Azure Communication 통화 SDK는 비디오 사용이 설정된 통화를 시작, 수락 또는 참가할 때 카메라를 사용할 수 없는 경우 cameraStartFailed: true 통화 진단을 발생시킵니다. 이 경우 통화는 비디오가 꺼진 상태로 시작됩니다. 카메라가 다른 프로세스에서 사용 중이거나 운영 체제에서 사용하지 않도록 설정되었기 때문에 카메라를 사용할 수 없을 수 있습니다.
통화 보류 및 다시 시작
참고 항목
지정된 시간의 활성 통화는 1개만 있어야 합니다(Connected 상태, 활성 미디어 포함). 다른 모든 통화는 사용자가 보류하거나 애플리케이션에서 프로그래밍 방식으로 대기해야 합니다. 이는 사용자가 여러 아웃바운드 및 인바운드 통화를 처리해야 할 수 있고, 모든 비활성 통화를 보류해야 하고, 사용자가 활성 통화에서만 다른 사용자와 상호 작용해야 하는 연락처 센터와 같은 시나리오에서 일반적입니다.
통화를 보류하거나 다시 시작하려면 hold 및 resume 비동기 API를 사용하면 됩니다.
통화를 보류하려면 다음을 수행합니다.
await call.hold();
hold API가 확인되면 통화 상태가 LocalHold로 설정됩니다. 1:1 통화에서는 상대방도 대기 상태가 되며, 상대방 관점에서 통화 상태가 'RemoteHold'로 설정됩니다. 나중에 상대방이 통화를 대기 상태로 전환할 수 있으며, 이럴 경우 상태가 LocalHold로 변경됩니다.
그룹 통화 또는 모임에서 - hold는 로컬 작업이며 다른 통화 참가자에 대한 통화를 보류하지 않습니다.
통화를 다시 시작하려면 보류를 시작한 모든 사용자가 다시 시작해야 합니다.
보류 중인 통화를 다시 시작하려면 다음을 수행합니다.
await call.resume();
resume API가 확인되면 통화 상태는 다시 Connected로 설정됩니다.
통화 음소거 및 음소거 해제
로컬 엔드포인트를 음소거하거나 음소거를 해제하려면 mute 및 unmute 비동기 API를 사용할 수 있습니다.
//mute local device (microphone / sent audio)
await call.mute();

//unmute local device (microphone / sent audio)
await call.unmute();
들어오는 오디오 음소거 및 음소거 해제
들어오는 오디오를 음소거하면 통화 볼륨이 0으로 설정됩니다. 들어오는 오디오를 음소거하거나 음소거를 해제하려면 muteIncomingAudio 및 unmuteIncomingAudio 비동기 API를 사용할 수 있습니다.
//mute local device (speaker)
await call.muteIncomingAudio();

//unmute local device (speaker)
await call.unmuteIncomingAudio();
들어오는 오디오가 음소거되어도 참가자 클라이언트 SDK는 계속 통화 오디오(원격 참가자의 오디오)를 수신합니다. 통화 소리가 스피커에서 들리지 않으며 참가자는 'call.unmuteIncomingAudio()'가 호출될 때까지 들을 수 없습니다. 그러나 통화 오디오에 필터를 적용하고 필터링된 오디오를 재생할 수는 있습니다.
원격 참가자 관리
모든 원격 참가자는 RemoteParticipant 개체에서 자세히 표시되며 통화 인스턴스의 remoteParticipants 컬렉션을 통해 연결할 수 있습니다.
remoteParticipants는 Call 인스턴스에서 액세스할 수 있습니다.
통화 참가자 나열
remoteParticipants 컬렉션은 통화의 원격 참가자 목록을 반환합니다.
call.remoteParticipants; // [remoteParticipant, remoteParticipant....]
통화에 참가자 추가
통화에 사용자나 전화 번호로 참가자를 추가하려면 addParticipant API를 사용하면 됩니다.
Identifier 유형 중 하나를 제공합니다.
remoteParticipant 인스턴스를 동기적으로 반환합니다. 참가자가 호출에 성공적으로 추가되면 호출의 remoteParticipantsUpdated 이벤트가 발생합니다.
const userIdentifier = { communicationUserId: '<ACS_USER_ID>' };
const pstnIdentifier = { phoneNumber: '<PHONE_NUMBER>' }
const remoteParticipant = call.addParticipant(userIdentifier);
const alternateCallerId = {  phoneNumber: '<ALTERNATE_CALLER_ID>' };
const remoteParticipant = call.addParticipant(pstnIdentifier, { alternateCallerId });
통화에서 참가자 제거
통화에서 참가자(사용자 또는 전화 번호)를 제거하려면 removeParticipant를 호출할 수 있습니다.
Identifier 유형 중 하나를 전달해야 합니다. 이 메서드는 통화에서 참가자가 제거된 후 이를 비동기적으로 해결합니다. 참가자는 remoteParticipants 컬렉션에서도 제거됩니다.
const userIdentifier = { communicationUserId: '<ACS_USER_ID>' };
const pstnIdentifier = { phoneNumber: '<PHONE_NUMBER>' }
await call.removeParticipant(userIdentifier);
await call.removeParticipant(pstnIdentifier);
원격 참가자 속성에 액세스
원격 참가자에게는 연결된 속성 및 컬렉션 집합이 있습니다.
-
CommunicationIdentifier: 원격 참가자의 식별자를 가져옵니다. ID는CommunicationIdentifier유형 중 하나입니다.
const identifier = remoteParticipant.identifier;
다음
CommunicationIdentifier유형 중 하나일 수 있습니다.-
{ communicationUserId: '<ACS_USER_ID'> }: Azure Communication Services 사용자를 나타내는 개체입니다. -
{ phoneNumber: '<E.164>' }: E.164 형식의 전화 번호를 나타내는 개체입니다. -
{ microsoftTeamsUserId: '<TEAMS_USER_ID>', isAnonymous?: boolean; cloud?: "public" | "dod" | "gcch" }: Teams 사용자를 나타내는 개체입니다. -
{ id: string }: 다른 유형에 해당하지 않는 식별자를 나타내는 개체입니다.
-
state: 원격 참가자의 상태를 가져옵니다.
const state = remoteParticipant.state;
상태는 다음과 같을 수 있습니다.
-
Idle: 초기 상태입니다. -
Connecting: 참가자가 통화에 연결되는 동안의 전환 상태입니다. -
Ringing: 참가자가 전화를 거는 중입니다. -
Connected: 참가자가 통화에 연결되었습니다. -
Hold: 참가자가 대기 중입니다. -
EarlyMedia: 참가자가 통화에 연결되기 전에 재생되는 알림입니다. -
InLobby: 원격 참가자가 로비에 있음을 나타냅니다. -
Disconnected: 최종 상태입니다. 참가자의 통화 연결이 끊겼습니다. 원격 참가자의 네트워크 연결이 끊어지면 2분 후 상태가Disconnected로 변경됩니다.
-
callEndReason: 참가자가 통화를 종료한 이유를 알아보려면callEndReason속성을 확인합니다.const callEndReason = remoteParticipant.callEndReason; const callEndReasonCode = callEndReason.code // (number) code associated with the reason const callEndReasonSubCode = callEndReason.subCode // (number) subCode associated with the reason고:
- 이 속성은 Call.addParticipant() API를 통해 원격 참가자를 추가할 때만 설정되며 예를 들어 원격 참가자가 거부하는 경우입니다.
- UserB가 UserC를 시작하는 경우 UserA의 관점에서는 이 플래그가 UserC에 대해 설정된 것이 보이지 않습니다. 즉 UserA는 UserC의 callEndReason 속성이 설정된 것을 젼혀 볼 수 없습니다.
isMuted상태: 원격 참가자가 음소거되어 있는지 확인하려면isMuted속성을 확인합니다.Boolean를 반환합니다.const isMuted = remoteParticipant.isMuted;isSpeaking상태: 원격 참가자가 말하는 중인지 확인하려면isSpeaking속성을 확인합니다.Boolean를 반환합니다.const isSpeaking = remoteParticipant.isSpeaking;videoStreams: 특정 참가자가 이 통화에서 보내는 모든 비디오 스트림을 검사하려면videoStreams컬렉션을 확인합니다.RemoteVideoStream개체가 포함됩니다.const videoStreams = remoteParticipant.videoStreams; // [RemoteVideoStream, ...]displayName: 이 원격 참가자의 표시 이름을 가져오려면displayName속성을 검사합니다. 문자열을 반환합니다.const displayName = remoteParticipant.displayName;endpointDetails: 이 원격 참가자에 대한 모든 엔드포인트의 세부 정보 가져오기const endpointDetails: EndpointDetails[] = remoteParticipant.endpointDetails;참고: 원격 참가자는 여러 엔드포인트로부터의 통화에 참가할 수 있으며 각 엔드포인트에는 고유한
participantId가 있습니다.participantId는 RemoteParticipant.identifier의 원시 ID와 다릅니다.
다른 참가자 음소거
참고 항목
이 API를 사용하려면 Azure Communication Services 호출 웹 SDK 버전 1.26.1 이상을 사용하세요.
다른 모든 참가자를 음소거하거나 통화에 연결된 특정 참가자를 음소거하려면 통화 및 mute 원격 참가자에서 비동기 API muteAllRemoteParticipants 를 사용할 수 있습니다. 통화의 mutedByOthers 이벤트는 다른 사용자가 로컬 참가자를 음소거했을 때 발생합니다.
참고: PSTN(전화 번호) 참가자 또는 1:1 통화 참가자를 음소거하는 시나리오는 지원되지 않습니다.
//mute all participants except yourself
await call.muteAllRemoteParticipants();

//mute a specific participant
await call.remoteParticipants[0].mute();
통화 속성 확인
통화의 고유 ID(문자열)를 가져옵니다.
const callId: string = call.id;
로컬 참가자 ID를 가져옵니다.
const participantId: string = call.info.participantId;
참고: Azure Communication Services ID는 여러 엔드포인트의 웹 통화 SDK를 사용할 수 있으며 각 엔드포인트에는 고유한 participantId가 있습니다.
participantId는 Azure Communication Services ID 원시 ID와 다릅니다.
Teams 모임에 참가하는 경우 스레드 ID를 검색합니다.
const threadId: string | undefined = call.info.threadId;
통화에 대한 정보 얻기:
const callInfo = call.info;
통화의 다른 참가자에 대해 알아보려면 '통화' 인스턴스의 remoteParticipants 컬렉션을 검사합니다.
const remoteParticipants = call.remoteParticipants;
수신 통화의 발신자를 식별합니다.
const callerIdentity = call.callerInfo.identifier;
identifier는 CommunicationIdentifier 유형 중 하나입니다.
통화의 상태를 가져옵니다.
const callState = call.state;
다음과 같은 통화의 현재 상태를 나타내는 문자열을 반환합니다.
-
None: 초기 통화 상태입니다. -
Connecting: 전화를 걸었거나 수락되었을 때의 초기 전환 상태입니다. -
Ringing: 발신 통화의 경우 원격 참가자의 전화 벨이 울리고 있다는 뜻입니다. 상대방에서는Incoming입니다. -
EarlyMedia: 통화가 연결되기 전에 알림이 재생되는 상태를 나타냅니다. -
Connected: 통화가 연결되었음을 나타냅니다. -
LocalHold: 로컬 참가자가 통화를 대기 상태로 전환했음을 나타냅니다. 로컬 엔드포인트와 원격 참가자 간에 미디어가 전달되지 않습니다. -
RemoteHold: 원격 참가자가 통화를 대기 상태로 전환했음을 나타냅니다. 로컬 엔드포인트와 원격 참가자 간에 미디어가 전달되지 않습니다. -
InLobby: 사용자가 로비에 있음을 나타냅니다. -
Disconnecting: 통화가Disconnected상태로 전환되기 전의 전환 상태입니다. -
Disconnected: 최종 통화 상태입니다. 네트워크 연결이 끊어지면 2분 후 상태가Disconnected로 변경됩니다.
callEndReason 속성을 검사하여 통화가 종료된 이유를 확인합니다.
const callEndReason = call.callEndReason;
const callEndReasonMessage = callEndReason.message // (string) user friendly message
const callEndReasonCode = callEndReason.code // (number) code associated with the reason
const callEndReasonSubCode = callEndReason.subCode // (number) subCode associated with the reason
direction 속성을 검사하여 현재 통화가 수신 또는 발신인지 확인합니다.
CallDirection를 반환합니다.
const isIncoming = call.direction == 'Incoming';
const isOutgoing = call.direction == 'Outgoing';
localVideoStreams 컬렉션을 확인하여 활성 비디오 스트림 및 활성 화면 공유 스트림을 검사합니다.
localVideoStreams API는 Video 형식, ScreenSharing 형식 또는 RawMedia 형식의 LocalVideoStream 개체를 반환합니다.
const localVideoStreams = call.localVideoStreams;
현재 마이크가 음소거되었는지 확인합니다.
Boolean를 반환합니다.
const muted = call.isMuted;
현재 들어오는 오디오(스피커)가 음소거되었는지 확인합니다.
Boolean를 반환합니다.
const incomingAudioMuted = call.isIncomingAudioMuted;
비디오가 켜지는지 확인합니다.
Boolean를 반환합니다.
const isLocalVideoStarted = call.isLocalVideoStarted;
화면 공유가 켜지는지 확인합니다.
Boolean를 반환합니다.
const isScreenSharingOn = call.isScreenSharingOn;
끊기
전화를 끊는 방법에는 두 가지가 있습니다. 통화를 종료하고 다른 참가자를 통화에 유지하거나 모든 참가자에 대한 통화를 종료할 수 있습니다. 통화를 나가려면 다음을 사용합니다.
call.hangUp();
제공하는 HangUpOptions경우 모든 참가자에 대한 호출을 종료할 수도 있습니다.
참고 항목
이 API는 회의실에서 사용할 수 없습니다.
call.hangUp( forEveryone: true);
SDK 설치
프로젝트 수준 build.gradle 파일을 찾아 다음 아래 buildscriptallprojects의 리포지토리 목록에 추가 mavenCentral() 합니다.
buildscript {
    repositories {
    ...
        mavenCentral()
    ...
    }
}
allprojects {
    repositories {
    ...
        mavenCentral()
    ...
    }
}
그런 다음, 모듈 수준 build.gradle 파일에서 섹션에 다음 줄을 dependencies 추가합니다.
dependencies {
    ...
    implementation 'com.azure.android:azure-communication-calling:1.0.0'
    ...
}
필요한 개체 초기화
CallAgent 인스턴스를 만들려면 CallClient 인스턴스에서 createCallAgent 메서드를 호출해야 합니다. 이 호출은 CallAgent 인스턴스 개체를 비동기적으로 반환합니다.
createCallAgent 메서드는 CommunicationUserCredential을 인수로 사용하여 액세스 토큰을 캡슐화합니다.
DeviceManager에 액세스하려면 먼저 callAgent 인스턴스를 만들어야 합니다. 그런 다음 CallClient.getDeviceManager 메서드를 사용하여 DeviceManager를 가져올 수 있습니다.
String userToken = '<user token>';
CallClient callClient = new CallClient();
CommunicationTokenCredential tokenCredential = new CommunicationTokenCredential(userToken);
android.content.Context appContext = this.getApplicationContext(); // From within an activity, for instance
CallAgent callAgent = callClient.createCallAgent(appContext, tokenCredential).get();
DeviceManager deviceManager = callClient.getDeviceManager(appContext).get();
호출자의 표시 이름을 설정하려면 다음과 같은 대체 방법을 사용합니다.
String userToken = '<user token>';
CallClient callClient = new CallClient();
CommunicationTokenCredential tokenCredential = new CommunicationTokenCredential(userToken);
android.content.Context appContext = this.getApplicationContext(); // From within an activity, for instance
CallAgentOptions callAgentOptions = new CallAgentOptions();
callAgentOptions.setDisplayName("Alice Bob");
DeviceManager deviceManager = callClient.getDeviceManager(appContext).get();
CallAgent callAgent = callClient.createCallAgent(appContext, tokenCredential, callAgentOptions).get();
전화 걸기
통화를 만들고 시작하려면 CallAgent.startCall() 메서드를 호출하고 호출 수신자의 Identifier를 제공해야 합니다.
그룹 통화에 참가하려면 CallAgent.join() 메서드를 호출하고 groupId를 제공해야 합니다. 그룹 ID는 GUID 또는 UUID 형식이어야 합니다.
통화 만들기와 시작은 동기적입니다. 통화 인스턴스를 사용하여 통화의 모든 이벤트를 구독할 수 있습니다.
사용자에게 1:1 전화 걸기
다른 Communication Services 사용자에게 전화를 걸려면 callAgent에서 call 메서드를 호출하고 communicationUserId 키를 사용하여 개체를 전달합니다.
StartCallOptions startCallOptions = new StartCallOptions();
Context appContext = this.getApplicationContext();
CommunicationUserIdentifier acsUserId = new CommunicationUserIdentifier(<USER_ID>);
CommunicationUserIdentifier participants[] = new CommunicationUserIdentifier[]{ acsUserId };
call oneToOneCall = callAgent.startCall(appContext, participants, startCallOptions);
사용자 및 PSTN과 1:n 통화
참고 항목
PSTN 통화 제공에 대한 세부 정보를 확인하세요. 미리 보기 프로그램에 액세스하려면 얼리어답터 프로그램을 신청하세요.
사용자 및 PSTN 번호로 1:n 전화를 걸려면 호출 수신자의 전화 번호를 지정해야 합니다. PSTN 통화를 허용하도록 Communication Services 리소스를 구성해야 합니다.
CommunicationUserIdentifier acsUser1 = new CommunicationUserIdentifier(<USER_ID>);
PhoneNumberIdentifier acsUser2 = new PhoneNumberIdentifier("<PHONE_NUMBER>");
CommunicationIdentifier participants[] = new CommunicationIdentifier[]{ acsUser1, acsUser2 };
StartCallOptions startCallOptions = new StartCallOptions();
Context appContext = this.getApplicationContext();
Call groupCall = callAgent.startCall(participants, startCallOptions);
전화 받기
전화를 받으려면 호출 개체에서 'accept' 메서드를 호출합니다.
Context appContext = this.getApplicationContext();
IncomingCall incomingCall = retrieveIncomingCall();
Call call = incomingCall.accept(context).get();
비디오 카메라를 켠 상태에서 통화를 수락하려면 다음을 수행합니다.
Context appContext = this.getApplicationContext();
IncomingCall incomingCall = retrieveIncomingCall();
AcceptCallOptions acceptCallOptions = new AcceptCallOptions();
VideoDeviceInfo desiredCamera = callClient.getDeviceManager().get().getCameraList().get(0);
acceptCallOptions.setVideoOptions(new VideoOptions(new LocalVideoStream(desiredCamera, appContext)));
Call call = incomingCall.accept(context, acceptCallOptions).get();
수신 통화는 callAgent 개체에서 onIncomingCall 이벤트를 구독하여 가져올 수 있습니다.
// Assuming "callAgent" is an instance property obtained by calling the 'createCallAgent' method on CallClient instance
public Call retrieveIncomingCall() {
    IncomingCall incomingCall;
    callAgent.addOnIncomingCallListener(new IncomingCallListener() {
        void onIncomingCall(IncomingCall inboundCall) {
            // Look for incoming call
            incomingCall = inboundCall;
        }
    });
    return incomingCall;
}
회의실 통화에 참가
CallAgent및 RoomCallLocator를 사용하여 roomId를 지정한 후 회의실 통화에 참가합니다.
CallAgent.join 메서드는 Call 개체를 반환합니다.
val roomCallLocator = RoomCallLocator(roomId)
call = callAgent.join(applicationContext, roomCallLocator, joinCallOptions)
room은 애플리케이션 개발자가 통화에 참가할 수 있는 사용자, 모임 시기, 협업 방법을 보다 잘 제어할 수 있도록 합니다.
rooms에 대해 자세히 알아보려면 개념 설명서를 읽거나 빠른 시작 가이드를 따르세요.
그룹 통화에 참가하기
새 그룹 통화를 시작하거나 진행 중인 그룹 통화에 참가하려면 'join' 메서드를 호출하고 groupId 속성을 통해 개체를 전달해야 합니다. 값은 GUID여야 합니다.
Context appContext = this.getApplicationContext();
GroupCallLocator groupCallLocator = new GroupCallLocator("<GUID>");
JoinCallOptions joinCallOptions = new JoinCallOptions();

call = callAgent.join(context, groupCallLocator, joinCallOptions);
통화 속성
다음과 같이 이 통화의 고유 ID를 가져옵니다.
String callId = call.getId();
통화의 다른 참가자에 대해 알아보려면 call 인스턴스의 remoteParticipant 컬렉션을 검사합니다.
List<RemoteParticipant> remoteParticipants = call.getRemoteParticipants();
수신 전화가 걸려 올 때의 호출자 ID입니다.
CommunicationIdentifier callerId = call.getCallerInfo().getIdentifier();
다음과 같이 통화의 상태를 가져옵니다.
CallState callState = call.getState();
다음과 같은 통화의 현재 상태를 나타내는 문자열을 반환합니다.
- ‘NONE’ - 초기 통화 상태입니다.
- ‘EARLY_MEDIA’ - 전화가 연결되기 전에 알림이 재생되는 상태를 나타냅니다.
- ‘CONNECTING’ - 전화를 걸었거나 수락되었을 때의 초기 전환 상태입니다.
- ‘RINGING’ - 발신 통화의 경우 원격 참가자의 전화벨이 울리고 있다는 뜻입니다.
- ‘CONNECTED’ - 전화가 연결되었습니다.
- ‘LOCAL_HOLD’ - 로컬 참가자가 전화를 대기 상태로 설정했으며, 로컬 엔드포인트와 원격 참가자 간에 미디어가 전달되지 않습니다.
- ‘REMOTE_HOLD’ - 원격 참가자가 전화를 대기 상태로 설정했으며, 로컬 엔드포인트와 원격 참가자 간에 미디어가 전달되지 않습니다.
- ‘DISCONNECTING’ - 통화가 ‘Disconnected’ 상태로 전환되기 전의 상태입니다.
- ‘DISCONNECTED’ - 최종 통화 상태입니다.
- ‘IN_LOBBY’ - Teams 모임의 상호 운용성을 위해 로비에 있습니다.
통화가 종료된 이유를 알아보려면 callEndReason 속성을 검사합니다. 이 속성에는 다음과 같은 코드/하위 코드가 포함되어 있습니다.
CallEndReason callEndReason = call.getCallEndReason();
int code = callEndReason.getCode();
int subCode = callEndReason.getSubCode();
현재 통화가 수신 통화인지 아니면 발신 통화인지 알아보려면 callDirection 속성을 검사합니다.
CallDirection callDirection = call.getCallDirection();
// callDirection == CallDirection.INCOMING for incoming call
// callDirection == CallDirection.OUTGOING for outgoing call
현재 마이크가 음소거되었는지 확인하려면 muted 속성을 검사합니다.
boolean muted = call.isMuted();
활성 비디오 스트림을 검사하려면 localVideoStreams 컬렉션을 검사합니다.
List<LocalVideoStream> localVideoStreams = call.getLocalVideoStreams();
음소거 및 음소거 해제
로컬 엔드포인트를 음소거하거나 음소거를 해제하려면 mute 및 unmute 비동기 API를 사용합니다.
Context appContext = this.getApplicationContext();
call.mute(appContext).get();
call.unmute(appContext).get();
통화 볼륨 변경
통화 중일 때 전화기의 하드웨어 볼륨 키를 사용하여 사용자가 통화 볼륨을 변경할 수 있어야 합니다.
이는 통화가 이루어지는 작업에서 스트리밍 유형이 AudioManager.STREAM_VOICE_CALL인 setVolumeControlStream 메서드를 사용하여 수행됩니다.
이렇게 하면 하드웨어 볼륨 키가 통화 볼륨(전화 아이콘 또는 볼륨 슬라이더에 이와 유사한 것으로 표시됨)을 변경할 수 있어 경보, 미디어 또는 시스템 전체 볼륨과 같은 다른 사운드 프로필의 볼륨을 변경할 수 없습니다. 자세한 내용은 오디오 출력의 변경 사항 처리 | Android Developers를 확인할 수 있습니다.
@Override
protected void onCreate(Bundle savedInstanceState) {
    ...
    setVolumeControlStream(AudioManager.STREAM_VOICE_CALL);
}
원격 참가자 관리
모든 원격 참가자는 RemoteParticipant 형식으로 표시되며 호출 인스턴스에서 remoteParticipants 컬렉션을 통해 사용할 수 있습니다.
통화 참가자 나열
remoteParticipants 컬렉션은 특정 통화의 원격 참가자 목록을 반환합니다.
List<RemoteParticipant> remoteParticipants = call.getRemoteParticipants(); // [remoteParticipant, remoteParticipant....]
통화에 참가자 추가
통화에 참가자(사용자 또는 전화 번호)를 추가하려면 addParticipant를 호출합니다.
그러면 원격 참가자 인스턴스가 동기적으로 반환됩니다.
const acsUser = new CommunicationUserIdentifier("<acs user id>");
const acsPhone = new PhoneNumberIdentifier("<phone number>");
RemoteParticipant remoteParticipant1 = call.addParticipant(acsUser);
AddPhoneNumberOptions addPhoneNumberOptions = new AddPhoneNumberOptions(new PhoneNumberIdentifier("<alternate phone number>"));
RemoteParticipant remoteParticipant2 = call.addParticipant(acsPhone, addPhoneNumberOptions);
통화에서 참가자 제거
통화에서 참가자(사용자 또는 전화 번호)를 제거하려면 removeParticipant를 호출합니다.
그러면 통화에서 참가자가 제거될 때 이를 비동기적으로 확인합니다.
참가자도 remoteParticipants 컬렉션에서 제거됩니다.
RemoteParticipant acsUserRemoteParticipant = call.getParticipants().get(0);
RemoteParticipant acsPhoneRemoteParticipant = call.getParticipants().get(1);
call.removeParticipant(acsUserRemoteParticipant).get();
call.removeParticipant(acsPhoneRemoteParticipant).get();
원격 참가자 속성
특정 원격 참가자와 연결된 여러 가지 속성 및 컬렉션이 있습니다.
이 원격 참가자의 식별자를 가져옵니다. ID는 'Identifier' 형식 중 하나입니다.
CommunicationIdentifier participantIdentifier = remoteParticipant.getIdentifier();이 원격 참가자의 상태를 가져옵니다.
ParticipantState state = remoteParticipant.getState();
상태는 다음 중 하나입니다.
‘IDLE’ - 초기 상태입니다.
‘EARLY_MEDIA’ - 참가자가 통화에 연결되기 전에 알림이 재생됩니다.
‘RINGING’ - 참가자의 전화벨이 울리고 있습니다.
‘CONNECTING’ - 참가자가 통화에 연결하는 동안의 전환 상태입니다.
‘CONNECTED’ - 참가자가 전화에 연결되었습니다.
‘HOLD’ - 참가자가 보류 중입니다.
‘IN_LOBBY’ - 참가자가 로비에서 참석 대기 중입니다. 현재는 Teams interop 시나리오에만 사용됩니다.
‘DISCONNECTED’ - 최종 상태입니다. 참가자의 통화 연결이 끊겼습니다.
참가자가 통화를 종료한 이유를 알아보려면
callEndReason속성을 검사합니다.CallEndReason callEndReason = remoteParticipant.getCallEndReason();이 원격 참가자가 음소거되었는지 확인하려면
isMuted속성을 검사합니다.boolean isParticipantMuted = remoteParticipant.isMuted();이 원격 참가자가 말하는 중인지 확인하려면
isSpeaking속성을 검사합니다.boolean isParticipantSpeaking = remoteParticipant.isSpeaking();특정 참가자가 이 통화에서 보내는 모든 비디오 스트림을 검사하려면
videoStreams컬렉션을 확인합니다.List<RemoteVideoStream> videoStreams = remoteParticipant.getVideoStreams(); // [RemoteVideoStream, RemoteVideoStream, ...]
다른 참가자 음소거
참고 항목
이 API를 사용하려면 Azure Communication Services Calling Android SDK 버전 2.11.0 이상을 사용하세요.
통화에서 다른 모든 참가자를 음소거하려면 통화에서 muteAllRemoteParticipants API를 사용합니다.
call.muteAllRemoteParticipants();
특정 원격 참가자를 음소거하려면 지정된 원격 참가자에서 mute API를 사용합니다.
remoteParticipant.mute();
다른 사용자가 음소거되었음을 로컬 참가자에게 알리려면 onMutedByOthers 이벤트를 구독합니다.
포그라운드 서비스 사용
애플리케이션이 백그라운드에 있는 경우에도 사용자 표시 작업을 실행하려는 경우 포그라운드 서비스를 사용할 수 있습니다.
예를 들어 포그라운드 서비스를 사용하면 애플리케이션에 활성 호출이 있을 때 사용자에게 표시되는 알림을 유지할 수 있습니다. 이렇게 하면 사용자가 홈 화면으로 가거나 최근 화면에서 애플리케이션을 제거하더라도 통화가 계속 활성화됩니다.
통화하는 동안 포그라운드 서비스를 사용하지 않으면 홈 화면으로 이동하여 통화를 활성 상태로 유지할 수 있지만 Android OS에서 애플리케이션의 프로세스를 종료하는 경우 최근 화면에서 애플리케이션을 제거하면 통화가 중단될 수 있습니다.
예를 들어 통화를 시작/참가할 때 포그라운드 서비스를 시작해야 합니다.
call = callAgent.startCall(context, participants, options);
startService(yourForegroundServiceIntent);
통화를 중단하거나 통화 상태가 연결 끊김인 경우 포그라운드 서비스를 중지합니다. 예를 들면 다음과 같습니다.
call.hangUp(new HangUpOptions()).get();
stopService(yourForegroundServiceIntent);
포그라운드 서비스 사용에 대한 참고 사항
앱이 최근 목록에서 제거될 때 이미 실행 중인 포그라운드 서비스를 중지하는 것과 같은 시나리오에서는 사용자에게 표시되는 알림을 제거하고 Android OS에서 추가 기간 동안 애플리케이션 프로세스를 활성 상태로 유지할 수 있습니다. 즉, 이 기간 동안 통화가 계속 활성화될 수 있습니다.
예를 들어 애플리케이션이 서비스 onTaskRemoved 메서드에서 포그라운드 서비스를 중지하는 경우 onDestroy 메서드 재정의로 활동이 삭제될 때 오디오 및 비디오가 중지되는 것처럼 애플리케이션은 활동 수명 주기에 따라 오디오 및 비디오를 시작/중지할 수 있습니다.
시스템 설정
다음 단계에 따라 시스템을 설정합니다.
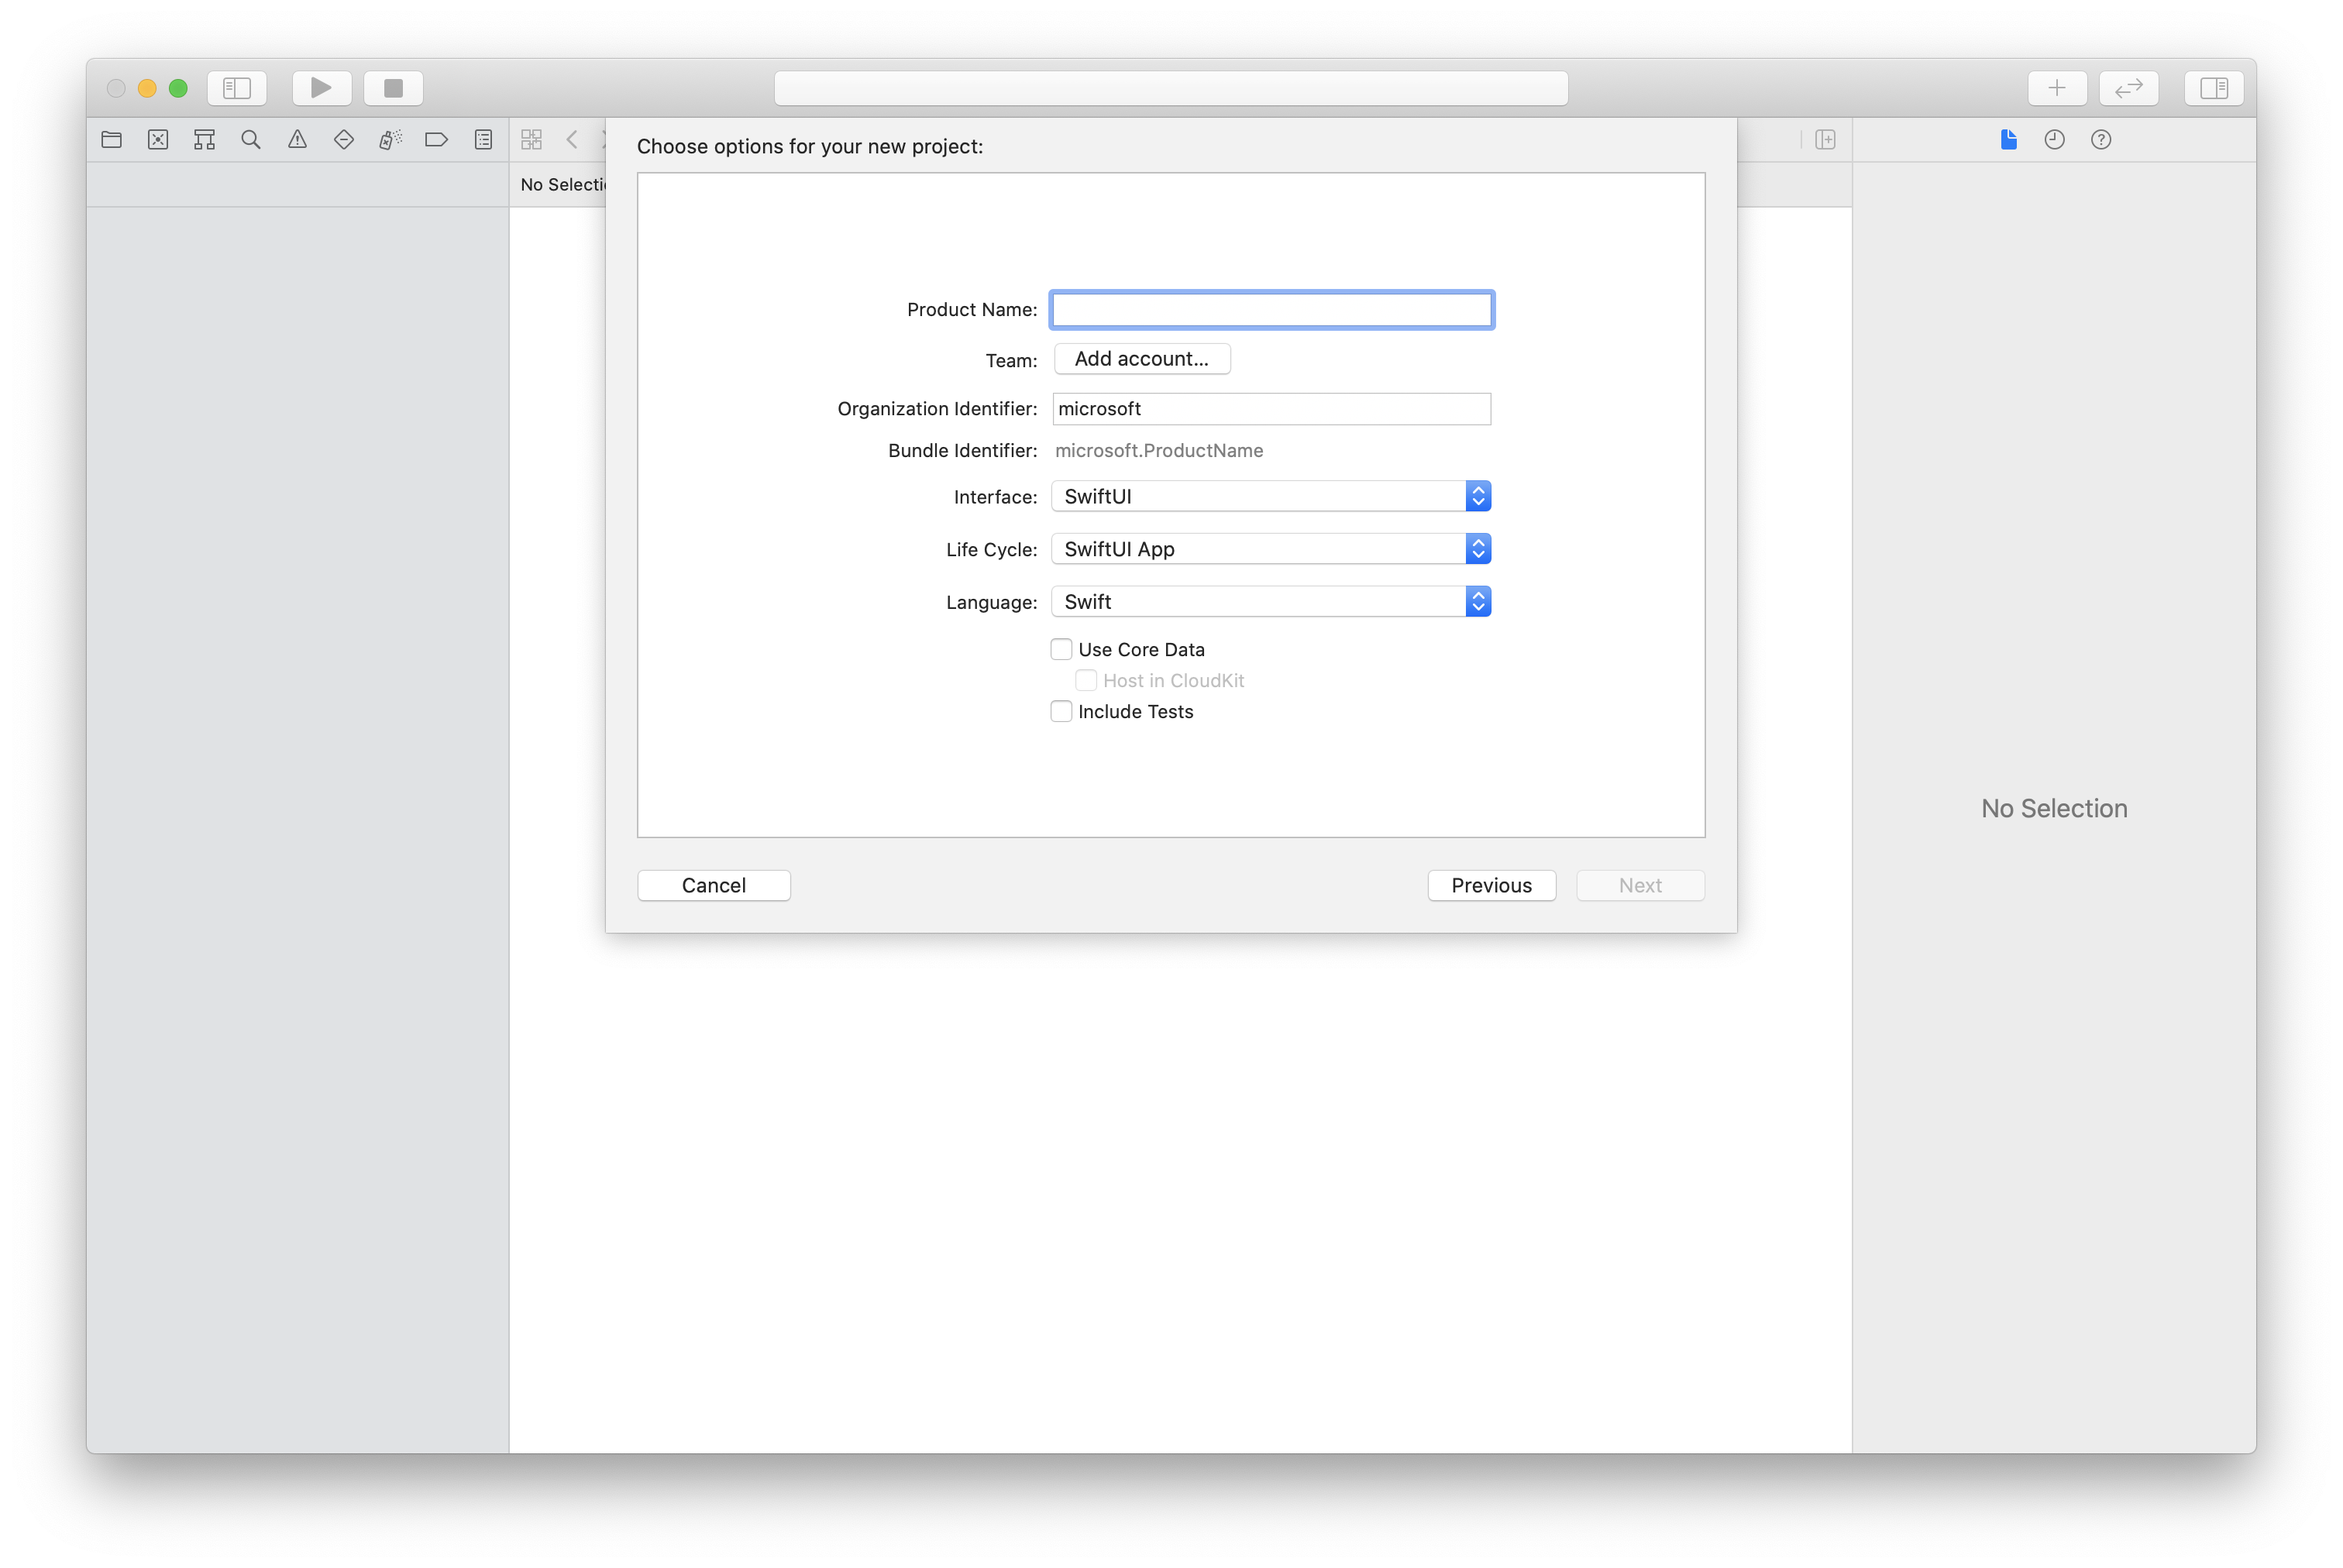
Xcode 프로젝트 만들기
Xcode에서 새 iOS 프로젝트를 만들고 단일 보기 앱 템플릿을 선택합니다. 이 문서에서는 SwiftUI 프레임워크를 사용하므로 언어를 Swift로 설정하고 인터페이스를 SwiftUI로 설정해야 합니다.
이 문서에서는 테스트를 만들지 않을 것입니다. 테스트 포함 확인란을 선택 취소합니다.
CocoaPods를 사용하여 패키지 및 종속성 설치
다음 예제와 같이 애플리케이션에 대한 Podfile을 만듭니다.
platform :ios, '13.0'
use_frameworks!
target 'AzureCommunicationCallingSample' do
    pod 'AzureCommunicationCalling', '~> 1.0.0'
end
pod install를 실행합니다.Xcode로
.xcworkspace를 엽니다.
마이크에 대한 액세스 요청
디바이스의 마이크에 액세스하려면 앱의 정보 속성 목록을 NSMicrophoneUsageDescription(으)로 업데이트해야 합니다. 연결된 값을 시스템에서 사용자의 액세스를 요청하는 데 사용하는 대화 상자에 포함된 문자열로 설정합니다.
프로젝트 트리의 Info.plist 항목을 마우스 오른쪽 단추로 클릭한 다음 Open As>Source Code를 선택합니다. 최상위 <dict> 섹션에 다음 줄을 추가한 다음, 파일을 저장합니다.
<key>NSMicrophoneUsageDescription</key>
<string>Need microphone access for VOIP calling.</string>
앱 프레임워크 설정
프로젝트의 ContentView.swift 파일을 엽니다.
AzureCommunicationCalling 라이브러리를 가져오려면 파일 상단에 import 선언을 추가합니다. 추가로 AVFoundation을 가져옵니다. 코드의 오디오 권한 요청에 필요합니다.
import AzureCommunicationCalling
import AVFoundation
CallAgent 초기화
CallAgent에서 CallClient 인스턴스를 만들려면 초기화된 후 비동기적으로 callClient.createCallAgent 개체를 반환하는 CallAgent 메서드를 사용해야 합니다.
호출 클라이언트를 만들려면 CommunicationTokenCredential 개체를 전달합니다.
import AzureCommunication

let tokenString = "token_string"
var userCredential: CommunicationTokenCredential?
do {
    let options = CommunicationTokenRefreshOptions(initialToken: token, refreshProactively: true, tokenRefresher: self.fetchTokenSync)
    userCredential = try CommunicationTokenCredential(withOptions: options)
} catch {
    updates("Couldn't created Credential object", false)
    initializationDispatchGroup!.leave()
    return
}

// tokenProvider needs to be implemented by Contoso, which fetches a new token
public func fetchTokenSync(then onCompletion: TokenRefreshOnCompletion) {
    let newToken = self.tokenProvider!.fetchNewToken()
    onCompletion(newToken, nil)
}
직접 만든 CommunicationTokenCredential 개체를 CallClient에 전달하고 표시 이름을 설정합니다.
self.callClient = CallClient()
let callAgentOptions = CallAgentOptions()
options.displayName = " iOS Azure Communication Services User"

self.callClient!.createCallAgent(userCredential: userCredential!,
    options: callAgentOptions) { (callAgent, error) in
        if error == nil {
            print("Create agent succeeded")
            self.callAgent = callAgent
        } else {
            print("Create agent failed")
        }
})
참고 항목
애플리케이션에서 이벤트 대리자를 구현할 때 이벤트 구독이 필요한 개체에 대한 강력한 참조를 보유해야 합니다. 예를 들어 call.addParticipant 메서드를 호출할 때 RemoteParticipant 개체가 반환되고 애플리케이션에서 RemoteParticipantDelegate를 수신 대기하도록 대리자를 설정하는 경우 애플리케이션은 RemoteParticipant 개체에 대한 강력한 참조를 보유해야 합니다. 그렇지 않으면 이 개체가 수집될 경우 호출 SDK가 개체를 호출하려고 할 때 대리자가 치명적인 예외를 throw합니다.
발신 전화 걸기
통화를 만들고 시작하려면 CallAgent에서 API 중 하나를 호출하고 Communication Services Management SDK를 사용하여 프로비저닝한 사용자의 Communication Services ID를 제공해야 합니다.
통화 만들기와 시작은 동기적입니다. 통화의 모든 이벤트를 구독할 수 있는 호출 인스턴스를 받게 됩니다.
사용자와 1:1 통화 또는 사용자 및 PSTN과 1:n 통화
let callees = [CommunicationUser(identifier: 'UserId')]
self.callAgent?.startCall(participants: callees, options: StartCallOptions()) { (call, error) in
     if error == nil {
         print("Successfully started outgoing call")
         self.call = call
     } else {
         print("Failed to start outgoing call")
     }
}
사용자 및 PSTN과 1:n 통화
참고 항목
PSTN 통화 제공에 대한 세부 정보를 확인하세요. 미리 보기 프로그램에 액세스하려면 얼리어답터 프로그램을 신청하세요.
PSTN과 통화하려면 Communication Services로 얻은 전화번호를 지정해야 합니다.
let pstnCallee = PhoneNumberIdentifier(phoneNumber: '+1999999999')
let callee = CommunicationUserIdentifier('UserId')
self.callAgent?.startCall(participants: [pstnCallee, callee], options: StartCallOptions()) { (groupCall, error) in
     if error == nil {
         print("Successfully started outgoing call to multiple participants")
         self.call = groupCall
     } else {
         print("Failed to start outgoing call to multiple participants")
     }
}
회의실 통화에 참가
room 통화에 참가하려면 roomId 속성을 room 식별자로 지정합니다. 통화에 참가하려면 join 메서드를 사용하고 roomCallLocator를 전달합니다.
func joinRoomCall() {
    if self.callAgent == nil {
        print("CallAgent not initialized")
        return
    }

    if (self.roomId.isEmpty) {
        print("Room ID not set")
        return
    }

    // Join a call with a Room ID
    let options = JoinCallOptions()
    let audioOptions = AudioOptions()
    audioOptions.muted = self.muted

    options.audioOptions = audioOptions

    let roomCallLocator = RoomCallLocator(roomId: roomId)
    self.callAgent!.join(with: roomCallLocator, joinCallOptions: options) { (call, error) in
        self.setCallAndObserver(call: call, error: error)
    }
}
room은 애플리케이션 개발자가 통화에 참가할 수 있는 사용자, 모임 시기, 협업 방법을 보다 잘 제어할 수 있도록 합니다.
rooms에 대해 자세히 알아보려면 개념 설명서를 읽거나 빠른 시작 가이드를 따르세요.
그룹 통화에 참가하기
통화에 참가하려면 CallAgent에서 API 중 하나를 호출해야 합니다.
let groupCallLocator = GroupCallLocator(groupId: UUID(uuidString: "uuid_string")!)
self.callAgent?.join(with: groupCallLocator, joinCallOptions: JoinCallOptions()) { (call, error) in
    if error == nil {
        print("Successfully joined group call")
        self.call = call
    } else {
        print("Failed to join group call")
    }
}
수신 전화 구독
수신 전화 이벤트를 구독합니다.
final class IncomingCallHandler: NSObject, CallAgentDelegate, IncomingCallDelegate
{
    // Event raised when there is an incoming call
    public func callAgent(_ callAgent: CallAgent, didReceiveIncomingCall incomingcall: IncomingCall) {
        self.incomingCall = incomingcall
        // Subscribe to get OnCallEnded event
        self.incomingCall?.delegate = self
    }

    // Event raised when incoming call was not answered
    public func incomingCall(_ incomingCall: IncomingCall, didEnd args: PropertyChangedEventArgs) {
        print("Incoming call was not answered")
        self.incomingCall = nil
    }
}
수신 전화 받기
통화를 수락하려면 IncomingCall 개체에서 accept 메서드를 호출합니다.
self.incomingCall!.accept(options: AcceptCallOptions()) { (call, error) in
   if (error == nil) {
       print("Successfully accepted incoming call")
       self.call = call
   } else {
       print("Failed to accept incoming call")
   }
}

let firstCamera: VideoDeviceInfo? = self.deviceManager!.cameras.first
localVideoStreams = [LocalVideoStream]()
localVideoStreams!.append(LocalVideoStream(camera: firstCamera!))
let acceptCallOptions = AcceptCallOptions()
acceptCallOptions.videoOptions = VideoOptions(localVideoStreams: localVideoStreams!)
if let incomingCall = self.incomingCall {
    incomingCall.accept(options: acceptCallOptions) { (call, error) in
        if error == nil {
            print("Incoming call accepted")
        } else {
            print("Failed to accept incoming call")
        }
    }
} else {
  print("No incoming call found to accept")
}
통화 중 작업
통화 중 비디오 및 오디오와 관련된 설정을 관리하는 다양한 작업을 수행할 수 있습니다.
음소거 및 음소거 해제
로컬 엔드포인트를 음소거하거나 음소거를 해제하려면 mute 및 unmute 비동기 API를 사용할 수 있습니다.
call!.mute { (error) in
    if error == nil {
        print("Successfully muted")
    } else {
        print("Failed to mute")
    }
}
다음 코드를 사용하여 로컬 엔드포인트의 음소거를 비동기 방식으로 해제합니다.
call!.unmute { (error) in
    if error == nil {
        print("Successfully un-muted")
    } else {
        print("Failed to unmute")
    }
}
원격 참가자 관리
모든 원격 참가자는 RemoteParticipant 형식으로 표시되며 호출 인스턴스에서 remoteParticipants 컬렉션을 통해 사용할 수 있습니다.
통화 참가자 나열
call.remoteParticipants
통화에 참가자 추가
통화에 참가자(사용자 또는 전화번호)를 추가하려면 addParticipant를 호출합니다. 이 명령을 통해 원격 참가자 인스턴스가 동기적으로 반환됩니다.
let remoteParticipantAdded: RemoteParticipant = call.add(participant: CommunicationUserIdentifier(identifier: "userId"))
통화에서 참가자 제거
통화에서 참가자(사용자 또는 전화번호)를 제거하려면 removeParticipant API를 호출합니다. 이는 비동기적으로 확인됩니다.
call!.remove(participant: remoteParticipantAdded) { (error) in
    if (error == nil) {
        print("Successfully removed participant")
    } else {
        print("Failed to remove participant")
    }
}
원격 참가자 속성 가져오기
// [RemoteParticipantDelegate] delegate - an object you provide to receive events from this RemoteParticipant instance
var remoteParticipantDelegate = remoteParticipant.delegate

// [CommunicationIdentifier] identity - same as the one used to provision a token for another user
var identity = remoteParticipant.identifier

// ParticipantStateIdle = 0, ParticipantStateEarlyMedia = 1, ParticipantStateConnecting = 2, ParticipantStateConnected = 3, ParticipantStateOnHold = 4, ParticipantStateInLobby = 5, ParticipantStateDisconnected = 6
var state = remoteParticipant.state

// [Error] callEndReason - reason why participant left the call, contains code/subcode/message
var callEndReason = remoteParticipant.callEndReason

// [Bool] isMuted - indicating if participant is muted
var isMuted = remoteParticipant.isMuted

// [Bool] isSpeaking - indicating if participant is currently speaking
var isSpeaking = remoteParticipant.isSpeaking

// RemoteVideoStream[] - collection of video streams this participants has
var videoStreams = remoteParticipant.videoStreams // [RemoteVideoStream, RemoteVideoStream, ...]
다른 참가자 음소거
참고 항목
이 API를 사용하려면 Azure Communication Services Calling iOS SDK 버전 2.13.0 이상을 사용하세요.
통화에서 다른 모든 참가자를 음소거하려면 통화에서 muteAllRemoteParticipants API를 사용합니다.
call!.muteAllRemoteParticipants { (error) in
    if error == nil {
        print("Successfully muted all remote participants.")
    } else {
        print("Failed to mute remote participants.")
    }
}
특정 원격 참가자를 음소거하려면 지정된 원격 참가자에서 mute API를 사용합니다.
remoteParticipant.mute { (error) in
    if error == nil {
        print("Successfully muted participant.")
    } else {
        print("Failed to mute participant.")
    }
}
다른 사용자가 음소거되었음을 로컬 참가자에게 알리려면 onMutedByOthers 이벤트를 구독합니다.
시스템 설정
다음 단계에 따라 시스템을 설정합니다.
Visual Studio 프로젝트 만들기
유니버설 Windows 플랫폼 앱의 경우 Visual Studio 2022에서 새 빈 앱(유니버설 Windows) 프로젝트를 만듭니다. 프로젝트 이름을 입력한 다음 10.0.17763.0보다 버전이 높은 Windows SDK를 아무거나 선택합니다.
WinUI 3 앱의 경우, 빈 앱, 패키지됨(데스크톱의 WinUI 3) 템플릿으로 새 프로젝트를 만들어 한 페이지 짜리 WinUI 3 앱을 설정합니다. Windows 앱 SDK 버전 1.3 이상이 필요합니다.
NuGet 패키지 관리자를 사용하여 패키지와 종속성 설치
Calling SDK API와 라이브러리는 NuGet 패키지를 통해 공개적으로 사용할 수 있습니다.
호출 SDK NuGet 패키지를 찾고, 다운로드하고, 설치하려면 다음을 수행합니다.
- 도구>NuGet 패키지 관리자>솔루션용 NuGet 패키지 관리를 선택해 NuGet 패키지 관리자를 엽니다.
- 찾아보기를 선택한 다음 검색 상자에 Azure.Communication.Calling.WindowsClient를 입력합니다.
- 시험판 포함 확인란이 선택되어 있는지 확인합니다.
- Azure.Communication.Calling.WindowsClient 패키지를 선택한 다음, Azure.Communication.Calling.WindowsClient1.4.0-beta.1 이상 버전을 선택합니다.
- 오른쪽 창에서 Azure Communication Services 프로젝트에 해당하는 확인란을 선택합니다.
- 설치를 선택합니다.
마이크에 대한 액세스 요청
앱이 제대로 실행되려면 마이크에 대한 액세스가 필요합니다. UWP 앱의 앱 매니페스트 파일에서 마이크 기능을 선언해야 합니다.
다음 단계는 이를 수행하는 방법을 안내합니다.
-
Solution Explorer패널에서 확장명이.appxmanifest인 파일을 두 번 클릭합니다. -
Capabilities탭을 클릭합니다. - 기능 목록에서
Microphone확인란을 선택합니다.
통화를 걸고 끊는 UI 단추 만들기
이 간단한 샘플 앱에는 두 개의 단추가 포함되어 있습니다. 하나는 통화를 걸고 다른 하나는 통화를 끊습니다. 다음 단계에서는 앱에 이러한 단추를 추가하는 방법을 안내합니다.
-
Solution Explorer패널에서MainPage.xaml(UWP의 경우) 또는MainWindows.xaml(WinUI 3의 경우)이라는 파일을 두 번 클릭합니다. - 중앙 패널의 UI 미리 보기에서 XAML 코드를 찾습니다.
- 다음 발췌에 따라 XAML 코드를 수정합니다.
<TextBox x:Name="CalleeTextBox" PlaceholderText="Who would you like to call?" />
<StackPanel>
    <Button x:Name="CallButton" Content="Start/Join call" Click="CallButton_Click" />
    <Button x:Name="HangupButton" Content="Hang up" Click="HangupButton_Click" />
</StackPanel>
Calling SDK API를 사용하여 앱 설정
Calling SDK API는 두 개의 다른 네임스페이스에 있습니다. 다음 단계에서는 Visual Studio의 IntelliSense에서 코드 개발을 지원할 수 있도록 하는 이러한 네임스페이스에 대해 C# 컴파일러에 알립니다.
-
Solution Explorer패널에서MainPage.xaml(UWP의 경우) 또는MainWindows.xaml(WinUI 3의 경우)이라는 파일의 왼쪽에 있는 화살표를 클릭합니다. -
MainPage.xaml.cs또는MainWindows.xaml.cs라는 파일을 두 번 클릭합니다. - 현재의
using문 아래에 다음 명령을 추가합니다.
using Azure.Communication.Calling.WindowsClient;
MainPage.xaml.cs 또는 MainWindows.xaml.cs를 열어 두세요. 다음 단계에서는 더 많은 코드를 추가합니다.
앱 상호 작용 허용
수행된 CommunicationCall에 대해 이전에 추가한 UI 단추가 작동해야 합니다. 즉, CommunicationCall 데이터 멤버가 MainPage 또는 MainWindow 클래스에 추가되어야 합니다.
또한 CallAgent를 생성하는 비동기 작업이 성공하려면 동일한 클래스에 CallAgent 데이터 멤버도 추가되어야 합니다.
MainPage 또는 MainWindow 클래스에 다음 데이터 멤버를 추가합니다.
CallAgent callAgent;
CommunicationCall call;
단추 처리기 만들기
이전에는 XAML 코드에 두 개의 UI 단추가 추가되었습니다. 다음 코드에서는 사용자가 단추를 선택하면 실행될 처리기를 추가합니다. 이전 섹션에서 데이터 멤버 뒤에 다음 코드를 추가해야 합니다.
private async void CallButton_Click(object sender, RoutedEventArgs e)
{
    // Start call
}

private async void HangupButton_Click(object sender, RoutedEventArgs e)
{
    // End the current call
}
개체 모델
UWP용 Azure Communication Services 통화 클라이언트 라이브러리의 주요 기능 중 일부를 처리하는 클래스와 인터페이스는 다음과 같습니다.
| 이름 | 설명 |
|---|---|
CallClient |
CallClient는 통화 클라이언트 라이브러리의 기본 진입점입니다. |
CallAgent |
CallAgent는 통화를 시작하고 참여하는 데 사용됩니다. |
CommunicationCall |
CommunicationCall은 발신 또는 참여한 통화를 관리하는 데 사용됩니다. |
CommunicationTokenCredential |
CommunicationTokenCredential은 CallAgent를 인스턴스화하기 위한 토큰 자격 증명으로 사용됩니다. |
CallAgentOptions |
CallAgentOptions에는 호출자를 식별하는 정보가 포함되어 있습니다. |
HangupOptions |
HangupOptions는 모든 참여자에게 통화를 종료해야 하는지 알려 줍니다. |
CallAgent 초기화
CallClient에서 CallAgent 인스턴스를 만들려면 초기화된 후 비동기적으로 CallAgent 개체를 반환하는 CallClient.CreateCallAgentAsync 메서드를 사용해야 합니다.
CallAgent를 만들려면 CallTokenCredential 개체와 CallAgentOptions 개체를 전달해야 합니다. 잘못된 형식의 토큰이 전달되면 CallTokenCredential이 throw됩니다.
앱 초기화 시 호출할 도우미 함수 및 내부에 다음 코드를 추가해야 합니다.
var callClient = new CallClient();
this.deviceManager = await callClient.GetDeviceManagerAsync();

var tokenCredential = new CallTokenCredential("<AUTHENTICATION_TOKEN>");
var callAgentOptions = new CallAgentOptions()
{
    DisplayName = "<DISPLAY_NAME>"
};

this.callAgent = await callClient.CreateCallAgentAsync(tokenCredential, callAgentOptions);
리소스에 대한 유효한 자격 증명 토큰으로 <AUTHENTICATION_TOKEN>을 변경합니다. 자격 증명 토큰을 원본으로 사용해야 하는 경우에는 사용자 액세스 토큰 설명서를 참조하세요.
CallAgent를 만들고 통화 걸기
CallAgent를 만드는 데 필요한 개체가 준비되었습니다. 이제 CallAgent를 비동기식으로 만들고 통화를 걸어야 합니다.
이전 단계의 예외를 처리한 후 다음 코드를 추가해야 합니다.
var startCallOptions = new StartCallOptions();
var callees = new [] { new UserCallIdentifier(CalleeTextBox.Text.Trim()) };

this.call = await this.callAgent.StartCallAsync(callees, startCallOptions);
this.call.OnStateChanged += Call_OnStateChangedAsync;
자유롭게 8:echo123을 사용하여 Azure Communication Services 에코 봇과 대화할 수 있습니다.
음소거 및 음소거 해제
나가는 오디오를 음소거하거나 음소거를 해제하려면 MuteOutgoingAudioAsync 및 UnmuteOutgoingAudioAsync 비동기 API를 사용할 수 있습니다.
// mute outgoing audio
await this.call.MuteOutgoingAudioAsync();

// unmute outgoing audio
await this.call.UnmuteOutgoingAudioAsync();
다른 참가자 음소거
참고 항목
이 API를 사용하려면 Azure Communication Services Calling Windows SDK 버전 1.9.0 이상을 사용하세요.
다른 모든 참가자를 음소거하거나 특정 참가자를 음소거하려면 통화에 비동기 API MuteAllRemoteParticipantsAsync를 사용하고 원격 참가자에 MuteAsync를 사용할 수 있습니다.
// mute all participants except yourself
await this.call.MuteAllRemoteParticipantsAsync();

// mute specific participant in the call
await this.call.RemoteParticipants.FirstOrDefault().MuteAsync();
다른 사용자가 음소거되었음을 로컬 참가자에게 알리려면 MutedByOthers 이벤트를 구독합니다.
통화 종료
통화가 걸린 후에는 CommunicationCall 개체의 HangupAsync 메서드를 사용하여 통화를 중단해야 합니다.
또한 HangupOptions의 인스턴스를 사용하여 모든 참가자에게 통화를 종료해야 하는지 여부를 알려야 합니다.
다음 코드는 HangupButton_Click 내에 추가되어야 합니다.
this.call.OnStateChanged -= Call_OnStateChangedAsync;
await this.call.HangUpAsync(new HangUpOptions() { ForEveryone = false });
코드 실행
Visual Studio가 x64, x86 또는 ARM64용 앱을 빌드하는지 확인한 다음 F5를 눌러 앱 실행을 시작합니다. 그런 다음, Call 단추를 클릭하여 정의된 통화 수신자에게 통화를 겁니다.
앱을 처음 실행하면 시스템에서 사용자에게 마이크에 대한 액세스 권한을 부여하라는 메시지를 표시합니다.