Hello, Wear
첫 번째 Android Wear 앱을 만들고 착용 에뮬레이터 또는 디바이스에서 실행합니다. 이 연습에서는 단추 클릭을 처리하고 착용 디바이스에 클릭 카운터를 표시하는 작은 Android Wear 프로젝트를 만들기 위한 단계별 지침을 제공합니다. Bluetooth를 통해 Android 휴대폰에 연결된 Wear 에뮬레이터 또는 Wear 디바이스를 사용하여 앱을 디버그하는 방법을 설명합니다. 또한 Android Wear에 대한 디버깅 팁 집합을 제공합니다.

다음 단계에 따라 첫 번째 Xamarin.Android Wear 앱을 만듭니다.
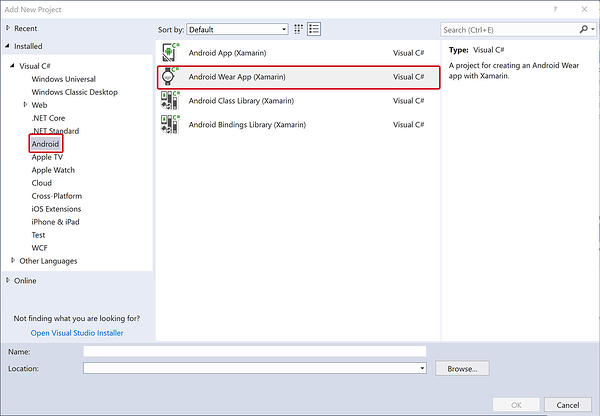
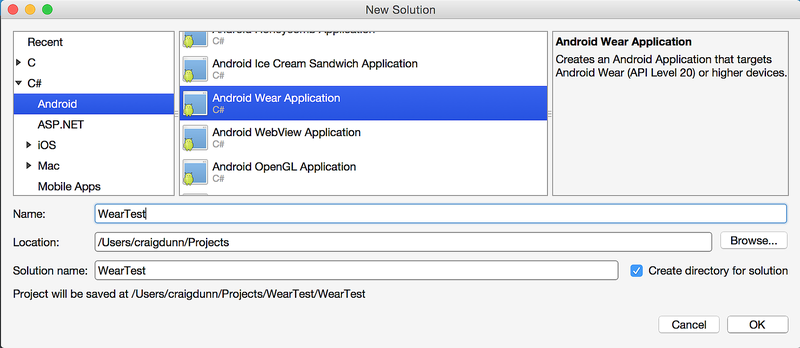
새 Android Wear 애플리케이션을 만듭니다.
이 템플릿에는 Xamarin Android 웨어러블 라이브러리 NuGet(및 종속성)이 자동으로 포함되므로 착용 관련 위젯에 액세스할 수 있습니다. Wear 템플릿이 표시되지 않으면 설치 및 설치 가이드를 검토하여 지원되는 Android SDK를 설치한 검사.
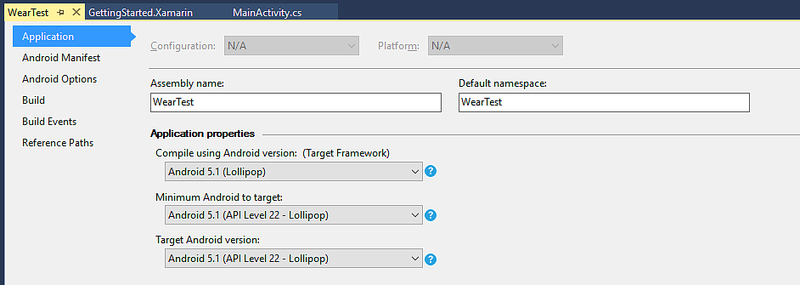
대상에 대한 최소 Android가 Android 5.0(롤리팝) 이상으로 설정되어 있는지 확인합니다.
대상 프레임워크 설정에 대한 자세한 내용은 Android API 수준 이해를 참조 하세요.
샘플 및 a를 포함 TextView Button 하도록 레이아웃을 구성합니다.
<?xml version="1.0" encoding="utf-8"?>
<FrameLayout xmlns:android="http://schemas.android.com/apk/res/android"
android:layout_width="match_parent"
android:layout_height="match_parent">
  <ScrollView
    android:id="@+id/scroll"
    android:layout_width="wrap_content"
    android:layout_height="wrap_content"
    android:background="#000000"
    android:fillViewport="true">
    <LinearLayout
      android:layout_width="match_parent"
      android:layout_height="wrap_content"
      android:orientation="vertical">
      <TextView
        android:layout_width="wrap_content"
        android:layout_height="wrap_content"
        android:layout_marginBottom="2dp"
        android:text="Main Activity"
        android:textSize="36sp"
        android:textColor="#006600" />
      <TextView
        android:layout_width="wrap_content"
        android:layout_height="wrap_content"
        android:layout_marginBottom="2dp"
        android:textColor="#cccccc"
        android:id="@+id/result" />
      <Button
        android:layout_width="match_parent"
        android:layout_height="wrap_content"
        android:onClick="showNotification"
        android:text="Click Me!"
        android:id="@+id/click_button" />
    </LinearLayout>
  </ScrollView>
</FrameLayout>
코드를 추가하여 카운터를 증가시키고 단추를 클릭할 때마다 표시합니다.
[Activity (Label = "WearTest", MainLauncher = true, Icon = "@drawable/icon")]
public class MainActivity : Activity
{
  int count = 1;

  protected override void OnCreate (Bundle bundle)
  {
    base.OnCreate (bundle);

    SetContentView (Resource.Layout.Main);

    Button button = FindViewById<Button> (Resource.Id.click_button);
    TextView text = FindViewById<TextView> (Resource.Id.result);

    button.Click += delegate {
      text.Text = string.Format ("{0} clicks!", count++);
    };
  }
}
다음 단계는 앱을 배포하고 실행하도록 에뮬레이터 또는 디바이스를 설정하는 것입니다. Xamarin.Android 앱을 배포하고 실행하는 프로세스에 아직 익숙하지 않은 경우 Hello, Android 빠른 시작을 참조하세요.
Android Wear Smartwatch와 같은 Android Wear 디바이스가 없는 경우 에뮬레이터에서 앱을 실행할 수 있습니다. 에뮬레이터에서 Wear 앱을 디버깅하는 방법에 대한 자세한 내용은 에뮬레이터에서 Android Wear 디버그를 참조 하세요.
Android Wear Smartwatch와 같은 Android Wear 디바이스가 있는 경우 에뮬레이터를 사용하는 대신 디바이스에서 앱을 실행할 수 있습니다. Wear 디바이스의 디버깅에 대한 자세한 내용은 착용 디바이스의 디버그를 참조 하세요.
Android Wear 디바이스는 디바이스 풀다운 메뉴에 표시됩니다. 디버깅을 시작하기 전에 올바른 Android Wear 디바이스 또는 AVD를 선택해야 합니다. 디바이스를 선택한 후 재생 단추를 클릭하여 에뮬레이터 또는 디바이스에 앱을 배포합니다.
처음에는 1분 만에 메시지(또는 다른 중간 화면)가 표시 될 수 있습니다.
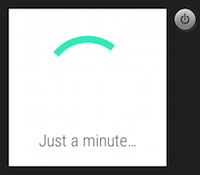
시계 에뮬레이터를 사용하는 경우 앱을 시작하는 데 시간이 걸릴 수 있습니다. Bluetooth를 사용하는 경우 USB보다 앱을 배포하는 데 더 많은 시간이 걸립니다. (예를 들어 이 앱을 넥서스 5 휴대폰에 Bluetooth로 연결된 LG G Watch에 배포하는 데 약 5분이 걸립니다.)
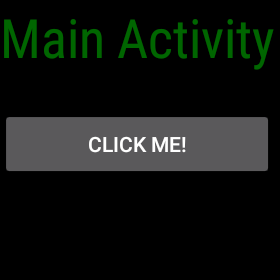
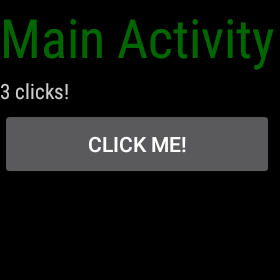
앱이 성공적으로 배포되면 Wear 디바이스의 화면에 다음과 같은 화면이 표시됩니다.
착용 장치의 얼굴에 있는 CLICK ME! 단추를 탭하고 각 탭으로 개수 증가가 표시됩니다.
앱을 배포할 준비가 되면 패키징 작업을 참조하세요.
