Configure Azure VPN Client – Certificate authentication OpenVPN – Linux (Preview)
This article helps you connect to your Azure virtual network (VNet) from the Azure VPN Client for Linux using VPN Gateway point-to-site (P2S) Certificate authentication. The Azure VPN Client for Linux requires the OpenVPN tunnel type.
While it's possible that the Azure VPN Client for Linux might work on other Linux distributions and releases, the Azure VPN Client for Linux is only supported on the following releases:
- Ubuntu 20.04
- Ubuntu 22.04
Before you begin
Verify that you are on the correct article. The following table shows the configuration articles available for Azure VPN Gateway P2S VPN clients. Steps differ, depending on the authentication type, tunnel type, and the client OS.
| Authentication | Tunnel type | Client OS | VPN client |
|---|---|---|---|
| Certificate | |||
| IKEv2, SSTP | Windows | Native VPN client | |
| IKEv2 | macOS | Native VPN client | |
| IKEv2 | Linux | strongSwan | |
| OpenVPN | Windows | Azure VPN client OpenVPN client version 2.x OpenVPN client version 3.x |
|
| OpenVPN | macOS | OpenVPN client | |
| OpenVPN | iOS | OpenVPN client | |
| OpenVPN | Linux | Azure VPN Client OpenVPN client |
|
| Microsoft Entra ID | |||
| OpenVPN | Windows | Azure VPN client | |
| OpenVPN | macOS | Azure VPN Client | |
| OpenVPN | Linux | Azure VPN Client |
Prerequisites
This article assumes that you've already performed the following prerequisites:
- The VPN gateway is configured for point-to-site certificate authentication and the OpenVPN tunnel type. See Configure server settings for P2S VPN Gateway connections - certificate authentication for steps.
- VPN client profile configuration files have been generated and are available. See Generate VPN client profile configuration files for steps.
Connection requirements
To connect to Azure using the Azure VPN Client and certificate authentication, each connecting client requires the following items:
- The Azure VPN Client software must be installed and configured on each client.
- The client must have the correct certificates installed locally.
Workflow
The basic workflow is as follows:
- Generate and install client certificates.
- Locate the VPN client profile configuration package that you generated in the Configure server settings for P2S VPN Gateway connections - certificate authentication article.
- Download and configure the Azure VPN Client for Linux.
- Connect to Azure.
Generate certificates
For certificate authentication, a client certificate must be installed on each client computer. The client certificate you want to use must be exported with the private key, and must contain all certificates in the certification path. Additionally, for some configurations, you'll also need to install root certificate information.
Generate the client public certificate data and private key in .pem format using the following commands. To run the commands, you need to have the public Root certificate caCert.pem and the private key of Root certificate caKey.pem. For more information, see Generate and export certificates - Linux - OpenSSL.
export PASSWORD="password"
export USERNAME=$(hostnamectl --static)

# Generate a private key
openssl genrsa -out "${USERNAME}Key.pem" 2048

# Generate a CSR
openssl req -new -key "${USERNAME}Key.pem" -out "${USERNAME}Req.pem" -subj "/CN=${USERNAME}"

# Sign the CSR using the CA certificate and key
openssl x509 -req -days 365 -in "${USERNAME}Req.pem" -CA caCert.pem -CAkey caKey.pem -CAcreateserial -out "${USERNAME}Cert.pem" -extfile <(echo -e "subjectAltName=DNS:${USERNAME}\nextendedKeyUsage=clientAuth")
View VPN client profile configuration files
When you generate and download a VPN client profile configuration package, all the necessary configuration settings for VPN clients are contained in a VPN client profile configuration zip file. The VPN client profile configuration files are specific to the P2S VPN gateway configuration for the virtual network. If there are any changes to the P2S VPN configuration after you generate the files, such as changes to the VPN protocol type or authentication type, you need to generate new VPN client profile configuration files and apply the new configuration to all of the VPN clients that you want to connect.
Locate and unzip the VPN client profile configuration package you generated and downloaded (listed in the Prequisites). Open the AzureVPN folder. In this folder, you'll see either the azurevpnconfig_cert.xml file or the azurevpnconfig.xml file, depending on whether your P2S configuration includes multiple authentication types. The .xml file contains the settings you use to configure the VPN client profile.
If you don't see either file, or you don't have an AzureVPN folder, verify that your VPN gateway is configured to use the OpenVPN tunnel type and that certificate authentication is selected.
Download the Azure VPN Client
Add the Microsoft repository list and install the Azure VPN Client for Linux using the following commands:
# install curl utility
sudo apt-get install curl

# Install Microsoft's public key
curl -sSl https://packages.microsoft.com/keys/microsoft.asc | sudo tee /etc/apt/trusted.gpg.d/microsoft.asc

# Install the production repo list for focal
# For Ubuntu 20.04
curl https://packages.microsoft.com/config/ubuntu/20.04/prod.list | sudo tee /etc/apt/sources.list.d/microsoft-ubuntu-focal-prod.list

# Install the production repo list for jammy
# For Ubuntu 22.04
curl https://packages.microsoft.com/config/ubuntu/22.04/prod.list | sudo tee /etc/apt/sources.list.d/microsoft-ubuntu-jammy-prod.list

sudo apt-get update

sudo apt-get install microsoft-azurevpnclient
For more information about the repository, see Linux Software Repository for Microsoft Products.
Configure the Azure VPN Client profile
Open the Azure VPN Client.
On the bottom left of the page of the Linux VPN client, select Import.
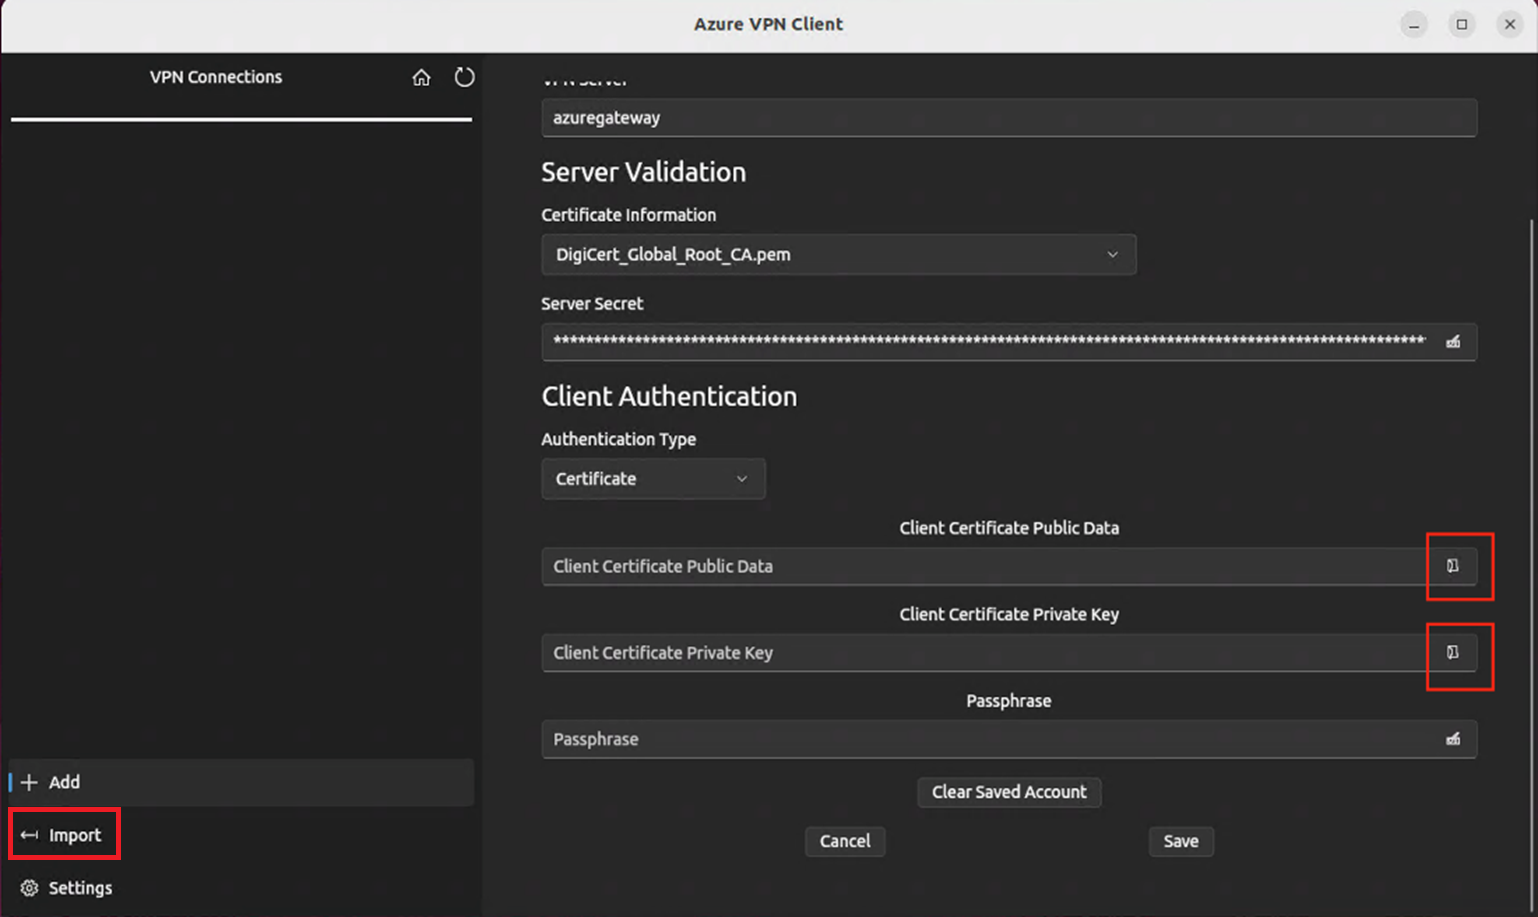
In the window, navigate to either the azurevpnconfig.xml or azurevpnconfig_cert.xml file, select it, then select Open.
To add Client Certificate Public Data, use the file picker and locate the related .pem files.

To add the Client Certificate Private Key, use the picker and select the certificate files path in the text boxes for the private key, with file extension .pem.
After the import validates (imports with no errors), select Save.
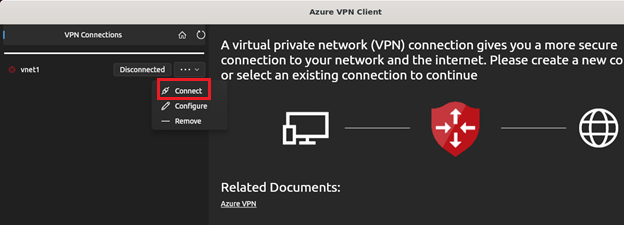
In the left pane, locate the VPN connection profile you created. Select Connect.
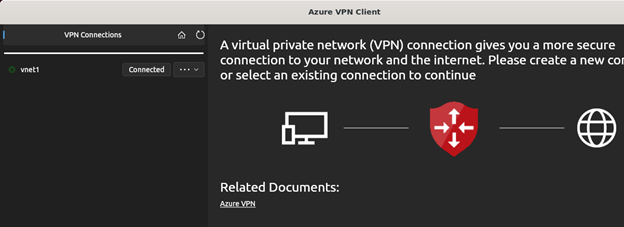
When the client is successfully connected, the status shows as Connected with a green icon.
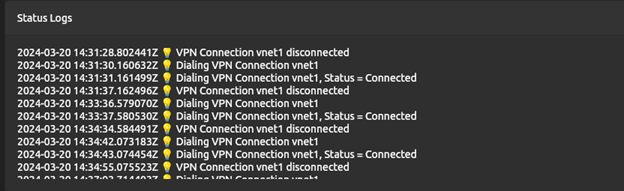
You can view the connection logs summary in the Status Logs on the main screen of the VPN client.


Uninstall the Azure VPN Client
If you want to uninstall the Azure VPN Client, use the following command in the terminal:
sudo apt remove microsoft-azurevpnclient
Next steps
For additional steps, return to the P2S Azure portal article.