


Notikumi
Veidojiet inteliģentas lietotnes
17. marts 21 - 21. marts 10
Pievienojieties meetup sērijai, lai kopā ar citiem izstrādātājiem un ekspertiem izveidotu mērogojamus AI risinājumus, kuru pamatā ir reālas lietošanas gadījumi.
Reģistrēties tūlītŠī pārlūkprogramma vairs netiek atbalstīta.
Jauniniet uz Microsoft Edge, lai izmantotu jaunāko līdzekļu, drošības atjauninājumu un tehniskā atbalsta sniegtās priekšrocības.
Azure DevOps Services | Azure DevOps Server 2022 - Azure DevOps Server 2019
In this article, learn how to use Azure Boards to plan and track your work using an Agile, Basic, Scrum, or Capability Maturity Model Integration (CMMI) process. For more information, see About processes and process templates.
Piezīme
The Basic process is available when you add a project to Azure DevOps Services or Azure DevOps Server 2019 Update 1. For earlier on-premises deployments, choose Agile, Scrum, or CMMI process.
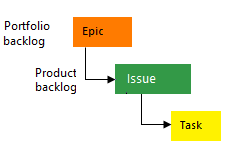
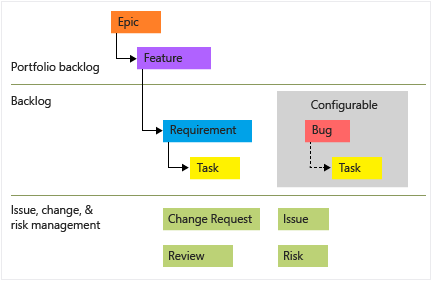
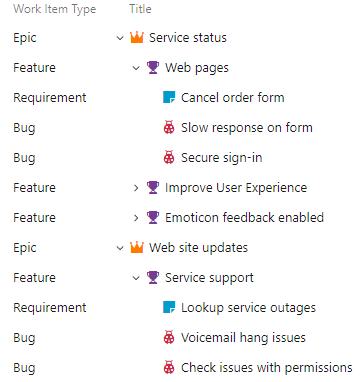
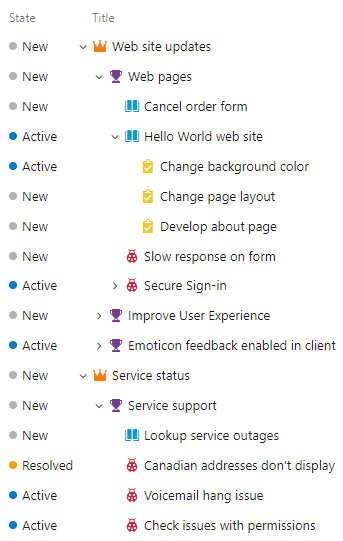
The Agile process uses various work item types such as user stories, tasks, bugs, features, and epics to plan and track work. Begin by adding user stories and grouping them into features if needed. You can add tasks to a user story to track more details.
| Work item types | Backlog hierarchy |
|---|---|

|
|
In each work item form, you can describe the work to be done, assign work to project contributors, track status, and collaborate with others through the Discussion section. This article describes how to add user stories and child tasks from the web portal and add details to those work items.
| Category | Requirements |
|---|---|
| Access levels | - To add work items to a board and use all other board features: At least Basic access. - Private project: To view boards, open and modify work items, and add child tasks to a checklist: At least Stakeholder access. You can't reorder or reparent a backlog item using drag-and-drop. You can't update a field on a card. - Public project: For full access to all Boards features: At least Stakeholder access. |
| Permissions | Member of the Contributors or Project Administrators group. |
| Category | Requirements |
|---|---|
| Access levels | - To add work items to a board and use all other board features: At least Basic access. - To view boards, open and modify work items, and add child tasks to a checklist: At least Stakeholder access. You can't reorder or reparent a backlog item using drag-and-drop. You can't update a field on a card. |
| Permissions | Member of the Contributors or Project Administrators group. |
Piezīme
To drag-and-drop cards to different columns, have Azure DevOps Server 2020 Update 1.
| Category | Requirements |
|---|---|
| Access levels | - To add work items to a board and use all other board features: At least Basic access. - To view boards, open and modify work items, and add child tasks to a checklist: At least Stakeholder access. You can't reorder or reparent a backlog item using drag-and-drop. You can't update a field on a card. |
| Permissions | Member of the Contributors or Project Administrators group. |
For more information, see Default permissions and access for Azure Boards.
A board is provisioned with the addition of each project and each team. You can only create or add boards to a project by adding another team. For more information, see About teams and Agile tools.
Sign in to your organization (https://dev.azure.com/{Your_Organization}) and go to your project.
Select Boards > Boards.
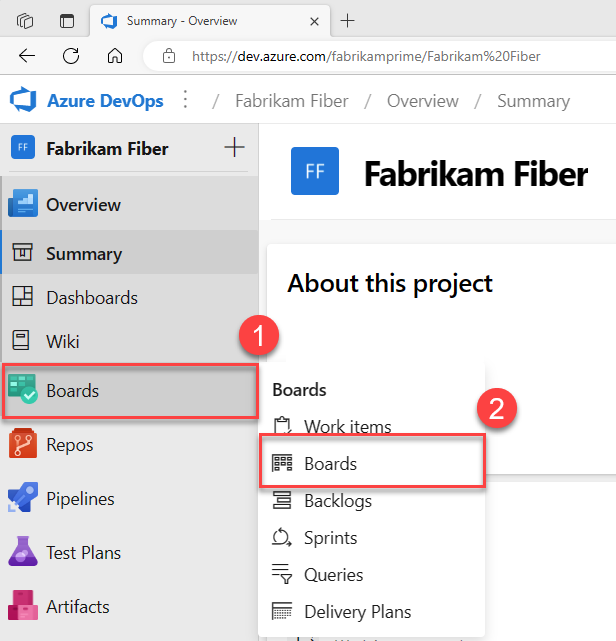
Select a board from the All Team Boards dropdown menu.

Work items on your board are automatically assigned the default Area Path and Iteration Path assigned to the team. For more information, see Manage and configure team tools.
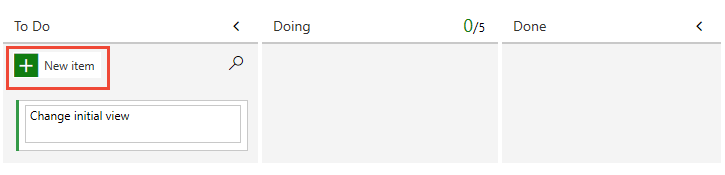
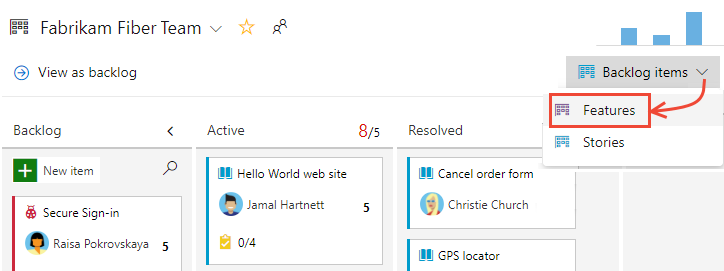
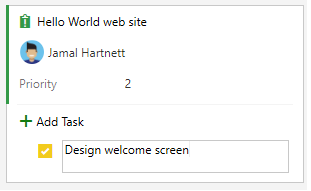
From the Stories board, choose New item and the stories you want to track.

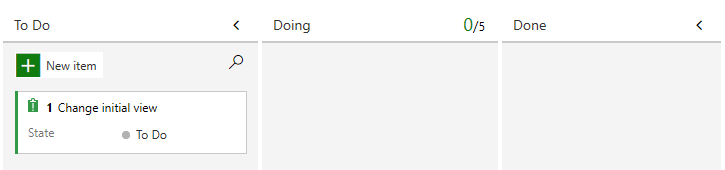
Select Enter. The system assigns a work item ID to the user story.
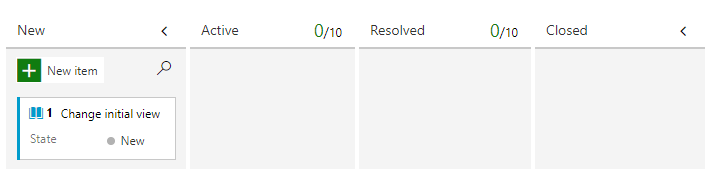
Add as many user stories as you need.
Padoms
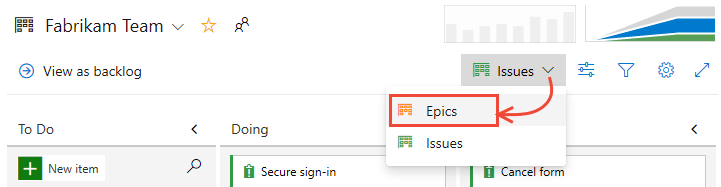
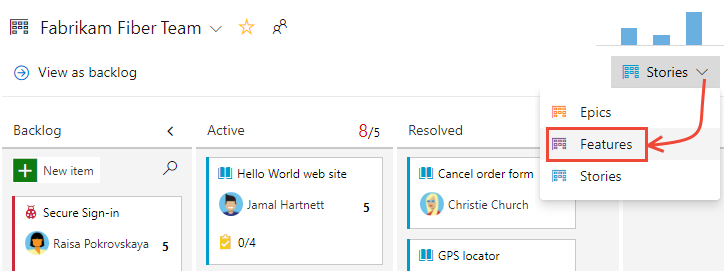
To quickly add features and child user stories, choose Features from the board selector.
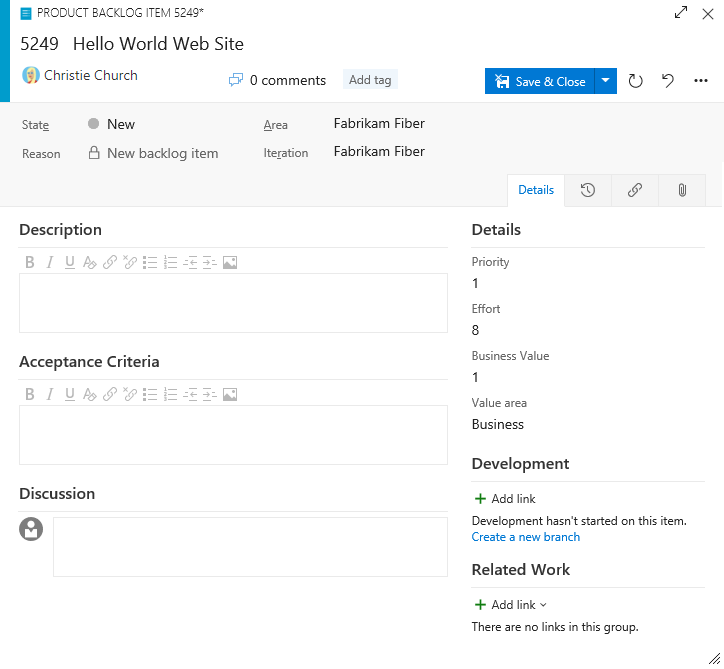
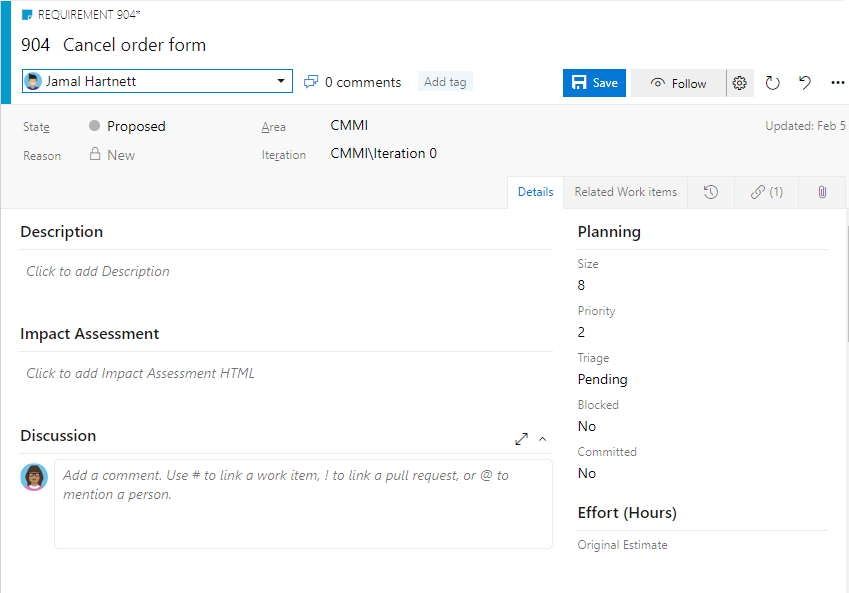
To open an issue or user story, select its title. Change one or more field values, add a description, or make a note in the Discussion section. You can also choose the ![]() Attachments tab and drag-and-drop a file to share the file with others.
Attachments tab and drag-and-drop a file to share the file with others.
For example, assign the story to Raisa Pokrovskaya and add a discussion note, at-mentioning Raisa.
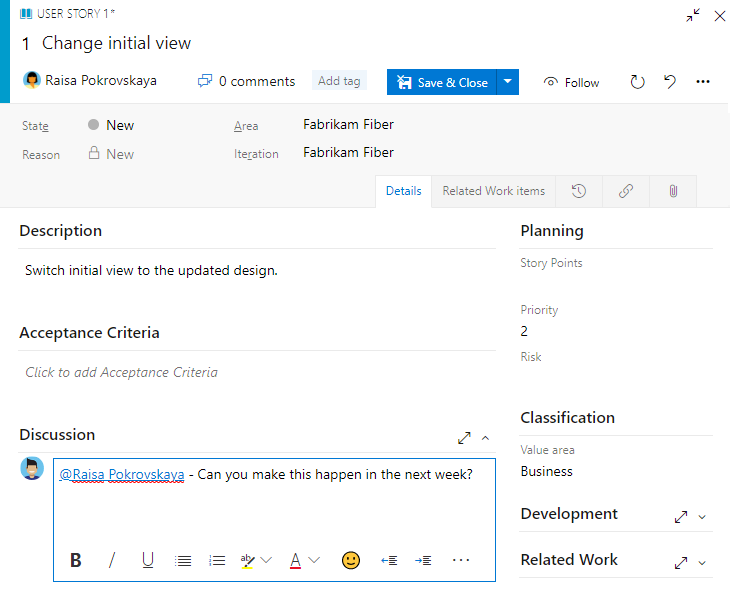
When you're done, select Save & Close.
Field
Usage
Enter a description of 255 characters or less. You can always modify the title later.
Assign the work item to the team member responsible for performing the work. Depending on the context you're working in, the drop-down menu lists only team members or contributors to the project.
Piezīme
You can only assign work to a single user. If you need to assign work to more than one user, add a work item for each user and distinguish the work to be done by title and description. The Assigned To field only accepts user accounts that have been added to a project or team.
When the work item is created, the State defaults to the first state in the workflow. As work progresses, update it to reflect the current status.
Use the default first. Update it when you change state as need. Each State is associated with a default reason.
Choose the area path associated with the product or team, or leave blank until assigned during a planning meeting. To change the dropdown list of areas, see Define area paths and assign to a team.
Choose the sprint or iteration in which the work is to be completed, or leave it blank and assign it later during a planning meeting. To change the drop-down list of iterations, see Define iteration paths and configure team iterations.
Provide enough detail to create shared understanding of scope and support estimation efforts. Focus on the user, what they want to accomplish, and why. Don't describe how to develop the product. Do provide sufficient details so that your team can write tasks and test cases to implement the item.
Provide the criteria to be met before the work item can be closed. Define what "Done" means by describing the criteria for the team to use to verify whether the backlog item or bug fix is fully implemented. Before work begins, describe the criteria for customer acceptance as clearly as possible. Have conversations between the team and customers to determine the acceptance criteria. These criteria help ensure a common understanding within the team to meet customers' expectations. Also, this information provides the basis for acceptance testing.
A subjective rating of the issue or task it relates to the business. You can specify the following values:
A subjective rating of the issue or task it relates to the business. You can specify the following values:
Provide a relative estimate of the amount of work required to complete an issue. Most Agile methods recommend that you set estimates for backlog items based on relative size of work. Such methods include powers of 2 (1, 2, 4, 8) and the Fibonacci sequence (1, 2, 3, 5, 8, etc.). Use any numeric unit of measurement your team prefers.
The estimates you set are used to calculate team velocity and forecast sprints.
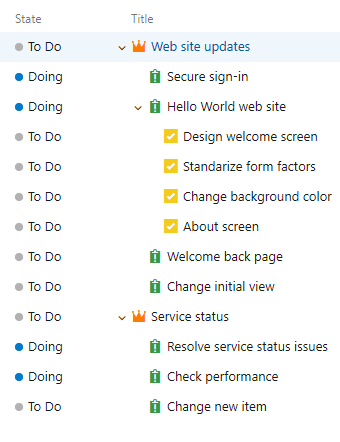
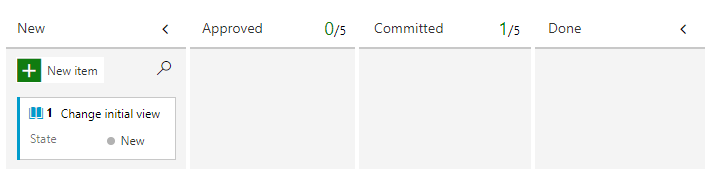
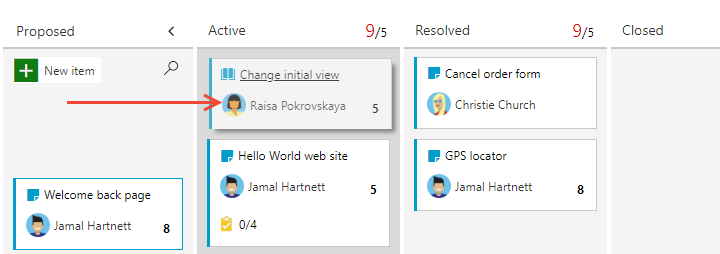
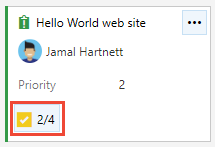
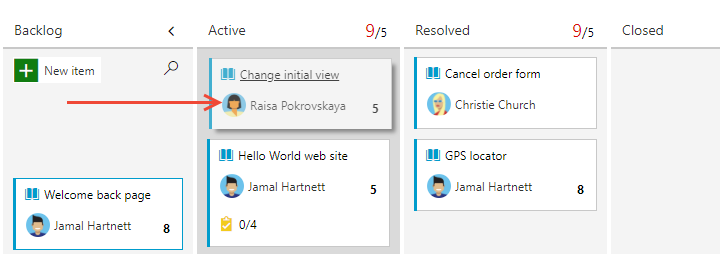
The State field tracks the status of a work item. With the board, you can quickly update the status of backlog items by dragging and dropping them to a different column.
As work begins, drag the user story card from the Backlog column to the Active column. When work is ready for review, move it to the Resolved column. After a team member reviews and accepts it, move it to the Closed column.
Padoms
To add or rename columns as needed, see About configuring and customizing Azure Boards.
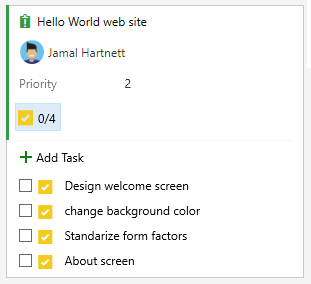
Task checklists provide a quick and easy way to track elements of work that are important to complete a backlog item. Also, you can assign individual tasks to different team members.
Padoms
Tasks that you create from the board are automatically assigned the Area Path and Iteration Path of their parent work item and show up on your sprint taskboard.
Tasks that you create from the sprint backlog or taskboard show up in tasks checklists on the board.
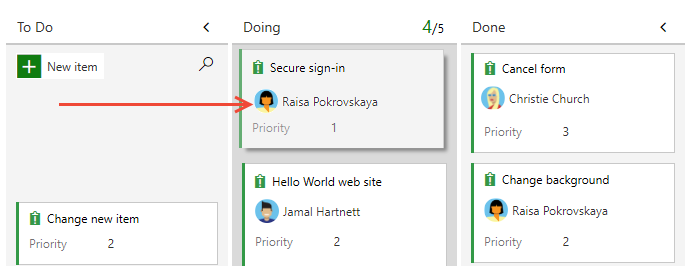
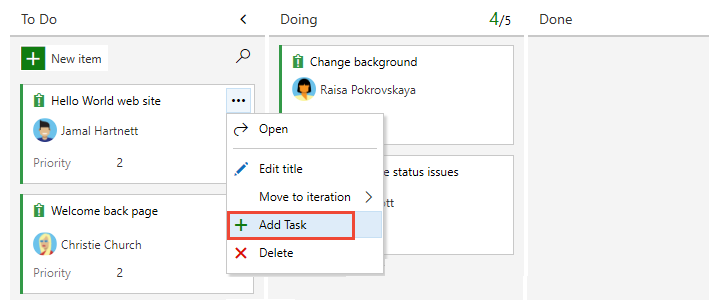
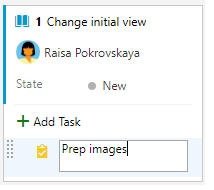
Select the ![]() actions icon for the story and select
actions icon for the story and select ![]() Add Task.
Add Task.

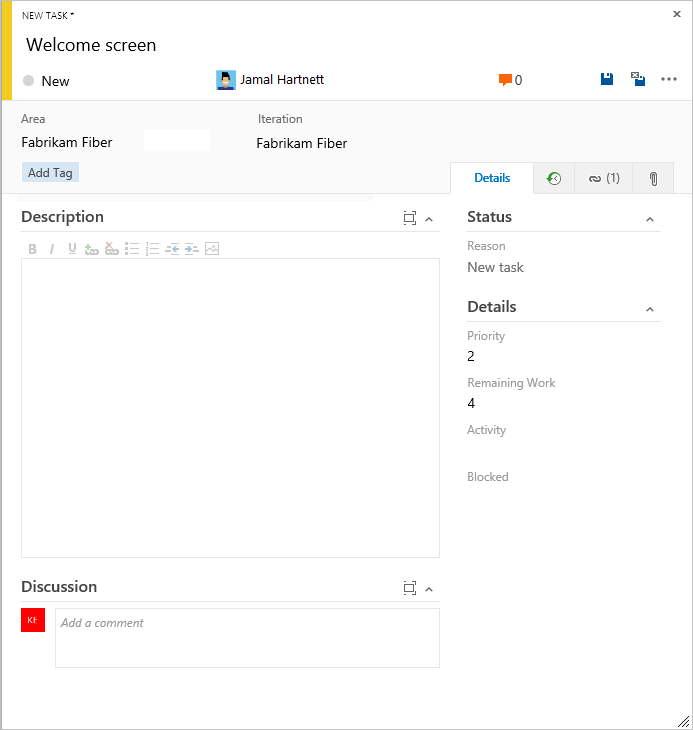
Enter a title for the task and select Enter.
If you have many tasks to add, keep entering your task titles and select Enter.
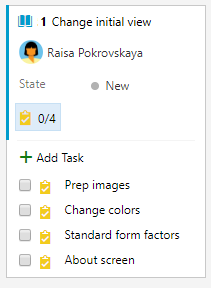
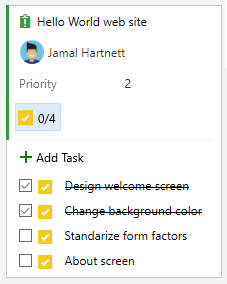
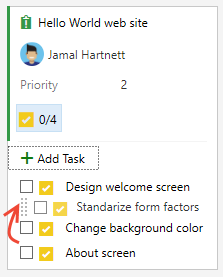
You can mark a task as done, expand or collapse the task checklist, reorder, and reparent tasks.
| Mark a task as done | Reorder and reparent tasks | Expand or collapse the checklist |
|---|---|---|
To mark a task as complete, select the task checkbox. The task State changes to Done.
|
To reorder a task, drag it in the checklist. To reparent a the task, drag it to another issue on the board.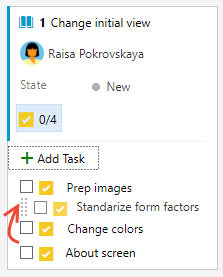
|
To expand or collapse a task checklist, choose the task annotation.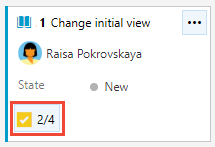
|
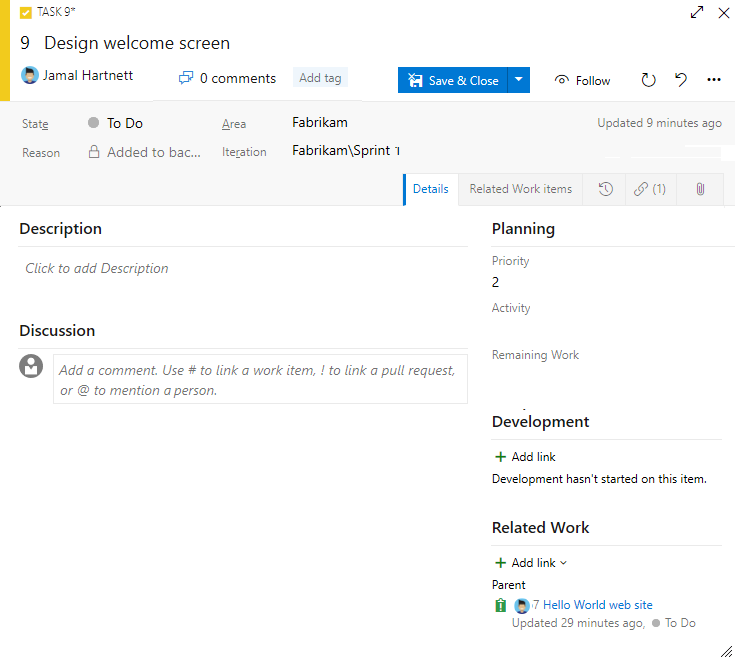
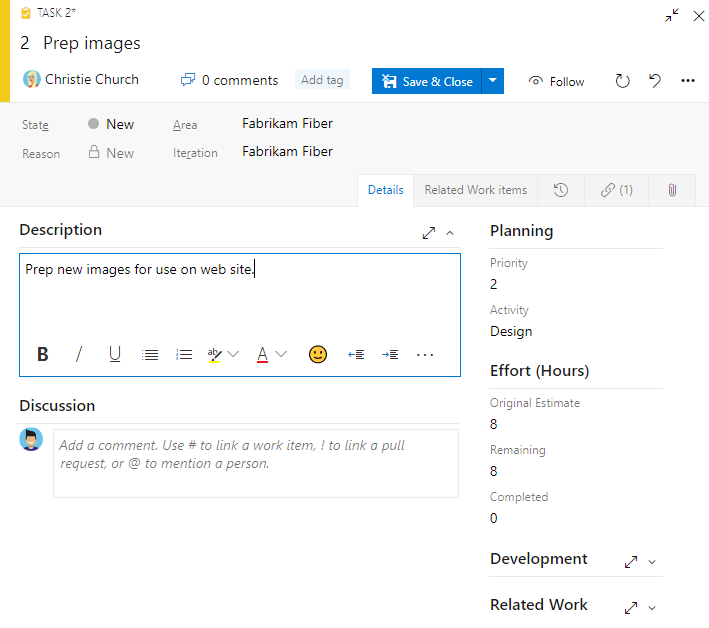
If you have details you want to add about a task, select the title to open it. Change one or more field values, add a description, or make a note in the Discussion section. Choose Save & Close.
This example assigns the task to Christie Church.
You can assign these fields for a backlog item: user story, issue, product backlog item, and requirement. You can specify the following fields for a task to support capacity and time tracking.
Piezīme
There are no inherent time units associated with this field even though the taskboard always shows "h" for hours in relationship to Remaining Work. You can specify work in any unit of measurement your team chooses.
Field
Usage
The type of activity that's required to do a task. For more information, see Determine and set sprint capacity. Allowed values are:
Discipline (CMMI process)
The type of activity that's required to do a task. For more information, see Determine and set sprint capacity. Allowed values are:
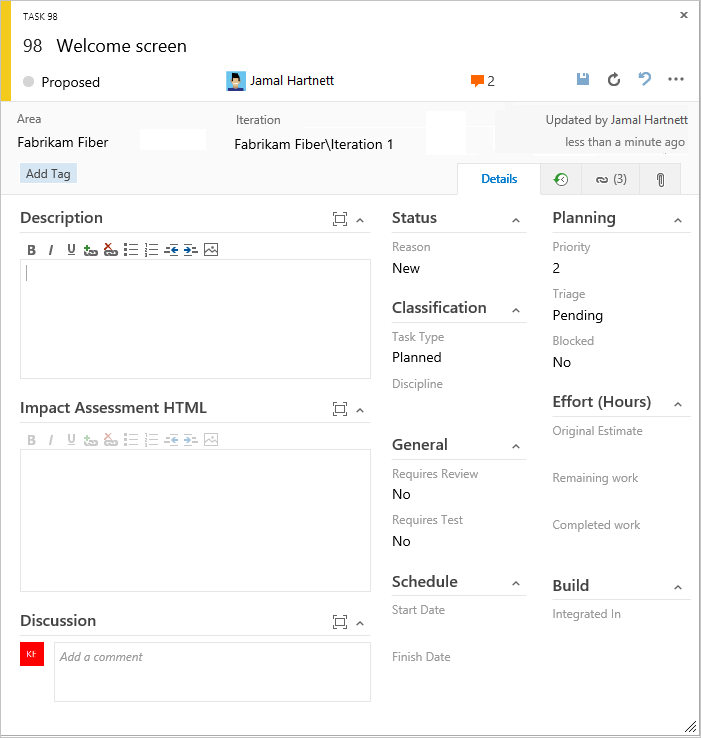
The amount of estimated work required to complete a task. Typically, this field doesn't change after you assign the task.
The amount of work that remains to finish a task. You can specify work in hours or in days. As work progresses, update this field. It's used to calculate capacity charts and the sprint burndown chart. If you divide a task into subtasks, specify Remaining Work for the subtasks only.
The amount of work spent implementing a task. Enter a value for this field when you complete the task.
Task Type (CMMI only)
Select the kind of task to implement from the allowed values:
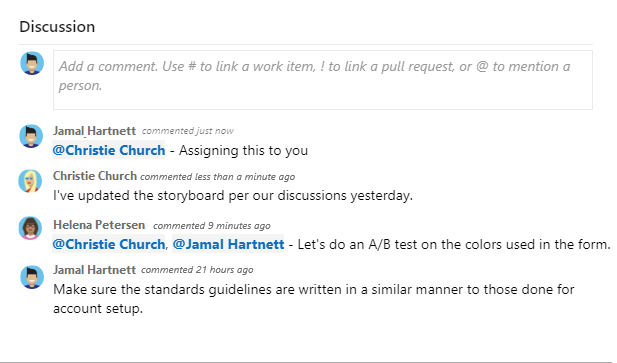
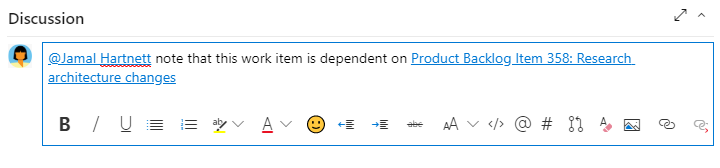
Use the Discussion section to add and review comments made about the work being performed.
The rich text editor toolbar appears under the text entry area when you place your cursor in any text box that supports text formatting.
Piezīme
A Discussion work item field doesn't exist. To query work items with comments from the Discussion area, filter on the History field. The full content of the text entered in the Discussion text box is added to the History field.
Select one of the following icons to open a menu of recent entries where you mentioned someone, linked to a work item, or linked to a pull request. Alternatively, you can open the same menu by entering @, #, or !.

Enter a name or number to filter the menu list to match your entry. Select the entry you want to add. To bring a group into the discussion, enter @ followed by the group name, such as a team or security group.
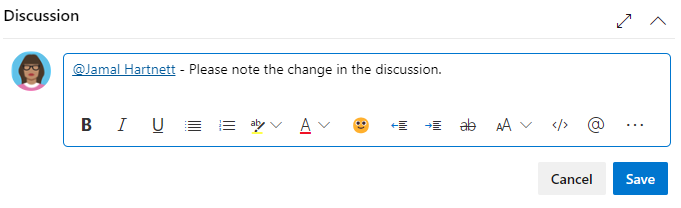
To edit or delete any of your discussion comments, choose ![]() Edit or choose the
Edit or choose the ![]() actions icon and then choose Delete.
actions icon and then choose Delete.

Piezīme
Editing and deleting comments requires Azure DevOps Server 2019 Update 1 or later version.
After you update the comment, select Update. To delete the comment, confirm that you want to delete it. The History tab on the work item form maintains a full audit trail of all edited and deleted comments.
Svarīgi
For on-premises Azure DevOps Server, configure an SMTP server for team members to receive notifications.
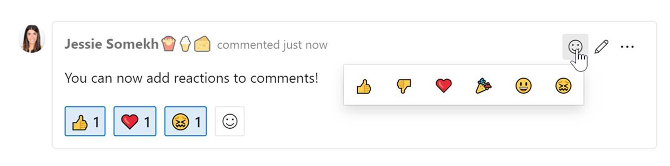
Add one or more reactions to a comment by choosing a smiley icon at the upper-right corner of any comment. Choose from the icons at the bottom of a comment next to any existing reactions. To remove your reaction, choose the reaction on the bottom of your comment. The following image shows an example of the experience of adding a reaction, and the display of reactions on a comment.
Piezīme
This feature is available starting in Azure DevOps Server 2022.1.
If you only have permissions to add to the Discussion of a work item, then you can do so by saving comments. This permission is controlled by Area Path nodes and the Edit work item comments in this node permission. For more information, see Set work tracking permissions, Create child nodes, modify work items under an area or iteration path.
When you save the comments, you don't need to save the work item.
Piezīme
When you save changes made to the Discussion control, only the comment gets saved. No work item rules defined for the work item type are executed.
Notikumi
Veidojiet inteliģentas lietotnes
17. marts 21 - 21. marts 10
Pievienojieties meetup sērijai, lai kopā ar citiem izstrādātājiem un ekspertiem izveidotu mērogojamus AI risinājumus, kuru pamatā ir reālas lietošanas gadījumi.
Reģistrēties tūlītApmācība
Modulis
Add collaborative comments in Power Automate - Training
In this module, you'll explore how to use comments to collaborate when you create cloud flows in Power Automate.
Dokumentācija
What is Azure Boards? - Azure Boards
Learn about the Agile tools that Azure Boards provides to manage software development projects.
Plan, track, and discuss work across teams. Define and update issues, bugs, user stories, & other work with customizable Kanban, Scrum, and Agile tools.
Best practices for Agile project management - Azure Boards
Get started with this guide for project managers who are new to Azure Boards to plan and track your projects.