Notitie
Voor toegang tot deze pagina is autorisatie vereist. U kunt proberen u aan te melden of de directory te wijzigen.
Voor toegang tot deze pagina is autorisatie vereist. U kunt proberen de mappen te wijzigen.
U kunt Azure Database Migration Service gebruiken via Azure Portal om databases te migreren van een on-premises exemplaar van SQL Server naar Azure SQL Database (offline).
In deze zelfstudie leert u hoe u de voorbeelddatabase AdventureWorks2022 migreert van een on-premises exemplaar van SQL Server naar Azure SQL Database met behulp van Database Migration Service. In deze zelfstudie wordt gebruikgemaakt van de offlinemigratiemodus, die rekening houdt met een acceptabele downtime tijdens het migratieproces.
In deze handleiding leer je hoe je:
- Een exemplaar maken van Azure Database Migration Service
- Uw migratie starten en de voortgang controleren tot voltooiing
Belangrijk
Op dit moment zijn onlinemigraties voor Azure SQL Database-doelen niet beschikbaar met Azure Database Migration Service. Bij een offlinemigratie wordt de downtime van toepassingen gestart wanneer de migratie wordt gestart. Het testen van een offlinemigratie wordt aanbevolen om te bepalen of de downtime acceptabel is.
Migratieopties
In de volgende sectie wordt beschreven hoe u Azure Database Migration Service gebruikt met Azure Portal.
Vereiste voorwaarden
Voordat u met de zelfstudie begint:
Zorg ervoor dat u toegang hebt tot Azure Portal.
Zorg ervoor dat de resourceprovider Microsoft.DataMigration is geregistreerd in uw abonnement.
Een Azure-account hebben dat is toegewezen aan een van de volgende ingebouwde rollen:
- Inzender voor de Azure SQL-doeldatabase
- Lezerrol voor de Azure-resourcegroep die de Doel-Azure SQL Database bevat
- De rol Eigenaar of Inzender voor het Azure-abonnement (vereist als u een nieuw exemplaar van Azure Database Migration Service maakt)
Als alternatief voor het gebruik van een van deze ingebouwde rollen kunt u een aangepaste rol toewijzen.
Maak een specifieke Azure SQL Database.
Zorg ervoor dat de SQL Server-aanmelding die verbinding maakt met het bron-SQL Server-exemplaar lid is van de db_datareader-rol en dat de aanmelding voor het doel-SQL Server-exemplaar lid is van de db_owner-rol .
Als u het databaseschema wilt migreren van de bron naar de Azure SQL-doeldatabase met behulp van de Database Migration Service, is de minimaal ondersteunde SHIR-versie 5.37 of hoger.
Voor schemamigratie zijn minimale machtigingen op de bron-SQL Server db_owner om toegang tot de database te krijgen, en op de doel-Azure SQL Database moet de gebruiker lid zijn van alle serverniveaurollen in de volgende tabel:
| Rollen | Beschrijving |
|---|---|
| ##MS_DatabaseManager## | Leden van de vaste serverrol ##MS_DatabaseManager## kunnen databases maken en verwijderen. Een lid van de rol ##MS_DatabaseManager## waarmee een database wordt gemaakt, wordt de eigenaar van die database, waardoor die gebruiker verbinding kan maken met die database als dbo-gebruiker. De dbo-gebruiker heeft alle databasemachtigingen in de database. Leden van de rol ##MS_DatabaseManager## hebben niet per se machtigingen voor toegang tot databases waarvan ze geen eigenaar zijn. Gebruik deze serverfunctie in plaats van de vaste databaserol dbmanager waarin zich bevindt master. |
| ##MS_DatabaseConnector## | Leden van de vaste serverrol ##MS_DatabaseConnector## kunnen verbinding maken met elke database zonder dat hiervoor een gebruikersaccount in de database nodig is. |
| ##MS_DefinitionReader## | Leden van de vaste serverrol ##MS_DefinitionReader## kunnen alle catalogusweergaven lezen die door VIEW ANY DEFINITION worden gedekt op elke database waarop een lid van deze rol een gebruikersaccount heeft. |
| ##MS_LoginManager## | Leden van de vaste serverrol ##MS_LoginManager## kunnen aanmeldingen maken en verwijderen. Het is raadzaam deze serverfunctie te gebruiken boven de database-rol loginmanager die op databaseniveau in de master database aanwezig is. |
De azure SQL-doeldatabase voorbereiden
Als u de aanmelding en gebruiker in de Azure SQL-doeldatabase wilt maken, voert u het volgende script uit op de master database:
CREATE LOGIN testuser WITH PASSWORD = '<password>';

ALTER SERVER ROLE ##MS_DefinitionReader## ADD MEMBER [testuser];
GO

ALTER SERVER ROLE ##MS_DatabaseConnector## ADD MEMBER [testuser];
GO

ALTER SERVER ROLE ##MS_DatabaseManager## ADD MEMBER [testuser];
GO

ALTER SERVER ROLE ##MS_LoginManager## ADD MEMBER [testuser];
GO

CREATE USER testuser FOR LOGIN testuser;
EXECUTE sp_addRoleMember 'dbmanager', 'testuser';
EXECUTE sp_addRoleMember 'loginmanager', 'testuser';
U kunt nu zowel het databaseschema als de gegevens migreren met behulp van Database Migration Service. U kunt ook andere hulpprogramma's zoals de extensie SQL Database Projects in Visual Studio Code gebruiken om het schema te migreren voordat u de lijst met tabellen selecteert die u wilt migreren.
Opmerking
Als er geen tabellen bestaan in het Azure SQL Database-doel of als er geen tabellen zijn geselecteerd voordat de migratie wordt gestart, is de knop Volgende niet beschikbaar om de migratie te starten. Als er geen tabel op het doel bestaat, moet u de optie voor schemamigratie selecteren om verder te gaan.
Een Database Migration Service-exemplaar maken
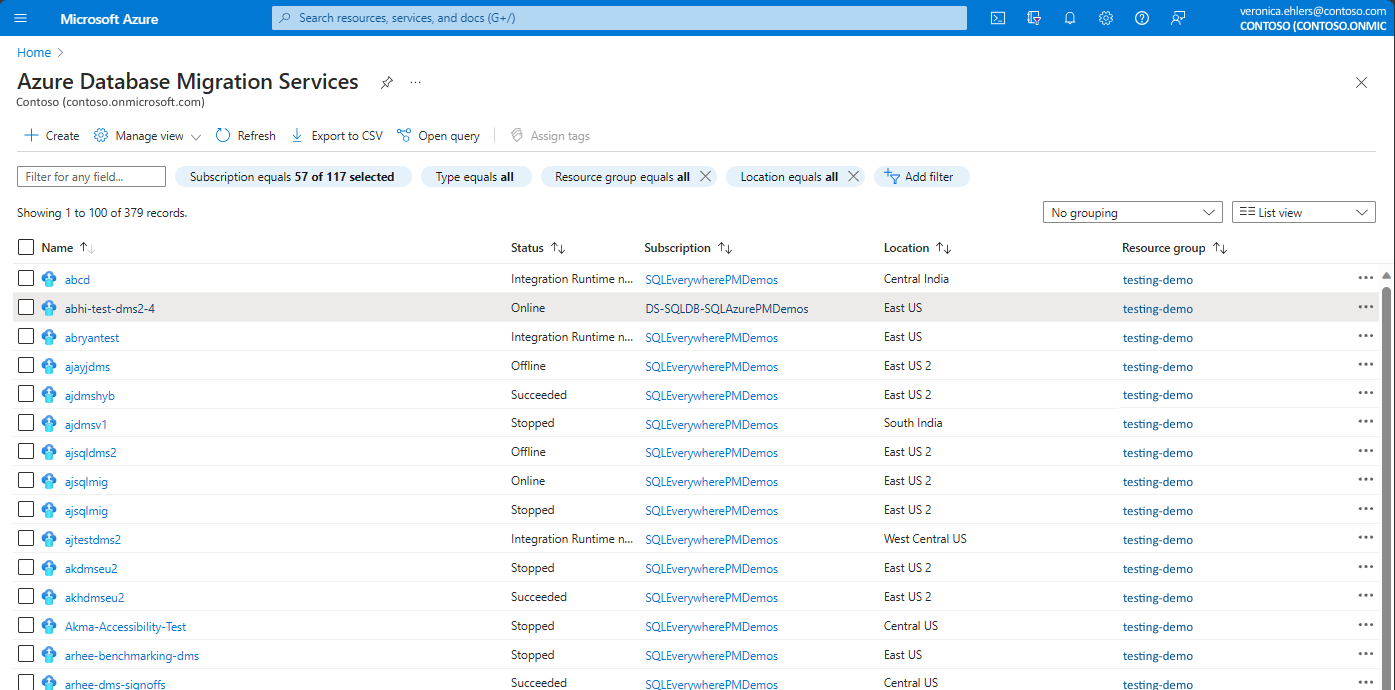
Stap 1: Navigeer in Azure Portal naar de pagina Azure Database Migration Service . Maak een nieuw exemplaar van Azure Database Migration Service of gebruik een bestaand exemplaar dat u eerder hebt gemaakt.
Een bestaand exemplaar van Database Migration Service gebruiken
Een bestaand exemplaar van Database Migration Service gebruiken:
Selecteer in Azure Portal onder Azure Database Migration Services een bestaand exemplaar van Database Migration Service dat u wilt gebruiken, zodat deze aanwezig is in de juiste resourcegroep en regio.

Een nieuw exemplaar van Database Migration Service maken
Ga als volgt te werk om een nieuw exemplaar van Database Migration Service te maken:
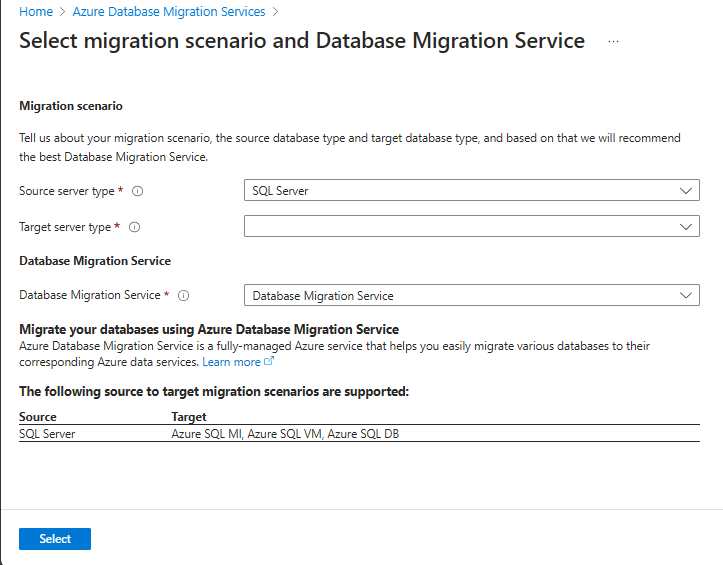
Selecteer Maken in de Azure-portal onder Azure Database Migration Service.
Selecteer in migratiescenario selecteren en Database Migration Service de gewenste invoer, zoals bron- en doelservertype, kies Database Migration Service en kies Selecteren.
Selecteer in het volgende scherm Gegevensmigratieservice maken uw abonnement en resourcegroep, selecteer locatie en voer de naam van de Database Migration Service in. Selecteer Beoordelen en Creëren. Hiermee maakt u de Azure Database Migration Service.

Als de lokaal gehoste integration runtime (SHIR) is vereist, selecteert u op de overzichtspagina van uw Database Migration Service en onder Instellingen Integration Runtime en voert u de volgende stappen uit:
Selecteer Integration Runtime configureren en kies de koppeling Integration Runtime downloaden en installeren om de downloadkoppeling in een webbrowser te openen. Download de Integration Runtime en installeer deze vervolgens op een computer die voldoet aan de vereisten voor het maken van verbinding met het SQL Server-bronexemplaren. Zie voor meer informatie Zelfgehoste Integration Runtime voor databasemigraties.
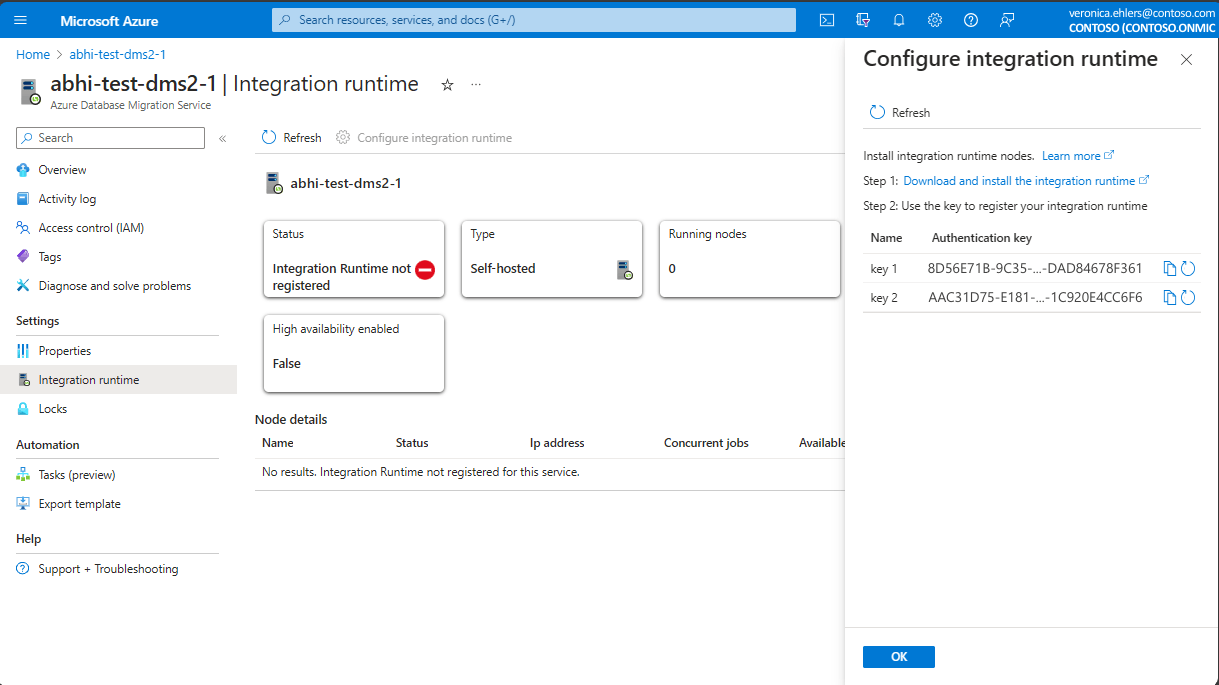
Wanneer de installatie is voltooid, wordt Microsoft Integration Runtime Configuration Manager automatisch geopend om het registratieproces te starten.
Kopieer in de tabel Verificatiesleutel een van de verificatiesleutels die zijn opgegeven in de wizard en plak deze in Microsoft Integration Runtime Configuration Manager.
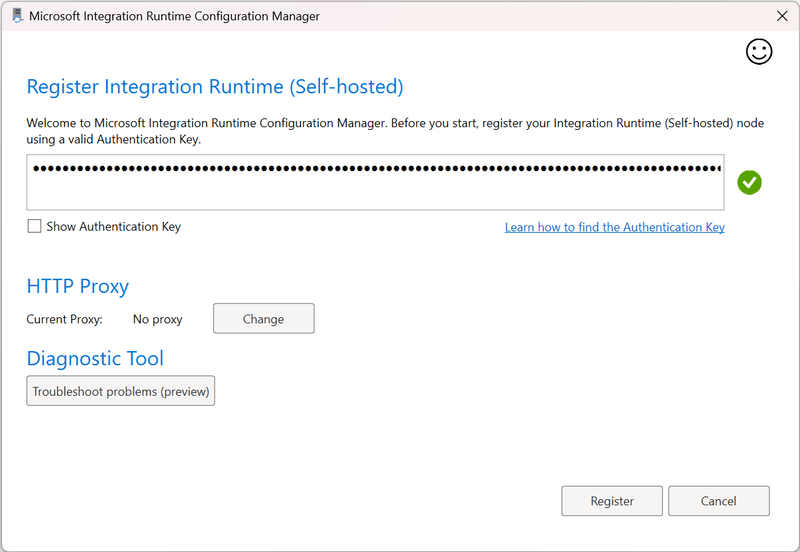
Als de verificatiesleutel geldig is, wordt er een groen vinkje weergegeven in Integration Runtime Configuration Manager. Een groene controle geeft aan dat u zich kunt blijven registreren.
Nadat u de zelf-hostende Integration Runtime hebt geregistreerd, sluit u Microsoft Integration Runtime Configuration Manager. Het kan enkele minuten duren voordat de knooppuntgegevens in De Azure-portal voor Database Migration Service worden weergegeven onder Instellingen > Integration Runtime.

Opmerking
Zie Een zelf-hostende Integration Runtime maken en configureren voor meer informatie over de zelf-hostende Integration Runtime.


Een nieuwe migratie starten
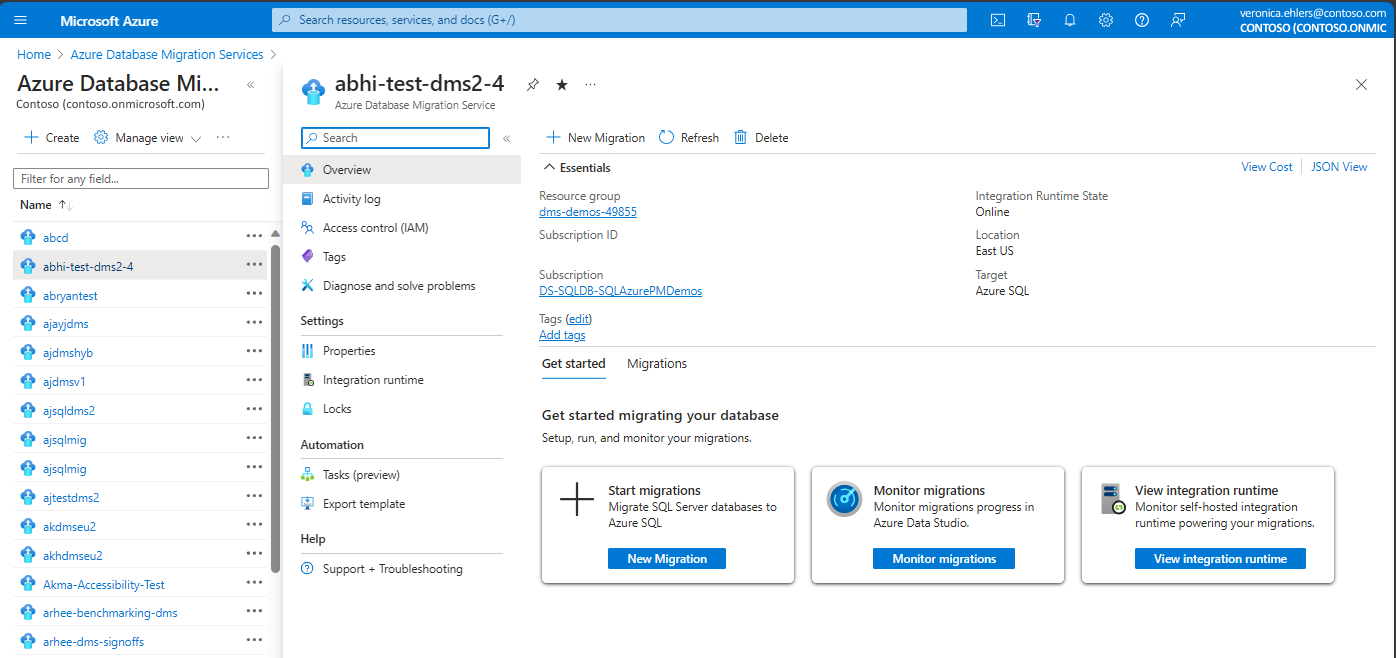
Als u een nieuwe migratie wilt starten, gaat u naar Azure Database Migration Service in Azure Portal en gebruikt u +Create om een nieuw exemplaar van Database Migration Service te maken of selecteert u een bestaand exemplaar en gaat u vervolgens naar uw Azure Database Migration Service-exemplaar.
Selecteer in het deelvenster Overzicht van uw Azure Database Migration Service-exemplaar de optie Nieuwe migratie:

Kies onder Nieuw migratiescenario selecteren uw bron, doelservertype, migratiemodus en kies Selecteren.

Voer in de wizard Offlinemigratie van Azure SQL Database de volgende stappen uit:
Voer op het tabblad Brondetails details in voor het SQL Server-bronexemplaar en selecteer vervolgens Volgende: Verbinding maken met de bron-SQL Server.

Geef op het tabblad Verbinding maken met bron-SQL Server verbindingsgegevens op en selecteer vervolgens Volgende: Databases selecteren voor migratie:

Schakel op het tabblad Databases selecteren voor migratie het selectievakje in naast de databases die u wilt migreren. Het invullen van de lijst met databases kan enige tijd duren. Klik op Volgende: Verbinding maken met Doel Azure SQL Database.

Geef op het tabblad Verbinding maken met doel Azure SQL Database verbindingsdetails op en selecteer daarna Volgende: Bron- en doeldatabases toewijzen:

Op het tabblad Bron- en doeldatabases kunt u de databases tussen de bron en het doel in kaart brengen.

(Optioneel) Schakel het selectievakje naast Ontbrekend schema migreren in om ontbrekende schemaobjecten van de bron te implementeren naar het Azure SQL Database-doel om de volgende schemaobjecten met één selectievakje te migreren:
- schemas
- Tabellen (geselecteerd)
- Indexen
- Weergaven
- Opgeslagen procedures (StoredProcedures)
- Synoniemen
- DDL-triggers (DdlTriggers)
- Standaardwaarden
- Volledigetextcatalogi (FullTextCatalogs)
- Planrichtlijnen (PlanGuides)
- Rollen
- Reglement
- Toepassingsrollen (Applicatierollen)
- Door de gebruiker gedefinieerde aggregaties (UserDefinedAggregates)
- Door de gebruiker gedefinieerde gegevenstypen (UserDefinedDataTypes)
- Door de gebruiker gedefinieerde functies (UserDefinedFunctions)
- Door de gebruiker gedefinieerde tabeltypen (UserDefinedTableTypes)
- Door de gebruiker gedefinieerde typen (UserDefinedTypes)
- Gebruikers* (niet elk gebruikerstype)
- XmlSchemaCollections (verzamelingen van XML-schema's)
Opmerking
- Als u Ontbrekend schema migreren selecteert, voert de Database Migration-service de schemamigratie uit voordat gegevens worden gemigreerd.
- DMS gaat verder met de gegevensmigratiefase, zelfs als schemamigratie fouten tegenkomt, tenzij er problemen zijn met tabelobjecten.
Gebruik vervolgens Alle tabellen selecteren om alle tabellen te migreren of gebruik het tekstvak om de lijst met tabellen te filteren en afzonderlijke tabellen te selecteren die u wilt migreren. Selecteer vervolgens Volgende: Samenvatting van databasemigratie.

Bekijk de details op het tabblad Overzicht van databasemigratie en selecteer vervolgens Migratie starten, waarmee de databasemigratie wordt gestart en u automatisch teruggaat naar het Database Migration Service-dashboard.

Opmerking
Voor een offlinemigratie wordt de downtime van toepassingen gestart wanneer de migratie wordt gestart.


De databasemigratie bewaken
Als u de databasemigratie wilt bewaken, selecteert u Migraties bewaken in het deelvenster Overzicht van uw Database Migration Service-exemplaar.
Op het tabblad Migraties kunt u migraties bijhouden die worden uitgevoerd, voltooid en mislukt (indien van toepassing) of kunt u alle databasemigraties bekijken. Selecteer Vernieuwen in de menubalk om de migratiestatus bij te werken.

Database Migration Service retourneert de meest recente bekende migratiestatus telkens wanneer de migratiestatus wordt vernieuwd. In de volgende tabel worden mogelijke statussen beschreven:
Toestand Beschrijving Maken De service begint de migratie. Kopiëren voorbereiden De service schakelt autostats, triggers en indexen uit in de doeltabel. Kopiëren Gegevens worden gekopieerd van de brondatabase naar de doeldatabase. Kopiëren voltooid Het kopiëren van gegevens is voltooid. De service wacht op andere tabellen om het kopiëren te voltooien om te beginnen met de laatste stappen om tabellen terug te zetten naar het oorspronkelijke schema. Indexen herbouwen De service bouwt indexen opnieuw op in doeltabellen. Geslaagd Alle gegevens worden gekopieerd en de indexen worden opnieuw opgebouwd. Selecteer onder Bronnaam een databasenaam om de tabelweergave te openen. In deze gedetailleerde weergave ziet u de huidige status van de migratie, het aantal tabellen dat zich momenteel in die status bevindt en een gedetailleerde status van elke tabel:

Wanneer alle tabelgegevens worden gemigreerd naar het Azure SQL Database-doel, werkt Database Migration Service de migratiestatus bij van Wordt uitgevoerd naar Geslaagd.


Opmerking
Database Migration Service optimaliseert de migratie door tabellen zonder gegevens (0 rijen) over te slaan. Tabellen die geen gegevens bevatten, worden niet weergegeven in de lijst, zelfs als u de tabellen hebt geselecteerd toen u de migratie maakte.
U hebt de migratie naar Azure SQL Database voltooid. Doorloop een reeks taken na de migratie om ervoor te zorgen dat alles soepel en efficiënt functioneert.
Beperkingen
Offlinemigratie van Azure SQL Database maakt gebruik van ADF-pijplijnen (Azure Data Factory) voor gegevensverplaatsing en houdt zich dus aan ADF-beperkingen. Er wordt een bijbehorende ADF gemaakt wanneer er ook een databasemigratieservice wordt gemaakt. De fabriekslimieten zijn dus per service van toepassing.
- De computer waarop de SHIR is geïnstalleerd, fungeert als de rekenkracht voor migratie. Zorg ervoor dat deze machine de cpu- en geheugenbelasting van de gegevenskopie kan verwerken. Raadpleeg een zelf-hostende Integration Runtime maken en configureren voor meer informatie.
- 100.000 tabellen per databaselimiet.
- 10.000 gelijktijdige databasemigraties per dienst.
- De migratiesnelheid is sterk afhankelijk van de Azure SQL Database-SKU en de zelf-hostende Integration Runtime-host.
- Azure SQL Database-migratie schaalt slecht met het aantal tabellen vanwege de overhead van ADF bij het starten van activiteiten. Als een database duizenden tabellen bevat, kan het opstartproces van elke tabel enkele seconden duren, zelfs als deze uit één rij met 1 bit gegevens bestaan.
- Azure SQL Database-tabelnamen met dubbele bytetekens worden momenteel niet ondersteund voor migratie. Beperking is het wijzigen van de naam van tabellen vóór de migratie; ze kunnen na een geslaagde migratie worden teruggezet naar de oorspronkelijke namen.
- Tabellen met grote blobkolommen kunnen niet worden gemigreerd vanwege een time-out.
- Databasenamen waarvoor SQL Server is gereserveerd, worden momenteel niet ondersteund.
- Databasenamen met puntkomma's worden momenteel niet ondersteund.
- Berekende kolommen worden niet gemigreerd.
- Kolommen in de brondatabase met standaardwaarden en
NULL-waarden worden gemigreerd met de gedefinieerde standaardwaarden in de Azure SQL-doeldatabase, in plaats van de NULL-waarden te behouden. - Als uw brondatabase verandert gegevensopname (CDC) is ingeschakeld en u Azure Database Migration Service (Azure DMS) gebruikt voor schemamigratie, moet u CDC uitschakelen voordat u de migratie start. Als CDC niet vooraf is uitgeschakeld, migreert Azure DMS CDC-gerelateerde objecten (zoals tabellen) naar het doel. Dit kan problemen veroorzaken bij het inschakelen van CDC op de doeldatabase na de migratie.