Section 2: Set up and register your data
If you don't have data sources available for scanning, then you can follow along with these steps to fully deploy an Azure Data Lake Stroage (ADLS Gen2) example.
Tip
If you already have a data source in the same tenant as your Microsoft Purview account, move ahead the next part of this section to scan your assets.
In a real data estate you find many different systems in use for different data applications. There are reporting environments like Fabric and Snowflake where teams use copies of data to build analytical solutions and power their reports and dashboards. There are operational data systems that power the applications teams or customers use to complete business processes that collect or add data based on decisions made during the process.
To create a more realistic data estate, the recommendation is to show many sources of data in the catalog, which can cover the breadth of different data uses any company might have. The types of data required to power a use case can be vastly different with business users that need reports and dashboards, analysts need conformed dimensions and facts to build reports, data scientists or data engineers need raw source data that came directly from the system that collects the data all of these and more enable different users to see the importance of finding, understanding, and accessing data in the same place.
For some other tutorials to add data to your estate, you can follow these guides:
- Fabric Lakehouse Tutorial – provides the base of a reporting environment
- Azure SQL Database (Sample) – provides a well structured example of an operational data store
Prerequisites
- Subscription in Azure: Create Your Azure Free Account Today
- Microsoft Entra ID for your tenant: Microsoft Entra ID Governance
- A Microsoft Purview Account
- Admin access to the Microsoft Purview account (This is the default if you created the Microsoft Purview account. Permissions in new Microsoft Purview portal preview | Microsoft Learn)
- All resources; Microsoft Purview, your data source, and Microsoft Entra ID have to be in the same cloud tenant.
Steps to set up your data estate
Create and populate a storage account
- Follow along with this guide to create a storage account: Create a storage account for Azure Data Lake Storage Gen2
- Create containers for your new data lake:
- Navigate to the Overview page of our Storage Account.
- Select the Containers tab under the Data storage section.
- Select the + Container button
- Name as 'bronze' and select the Create button
- Repeat these steps to create a 'gold' container
- Download some example CSV data from data.gov: Covid-19 Vaccination And Case Trends by Age Group, United States
- Upload the CSV to the container named 'bronze' in the storage account you created.
- Select the container named 'bronze' and select the Upload button.
- Browse the location where you saved the CSV and select the Covid-19_Vaccination_Case _Trends file.
- Select Upload.
Create an Azure Data Factory
This step will demonstrate how data moves between layers of a medallion data lake and ensure the data is in a standardized format that consumers would expect to use, this is a prerequisite step for running Data Quality.
Follow this guide to create an Azure Data Factory: Create an Azure Data Factory
Copy the data from the CSV in the 'bronze' container to the 'gold' container as a Delta format table using this Azure Data Factory guide: Transform data using a mapping data flow
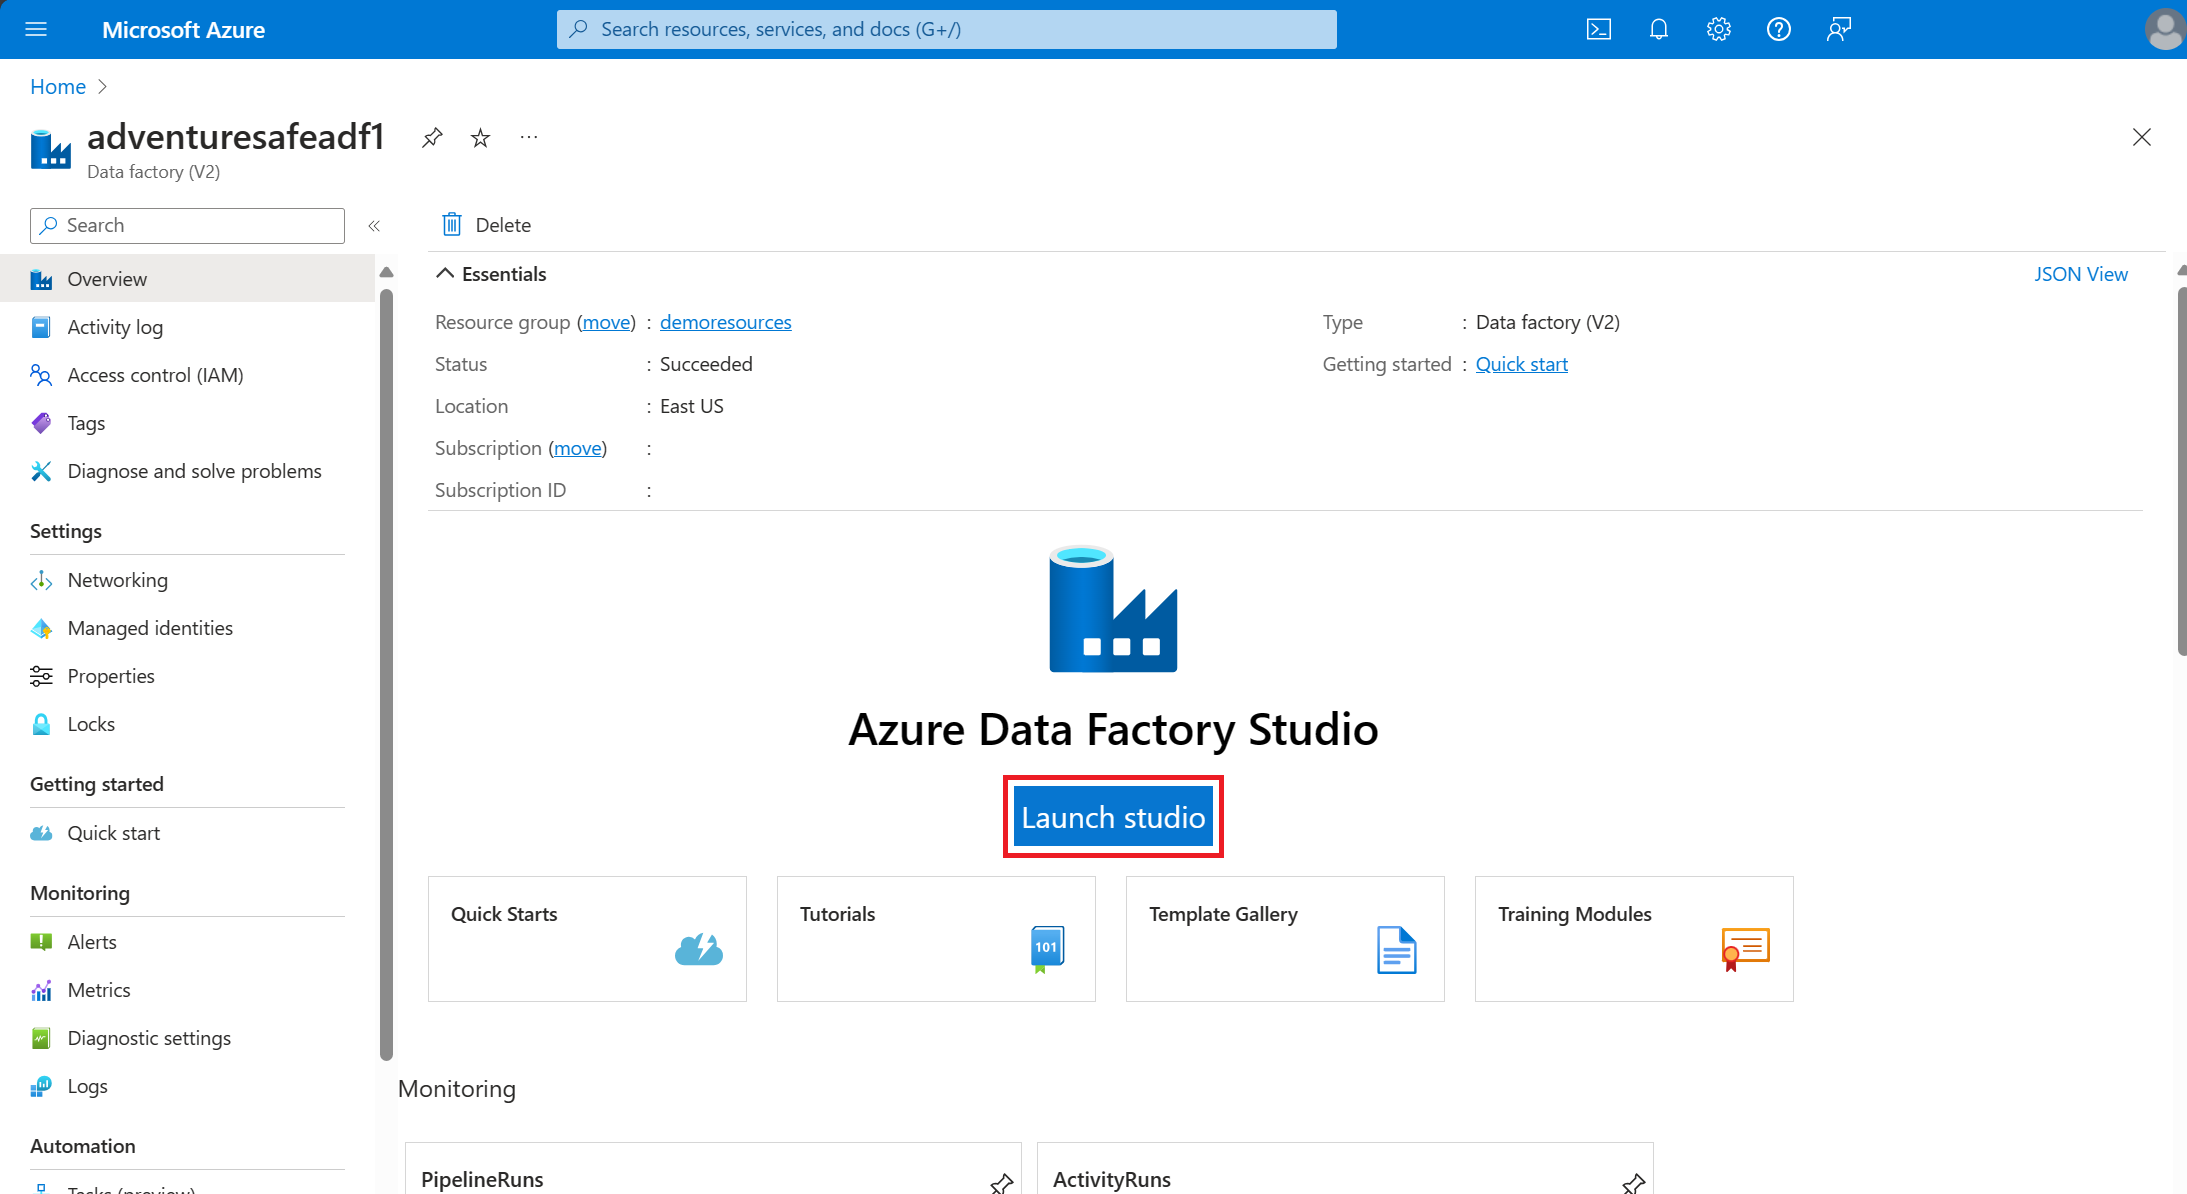
Open the Azure Data Factory (ADF) experience from the Azure portal by selecting the Launch studio button on the Overview tab of the ADF resource created.
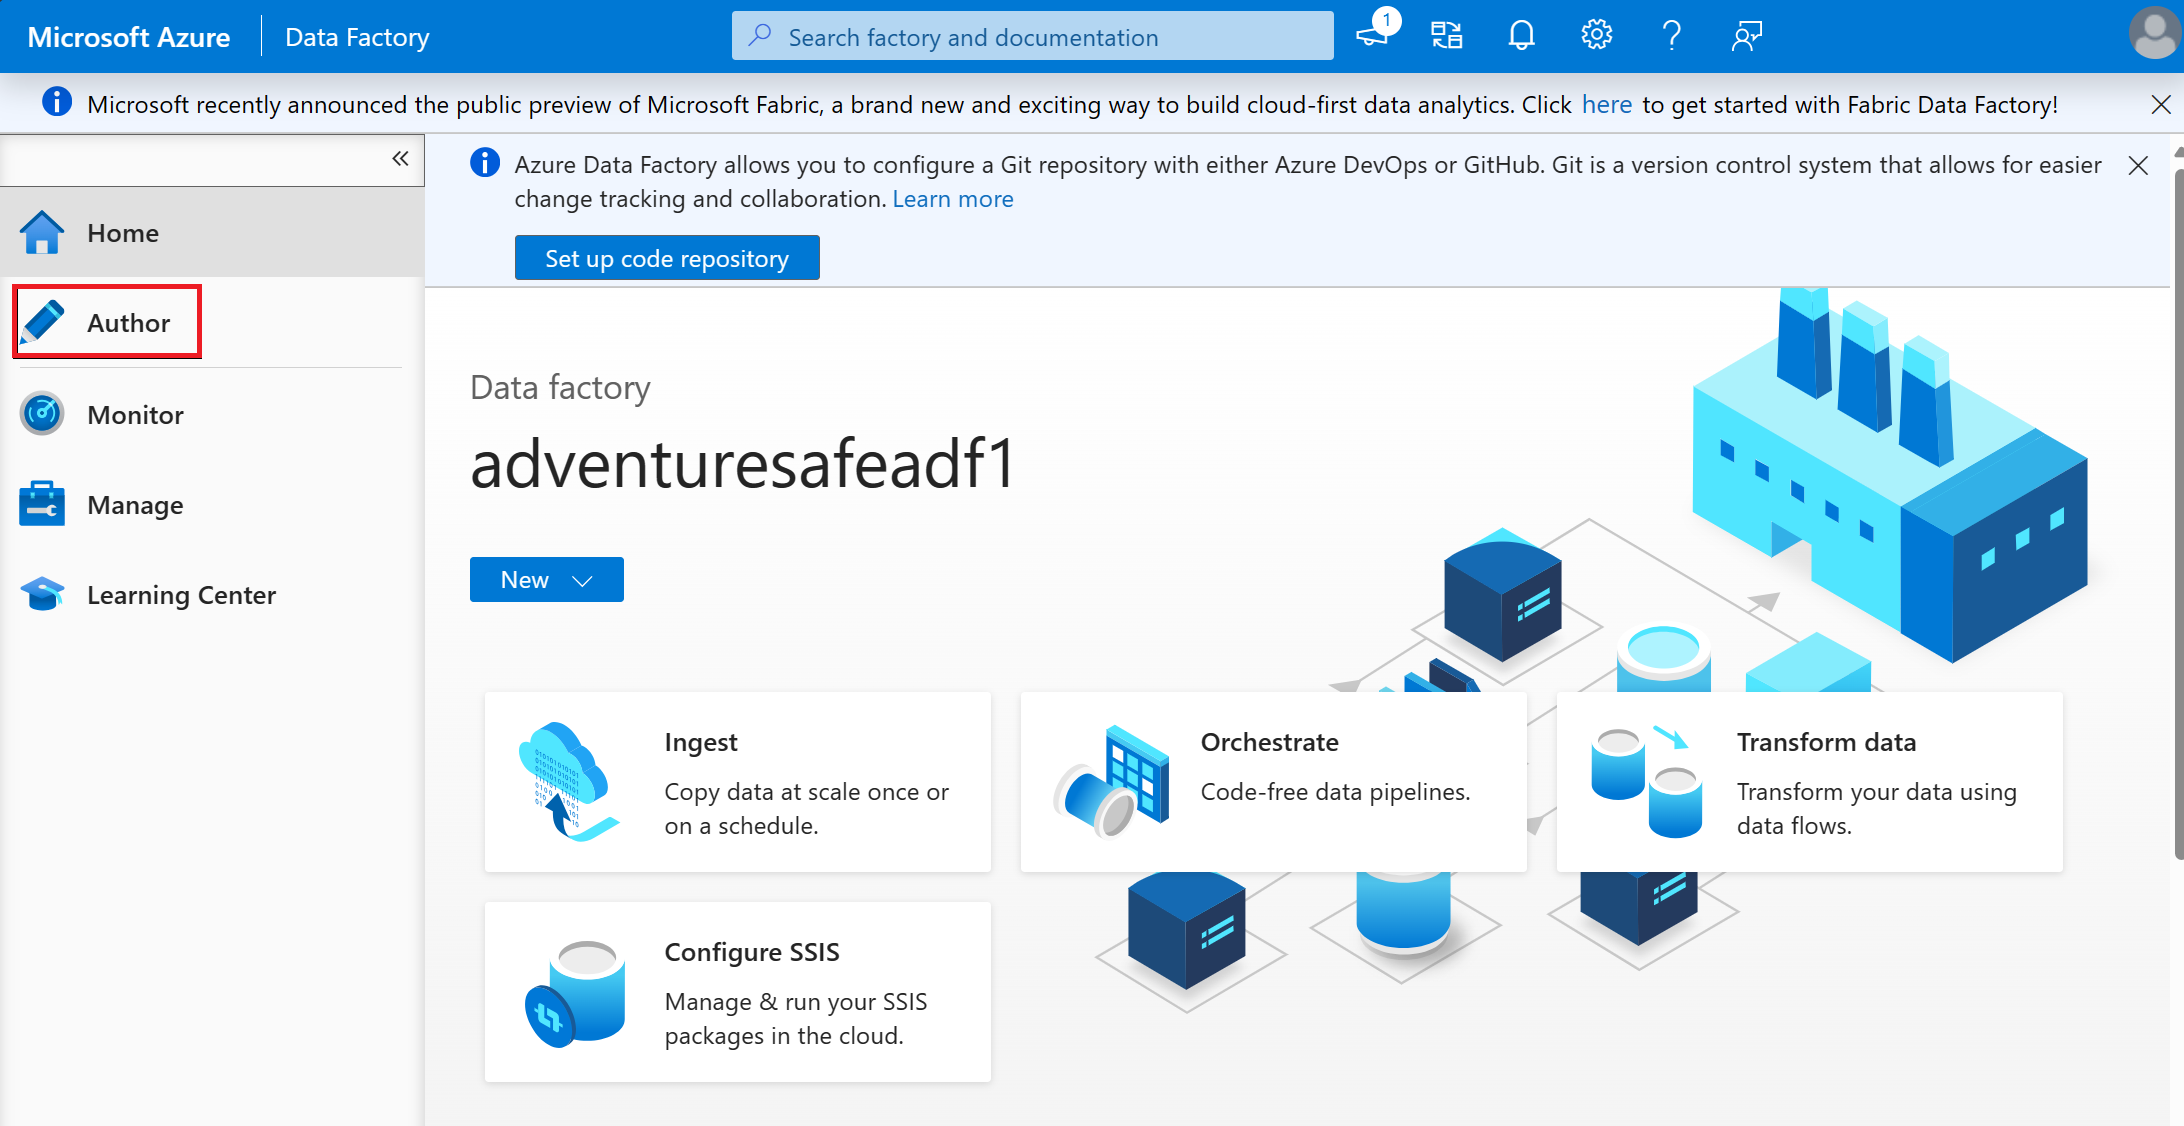
Select the Author tab in ADF studio.
Select the + button and pick Data flow from the drop-down menu.

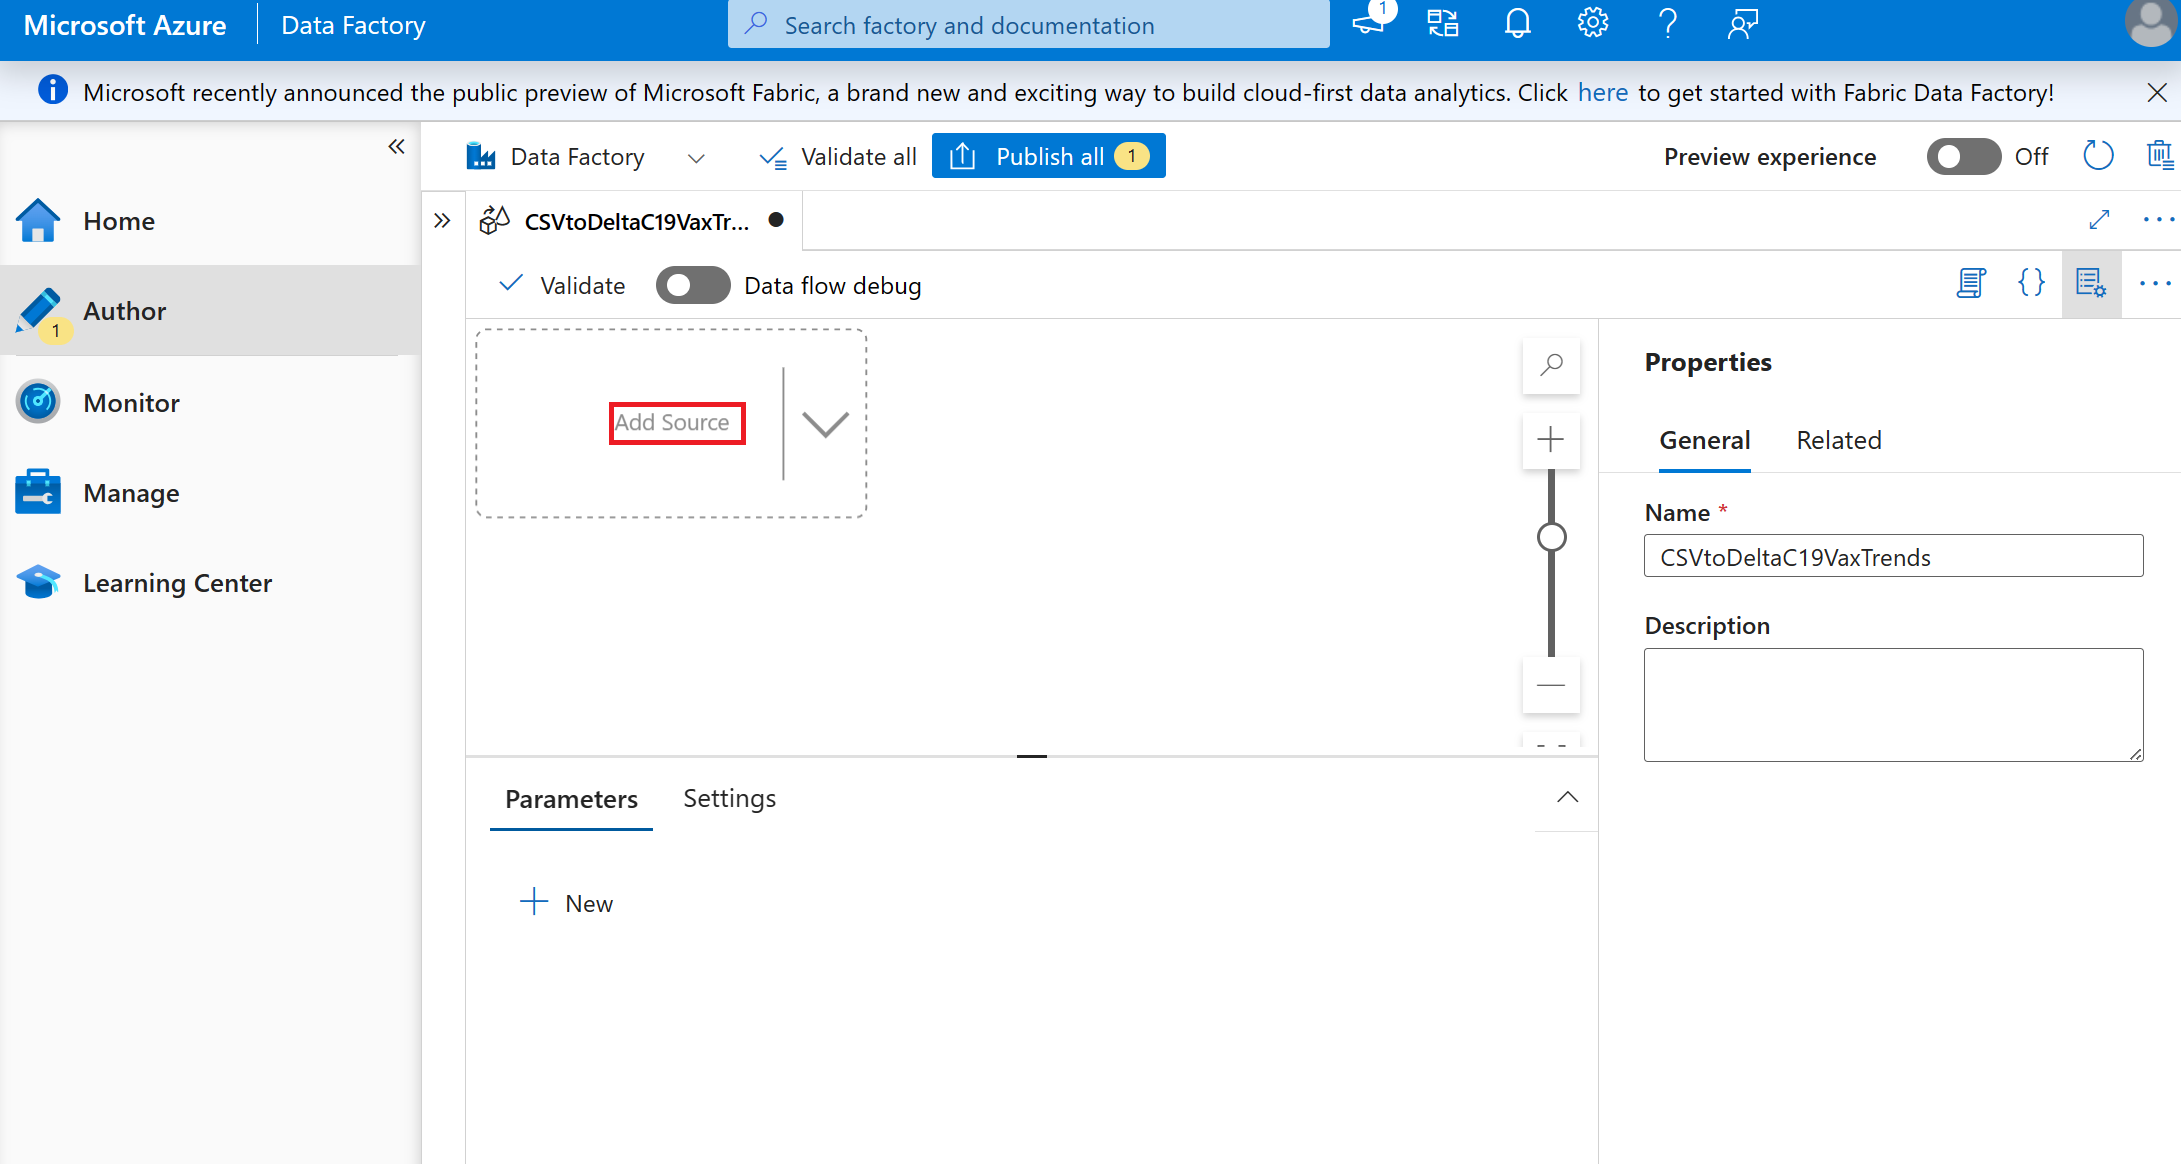
Name the dataflow 'CSVtoDeltaC19VaxTrends'.
Select Add Source in the empty box.
Set Source settings to:
- Output stream name: 'C19csv'
- Description: leave blank
- Source type: Inline
- Inline dataset type: Delimited Text
- Linked Service: Select the data lake where you stored the csv
Set Source options to:
- File mode: File
- File path: /bronze/ Covid-19_Vaccination_Case _Trends
- Allow no files found: leave unchecked
- Change data capture: leave unchecked
- Compression type: None
- Encoding: Default(UTF-8)
- Column delimiter: Comma (,)
- Row delimiter: Default(\r, \n, or\r\n)
- Quote character: Double quote (“)
- Escape character: Backslash ()
- First row as header: CHECKED
- Leave the rest as defaults
Select the small + Next to the source created and select Sink
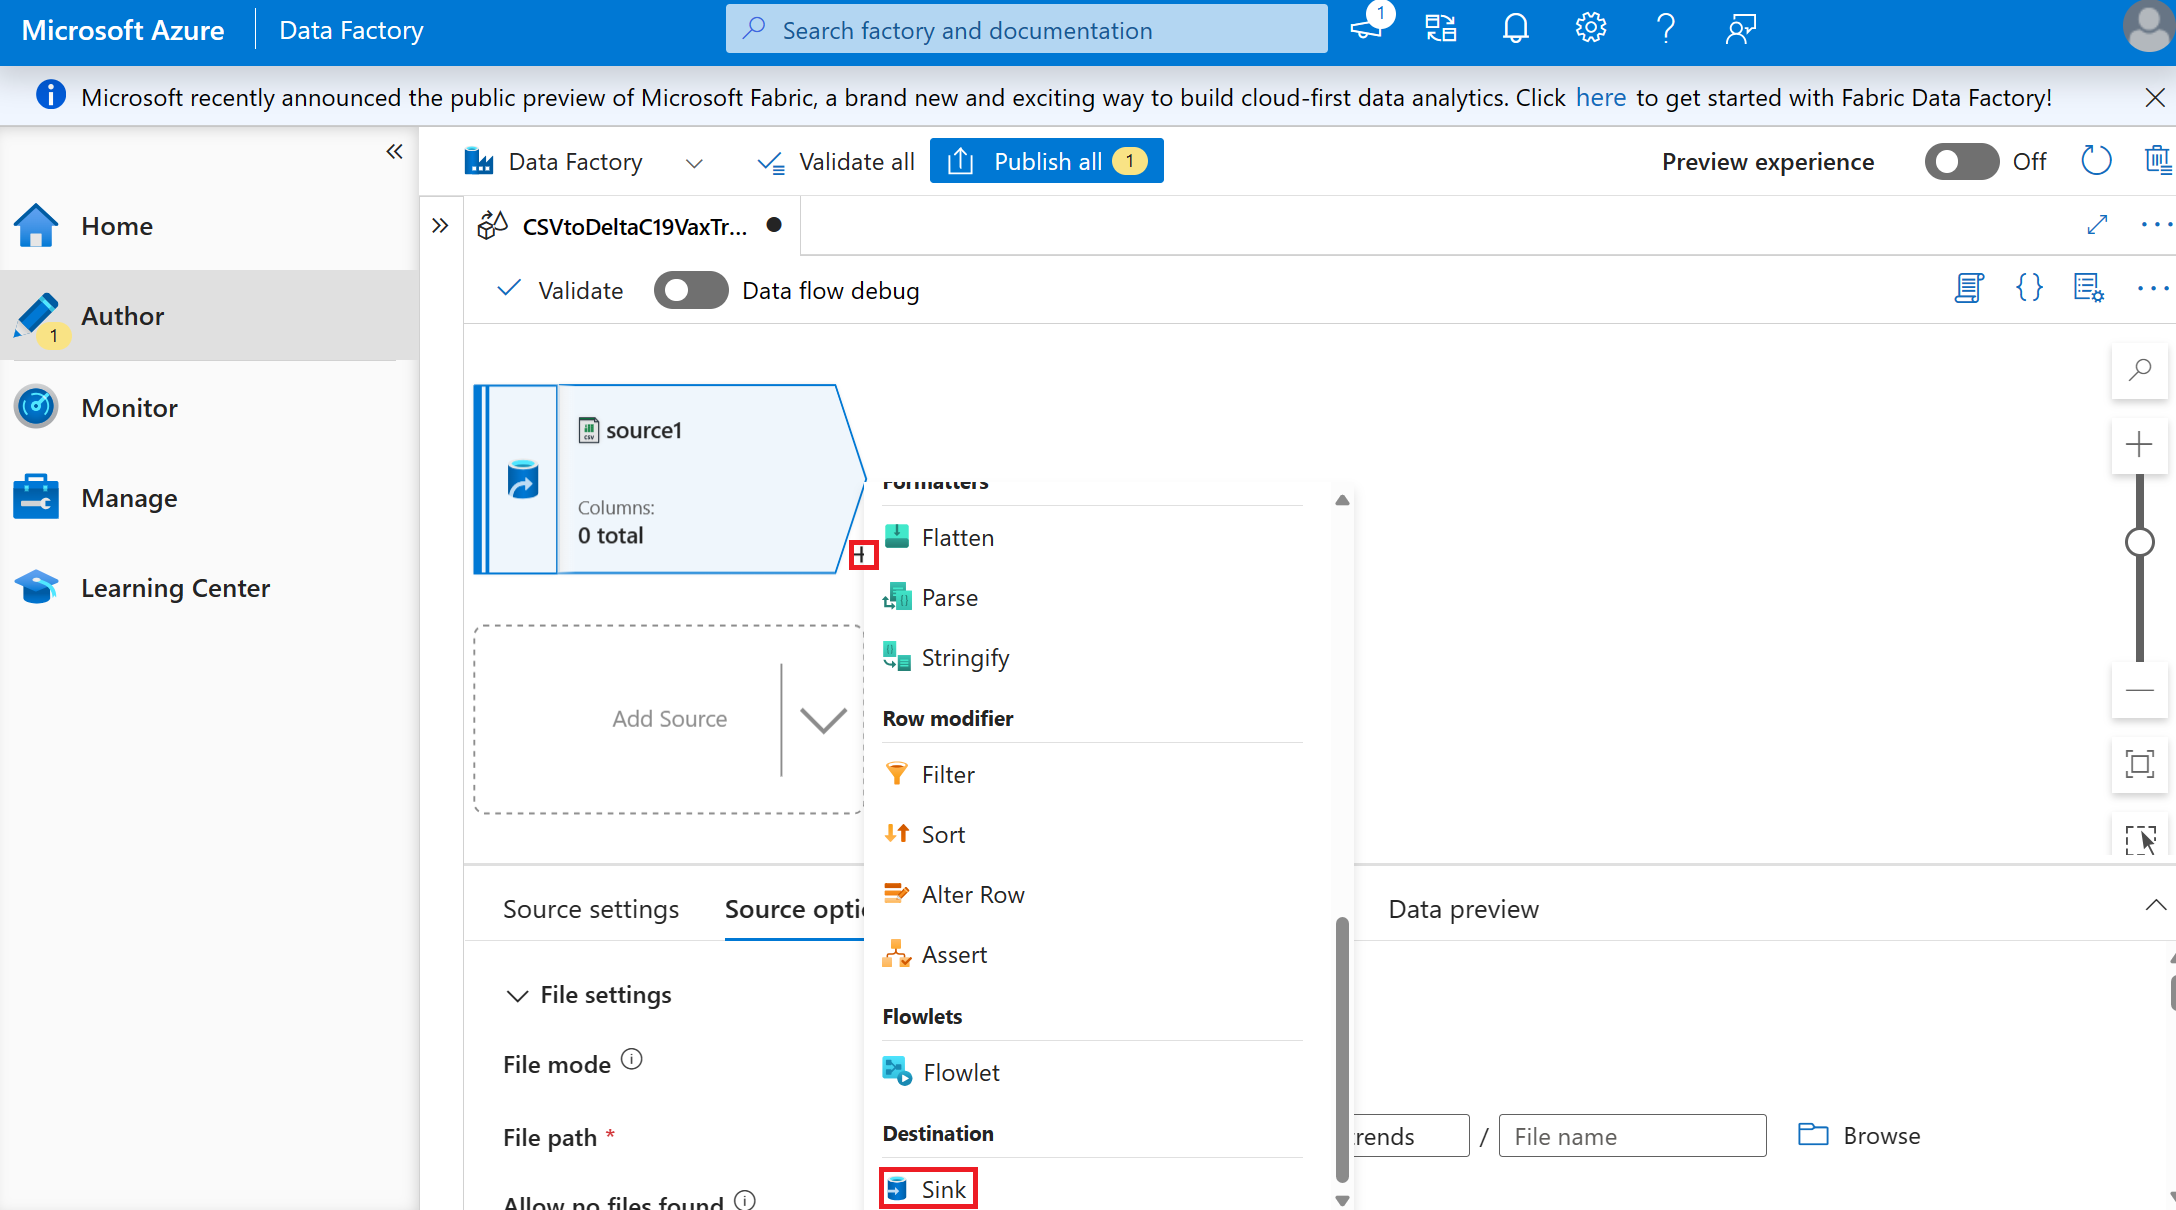
Create the sink where the format and location of the data to be stored to move the data from a csv in 'bronze' to a delta table in 'gold'.
- Set the Sink values (leave all settings as default unless specified)
- Sink type: Inline
- Inline dataset type: Delta
- Linked service: the same data lake as used in the source, because we'll be storing in a different container.
Set the Setting values (leave all settings as default unless specified)
- Folder path: gold/Covid19 Vaccine and Case Trends
You need to enter the value because this name is how we want the data to be stored and doesn't exist to select.
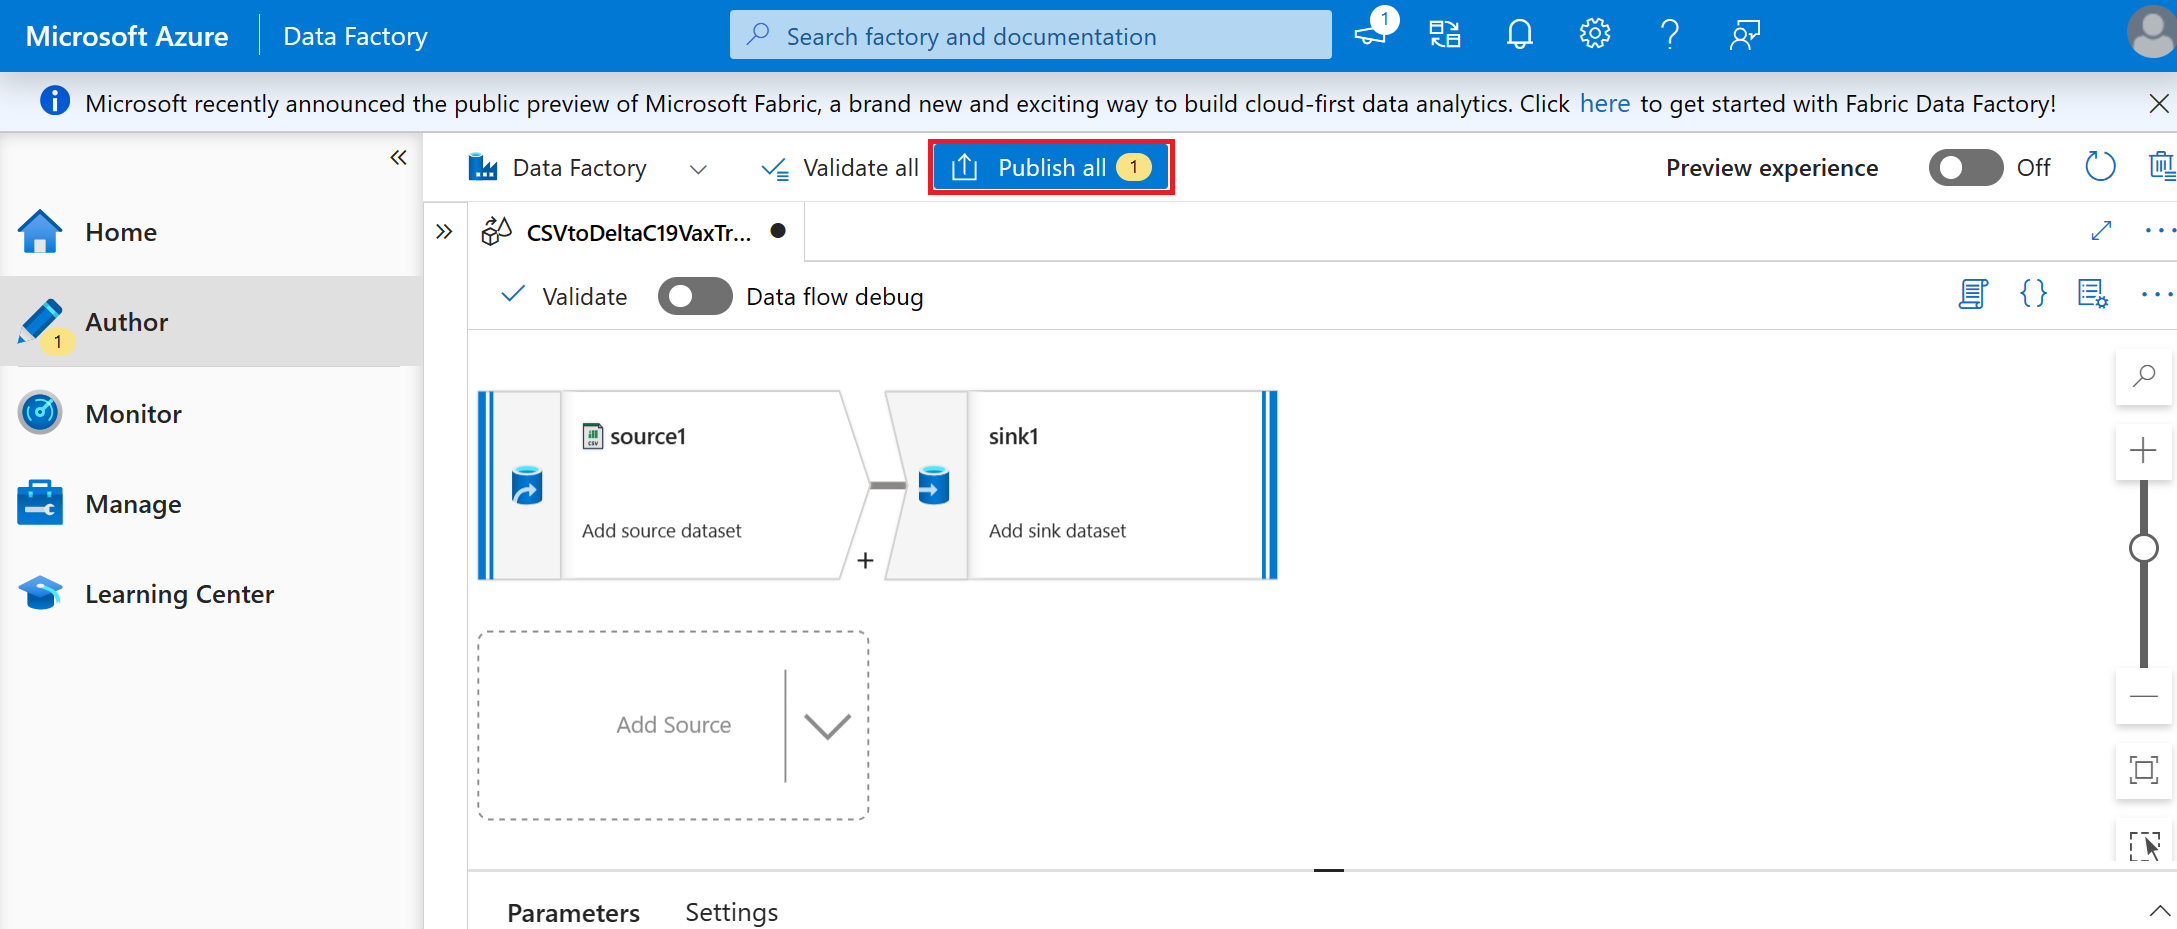
Select Validate, this checks your data flow and provide instructions to fix any errors.
Select Publish all.
Select the + button and select pipeline from the drop-down menu
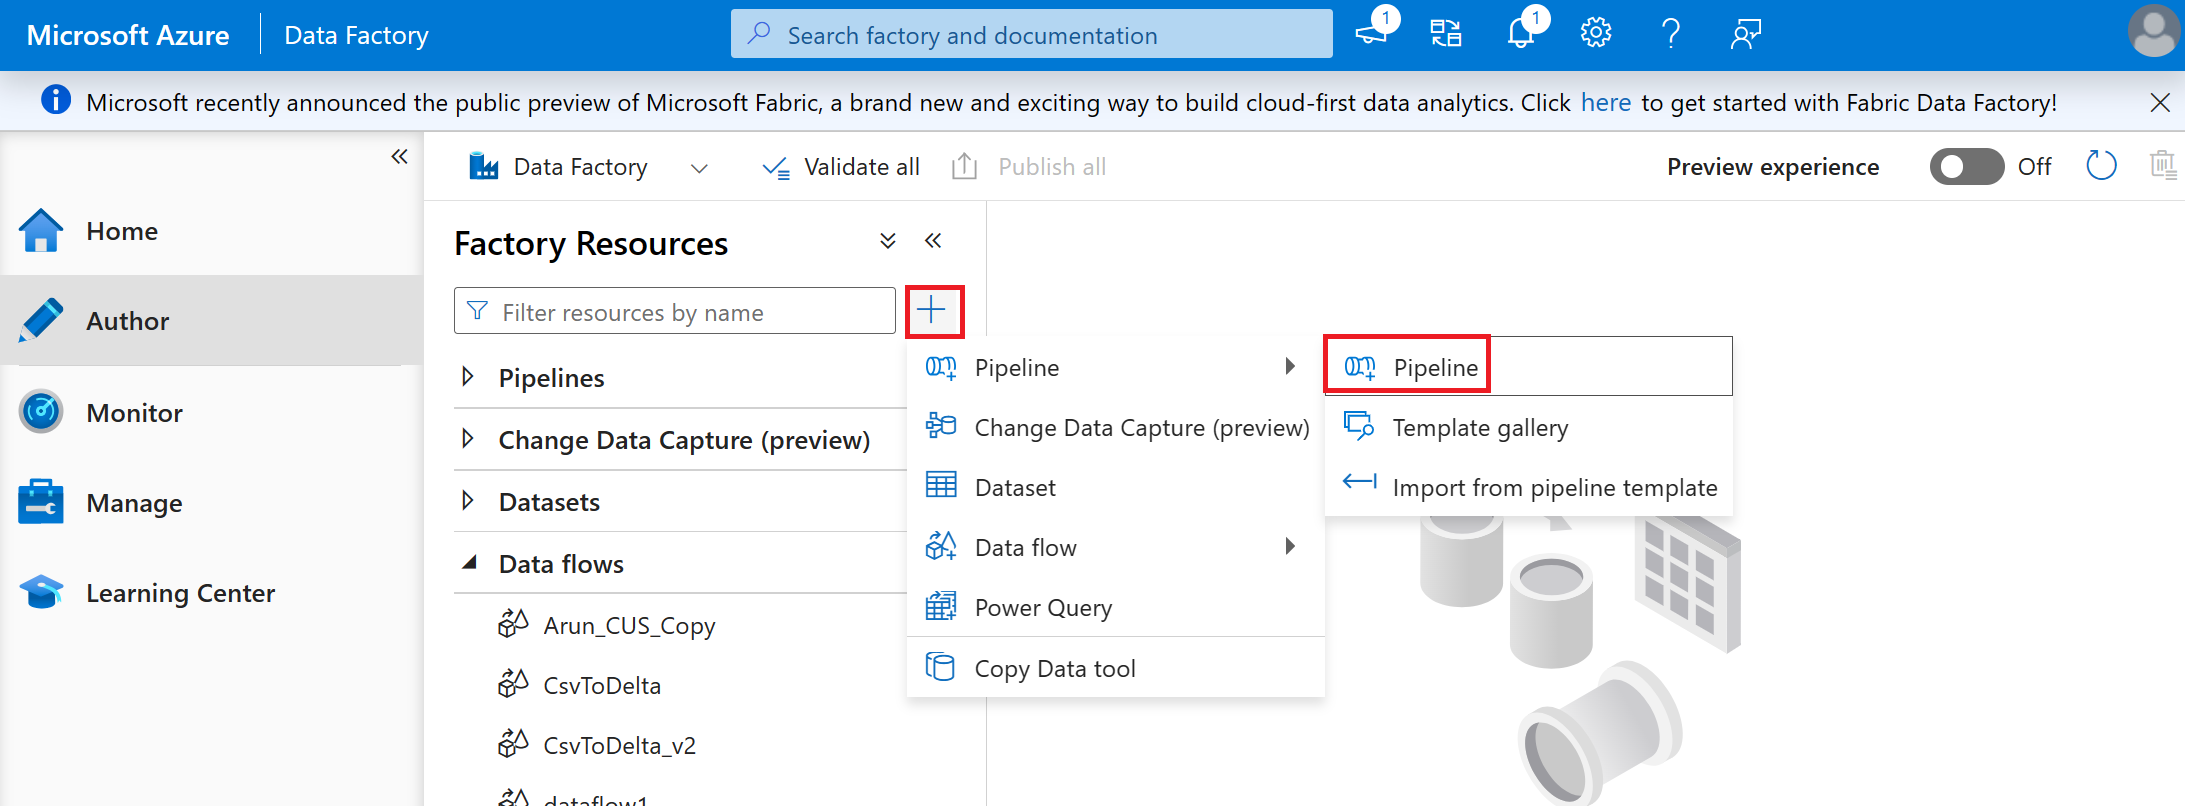
Name your pipeline 'CSV to Delta C19 Vax Trends'
Select the dataflow created in the previous steps CSV to Delta (C19VaxTrends) and drag and drop it on the open pipeline tab.
Select Validate
Select Publish
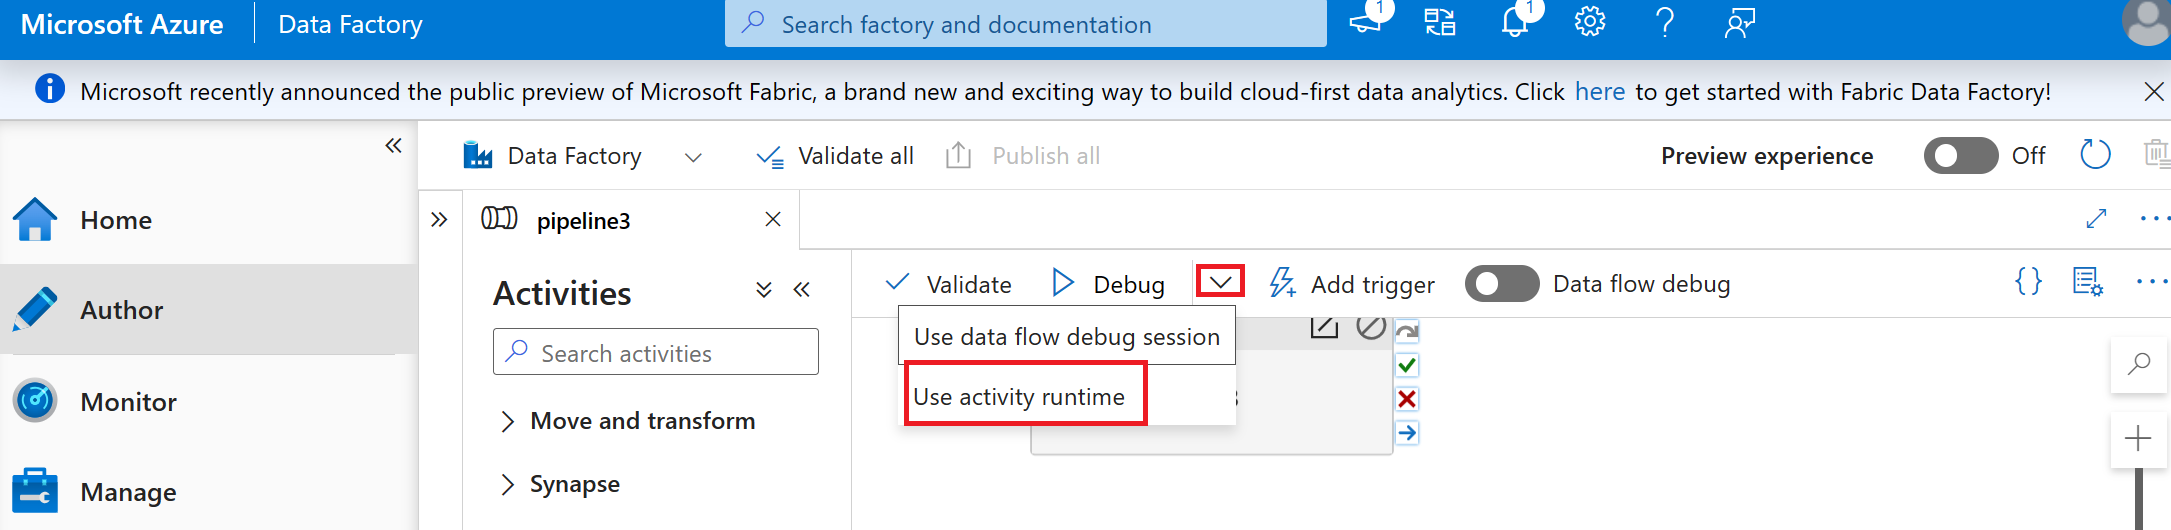
Select Debug (use activity runtime) to run the pipeline.
Tip
If you hit errors for spaces or inappropriate characters for delta format: open the downloaded CSV and make corrections. Then,reupload and overwrite the CSV in the bronze zone. Then rerun your pipeline.
Navigate to your gold container in the data lake and you should now see the new Delta table created during the pipeline.
Scan your assets
If you haven't scanned data assets into your Microsoft Purview Data Map, then you can follow these steps to populate your data map.
Scanning sources in your data estate will automatically collect the metadata of the data assets (tables, files, folders, reports, etc.) in those sources. By registering a data source and creating the scan, you establish the technical ownership over the sources and assets that are displayed in the catalog and ensure that you have control over who can access which metadata in Microsoft Purview. By registering and storing sources and assets at the domain level, it will be stored at the highest level of access hierarchy. Typically it's best to create some collections where you'll scan the asset metadata and establish the correct access hierarchy for that data.
- Provide reader access for Microsoft Purview Managed Identity (MSI) to your data lake or other data store.
Tip
The MSI is the account name of the Microsoft Purview instance.
If you've chosen to use Microsoft Fabric or SQL, you can use these guides to provide access:
Register your data lake and scan your assets
In Microsoft Purview Data Map under domains tab, select the Role assignments for the domain (it will be the name of Microsoft Purview account):
- Add yourself as the data source admin and the data curator to the domain.
- Select the person icon next to the role Data source admin.
- Search your name as it is in Microsoft Entra ID (it could require you to enter your full name spelled exactly as it is in Microsoft Entra ID).
- Select OK.
- Repeat these steps for data curator.
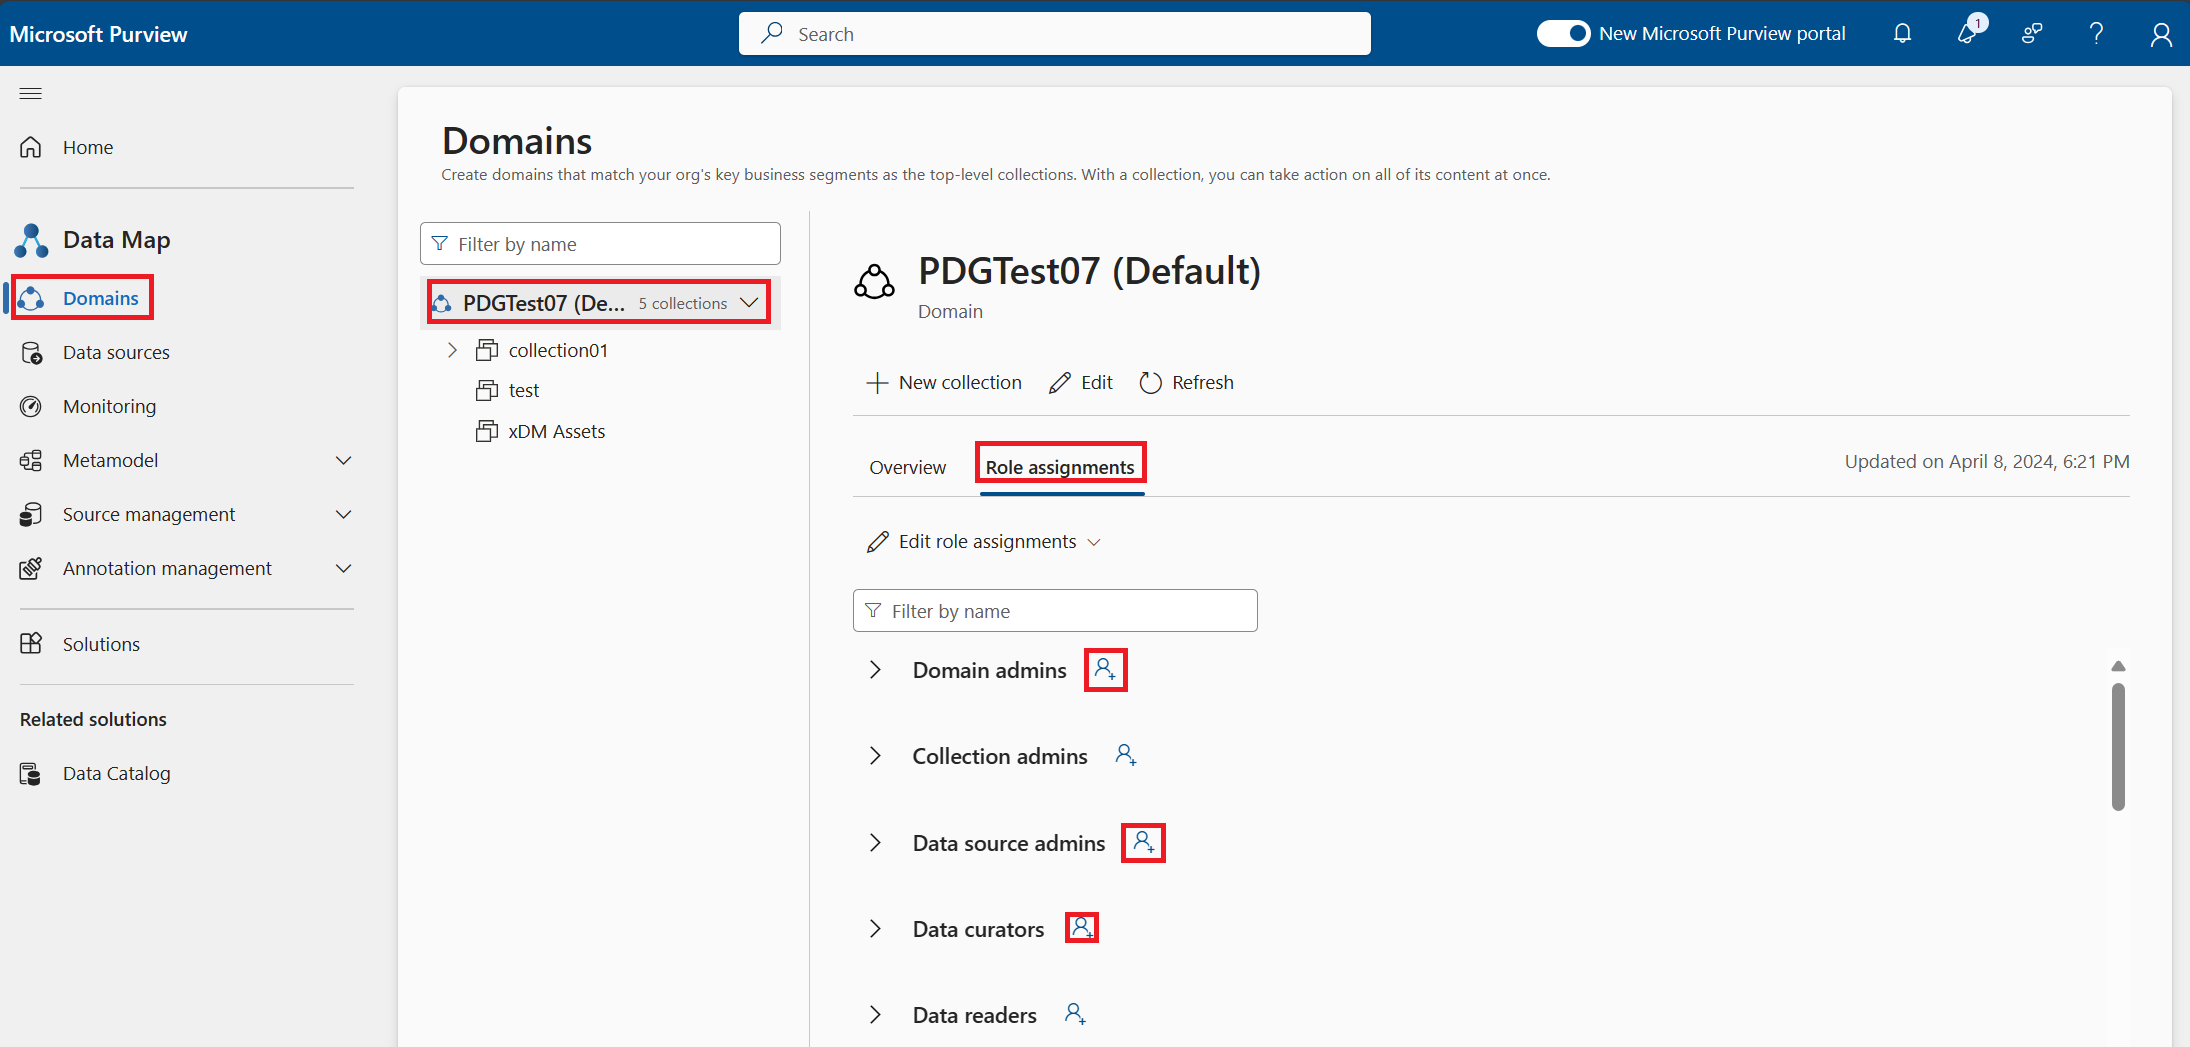
- Add yourself as the data source admin and the data curator to the domain.
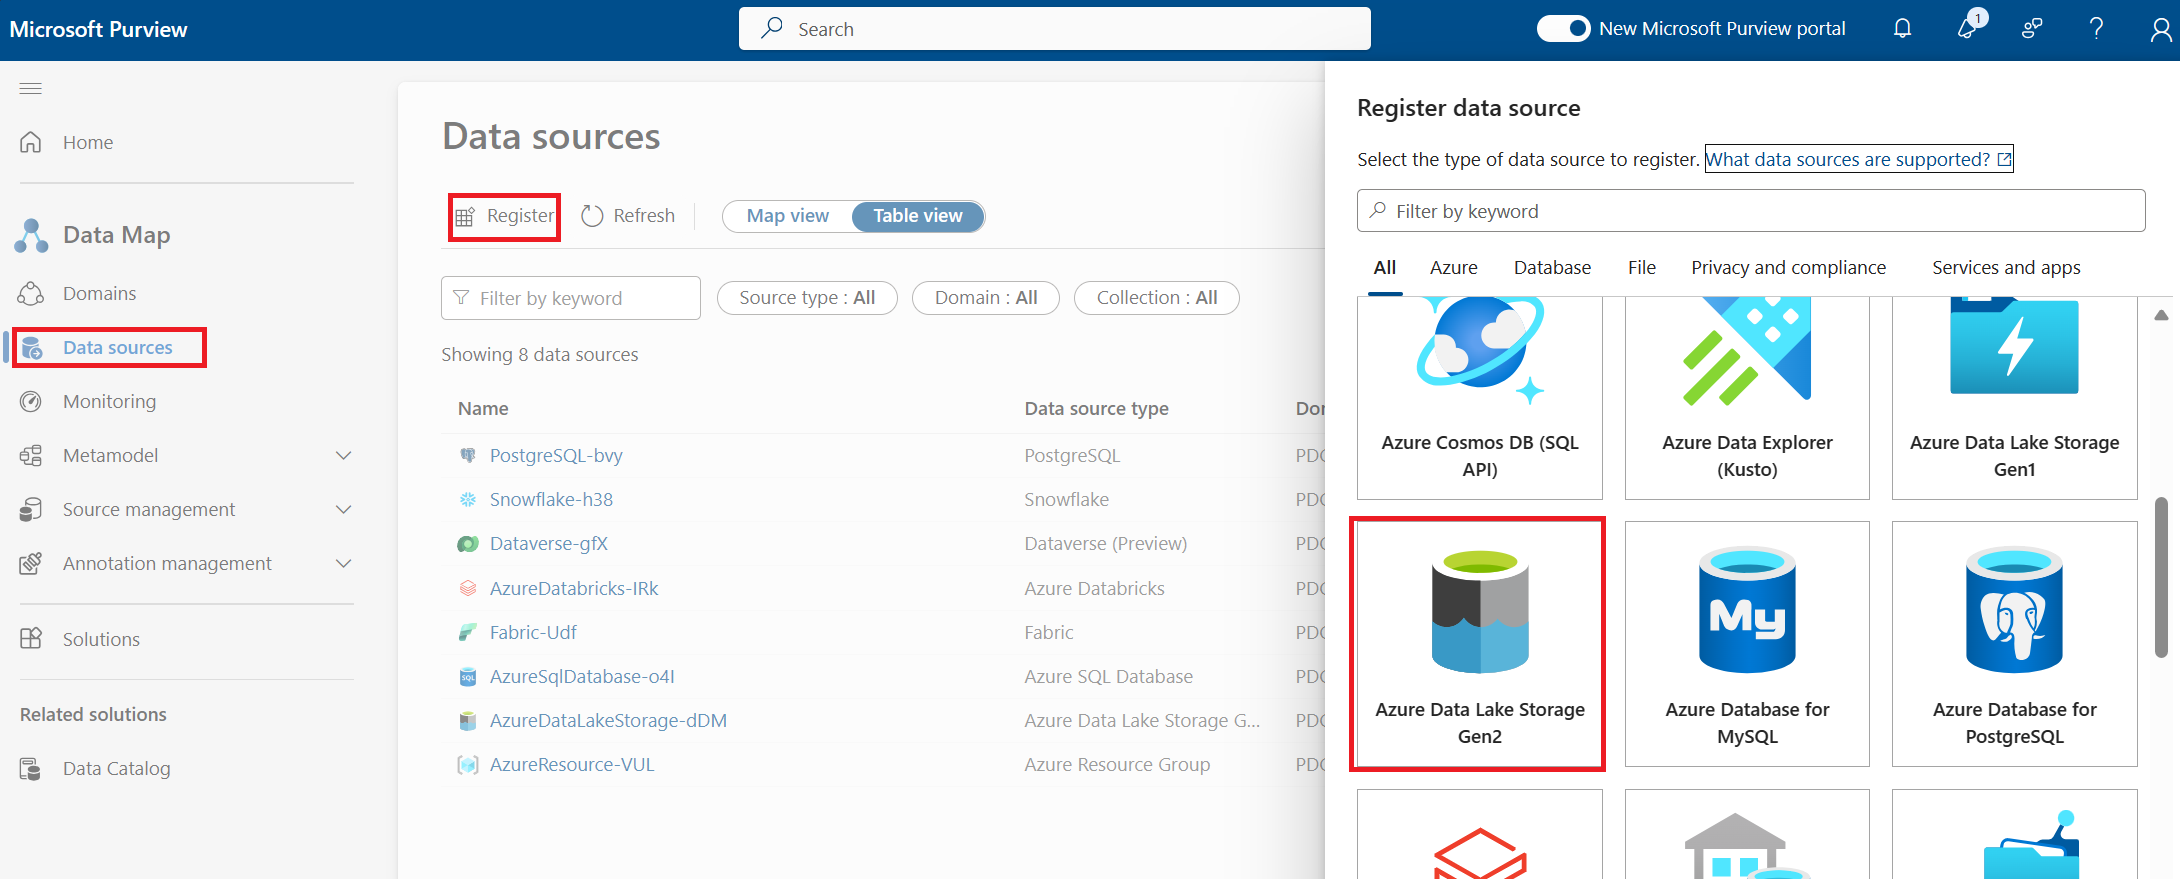
Register the data lake:
- Select the Data sources tab.
- Select Register.
- Select the Azure Data Lake Storage Gen2 storage type.
Provide the details to connect:
- Subscription (optional)
- Data Source Name (this will be the name of the ADLS Gen2 source)
- Collection where asset metadata should be stored (optional)
- Select Register
Once registration of the data source is complete, you can configure the scan. Registration signifies that Microsoft Purview is connected to the data source and has placed it in the correct collection for ownership. Scanning will then read the metadata from the source and populate the assets in the data map.
Select the source you registered in data sources tab
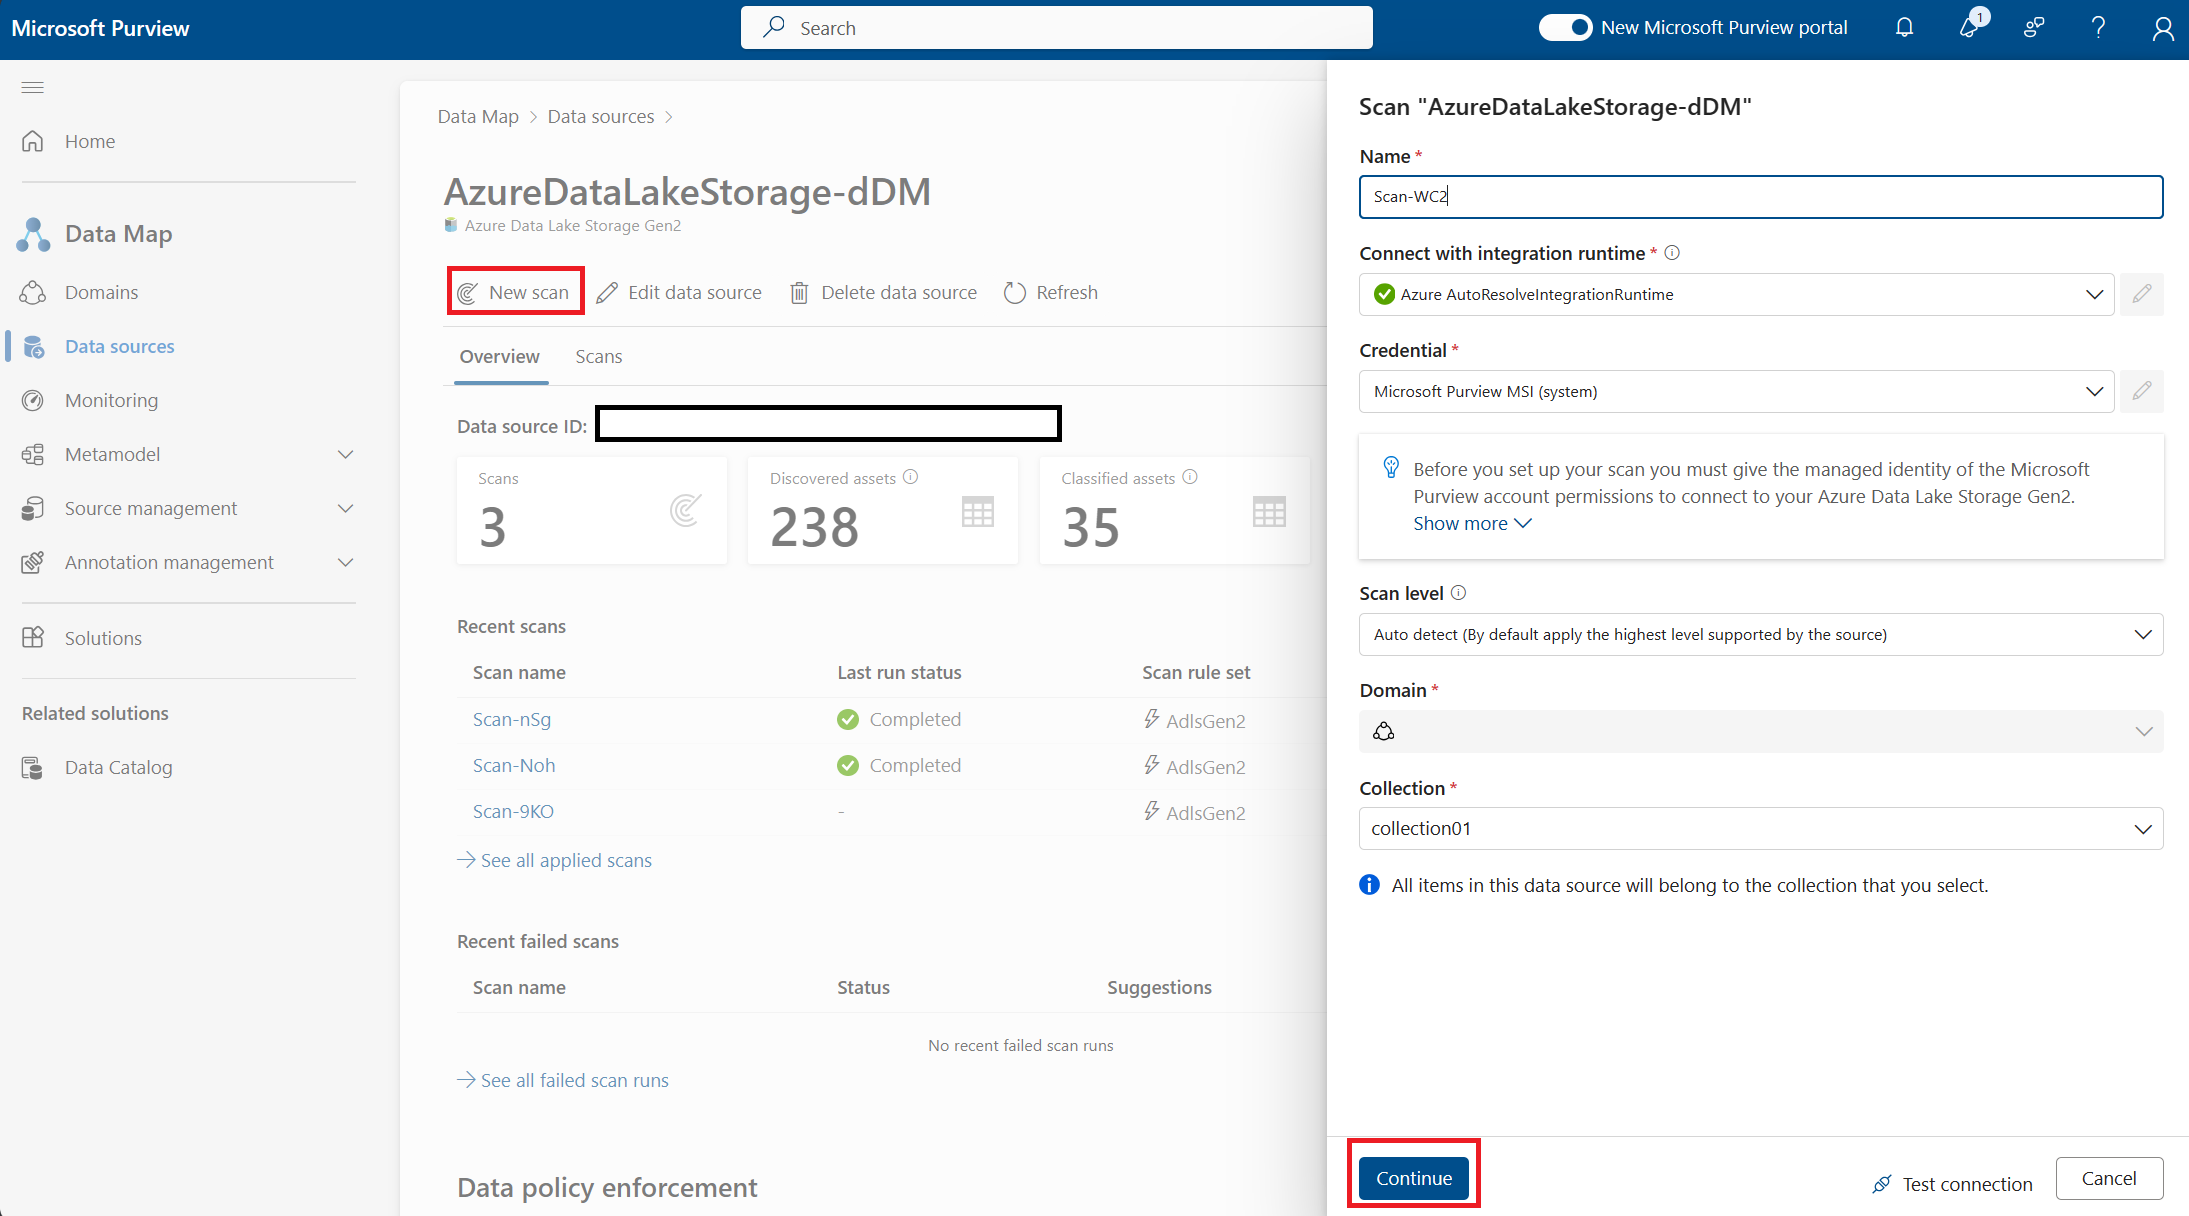
Select new scan and provide details:
- Use the default integration runtime for this scan
- Credential should be Microsoft Purview MSI (system)
- Scan level is Auto Detect
- Select a collection or use the domain (collection must be the same collection or child collection of where the data source was registered)
- Select Continue
Tip
At this point Microsoft Purview will test the connection to validate a scan can be done. If you have not granted the Microsoft Purview MSI reader access on the data source it will fail. If you are not the data source owner or have user access contributor the scan will fail since it expects you have authorization to create the connection.
Now only select the container 'gold' where we placed the delta table in the building data section of the tutorial. This will prevent scanning any other data assets that are in your data store.
- Should have only one blue check next to gold, you can leave checks next to everything as it will scan the full source and still create the assets we'll use and more.
- Select Continue
In the select a scan rule set screen you should use the default scan rule set.
Select Continue
In set a scan trigger you'll set the frequency of the scanning so as you continue to add data assets to the gold container of the lake it will continue to populate the data map. Select Once.
Select Continue.
Select Save and Run. This will create a scan that will only read the metadata from the gold container of your data lake and populate the table we'll use in the Microsoft Purview Data Catalog in the next sections. If you only select save, it will not run the scan, and you won't see the assets. Once the scan is running, you'll see the scan you created with a Last run status of Queued. When the scan reads complete your assets are ready for the next section. This could take a few minutes or hours depending on how many assets you have in your source.
Next steps
Comentários
Brevemente: Ao longo de 2024, vamos descontinuar progressivamente o GitHub Issues como mecanismo de feedback para conteúdos e substituí-lo por um novo sistema de feedback. Para obter mais informações, veja: https://aka.ms/ContentUserFeedback.
Submeter e ver comentários