本文介绍如何使用适用于 Python 的 Azure 管理库创建资源组,以及 Azure 存储帐户和 Blob 存储容器。
预配这些资源后,请参阅“ 示例:使用 Azure 存储 ”了解如何使用 Python 中的 Azure 客户端库将文件上传到 Blob 容器。
本文后面列出了 bash 和 PowerShell 的 等效 Azure CLI 命令 。 如果想要使用 Azure 门户,请参阅 “创建 Azure 存储帐户 ”和 “创建 Blob 容器”。
1:设置本地开发环境
如果尚未设置,请设置一个可在其中运行代码的环境。 下面是一些选项:
使用
venv或所选工具配置 Python 虚拟环境。 若要开始使用虚拟环境,请务必激活它。 若要安装 python,请参阅 “安装 Python”。#!/bin/bash # Create a virtual environment python -m venv .venv # Activate the virtual environment source .venv/Scripts/activate # only required for Windows (Git Bash)使用 conda 环境。 若要安装 Conda,请参阅 “安装 Miniconda”。
在 Visual Studio Code 或 GitHub Codespaces中使用 开发容器。
2:安装所需的 Azure 库包
在控制台中创建一个 requirements.txt 文件,其中列出了此示例中使用的管理库:
azure-mgmt-resource
azure-mgmt-storage
azure-identity
在激活虚拟环境的控制台中,安装要求:
pip install -r requirements.txt
3. 设置环境变量
在此步骤中,你将设置环境变量,以便在本文中的代码中使用。 代码使用 os.environ 方法来检索值。
#!/bin/bash
export AZURE_RESOURCE_GROUP_NAME="<ResourceGroupName>" # Change to your preferred resource group name
export LOCATION="<Location>" # Change to your preferred region
export AZURE_SUBSCRIPTION_ID=$(az account show --query id --output tsv)
export STORAGE_ACCOUNT_NAME="<StorageAccountName>" # Change to your preferred storage account name
export CONTAINER_NAME="<ContainerName>" # Change to your preferred container name
4:编写代码以创建存储帐户和 Blob 容器
在此步骤中,你将使用以下代码创建名为 provision_blob.py 的 Python 文件。 此Python脚本使用Python管理库的Azure SDK来创建资源组、Azure 存储帐户和 Blob 容器。
import os

# Import the needed credential and management objects from the libraries.
from azure.identity import DefaultAzureCredential
from azure.mgmt.resource import ResourceManagementClient
from azure.mgmt.storage import StorageManagementClient
from azure.mgmt.storage.models import BlobContainer

# Acquire a credential object.
credential = DefaultAzureCredential()

# Retrieve subscription ID from environment variable.
subscription_id = os.environ["AZURE_SUBSCRIPTION_ID"]

# Retrieve resource group name and location from environment variables
RESOURCE_GROUP_NAME = os.environ["AZURE_RESOURCE_GROUP_NAME"]
LOCATION = os.environ["LOCATION"]

# Step 1: Provision the resource group.
resource_client = ResourceManagementClient(credential, subscription_id)

rg_result = resource_client.resource_groups.create_or_update(RESOURCE_GROUP_NAME,
    { "location": LOCATION })

print(f"Provisioned resource group {rg_result.name}")

# For details on the previous code, see Example: Create a resource group:
# https://learn.microsoft.com/azure/developer/python/sdk/examples/azure-sdk-example-resource-group


# Step 2: Provision the storage account, starting with a management object.

storage_client = StorageManagementClient(credential, subscription_id)

STORAGE_ACCOUNT_NAME = os.environ["STORAGE_ACCOUNT_NAME"]

# Check if the account name is available. Storage account names must be unique across
# Azure because they're used in URLs.
availability_result = storage_client.storage_accounts.check_name_availability(
    { "name": STORAGE_ACCOUNT_NAME, "type": "Microsoft.Storage/storageAccounts" }
)

if not availability_result.name_available:
    print(f"Storage name {STORAGE_ACCOUNT_NAME} is already in use. Try another name.")
    exit()

# The name is available, so provision the account
poller = storage_client.storage_accounts.begin_create(RESOURCE_GROUP_NAME, STORAGE_ACCOUNT_NAME,
    {
        "location" : LOCATION,
        "kind": "StorageV2",
        "sku": {"name": "Standard_LRS"}
    }
)

# Long-running operations return a poller object; calling poller.result()
# waits for completion.
account_result = poller.result()
print(f"Provisioned storage account {account_result.name}")


# Step 3: Retrieve the account's primary access key and generate a connection string.
keys = storage_client.storage_accounts.list_keys(RESOURCE_GROUP_NAME, STORAGE_ACCOUNT_NAME)

print("Retrieved the primary key for the storage account")

conn_string = f"DefaultEndpointsProtocol=https;EndpointSuffix=core.windows.net;AccountName={STORAGE_ACCOUNT_NAME};AccountKey={keys['keys'][0].value}"

# print(f"Connection string: {conn_string}")

# Step 4: Provision the blob container in the account (this call is synchronous)
CONTAINER_NAME = os.environ["CONTAINER_NAME"]
container = storage_client.blob_containers.create(RESOURCE_GROUP_NAME, STORAGE_ACCOUNT_NAME, CONTAINER_NAME, BlobContainer())

print(f"Provisioned blob container {container.name}")
代码中的身份验证
在本文稍后的内容中,你将使用 Azure CLI 登录 Azure,然后执行示例代码。 如果帐户有足够的权限在Azure订阅中创建资源组和存储资源,则脚本会成功运行,而无需其他配置。
若要在生产环境中使用此代码,请使用服务主体进行身份验证并设置环境变量。 此方法支持安全、自动化的访问,而无需依赖交互式登录。 有关详细指南,请参阅 如何使用 Azure 服务对 Python 应用进行身份验证。
确保为服务主体分配了具有足够权限的角色来创建资源组和存储帐户。 例如,在订阅级别分配参与者角色可提供必要的访问权限。 若要了解有关角色分配的详细信息,请参阅 Azure 中基于角色的访问控制(RBAC)。
代码中使用的类的参考链接
- DefaultAzureCredential (azure.identity)
- ResourceManagementClient (azure.mgmt.resource)
- StorageManagementClient (azure.mgmt.storage)
5.运行脚本
如果尚未登录,请使用Azure CLI登录到Azure:
az login
运行以下脚本:
python provision_blob.py脚本需要一两分钟才能完成。
6:验证资源
打开 Azure 门户 ,验证是否已按预期创建资源组和存储帐户。 可能需要等待一分钟,然后刷新资源组视图。
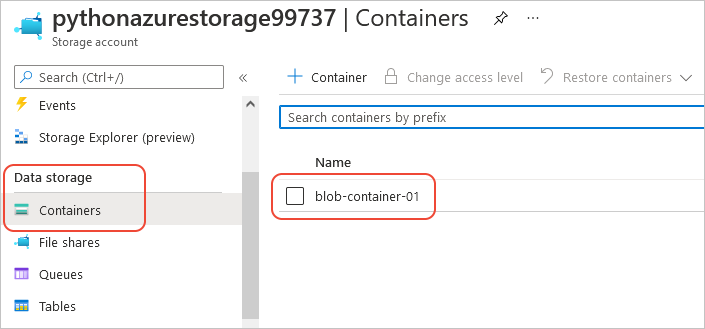
选择存储帐户,然后在左侧菜单中选择 “数据存储>容器 ”以验证创建的容器是否显示:
若要尝试从应用程序代码使用这些资源,请继续学习 示例:使用 Azure 存储。
有关使用 Azure 存储管理库的另一个示例,请参阅 “管理 Python 存储”示例。
7:清理资源
如果要在应用代码中使用这些资源,请按照文章 Example:使用 Azure 存储。 否则,如果不需要保留在此示例中创建的资源组和存储资源,请运行 az group delete 命令。
资源组不会在订阅中产生任何持续费用,但资源组中的资源(如存储帐户)可能会产生费用。 最好养成清理当前未在使用的任何资源组的习惯。
--no-wait 参数允许命令立即返回,而不是等待作完成。
#!/bin/bash
az group delete -n $AZURE_RESOURCE_GROUP_NAME --no-wait
有关参考:等效的 Azure CLI 命令
以下 Azure CLI 命令完成与 Python 脚本相同的创建步骤:
#!/bin/bash

# Set variables
export LOCATION="<Location>" # Change to your preferred region
export AZURE_RESOURCE_GROUP_NAME="<ResourceGroupName>" # Change to your preferred resource group name
export STORAGE_ACCOUNT_NAME="<StorageAccountName>" # Change to your preferred storage account name
export CONTAINER_NAME="<ContainerName>" # Change to your preferred container name

# Provision the resource group
echo "Creating resource group: $AZURE_RESOURCE_GROUP_NAME"
az group create \
    --location "$LOCATION" \
    --name "$AZURE_RESOURCE_GROUP_NAME"

# Provision the storage account
az storage account create \
    --resource-group "$AZURE_RESOURCE_GROUP_NAME" \
    --location "$LOCATION" \
    --name "$STORAGE_ACCOUNT_NAME" \
    --kind StorageV2 \
    --sku Standard_LRS

echo "Storage account name is $STORAGE_ACCOUNT_NAME"

# Retrieve the connection string
CONNECTION_STRING=$(az storage account show-connection-string \
    --resource-group "$AZURE_RESOURCE_GROUP_NAME" \
    --name "$STORAGE_ACCOUNT_NAME" \
    --query connectionString \
    --output tsv)

# Provision the blob container
az storage container create \
    --name "$CONTAINER_NAME" \
    --account-name "$STORAGE_ACCOUNT_NAME" \
    --connection-string "$CONNECTION_STRING"