在本文中,您將瞭解如何使用 Python 腳本中的 Azure SDK 管理連結庫來建立包含 Linux 虛擬機的資源群組。
本文稍後會列出 對等的 Azure CLI 命令 。 如果您想要使用 Azure 入口網站,請參閱 建立 Linux VM 和 建立 Windows VM。
備註
透過程式碼建立虛擬機是一個多步驟的過程,涉及配置虛擬機所需的多種其他資源。 如果您只是從命令列執行這類程式代碼,則使用az vm create命令會更容易,它會針對您選擇省略的任何設定,自動布建這些次要資源。 唯一需要的參數是資源群組、虛擬機名稱、映像檔名稱和認證憑證。 如需詳細資訊,請參閱 使用 Azure CLI 快速建立虛擬機。
1:設定本機開發環境
如果您尚未設定環境,您可以在其中執行此程序代碼。 以下是一些選項:
#!/bin/bash
# Create a virtual environment
python -m venv .venv
# Activate the virtual environment
source .venv/Scripts/activate # only required for Windows (Git Bash)
使用 conda 環境。 若要安裝 Conda,請參閱 安裝 Miniconda。
在 Visual Studio Code 或 GitHub Codespaces中使用 開發容器。
2:安裝所需的 Azure 連結庫套件
建立 requirements.txt 檔案,指定此腳本所需的 Azure SDK 管理套件。
azure-mgmt-resource
azure-mgmt-compute
azure-mgmt-network
azure-identity
接下來,安裝 requirements.txt中指定的管理連結庫:
pip install -r requirements.txt
3:撰寫程式代碼以建立虛擬機
使用下列程式代碼建立名為 provision_vm.py 的 Python 檔案。 註解會說明詳細資料:
# Import the needed credential and management objects from the libraries.
import os

from azure.identity import DefaultAzureCredential
from azure.mgmt.compute import ComputeManagementClient
from azure.mgmt.network import NetworkManagementClient
from azure.mgmt.resource import ResourceManagementClient

print(
    "Provisioning a virtual machine...some operations might take a \
minute or two."
)

# Acquire a credential object.
credential = DefaultAzureCredential()

# Retrieve subscription ID from environment variable.
subscription_id = os.environ["AZURE_SUBSCRIPTION_ID"]


# Step 1: Provision a resource group

# Obtain the management object for resources.
resource_client = ResourceManagementClient(credential, subscription_id)

# Constants we need in multiple places: the resource group name and
# the region in which we provision resources. You can change these
# values however you want.
RESOURCE_GROUP_NAME = "PythonAzureExample-VM-rg"
LOCATION = "westus2"

# Provision the resource group.
rg_result = resource_client.resource_groups.create_or_update(
    RESOURCE_GROUP_NAME, {"location": LOCATION}
)

print(
    f"Provisioned resource group {rg_result.name} in the \
{rg_result.location} region"
)

# For details on the previous code, see Example: Provision a resource
# group at https://learn.microsoft.com/azure/developer/python/
# azure-sdk-example-resource-group

# Step 2: provision a virtual network

# A virtual machine requires a network interface client (NIC). A NIC
# requires a virtual network and subnet along with an IP address.
# Therefore we must provision these downstream components first, then
# provision the NIC, after which we can provision the VM.

# Network and IP address names
VNET_NAME = "python-example-vnet"
SUBNET_NAME = "python-example-subnet"
IP_NAME = "python-example-ip"
IP_CONFIG_NAME = "python-example-ip-config"
NIC_NAME = "python-example-nic"

# Obtain the management object for networks
network_client = NetworkManagementClient(credential, subscription_id)

# Provision the virtual network and wait for completion
poller = network_client.virtual_networks.begin_create_or_update(
    RESOURCE_GROUP_NAME,
    VNET_NAME,
    {
        "location": LOCATION,
        "address_space": {"address_prefixes": ["10.0.0.0/16"]},
    },
)

vnet_result = poller.result()

print(
    f"Provisioned virtual network {vnet_result.name} with address \
prefixes {vnet_result.address_space.address_prefixes}"
)

# Step 3: Provision the subnet and wait for completion
poller = network_client.subnets.begin_create_or_update(
    RESOURCE_GROUP_NAME,
    VNET_NAME,
    SUBNET_NAME,
    {"address_prefix": "10.0.0.0/24"},
)
subnet_result = poller.result()

print(
    f"Provisioned virtual subnet {subnet_result.name} with address \
prefix {subnet_result.address_prefix}"
)

# Step 4: Provision an IP address and wait for completion
poller = network_client.public_ip_addresses.begin_create_or_update(
    RESOURCE_GROUP_NAME,
    IP_NAME,
    {
        "location": LOCATION,
        "sku": {"name": "Standard"},
        "public_ip_allocation_method": "Static",
        "public_ip_address_version": "IPV4",
    },
)

ip_address_result = poller.result()

print(
    f"Provisioned public IP address {ip_address_result.name} \
with address {ip_address_result.ip_address}"
)

# Step 5: Provision the network interface client
poller = network_client.network_interfaces.begin_create_or_update(
    RESOURCE_GROUP_NAME,
    NIC_NAME,
    {
        "location": LOCATION,
        "ip_configurations": [
            {
                "name": IP_CONFIG_NAME,
                "subnet": {"id": subnet_result.id},
                "public_ip_address": {"id": ip_address_result.id},
            }
        ],
    },
)

nic_result = poller.result()

print(f"Provisioned network interface client {nic_result.name}")

# Step 6: Provision the virtual machine

# Obtain the management object for virtual machines
compute_client = ComputeManagementClient(credential, subscription_id)

VM_NAME = "ExampleVM"
USERNAME = "azureuser"
PASSWORD = "ChangePa$$w0rd24"

print(
    f"Provisioning virtual machine {VM_NAME}; this operation might \
take a few minutes."
)

# Provision the VM specifying only minimal arguments, which defaults
# to an Ubuntu 18.04 VM on a Standard DS1 v2 plan with a public IP address
# and a default virtual network/subnet.

poller = compute_client.virtual_machines.begin_create_or_update(
    RESOURCE_GROUP_NAME,
    VM_NAME,
    {
        "location": LOCATION,
        "storage_profile": {
            "image_reference": {
                "publisher": "Canonical",
                "offer": "UbuntuServer",
                "sku": "16.04.0-LTS",
                "version": "latest",
            }
        },
        "hardware_profile": {"vm_size": "Standard_DS1_v2"},
        "os_profile": {
            "computer_name": VM_NAME,
            "admin_username": USERNAME,
            "admin_password": PASSWORD,
        },
        "network_profile": {
            "network_interfaces": [
                {
                    "id": nic_result.id,
                }
            ]
        },
    },
)

vm_result = poller.result()

print(f"Provisioned virtual machine {vm_result.name}")
程式代碼中的驗證
本文後面,你要使用 Azure CLI 來執行範例程式碼來登入 Azure。 如果你的帳號有足夠權限在 Azure 訂閱中建立資源群組和儲存資源,腳本就能在不需額外設定的情況下順利執行。
若要在生產環境中使用此程式碼,請使用服務主體進行驗證並設定環境變數。 此方法能安全且自動化地存取,無需依賴互動式登入。 如需詳細指引,請參閱 如何使用 Azure 服務驗證 Python 應用程式。
請確定服務主體已獲指派具有足夠許可權的角色,以建立資源群組和記憶體帳戶。 例如,在訂用帳戶層級指派參與者角色可提供必要的存取權。 若要深入瞭解角色指派,請參閱 Azure 中的角色型訪問控制 (RBAC)。
程式代碼中使用的類別參考連結
- DefaultAzureCredential (azure.identity)
- ResourceManagementClient (azure.mgmt.resource)
- NetworkManagementClient (azure.mgmt.network)
- ComputeManagementClient (azure.mgmt.compute)
4.執行腳本
如果你還沒登入,請使用以下Azure CLI登入Azure:
az login將
AZURE_SUBSCRIPTION_ID環境變數設定為訂用帳戶標識碼。 (執行 az account show 指令,從輸出中的屬性取得你的訂閱 IDid):export AZURE_SUBSCRIPTION_ID=$(az account show --query id -o tsv)執行指令碼:
python provision_vm.py
布建程式需要幾分鐘的時間才能完成。
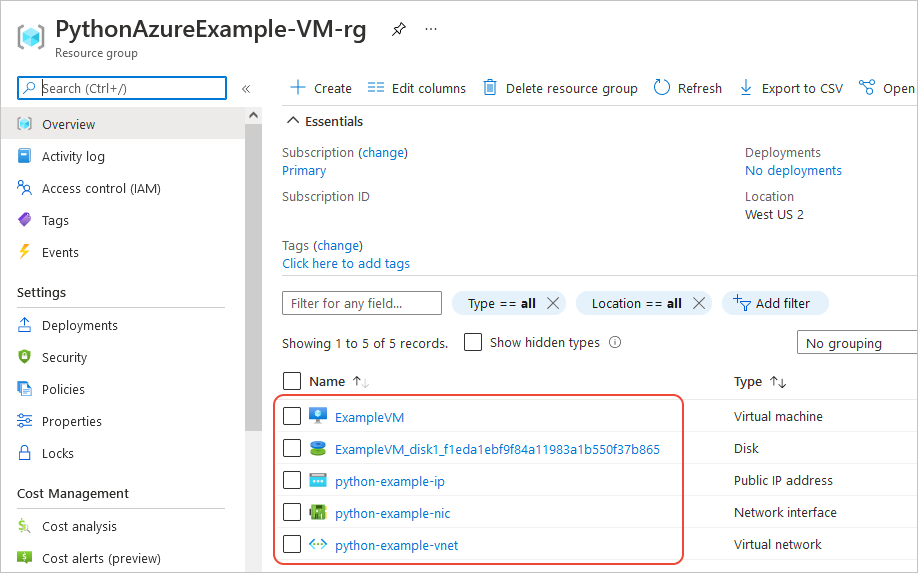
5.確認資源
打開 Azure 入口網站,前往 PythonAzureExample-VM-rg 資源群組,記錄虛擬機、虛擬磁碟、網路安全群組、公共 IP 位址、網路介面和虛擬網路。
你也可以使用 Azure CLI 透過 az vm list 指令來驗證虛擬機的存在:
az vm list --resource-group PythonAzureExample-VM-rg
對等的 Azure CLI 命令
# Provision the resource group

az group create -n PythonAzureExample-VM-rg -l westus2

# Provision a virtual network and subnet

az network vnet create -g PythonAzureExample-VM-rg -n python-example-vnet \
    --address-prefix 10.0.0.0/16 --subnet-name python-example-subnet \
    --subnet-prefix 10.0.0.0/24

# Provision a public IP address

az network public-ip create -g PythonAzureExample-VM-rg -n python-example-ip \
    --allocation-method Dynamic --version IPv4

# Provision a network interface client

az network nic create -g PythonAzureExample-VM-rg --vnet-name python-example-vnet \
    --subnet python-example-subnet -n python-example-nic \
    --public-ip-address python-example-ip

# Provision the virtual machine

az vm create -g PythonAzureExample-VM-rg -n ExampleVM -l "westus2" \
    --nics python-example-nic --image UbuntuLTS --public-ip-sku Standard \
    --admin-username azureuser --admin-password ChangePa$$w0rd24
如果出現容量限制的錯誤,試試其他規模或區域。 如需詳細資訊,請參閱 解決 SKU 無法使用的錯誤。
6:清除資源
如果你想繼續使用本文中建立的虛擬機器和網路,請不要刪除資源。 否則,請執行 az group delete 命令來刪除資源群組。
資源群組不會在您的訂用帳戶中產生任何持續費用,但群組中包含的資源,例如虛擬機,可能會繼續產生費用。 清理任何你沒有積極使用的資源群組。 這個 --no-wait 參數會讓指令立即返回,而不是等待操作完成。
az group delete -n PythonAzureExample-VM-rg --no-wait
您也可以使用 ResourceManagementClient.resource_groups.begin_delete 方法,從程式代碼中刪除資源群組。
範例:建立資源群組中的程式代碼會示範使用方式。
另請參閱
- 範例:建立資源群組
- 範例:列出訂用帳戶中的資源群組
- 範例:建立 Azure 記憶體
- 範例:使用 Azure 儲存體
- 範例:建立 Web 應用程式並部署程式代碼
- 範例:建立和查詢資料庫
- 搭配虛擬機器使用 Azure 受控磁碟
- 完成 Azure SDK for Python 的簡短問卷
以下資源包含更完整的範例,說明使用 Python 建立虛擬機器:
- Azure 虛擬機管理範例 - Python (GitHub)。 此範例示範更多管理作業,例如啟動和重新啟動 VM、停止和刪除 VM、增加磁碟大小,以及管理數據磁碟。