當你將 Microsoft Copilot Studio 代理程式複製到本地機器時,可以透過 Microsoft Visual Studio Code 的文字編輯功能來編輯其組件。 Copilot Studio 擴充套件提供 IntelliSense、驗證及 YAML 語言支援,使編輯過程高效且無錯誤。
代理檔結構
了解檔案結構是高效編輯的關鍵。
my-agent/
├── actions                   # Connectors
│   ├── DevOpsAction.mcs.yml
│   └── GetItems.mcs.yml
├── knowledge/files                # Knowledge sources
│   ├── source1.yaml
│   └── source2.yaml
├── topics/                   # Conversation topics
│   ├── greeting.mcs.yaml
│   ├── help.mcs.yaml
│   └── escalate.mcs.yaml
├── workflows/                    # Agent tools and actions
│   └── GetDevOpsItems
│       ├── metadata.yaml
│       └── workflow.json
│   └── GetMeetings
│       ├── metadata.yaml
│       └── workflow.json
├── trigger/                 # Event triggers
│   └── welcometrigger.mcs.yaml
├── agent.mcs.yaml                # Main agent definition
├── icon.png                      # Icon used for the agent, visible in test panel and in supported channels
├── settings.mcs.yml              # Configuration settings for the agent
└── connectioreferences.mcs.yml   # Connection References used by Connectors and other actions
編輯主要代理設定
IntelliSense 功能
當你輸入時,建議會被顯示,無效值會被標示出來。 這些建議會根據你所在的節點等級而有所不同。
- 用
Ctrl+Space來根據節點等級獲得建議。 - 用
Ctrl+F來搜尋整個代理的變數名稱和其他資訊,快速更新
檢視問題
你可以在Visual Studio Code的Problems面板中查看檔案的問題。 另外,當你打開檔案時,可以看到紅色底線標示問題。
問題面板
使用
Ctrl+Shift+M開啟 問題 窗格(或前往 檢視>問題)。查看所有錯誤與警告。
選擇任意問題以跳轉到其位置。
與變革共事
當變更被做並儲存時,會在 Visual Studio 中以不同顏色顯示,方便你辨識。

編輯代理元件
Topics
主題 定義對話流程與對話內容。 其類型為 AdaptiveDialog。
你可以使用GitHub Copilot或其他代理來協助建立new元件,或者如果你願意,也可以自己撰寫主題。
主題檔案結構
這裡有一個簡單的問候主題範例:
# This is the name of the topic that will appear in the 'topics' list in Copilot Studio
kind: AdaptiveDialog
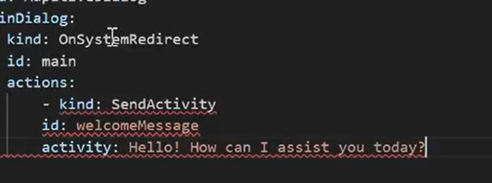
beginDialog:
kind: OnConversationStart
id: main
actions:
- kind: SendActivity
id: sendMessage_M0LuhV
activity:
text:
- Hello, I'm {System.Bot.Name}. How can I help?
speak:
- Hello and thank you for calling {System.Bot.Name}.
進階主題功能
你可以在主題中使用其他元件,例如:
實體:
- kind: Question id: question_1 alwaysPrompt: true variable: init:Topic.Continue prompt: Can I help with anything else? entity: BooleanPrebuiltEntity變數:
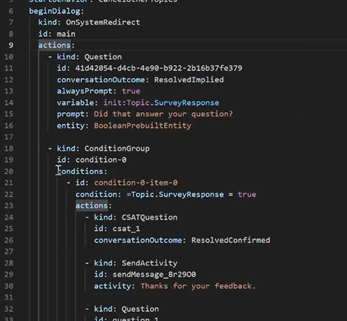
  actions:
    - kind: Question
      id: 41d42054-d4cb-4e90-b922-2b16b37fe379
      conversationOutcome: ResolvedImplied
      alwaysPrompt: true
      variable: init:Topic.SurveyResponse
      prompt: Did that answer your question?
      entity: BooleanPrebuiltEntity
使用Power Fx的條件:
            - kind: ConditionGroup
              id: condition-1
              conditions:
                - id: condition-1-item-0
                  condition: =Topic.Continue = true
                  actions:
                    - kind: SendActivity
                      id: sendMessage_4eOE6h
                      activity: Go ahead. I'm listening.
其他節點,例如,HTTP 節點
調適型卡片
工具
工具定義了你的代理能執行的行動。 你可以在 Copilot Studio Agent UI 的 Tools 區域看到它們。
工具 可能包括:
- 提示
- 工作流程 (Power Automate 流程)
- CUA 工具
- 自訂連接器
- REST API
- MCP 連接器
工具會出現在擴充功能內的代理人/actions資料夾中,但也可能出現在帶有額外元資料的其他資料夾中。 例如, 工作流程 和 觸發 器有自己的資料夾和 JSON。
編輯觸發條件
觸發器定義 了主題或行動何時被啟動。 你可以將它們設為排程、事件或條件類型。 觸發器通常會參考一個工作流程。
kind: ExternalTriggerConfiguration
externalTriggerSource:
  kind: WorkflowExternalTrigger
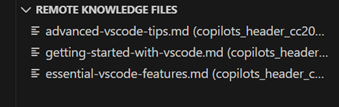
管理遠端知識檔案
如果你使用 Copilot Studio 的上傳功能上傳文件,這些文件可點擊 Remote Knowledge Files 視窗中的名稱下載。 這些文件不會自動下載,必須在視窗中選擇下載。 下載成功時你會看到通知。
如果你想上傳新檔案,可以放在代理定義裡的 knowledge/files 資料夾裡。 當你套用這些變更時,會透過代理內容上傳功能上傳。
最佳做法
命名慣例
檔案:
- 使用 kebab-case:
create-ticket.tool.yaml - 具體描述:
product-pricing-faq.yaml而非faq.yaml - 請使用類型後綴:
.topic.yaml,.tool.yaml,.trigger.yaml
ID 與變數:
- 使用 camelCase:
userOrderNumber、productDetails - 具體描述:
checkPaymentStatus而非check1 - 避免縮寫:
customerEmail不custEmail
Comments
為了解釋複雜的邏輯,請加上註解:
nodes:
  # Check if user is within business hours and eligible for live support
  # Business hours: 9 AM - 5 PM EST, Monday-Friday
  # Eligibility: Premium tier customers only
  - id: check-live-support-availability
    type: condition
後續步驟
現在你已經了解了編輯的流程: